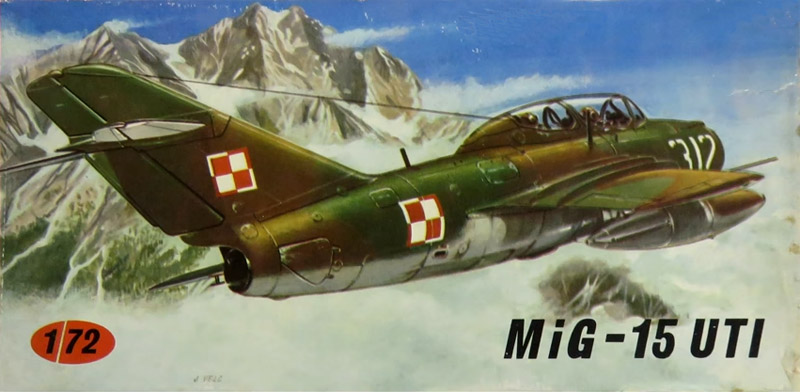
Kovozavody Prostejov 1/72 MiG-15UTI
A chat with a friend about modeling during our youths made me remember my KP 1/72 MiG-15UTI. I had very limited modeling experience and knowledge, I knew no experienced modelers - I was modeling in the dark so to speak. It's therefore interesting to look back at those days by reviewing the work done on this model.
Work was never finished however. Back then I could not solve the canopy problems. And since then, much better models have come out. I will keep this unfinished model as a reminder of my early modeling days.
|
Ordering
I vividly remember how I obtained this model. In 1987, the IPMS-NL magazine 'Modelbouw in Plastic' (MIP) ran a two-part article of 16 pages total about the MiG-15 by Fred Bachofer. A small advertisement by MBC Models from Vlaardingen in the same magazine announced that they imported the MiG-15 and MiG-15UTI models from Czechoslovakia, at 6.95 guilders each. I found it very exciting, I had never seen a model from the other side of the Iron Curtain. A friend joined in, I wrote a letter to MBC, and we ordered two MiG-15UTI models.
The model
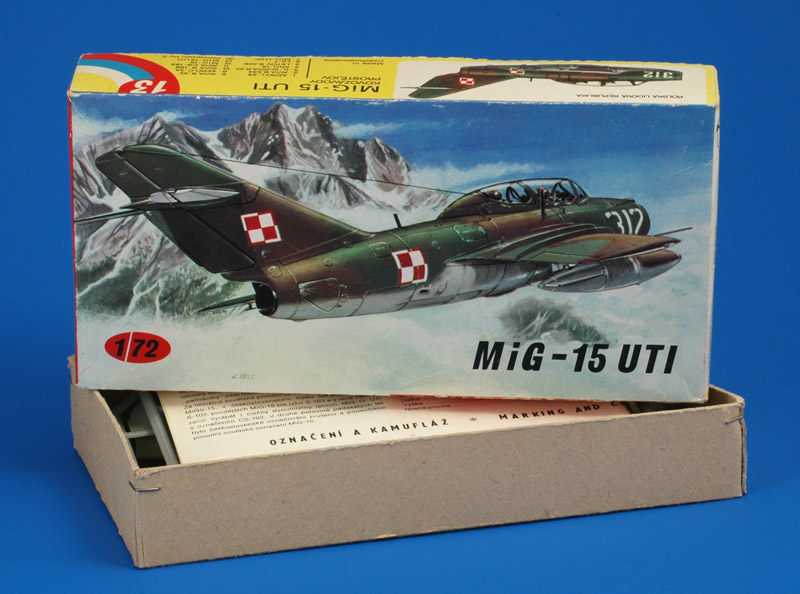
| When the kits arrived, they surely were different from the West-European, American and Japanese kits that I was used to. The heavy and rough cardboard of the lower box, the grayish paper of the instruction sheet and the sweet drawing on the box top surely were different. 'Kovozavody Prostejov' was a nearly unpronounceable name for me. The plastic parts looked very decent and well-researched, although a bit simple, and with raised detail. The decals were badly yellowed, and therefore probably unusable.
| 
|
Construction
| As usual I started work with the cockpit. The KP tub was a simplistic rectangular affair, and I did not use it. Instead I wanted to show the air intake ducts running on the sides of the cockpit, with the nice rounded shape. Only at their forward ends they had small side consoles, the other instruments were placed at an angle on the ducts. In the end I built a complete new cockpit with plastic card, guesstimated from a cutaway drawing of the single seater. I also built new instrument panels with painted instruments, a stick pedestal and rudder pedals.
| 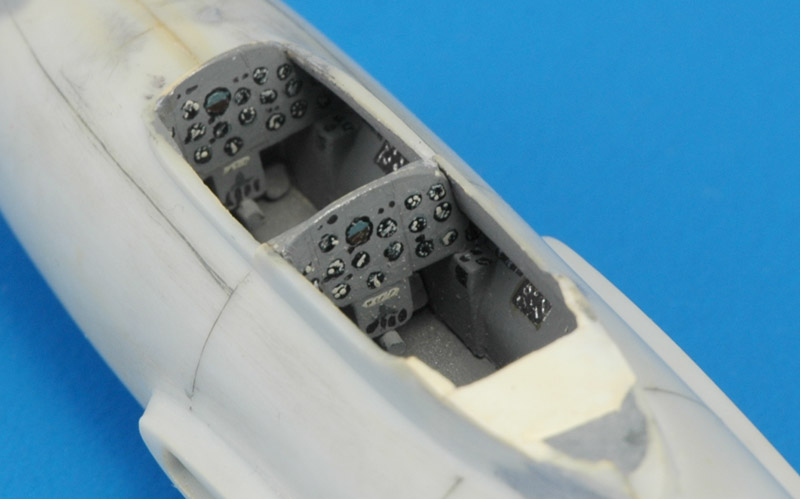
|

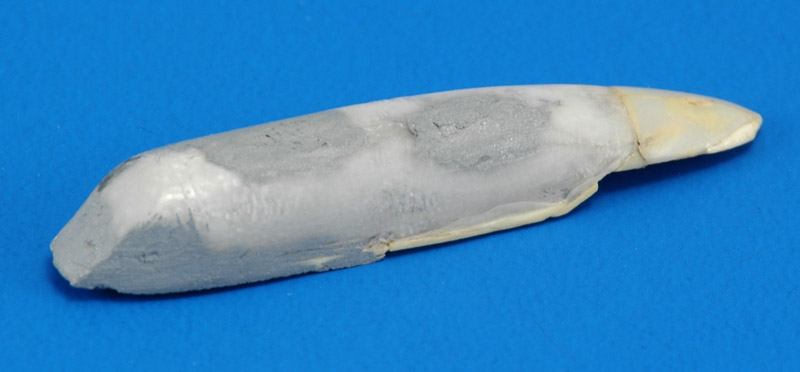
| I thought the kit-supplied seats did not look realistic, so I started modifying them. I sanded off the edges from the seatback that created a 'bucket seat' look, glued on new sides, foot steps and ejection handles. I largely followed a tiny drawing of the seat in the MIP magazine article. Work wasn't quite finished.
|
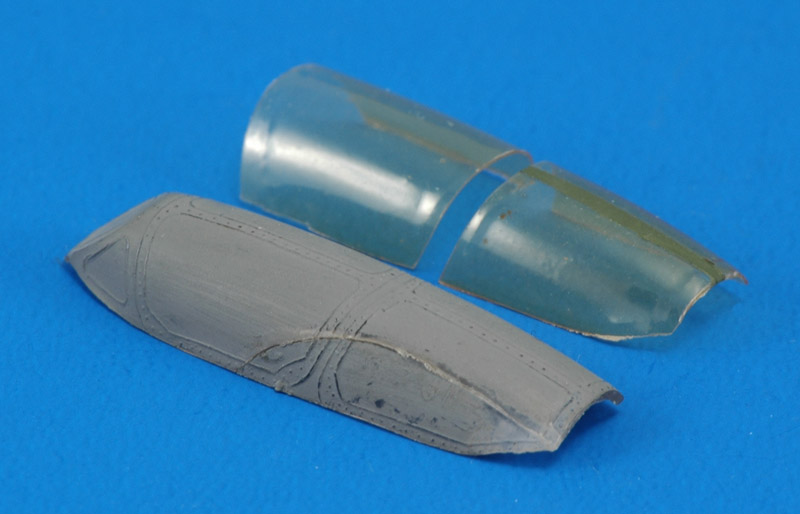
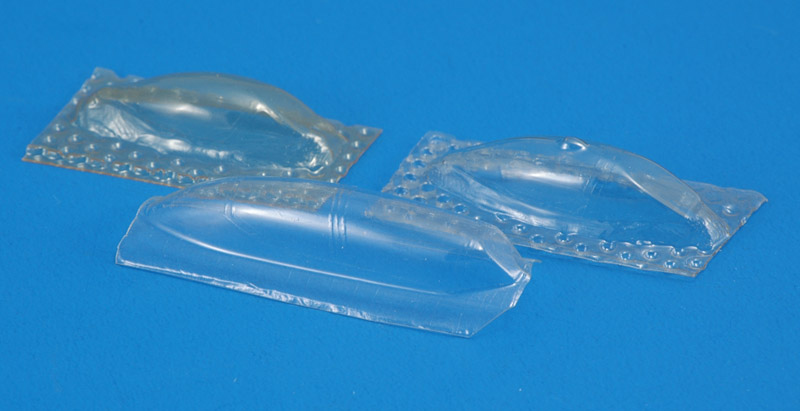
| I do not remember how good or bad the kit canopy looked, but I wanted to make a thin replacement so I could pose the canopy open. That would mostly serve to break the ugly lines of the twin-seater. Smash-forming was all I knew, using plastic from blister packages. What I did not count on was the unsupported canopy slowly deforming due to the heat of multiple smash attempts, leading to unusable copies and a flattened master. When I tried to bend it back, a large part snapped off, and that was the end of this canopy. The only smash-formed parts that I saved have yellowed nicely over the years.
| 
|
| After obtaining an extra kit (the beginning of the stash?) I thought it was smart to reinforce the inside of the second canopy. Of course I used solvent putty, because it was the only thing I knew. And of course it melted the canopy, so I later repaired the dents with more putty. The fairing at the rear was also added, since it slides together with the rear canopy. I also created a stepped lower edge, to make it more like the real thing. But I never finished it completely.
|
| The next attempt at a better canopy was buying an Aeroclub canopy set, C014 'MIG 15/17/19/JJ5(MIG15UT1) canopy set'. It contained two single-seat canopies and one twin-seat canopy, of reasonable quality, but far removed from a Falcon quality canopy. It was a direct copy of the kit. And only then I noted that the bow between the two canopies was skewed quite badly. That stopped my attempts for a while.
| 
|
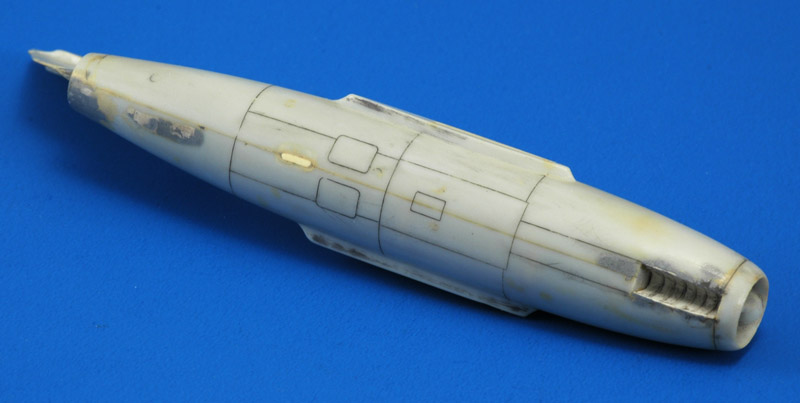
| After the cockpit interior was mostly done, the fuselage was glued together. It was sanded completely smooth, and rescribing was started. I'm showing the work done on the lower side, where I flowed some dark gray paint in the lines to see the results.
|
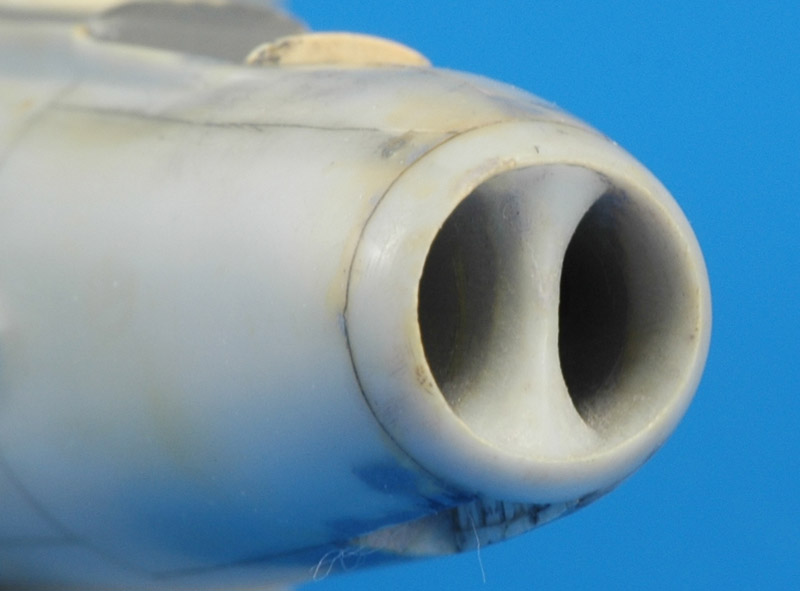
| The kit's air intake has a blanking plate, maybe 6-7 mm inside the fuselage. I wanted longer ducts, so I removed the blanking plate, and used solvent putty to slowly build smooth ducts inside, very laboriously.
| 
|
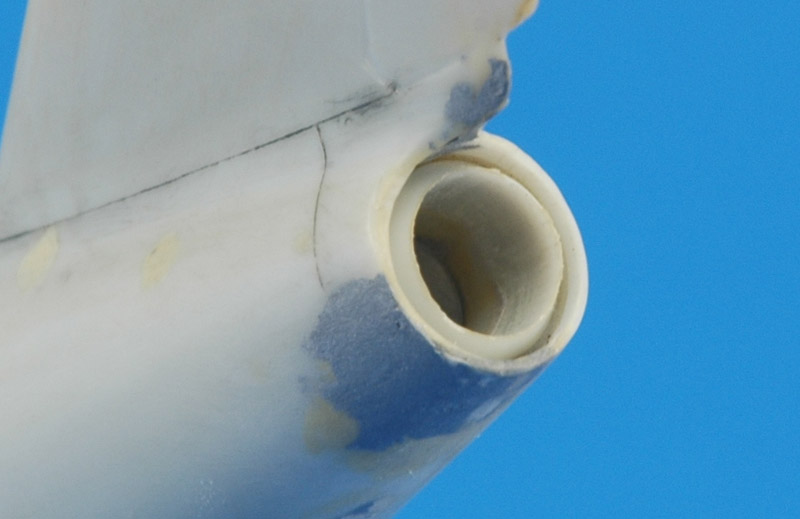
| The exhaust was an equally short affair, and I lengthened it with a piece of tubing.
|
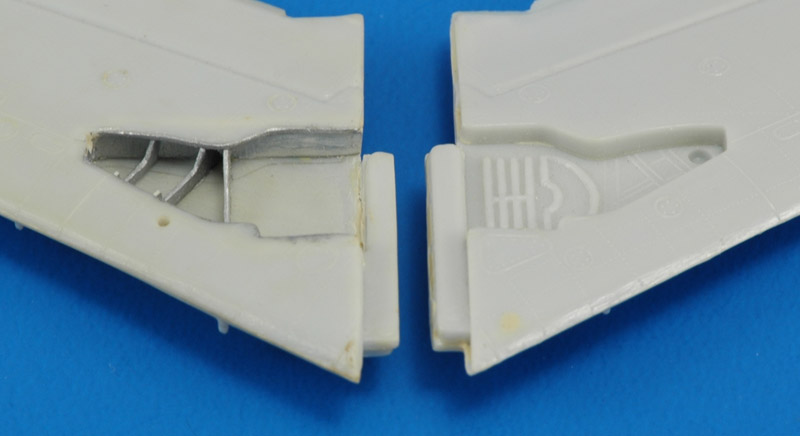
| I really did not like the shallow wheel wells, in thick wings that offered so much more room. So I dug a hole in the top half, glued spars to the lower half and made things fit. Lastly I installed three small ribs. I remember being very happy with the result.
| 
|
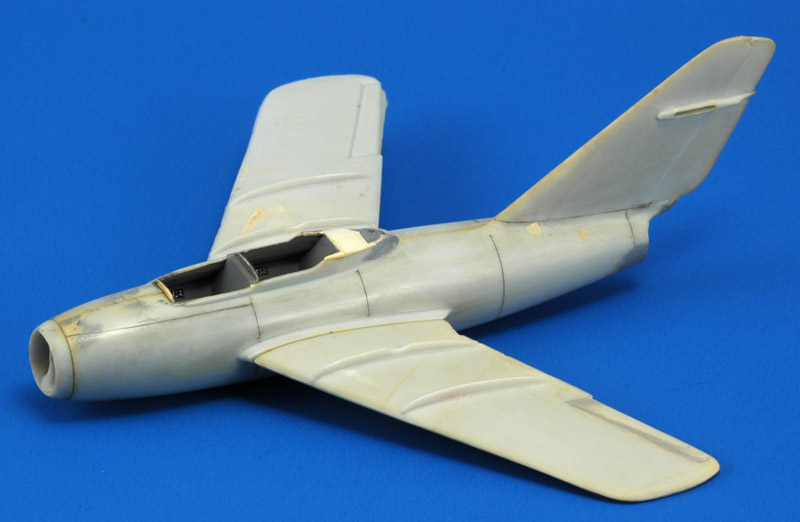
| Here's an overview of the model as far as it got. The canopy problems took the wind out of the project, and other models looked like easier projects.
And with the much better Eduard MiG-15UTI from 2015, my old kit's fate was sealed: I will not resume its construction.
|
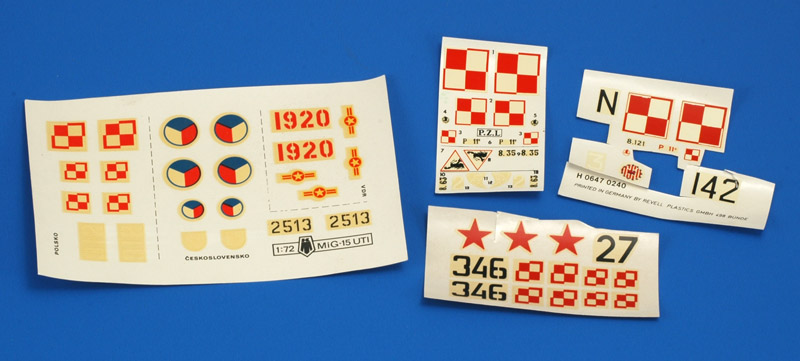
| With the badly yellowed kit decals (left), I looked high and low for replacement decals (right), in a time when there was not much more than Microscale and ModelDecal. Here's what I gathered back then. I would never have guessed that I would later learn to design decals myself, and that I would have an Alps printer that could print very nice decals. Until it broke, of course :-(
| 
|
Seeing the real thing still in operational service
To see the real thing flying was the last thing that I had ever expected in 1987, when I bought the model and the Iron Curtain still was a hard division line right through Europe. And to see it flying in operational service no less. Yet in 1991, at Babimost in Poland, there they were: operational SBLim-2 and Lim-6bis aircraft used in pilot training! I managed to shoot some photos, but we hadn't found a decent spot yet when flying ended, so they are not very good.
Return to models page