Matchbox 1/72 MiG-21PF


Fellow club member Leo Ripken of IPMS-NL Regio Zuid-Holland has built around 140 Matchbox models in their natural plastic colors, and together they make a great collection. I decided to give it a try too, and Leo gave me a MiG-21 kit for the experiment. It was a quick and fun project, way different from my other models that generally take years to build. But for me, it doesn't really count as a serious scale model.


Background

Before the build, some words on my relation with the Matchbox brand.

When I was young, I built several Matchbox models, like most young boys at that time. The boxes were attractive, the multiple plastic colors were fun. I think I built between 10 to 15 of them. I had one catalogue, the 1979-1980 issue, and I read it so many times that I knew it by heart. But I also remember why I stopped building them. While I was building a Matchbox B-26 Marauder, my cousin showed me his Airfix B-26 Marauder under construction. I saw how much more detailed and 'serious' his model was, and concluded that I needed to try other brands. I stopped buying Matchbox models.

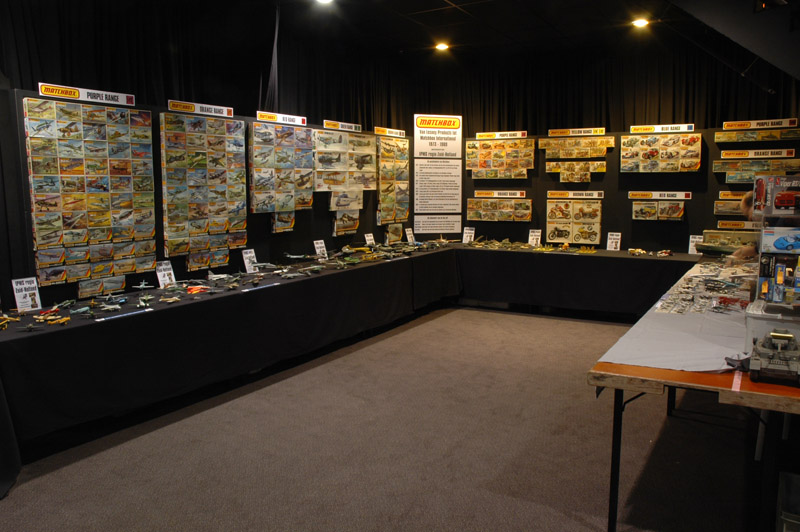
Fast forward to 2016. Reinhold Bogaard (of Matchboxkits.org), Leo Ripken and I created a large Matchbox display at Euro Scale Modeling. We showed the full range of kits, some 200 boxes, plus many built models. It was a large undertaking, the biggest so far by our club. You can read a full report on the IPMS-The Netherlands website (in Dutch). The photo shows the stand just before the opening. It would be more atmospheric with the public, but you couldn't see the stand anymore :-)


The model

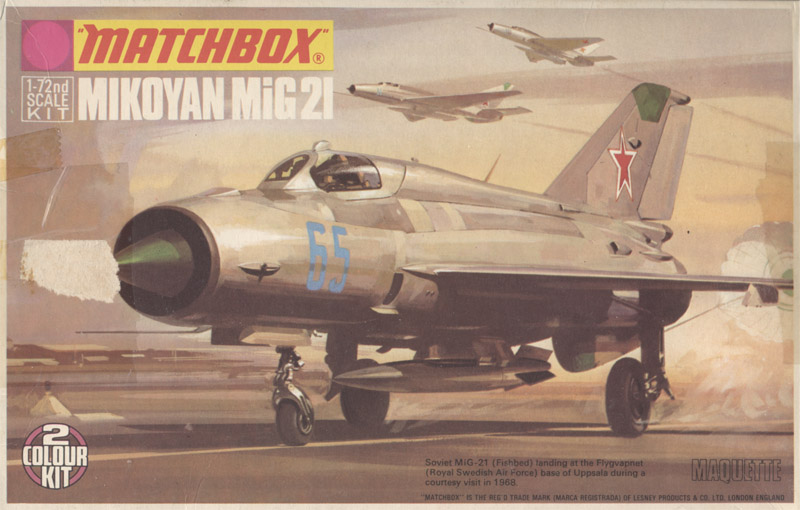
The Matchbox MiG-21PF was issued in 1973, as the 19th model in their Purple series, their smallest 1/72 range. Purple range models always had just two small sprues (175 x 110 mm) in different colors, plus a small sprue with the clear parts plus the stand. Although it's not mentioned anywhere on the box or in the instructions, the model represents the PF version, basically the second main version of the MiG-21.

The model comes with just one centerline fuel tank, economy apparently preventing the inclusion of a pair of missiles, pylons or anything else. The model mainly has very fine raised panel lines, the Matchbox trench digger clearly had a day off. The olive green and mustard plastic colors of this particular kit have little to do with the paint schemes offered in the kit: both are natural metal or silver lacquer. The kit was also issued with silver and gray plastic, see Leo's build of that version in this report of our February 2016 Regio Zuid-Holland club meeting.

I can't judge the kit's accuracy, since I own just one booklet on the subject, that lacks drawings. I've read that the fuselage is about 10 mm too long. In most discussions about MiG-21 models, the Matchbox kit isn't even considered, so that's no help either. But the accuracy doesn't really matter for this project: this is all about building a Matchbox kit 'au naturel' without any modifications.
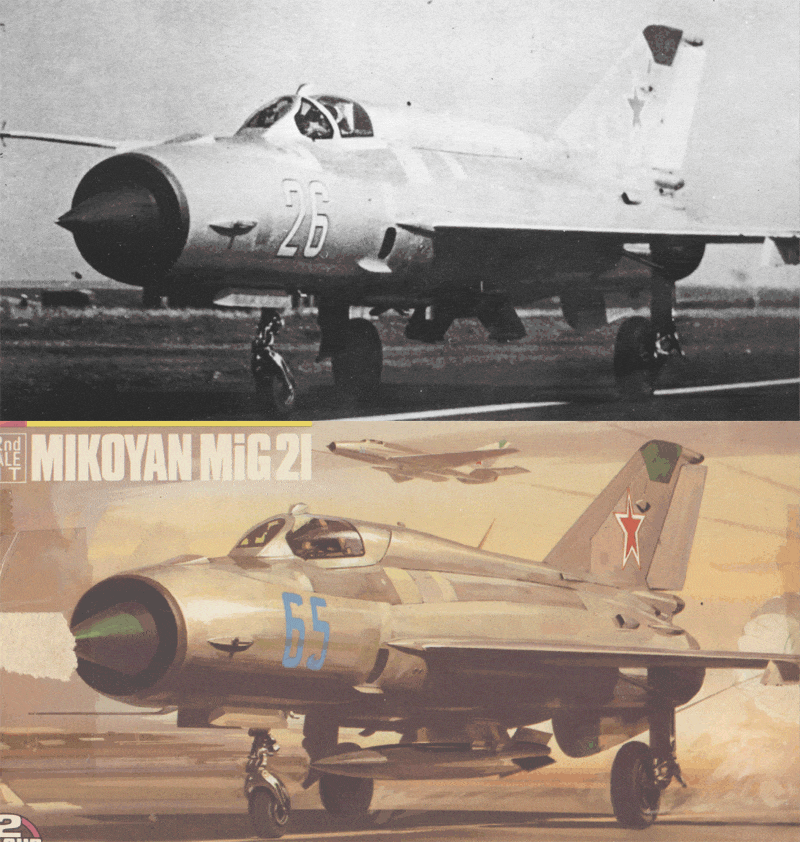
When I browsed through the 1978-vintage book 'Soviet Aircraft of Today' by Nico Sgarlato, I spotted a photo on page 23 that looked extremely familiar. It's a Soviet MiG-21MF photographed in 1971 at Reims air base during an exchange with the French Air Force. I overlaid the photo on the box art in CorelDraw, and it's a 99% match. I made an animated GIF using EZGIF.com.

I'm pretty sure that artist Doug Post used this photo as the basis for the box art. Of course he changed the pitot tube, the canopy and the spine to make it a PF version. Also, the centerline tank, that he also added, has fins that look rather crooked, since he had to sketch them free-hand. The tank appears to be yawed to the right too, now that I look at it closer.

He added a parachute to make it more dynamic, but you can see that this is from his own imagination, since he attached the parachute to the bottom of the fuselage, as on the earlier MiG-21F, whereas it should attach to the base of the fin on the PF and MF.


Construction

Before I started, I asked Leo lots of questions about his techniques, which involved mostly Revell Contacta glue with a needle dispenser. He works so tidy that there is no need for sanding of the glue joints. However, I've been building all my models for 20+ years with CA glue, therefore solvent glue was foreign territory for me. I struggled quite a bit, and had to resort to light sanding and polishing of some joints. I decided to try some other methods too, and glued the wings with epoxy.

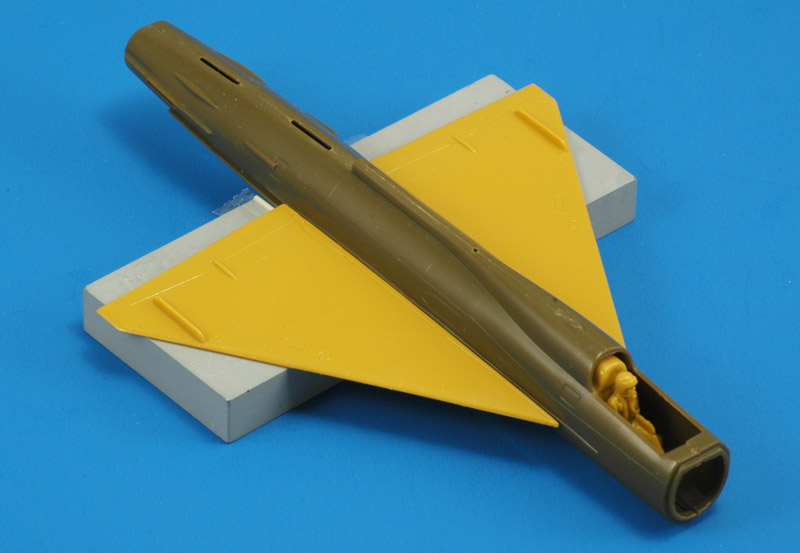
I made a simple jig to achieve 2 degrees anhedral. The wing thickness tapers from 2.5 mm at the root to 1 mm at the tip, on a span of 43 mm. Therefore, with the wing's lower side on a flat surface, the anhedral is already 1 degree. Consequently, I needed another 0.75 mm to create the other degree. This was achieved with a small plastic strip taped to a steel block, that can be seen just behind the root. The resulting anhedral is subtle but visible.
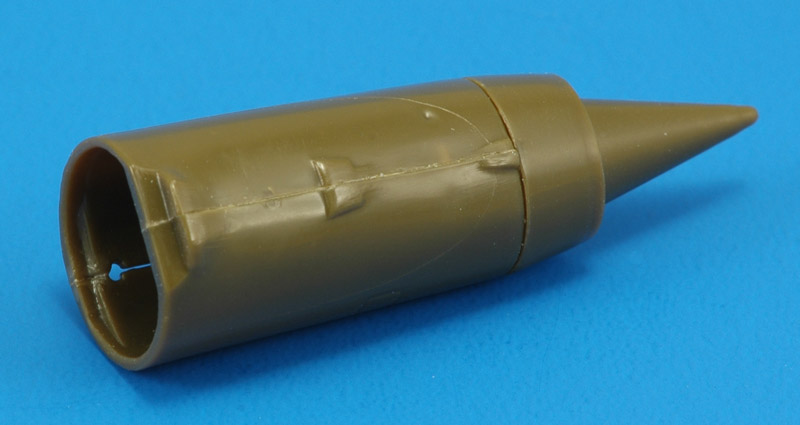
Most of my glue joints were not very tidy. Here plastic was squeezed out. Another problem that I discovered was the most sprue attachment points left some discolored plastic. In some places I could solve it by applying a bit of Tamiya Ultra Thin, with subsequent sanding and polishing. But the glue joint is still very visible - my inexperience with this building style shows! It also felt very unnatural to leave the gap between intake ring and nose section alone.
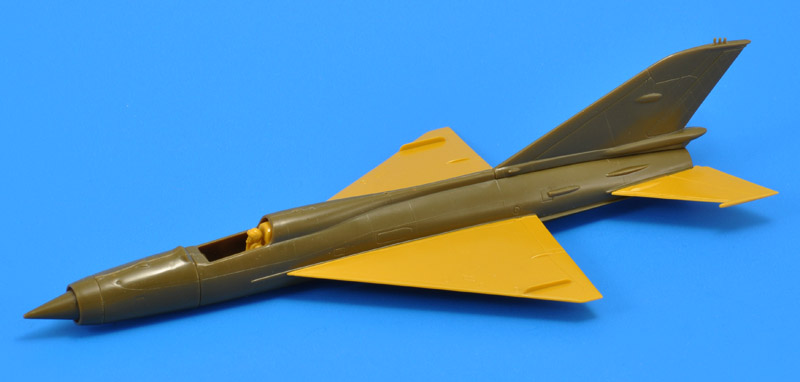
Construction moved ahead quickly, without the need or possibility to sand joints and/or fill gaps. I switched mostly to Colle21 slow-setting thick CA glue; it allows plenty of time for alignment, but still cures within minutes, so you can move on quickly. I also reglued the wings with Colle21, since I kept hearing slight cracking sounds coming from the wing-fuselage connection - the epoxy glue joint was clearly failing.
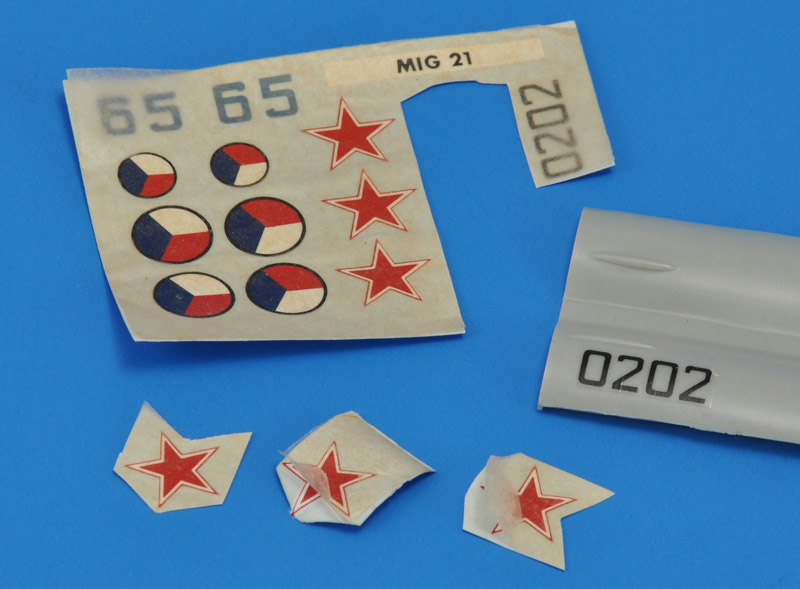
I decided to apply the decals before attaching the landing gear and other delicate parts. Unfortunately, the old Matchbox decal sheet was unusable: the protection sheet was stuck to the decals. I tried several fluids to make the protection sheet release, but I could not find one that worked. If the sheet would release, fibers remained attached to the decal. For the record: a serial number, from a corner where the protection sheet hadn't fused, worked really well on bare plastic.

Later I found a method that worked somewhat to dislodge the protection sheet. Hot air seems to re-melt the wax of the protection sheet, you can see it become glossy. While heating, you can peel off the sheet, without fibers remaining on the decals. But about half of the decals still got damaged, probably because they can't stand the heat.
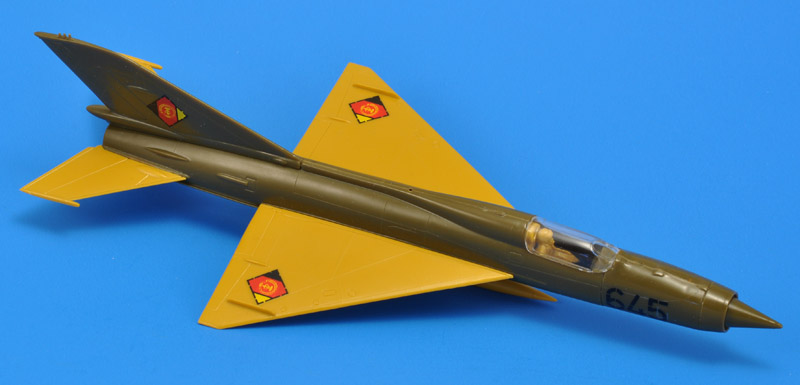
I looked through my decal stash, and quickly found a sheet that quickly made me forgot the disappointment: SuperScale sheet 72-159 'MiG-21 Indonesian AF (2), Russia, Yugoslavia, Syria, India, GDR'. It was a difficult choice between the East German and Syrian options, but I picked the first. The set consisted of six roundels and two serial numbers, much like the Matchbox decals. They were applied using the Micro system of Set and Sol, although I still doubt whether they have any effect. The roundels (squarels, diamondels ?) give a really nice color touch to the model. But it does conflict with the original plan to build a Matchbox kit straight from the box.
Last decision to make was landing gear up or down. The ridiculous main landing gear legs of just 1 mm diameter decided that: landing gear up! Scott Van Aken once described them as follows: "They are so thin that a fly walking on the floor causes them to wobble." The six landing gear doors were a bit of a rough fit, but that fitted the model, so no problem.
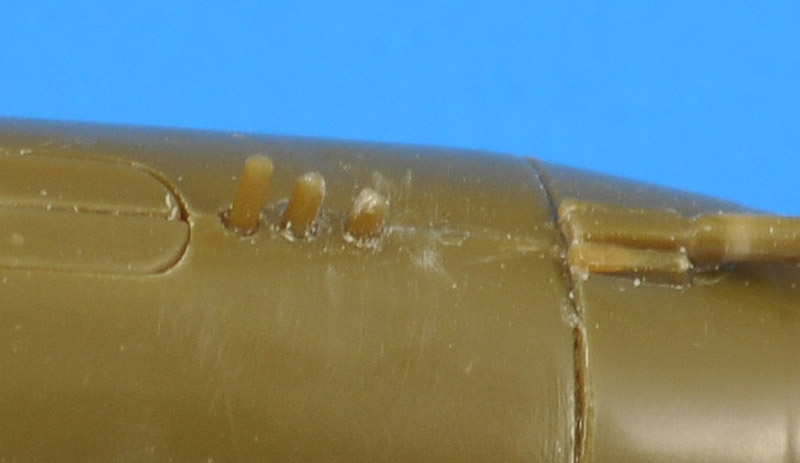
The 'Odd Rods' IFF antennas under the nose disappeared during assembly. That's not surprising since they are molded to one fuselage half, with only half the diameter of the pins connecting to the fuselage. I decided to restore them with stretched sprue glued in 0.8 mm diameter holes. The close-up photo also shows the dust inherent in building scale models.
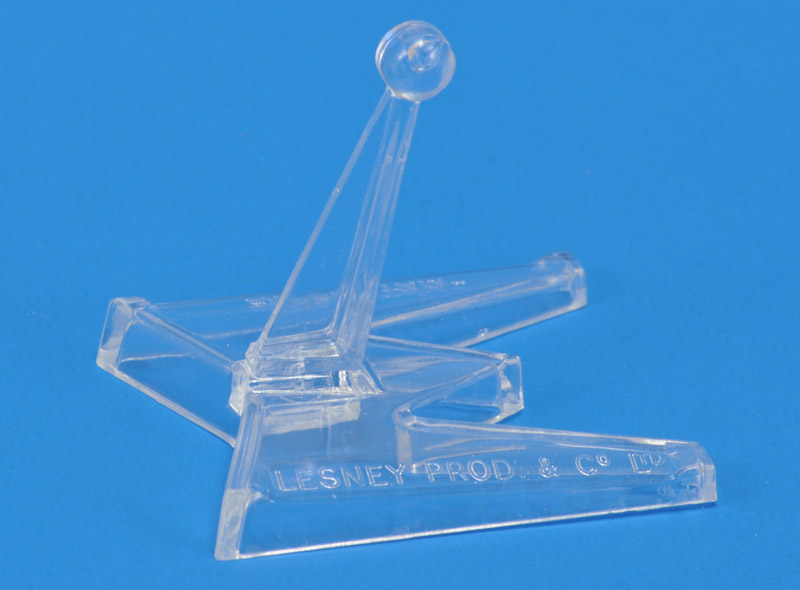
The traditional Matchbox stand was required for my 'flying' model, and I assembled the two main parts with epoxy glue. If you use plastic glue, the joint will discolor whitish.

I discovered that the ball joint swivel was missing from my kit. Leo later donated the missing part. But I cracked the part immediately; it's far too small to fit over the ball. With the piece in place, the crack still stands open 1 millimeter, a sure sign that it's really too small to ever fit properly. Due to the crack, the clamping force is much reduced, and the ball joint often cannot hold the model in its intended position. Sigh..
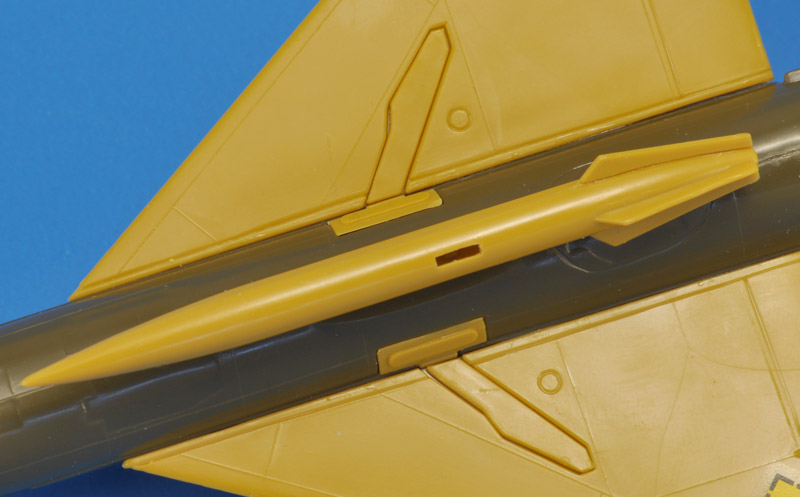
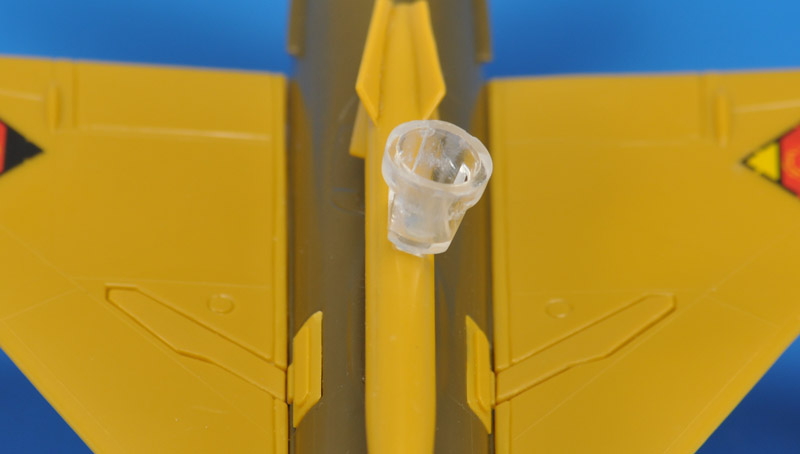
Per instructions I cut a slot in the centerline fuel tank for mounting the model on its stand, see three photos above. Strangely the slot is offset to the right. The lack of support inside the tank means the tab that goes into the slot can tilt sideways so much that it doesn't work at all - the model flops left and right. And since the center of gravity is further aft than the slot (another design error) it also pitches up and then disconnects from the stand.

To solve these problems, I filled the center part of the tank through the slot with Apoxie Sculpt, and pressed the tab into the still soft Apoxie. After the Apoxie cured, I CA glued the swivel part to the tank. That's not the normal way, but it was the only way to make the stand work.


Finished model

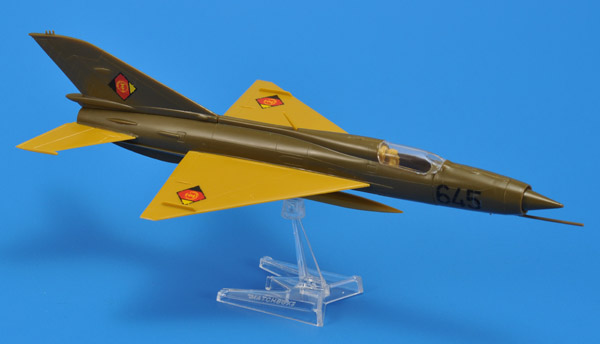
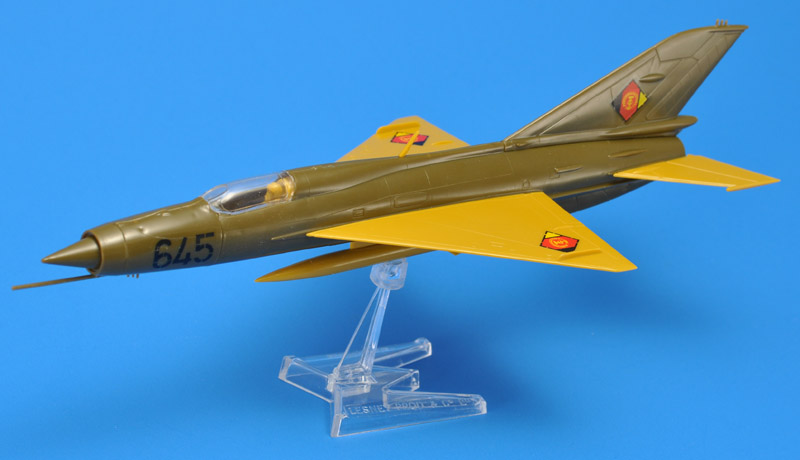
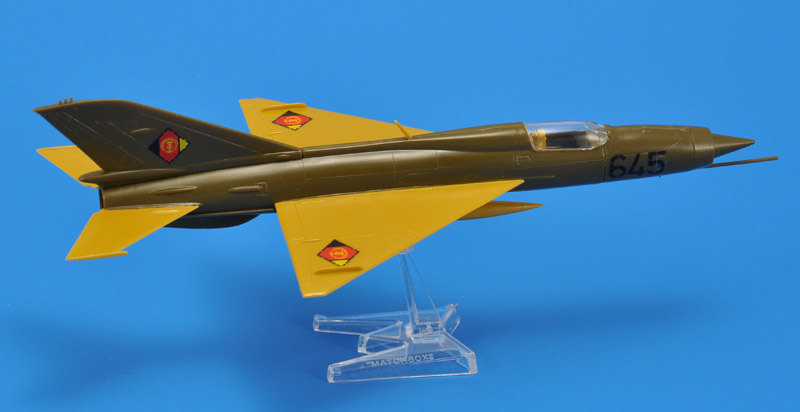
Finally: the completed model on its swivel stand. For me, the model came alive after applying the markings. Before that, I did not like the model much. My alternative markings might have been a good choice for Matchbox too.

Building a model without paint isn't easy, I found out. Of course, you have to be super careful with glue, whether it's solvent glue or CA glue. If there are fit problems, there are almost no methods to solve them. Quite often small defects remain from the attachment points to the runners, and you can't really solve those either.
I can see now that Matchbox's concept was a pretty good choice for young modellers. After a simple and quick build process, you have an attractive model to play with. However, using plastic glue probably ruined much of the experience: it takes too long to set for a child, and it's easily smeared over the model. CA glue worked a lot better for me, but it's probably not a glue suitable for children.
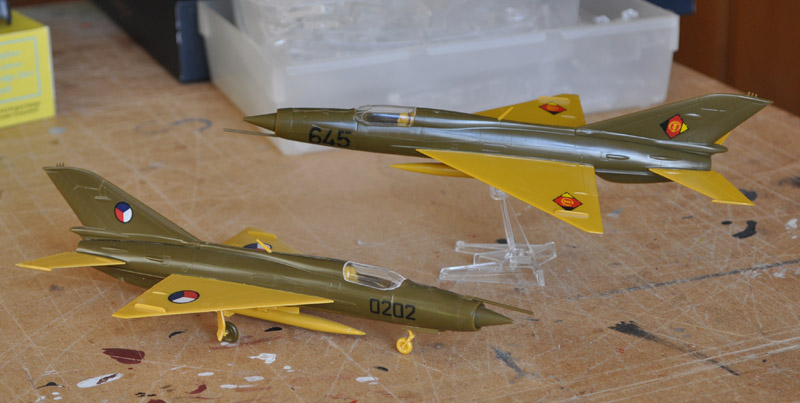
During a visit to Leo I shot this photo of his and my MiG-21PF models. They make a nice couple I think! Leo will reposition the pitot tube to the lower side of the intake. He mistakenly glued the nose cone 180 degrees rotated, like on later MiG-21 versions.

I don't have plans to build more 'au naturel' Matchbox models, unless a special club project would require me to do so. I will leave it to Leo Ripken to build the rest.


Return to models page