Esci 1/72 RF-104G Starfighter
| I usually build aircraft that I've seen in the flesh. I grew up near Volkel, the last and largest Dutch Starfighter airbase, and spent a lot of time there as an aircraft spotter. Therefore my Starfighter will be a RNLAF RF-104G of 306 squadron from Volkel air base. I liked them best either clean or fully loaded, with four fuel tanks and a centerline store, in this case an Orpheus recce pod. I want to depict it taxying: canopy open, pilot in the cockpit, flaps in take off position, and since the engine is running, several blow-in doors are sucked open by engine. Another thing to add were the RNLAF specific ECM antennas.
|
Model issues and reissues
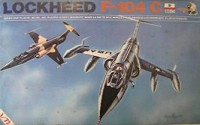
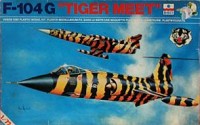
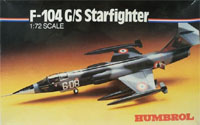
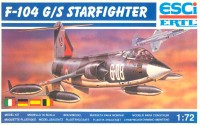
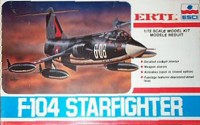
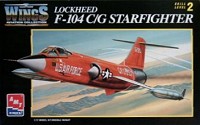
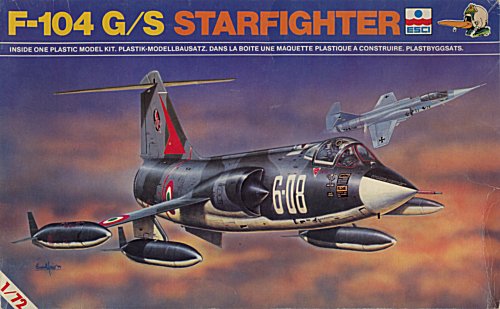
Shown below are most of the boxings of this model, by Esci, Humbrol, Esci-Ertl/Ertl-Esci and AMT. The one I'm building has catalog number 9007. The model was later reissued by Italeri too, along with many former Esci models.
Model quality
The Esci kit was by far the best Starfighter available in the eighties, when its competition consisted of the Airfix, old Hasegawa, Matchbox and Heller kits. The Starfighter was part of a series of excellent 1/72 Esci models like the F-5A and the Harrier, that were among the very best of their time, and are still not surpassed. Esci outsourced all its moulds, and reportedly this great series of models was done by the Suntak company from Japan. It has very fine engraved panel lines details, nicer than most modern kits I would say. For example, if you compare the wings of the Esci, Hasegawa and Revell models, the Esci wing is definitely the nicest. Compared to current-day kits, the cockpit is rather bare, with decals for the instrument panel and side consoles. You can also build it as a F-104S, for which extra fins and pylons are provided, but the subtle differences such as the slightly different inlets, smaller ventral fin, Martin-Baker ejection seat, and the covered gun muzzle are not taken care of.
The kit's main problems are the drop tanks and the canopy. The drop tanks have a too small diameter. The real tanks scaled down are 7.2 mm diameter, the Esci tanks are about 6.4 mm. Admittedly that's only 11%, but it makes a big difference in appearance. Maybe it's the cross section area that one judges, and that's 21% too small. The canopy is a slightly oversized in all directions. The length isn't much of a problem, but the increased width and height give it a slight bug-eye appearance. The thickness of the canopy is not constant, creating optical distortion. Smaller problems are the weak representation of the gun muzzle, lack of bulge in the main gear doors and narrow tires. The real tire measures 185 mm sidewall to sidewall, making 2.6 mm in 1/72 scale. Esci's tire is 2.2 mm, Hasegawa overdoes it with 2.9 mm. The bulge on the MLG doors is about 20 mm on the real thing, making 0.3 mm in 1/72 scale, or about the thickness of three sheets of paper.
Other kits
In the sixties, Hasegawa issued a 1/72 F-104J (JS13), that was also issued by Frog (F268) in 1968, and later copied by Academy F-104G kit with recessed panel lines. In 1992, Hasegawa came out with a second and much improved Starfighter model, that was an improvement over the Esci model in a number of areas. The Hasegawa model has a much better cockpit, clear parts, tanks of the right diameter and shape, and nicer decals, but I definitely do not like the engraved rivets on the tail section. Esci's engravings look a little finer too. I will use Hasegawa tanks on my Esci model.
The Revell 1/72 F-104G, that came out in 1996, is also very nice. Unfortunately it too has rivets on the rear fuselage, and also on the vertical tail. Another issue is that the forward canopy frame is located too far forward, making the windscreen too small and the canopy too large. The canopy also has a weld line in the middle of the canopy, and you cannot get it out. The tip tanks don't have a recess for the wing (they should slide on the wing), which creates a overall width that is 4.5 mm too large. The bulged wheel doors are far too bulged, roughly triple the 0.3 mm that it should be.
In 2002, the Esci Starfighter was reissued by Italeri with minute differences. That makes it a difficult choice between the three kits: the overall quality of the Hasegawa and Revell kits is better, but the rivet detailing is really annoying and a lot of work to get rid off.
Accessories
I did not buy any detailing sets for this model, since I had the ultimate reference at hand (a real F-104G stood less than 50 meters from my desk at the time) and I like scratchbuilding. Some of the available accessories are the following. Eduard has a several photo-etched sets, 72-113 for the F-103D/J, 72-114 for the F-104G and probably some more; Verlinden has a 'TF-104G/J Super Detail Set' (#567), and CMK has several resin sets, including 7057 'F-104S/G detail set'. See this super 1/72 Scale Model Census site for a more complete list of accessories.
Construction
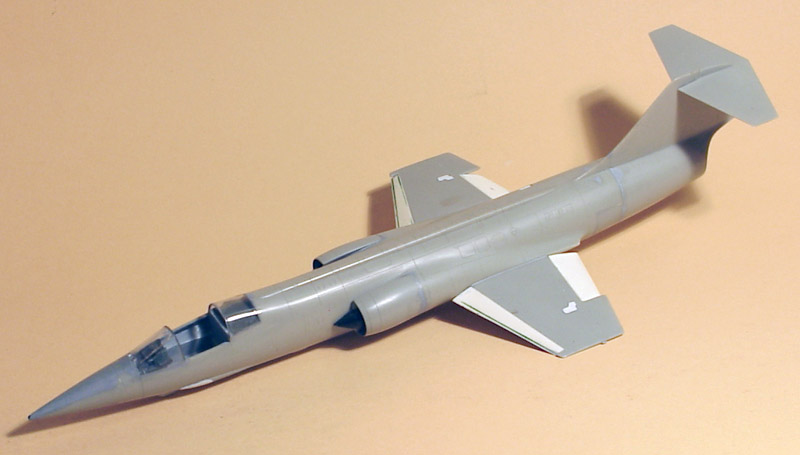
I had built the model already before I started taking photos, so this construction report starts with a largely built model. The rear part of the fuselage did not fit perfectly on the front/middle part, it is slightly larger. Furthermore, on the left side this connection was wobbly. It turned out the mating surface of the rear part was not perpendicular to the aircraft's symmetry plane (use machinist square or similar to see what I mean here, if you're building the same model). After a bit of sanding it fitted perfectly.
In this side view some of the modifications are visible. Somehow I managed to do all modifications in white plastic, which shows up nicely in the pictures. The dropped leading edge and trailing edge flaps come from an old Matchbox Starfighter (it would be simpler to sacrifice another Esci kit). Hardly visible is that the horizontal tail was mounted at a negative angle of attack, which is the standard trim setting before take-off. The model as seen here is basically ready for painting. The intakes inners and the shock cones are painted already.
| 
|
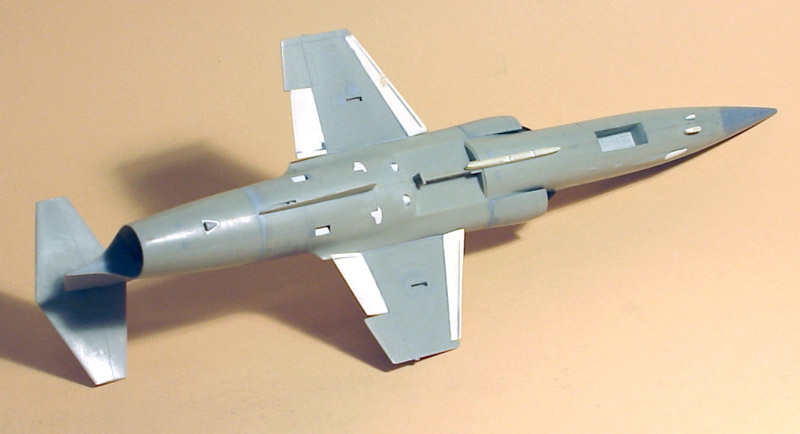
| The underside shows again the lowered flaps. After measurements from photographs I decided to drop them 20 degrees. Later I measured the take-off flap position on the real one (it has no engine, but is fully functional otherwise), and it turned out to be 15 degrees for both surfaces. These angles were later confirmed by the flight manual (page 1-75). The landing settings are 30 degrees for the leading edge flap and 45 degrees for the trailing edge flap. I'm not planning to change the settings on my model though. Also visible in this photo is that the intakes pieces required some putty at their rear sides.
|
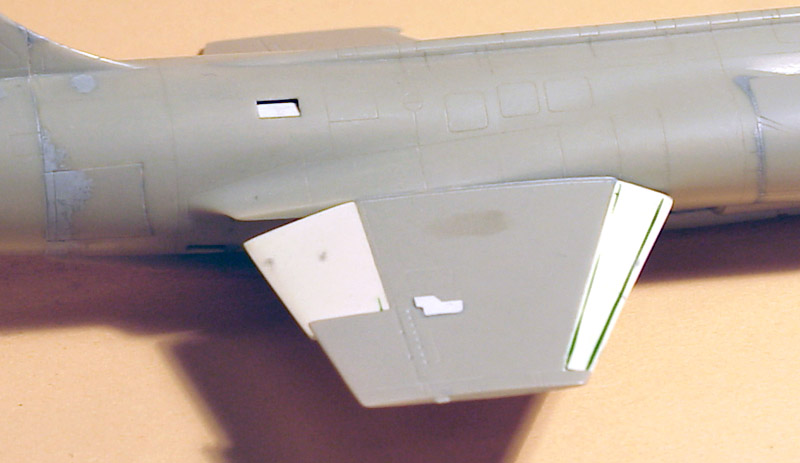
| A close up of wing, showing again the flaps, the single blow-in door on the upper fuselage, and two repairs on the wings. According to a former Fokker mechanic, these repairs were needed because the aileron servo in the wing made the wing skin crack. The real patches are high-strength steel. I measured the repairs on a real Starfighter. Also visible are putty jobs on the intake and the rear fuselage connection.
| 
|
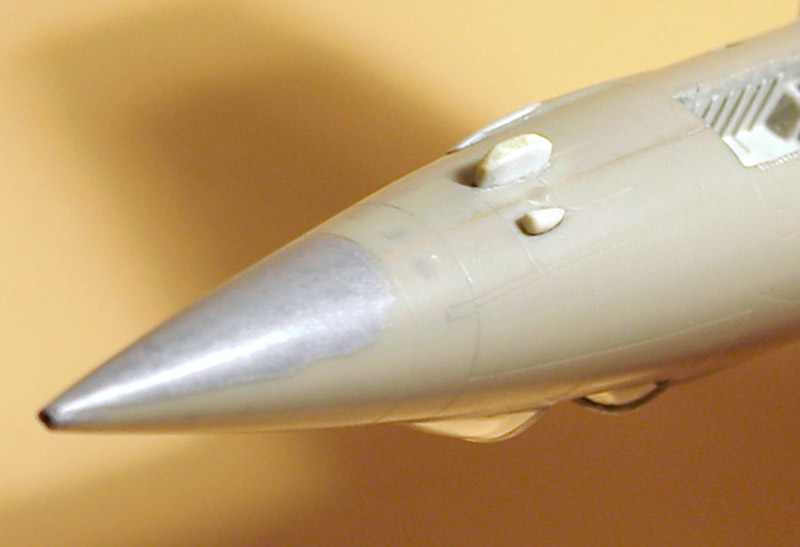
| A close up of underside nose. It shows two ECM antennas under the nose (not used by other air forces by the way) and the cover plate for the gun muzzle. The RF-104G had no gun, but had an extra tank installed in the gun bay. Another small detail (not visible in this picture) is a small NACA inlet in the gun cover (3.5 mm long). I've seen it only on Dutch RF-104's so far.
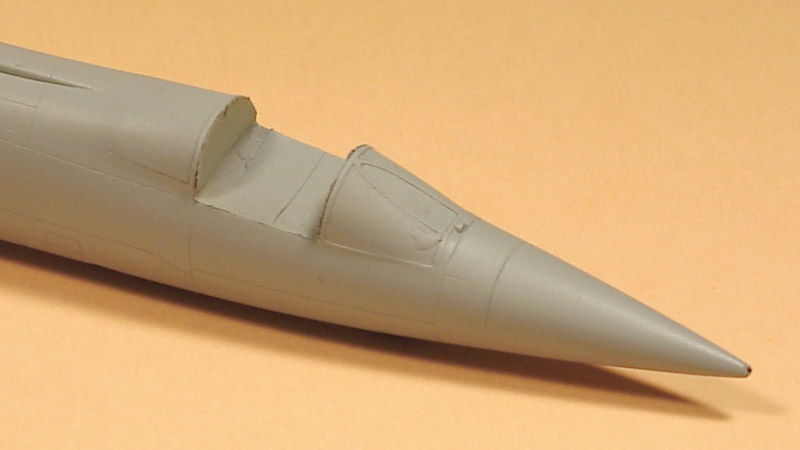
You may wonder about the large amount of putty on the radome. I glued this model either with a bad plastic glue, or the gluing operation took too long. Anyway, the radome kept cracking, and I kept sanding the seam. After some time I noted that the radome had become seriously unround. I added putty and checked progress with a circle template until it was round again. With my current glue, super glue, I happily no longer experience this kind of trouble.
|
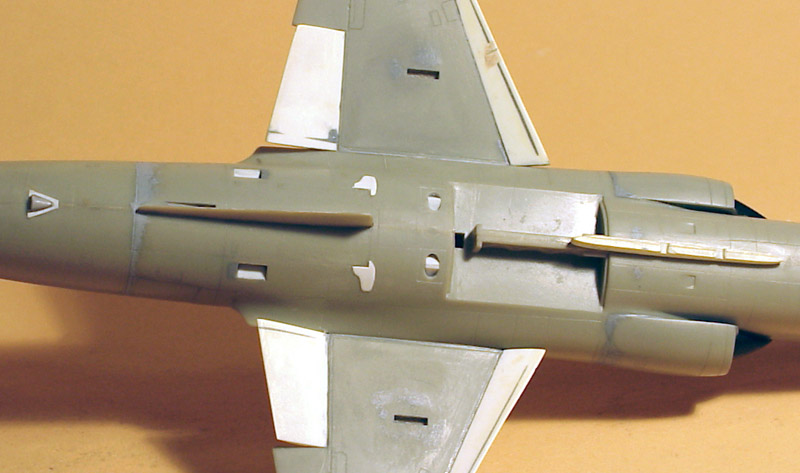
The underside of the fuselage. Starting at the front, a scratch built centerline pylon can be seen, measured a a real 104 (the pylon that comes with the SUU-21 is not correct). It has notches to accept anti-sway braces later. Just behind the landing gear bays, two elliptical two-door blow-in panels can be seen. I added these in error though: as far as I know now, these are only sucked open with the engine running at power, and I want to portray one running at idle. Therefore I will fill them again. Next are two reinforcement plates at the edges of the hydraulic bay door, again as measured on a real one. I later found them in the F-104G Structural Repair Manual, pages 4-178D and E.
A little more aft, two blow-in doors were made. They are in a slightly different position that the engravings on the model, I measured the true (asymmetric) position on the real one. Note that there is yet another blow-in door, just below the left speedbrake, but while taxying it is not sucked open, so I left it closed. Then comes the fuselage break, and this required putty all around, as can be seen. The last item is the rear ECM antenna. A small piece of tube was glued on a thin piece of plastic card to simulate the mounting plate.
| 
|
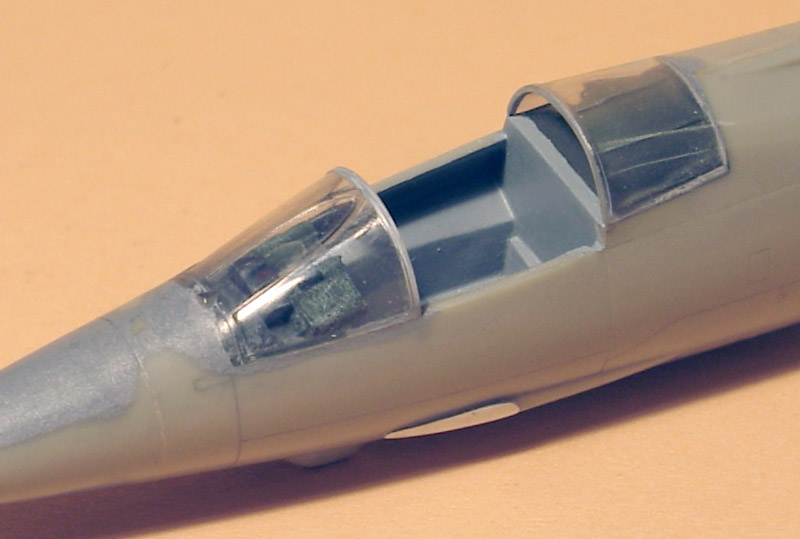
| A close-up of the cockpit area, showing a number of details. The bare cockpit tub with canted side consoles was scratch-built from card, using the 1/32 Hasegawa kit as a guide. This was all done in an age when resin detail parts did not exist yet! I cut the clear part in three pieces, because I wanted an open cockpit. The area under the rear canopy part was detailed with two stringers (which is all there is on the real one too). You can also see the puttying around this clear part. I treated it as a normal plastic part, puttied and sanded it until it sat properly, then polished the part clear again. One mistake I made was that I forgot to paint the clear part's edges in a dark color. The blueish putty will be visible after painting. Under the windshield the scratch-built coaming can be seen. It consists of a plastic gun-sight projector, and tissue paper 'fabric' covers. Like on the lower side of the radome, I had to putty the upper side considerably to make it round again. Last detail visible is the cover over the gun muzzle (this being a recce RF-104). Later I reshaped this part considerably, since its shape was more complex than I had modeled here.
|
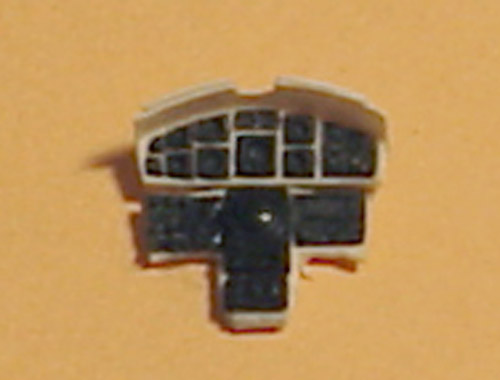
| I built a two-piece stepped instrument panel, and glare shield from thin card. The release of the Hasegawa kit solved the problem of the instruments: I cast a copy of a Hasegawa cockpit, and then sanded the instrument panels so thin that I got seperate instruments. I attached these to my own-built instrument panels and side consoles.
| 
|
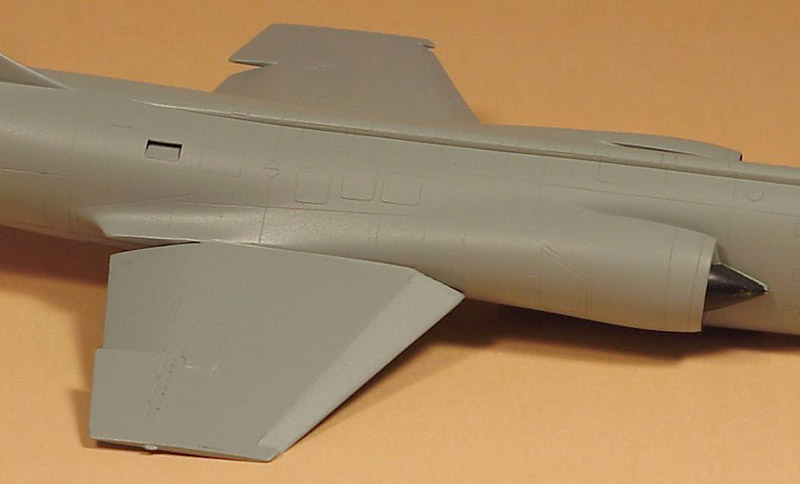
| I'm always looking forward to base coating a model, since it signals the beginning of the end of the construction phase. I tried to find the best match to FS 26373, and concluded that Humbrol 127 would come very close. Humbrol 1 primer was a near-perfect match, but I had reservations against using a matt paint. I had had numerous problems before trying to spray matt Humbrol paints, but a recent paint test had shown that this matt primer sprayed quite nicely. The model shop was out of 127, and I decided to use Humbrol 1 after all. That wasn't too smart: the paint turned out with a rather rough surface all over the model. After a quick paint drying session at 50 degrees C, I wet-sanded the complete model with 1200 paper. But I was rewarded with a very nice model, with a lot less building errors than I had expected of my oldest model. It will require some touch-up jobs, but it is already pretty smooth. And what a pretty overall shape, I can't stop looking at it! It really brings backs those days in the early eighties at the fence, enjoying low-flying 104's and listening to the fantastic howl of J79's :-)
|
| After a first round of touch-up jobs I airbrushed the model again, but this time I used Revell 374 RAL 7001, which is the actual color used on Dutch 104's. This Revell paint matches the color on the real item excellently. Both this front fuselage photo and the center fuselage photo above were taken after this second paint job. As you can see, the engravings are very restrained and nice. Like I wrote above, this old Esci model holds itself very well against the Hasegawa and Revell competition, and it has no stupid rivets on rear fuselage! I also painted the Hasegawa tanks that I will fit to the model. But it's almost a shame to add tanks to the model and spoil the fantastic clean lines. The clear parts were masked as usual with Cheap Chocolate Foil; see my Canopy masking with Cheap Chocolate Foil page for all the details.
| 
|
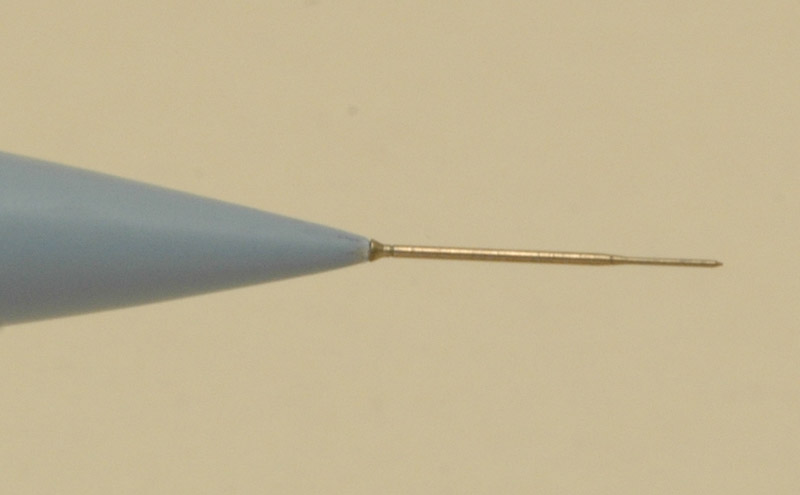
| Although I had made a nice pitot tube from wire and stretched tube, I gave in and bought the very, very nice Fine Molds F-104 pitot tube set (AA-23). To make it fit the radome, I installed a 0.7 mm internal diameter tube in the nose, carefully aligned dead ahead and slightly downwards.
|
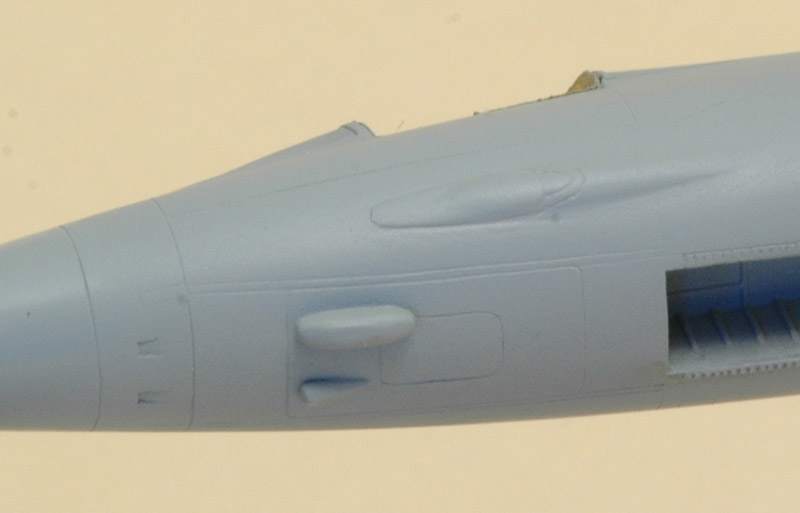
| With the model in its base coat, I compared it one more time with the 1:1 scale item, and I found a few areas that needed changes. One was the gun muzzle. Esci's gun muzzle bulge (not the cover that I added) is a simple bulge, as you can see in the sixth construction photo. The real thing does not have the sharp corners though, and some filling will be in order to make the bulge smoother. The shape of the gun muzzle cover plate (recce only) is also more complex than I thought initially, and it too was modified.
| 
|
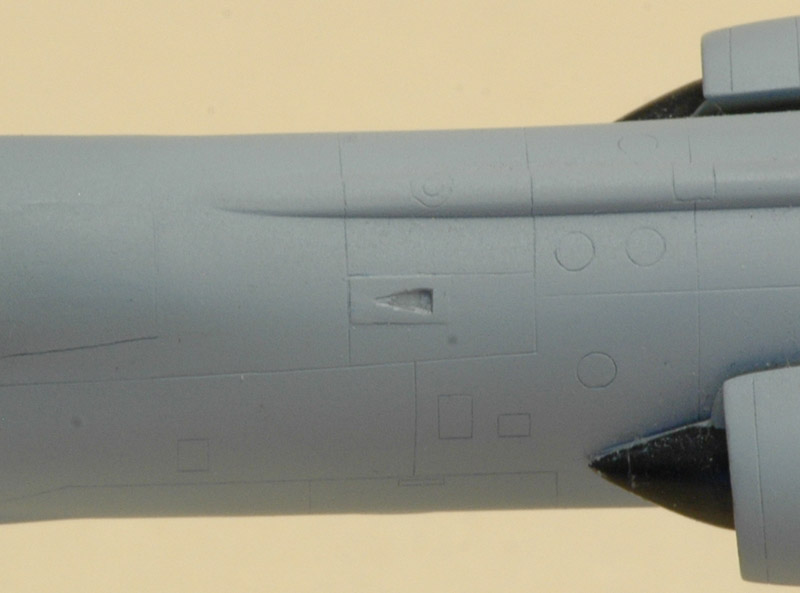
| I added a small NACA duct in the gun ammo hatch, on the left side. This is a Dutch modification for cooling of the ECM equipment in the gun ammo bay. However, I found out later that this only applies to fighter-bombers, not the recce version. The latter has the ECM equipment in the gun bay, as a former radar/ECM mechanic explained to me. It has a cooling inlet just behind and below the gun muzzle, typically below the '8' of the serial number. I will remove the inlet seen in the photo.
|
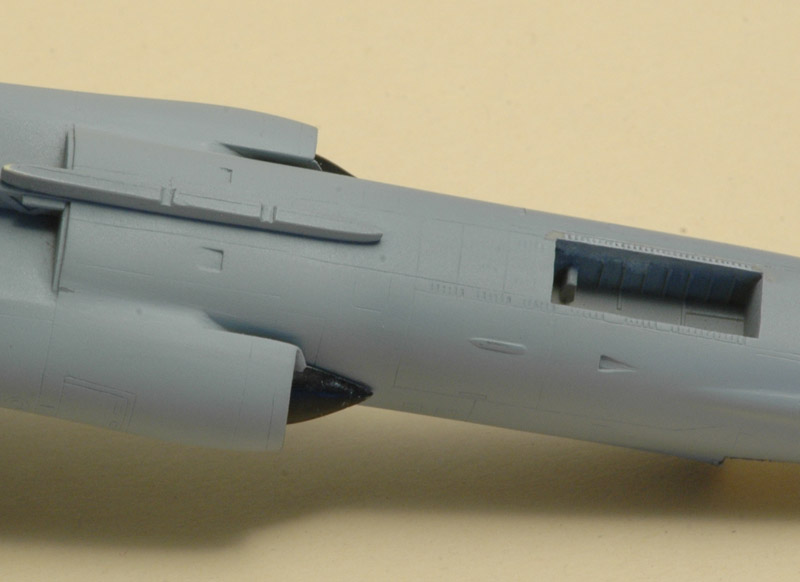
| Here the correct ECM cooling intake can be seen, next to the nose landing gear bay. The slots alongside the intakes (boundary layer bleed slots) were not completely accurate. Those on the lower side are much too long, running all the way to the main landing gear bay, and I filled the last 50-60% with putty.
| 
|
Other modifications: the leading and trailing edges of the horizontal stabiliser were thinned slightly, and navigation lights were scribed on the inlet ducts (Esci forgot these). The various outlets are either much too small (like those behind the radome), or not deep enough (the ones ahead of the MLG bays). This is easily improved however.
Colors
In the past I took color matches with a FS595B fandeck from two Dutch 104s, D-8114 and D-8048 at Delft University:
RAL 6014 green: FS 34064 but satin (the 'official' match is 24086)
RAL 7012 dark gray: FS 26152
RAL 7001 light gray: FS 26373 (sometimes leaning towards 26473)
radome: FS 16473
anti-glare: FS 34096 on radome, FS 34092 aft of radome
Next I started looking for suitable paint matches for the camouflage colors. I bought Xtracolor's X251 RAL6014, but it didn't match the color on a RNLAF 104 very well, being too yellow and olive drab instead of green. The Xtracolor RAL6014 paint matches a RAL fan deck very well, so it was the RNLAF paint that was different from the RAL standard. From memory the upperside colors of Dutch and German 104's were not 100% identical, although they are both specified as RAL6014 and 7012. Likely Xtracolor RAL6014 is better matched to Luftwaffe Starfighters.
Then I found a 25-30 year old tin of Humbrol Authentics RAL6014. The color is very close to that of the real thing, but the paint won't spray nicely. Later I found that Revell 42 is also an excellent match for the RNLAF green.
This leads to the following provisional choice of paints:
RAL 6014 green: Humbrol Authentics RAL6014, and Revell 42 'olive yellow'
RAL 7012 dark gray: Revell 378 'RAL7012 Dunkelgrau'
RAL 7001 light gray: Revell 374 'RAL 7001 Grau'
radome: to be determined
anti-glare: to be determined
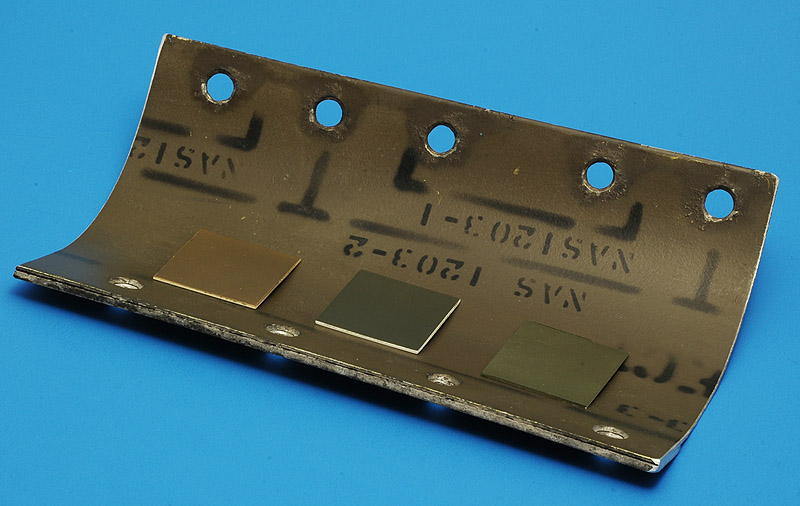
I have some pieces of sheet metal from D-8048, that was dismantled at Delft University by mechanic Peter Gouweleeuw. He knew of my interest and gave me a few pieces. This Starfighter had been stored outdoors for a few years at Ypenburg, so the paint was somewhat weathered. The piece shown here is most likely the root fairing of either the wing, or of the vertical tail. I had identified three possible paint matches for RAL 6014, from left to right Xtracolor's X251 RAL6014, Revell 42 Gelboliv and Humbrol Authentics RAL 6014.
I had compared these samples in natural light and concluded that the middle one was very close, and the left one too yellow. Imagine my amazement when I saw the result of this photo, which gives a very different impression, with my best match being much too green. To be studied more..
| 
|
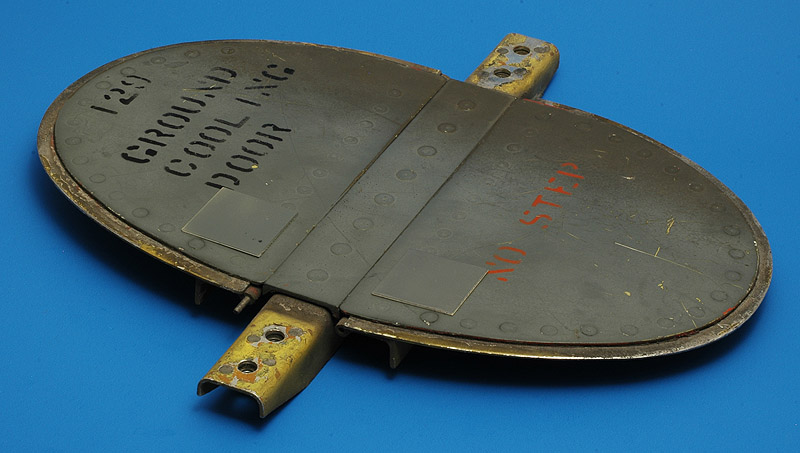
| For the RAL 7012, I had a blow-in door from the center/rear fuselage. Positioned on the part are on the left Revell 378 RAL 7012, and on the right Humbrol 125. Both appear to be fine matches, with a slight advantage to the the Revell color if you ask me.
|
Decals
I plan to use an old Modeldecal sheet (#43) for the larger markings and stencils. I compared the decals against the real ones, and the sheet is very accurate as far as I can see. Very impressive for a 1977 vintage decal sheet! I also bought the mind-boggling DACO 'F-104G Starfigher Stenciling' set (D7242), that is meant for a Belgian 104. I compared the small stencils with our Dutch 104, and it seems most can be used. It will be a major task to apply all of them (I guess some 250 decals), but I think it will be worth it. I may have the large serial numbers Alps-printed, since I don't like to assemble a serial from six separate decals, risking a 'wavy' serial. I also have a Dutch Decal F-104/F-16 set (72031), but the alignment isn't very good, and it doesn't include any items not already covered by Modeldecal and DACO. I haven't seen a later Starfighter sheet by Dutch Decal (72054) from 2002. The decal sheet of my Hasegawa TF-104G / F-104DJ also contains stencils, but they are printed far less subtle than the DACO set, and likely optimized for an F-104DJ.
One crazy detail that I plan for this model is a decal for the visor cover of the pilot's helmet. This area measures some 2 x 4 millimeters, but the Alps printer resolution is good enough to make a decent decal. I want the squadron's mascotte on it, a giraffe complete with helmet and oxygen mask, with the numbers 3-0-6 and a piece of film. This Danish Flightgear page has a nice photo. The helmets were of the HGU-26 type as far as I can tell. Shown below is the partly-finished artwork.
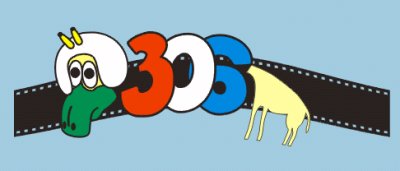
I found out more about the background of this helmet cover design in the RNLAF magazine 'KLuPActief' issue March 2012. When 'Oude Delft' officialy handed the Orpheus recce pod to 306sqn in 1974, they presented a very large (half scale maybe) giraffe stuffed animal (see the 306sqn 1974 diary, 31 October 1974 entry). In 1977 this triggered Ton van Andel, air force maintenance officer and well-known aviation cartoon artist, to design new visor cover artwork featuring this giraffe. You can see the basic design in the 306sqn 1977 diary (16 August 1977 entry). The head of the giraffe always was a custom-design that had good or bad features of the pilot involved. The previous visor cover design can be seen in the 306sqn 1974 diary (18 - 20 June 1974 entry).
Armour Collection makes (made) a 1/8 scale version the HGU-26P helmet. So far I found three versions:
6014 Belgian AF Red Devils, 6034 USAF green/brown/black camouflage, 6045 Portuguese AF Tiger Meet. They can be found on Ebay. I also came across a 1/6 scale HGU-26 by Metalcraft By Blair that look surprisingly similar.
Stores
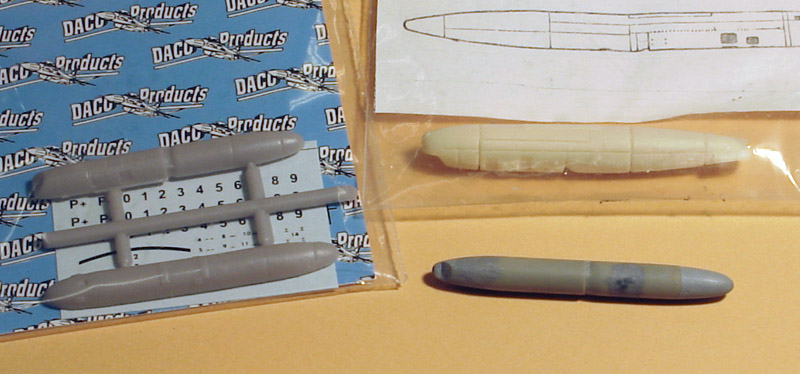
| The stores will consist of four tanks from a Hasegawa model and an Orpheus reconnaissance pod. I converted the SUU-21 bomb dispenser supplied with the kit to an Orpheus pod (bottom right), using a drawing obtained from 306sqn. An injection moulded one is now available from Daco Products, and earlier I bought a PD Models resin Orpheus pod (top right). The latter appears way too fat, and the panel lines are very deep. I will use the DACO pod, but I will sand off the ridges near the mating surface, I've never seen those on the real thing.
| 
|
ECM antenna sketches
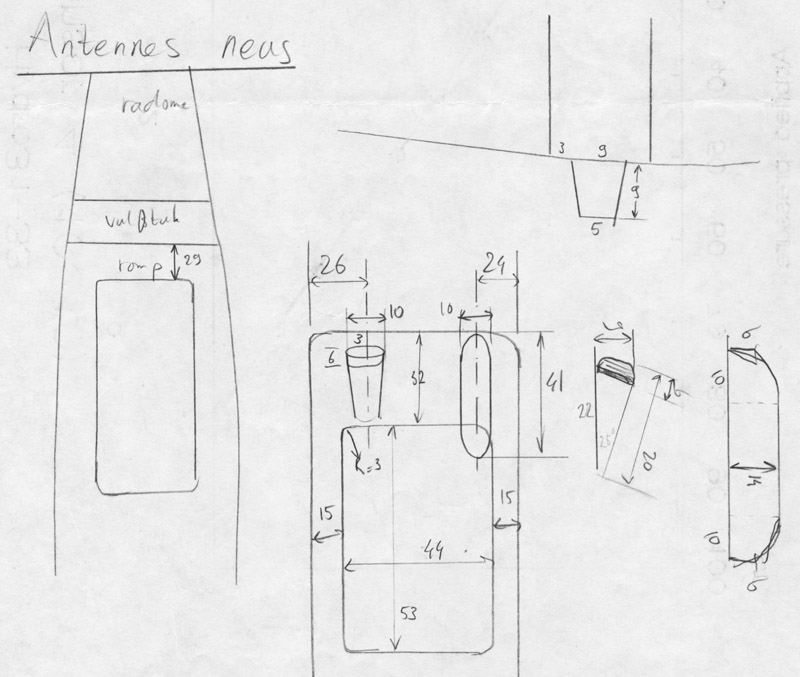
| Here are my ~1990 vintage sketches of the RNLAF F-104G ECM antennas, as measured from D-8114 and D-8048 the the Delft Technical University. The sketches were made on the spot, using a wing as my drawing table, so they are quick and dirty. Units are centimeters.
| 
|
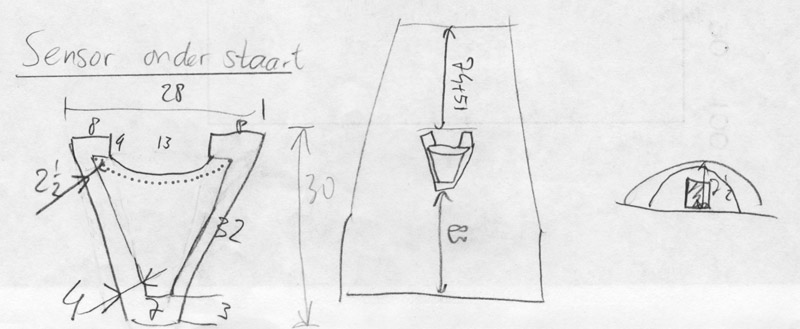
| Here is the scan of the rear antenne drawing, with only the dotted line added. It's rough but it does contain enough to build it in scale.
|
Canopy comparison
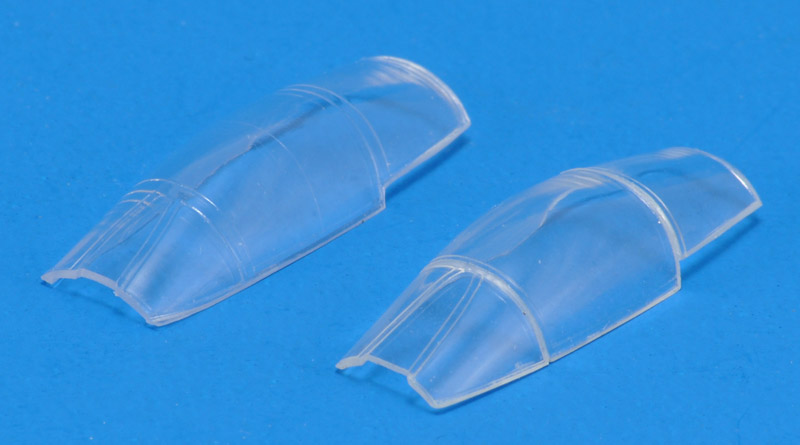
In a comparison of the available 1/72 Starfighter kits, the canopies are important for the 'face' of the models. Based on measurements, I concluded that the Hasegawa canopy (right) is the best, and I'm using it as the reference.
Seen on the left is the Revell canopy. The frame between the windshield and the canopy sits 1 mm too far forward. It leads to a shortened windshield. The canopy also has a 'flatter' appearance.
| 
|

| Again Hasegawa on the right, and Revell on the left. In this view the weld line in the Revell canopy is well visible. This cannot be polished out, it runs through the thickness. And now you know where it is located, check the first photo again.
|
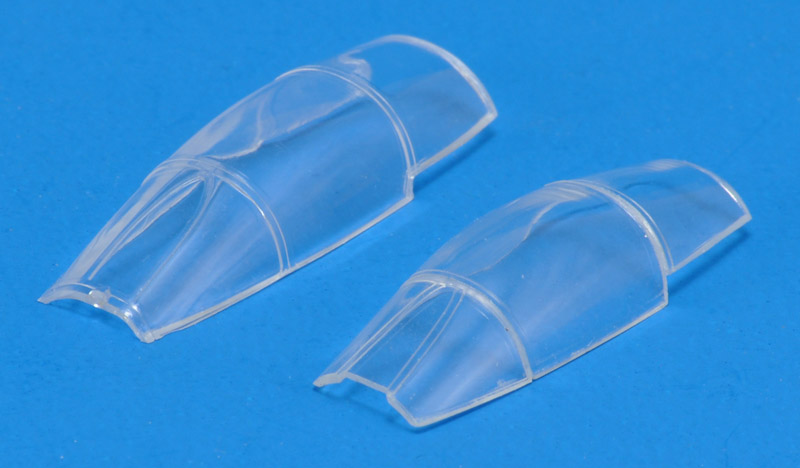
| This photo shows the Hasegawa canopy on the right, and the Esci/Italeri canopy on the left. The canopy is larger overall, and too large according to my measurements on a real 104.
| 
|

| Again Hasegawa on the right, and Esci/Italeri on the left.
|
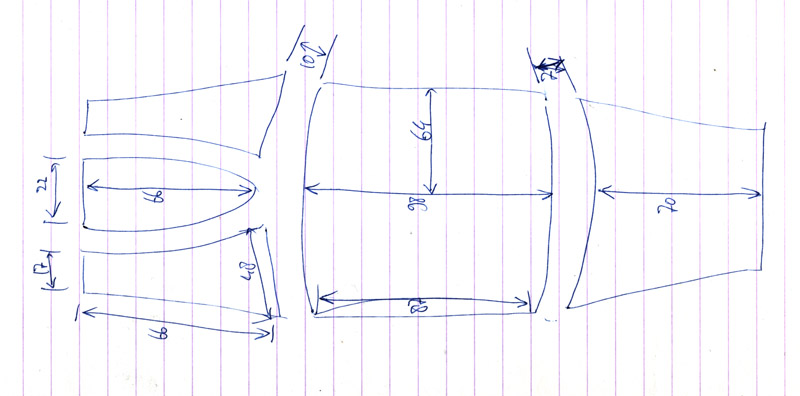
| Here are the canopy measurements that I took way back. Units are centimeters, with a note that the corners of the windscreen panes were rounded, and the measurements were done as if these corners were square.
| 
|
Tip tank comparison
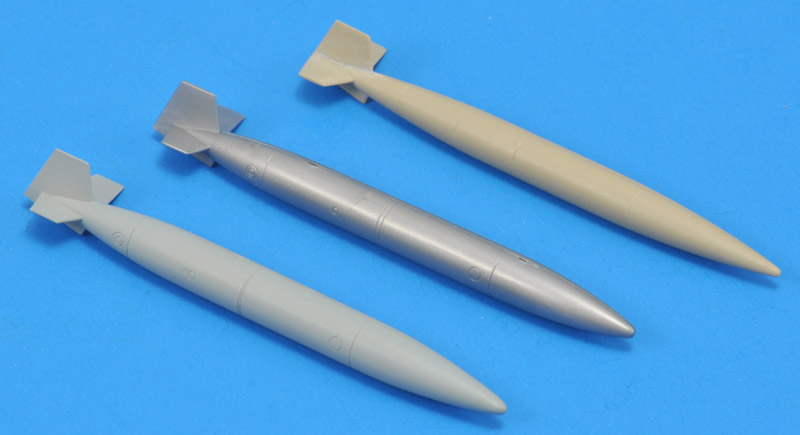
The tanks of the three kits differ in diameter. Front to back: Hasegawa (7.1 mm), Revell (6.8 mm), Esci (6.4 mm average). The real diameter is 20.4", scaling to 7.2 mm, so Hasegawa is very close.
Tank lengths are 76.3 mm (Hasegawa), 75.9 mm (Revell) and 75.2 mm (Esci), and again Hasegawa is correct. My conclusion is simple: the Hasegawa tanks are best.
| 
|
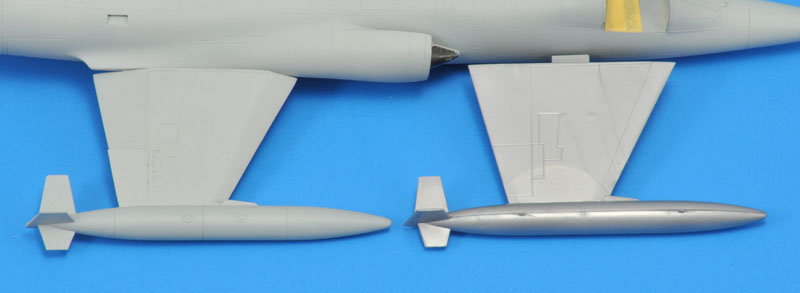
| A peculiar problem of the Revell model is that the tank is positioned too far back on the wing. Shown here is my Esci model with a Hasegawa tank, plus the Revell wing and tank. The error is ~2.5 mm, based on the Structural Repair Manual, TO 1F-104G-3, page 2-10. I haven't checked the pylon tanks.
Also, the Revell tank butts against the wing tip, whereas the real tanks slides over the wing over a distance of 165 mm (2.3 mm), measurement again taken from the Structural Repair Manual, TO 1F-104G-3, page 2-10. I once measured the stripes on the wing of D-8114 that indicate how far the tank had to go over the wig tip, and measured 17 cm, so this value is confirmed.
|
Nozzle comparison
The J79GE-11A has an ejector nozzle, that has two converging nozzles. The one inside is in direct contact with the hot exhaust gasses, the second (exterior) nozzle's primary function is guide the secondary (cool) air flowing through the engine bay to form the divergent part of the nozzle. The latter is the nozzle that we see.
I collected the nozzles supplied in the common F-104 kits, from left to right Esci, Hasegawa (most issues contain two nozzle types) and Revell. The details are accented with a black oil paint wash. Only the first two are suitable for a J79GE-11A, and they have 24 petals. The last two are for the later German-modified post-1970 smokeless J79-MTU-J1K engine; they are longer and have only 16 petals.
That leaves two. The Esci nozzle has detailing that doesn't match the real nozzle, with alternating short and long petals. The Hasegawa nozzle is more correct, with petals that are all the same. But the nozzle has very little detailing.
| 
|
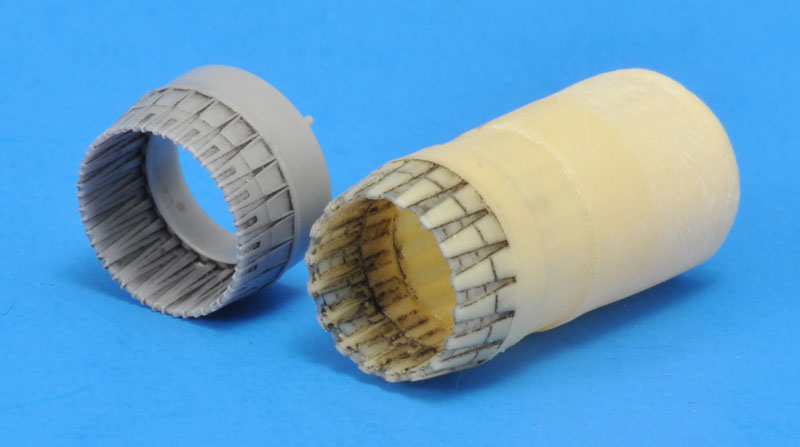
| I have two more J79 nozzles: a very recent injection moulded one by Fine Molds from their F-4C kit (left) and an old resin product by Eagle Designs (72-CK-12 F-B/C/D/N exhausts) from the late nineties. Again I accented the details with a black oil paint wash. The Fine Molds one has the best external detail, by far, and inside there's a simple representation of the primary nozzle - it's just a short length of tube, without any details. The Eagle Designs has beautiful internal detail, including something resembling the primary nozzle.
The Fine Molds nozzle has the best detail on the exterior, but internal detail is better on the Eagle Designs part. Maybe the diameter will decide it, since it's a tight fit inside the Esci rear fuselage.
|
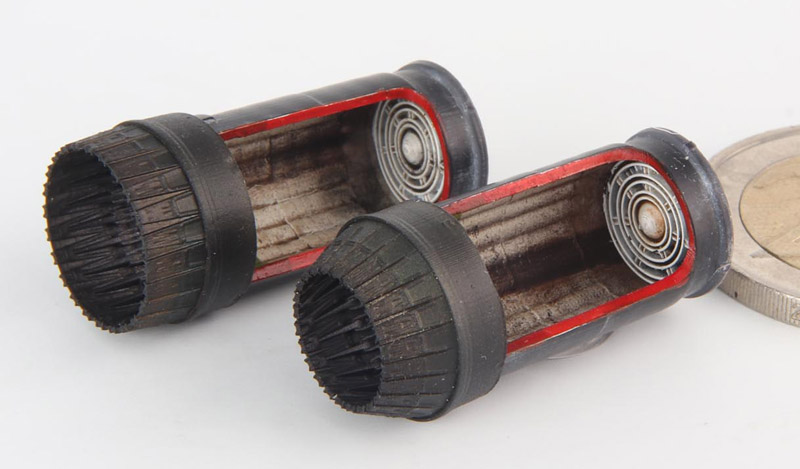
| The only currently available aftermarket nozzle that I could find is the KA Models F-4 A/B/C/D/N GE Exhaust Nozzle & After Burner Set for Fujimi (Opend) with catalog number MA-72014. It's 3D printed and looks spectacular on the website. But it could be the good side is shown, without printing steps. Also, the primary nozzle is designed as a very short part. KA Models also has an 'Closed' version, with catalog number MA-72015, reviewed on Hyperscale. The closed version is not suited for an aircraft on the ground.
| 
|
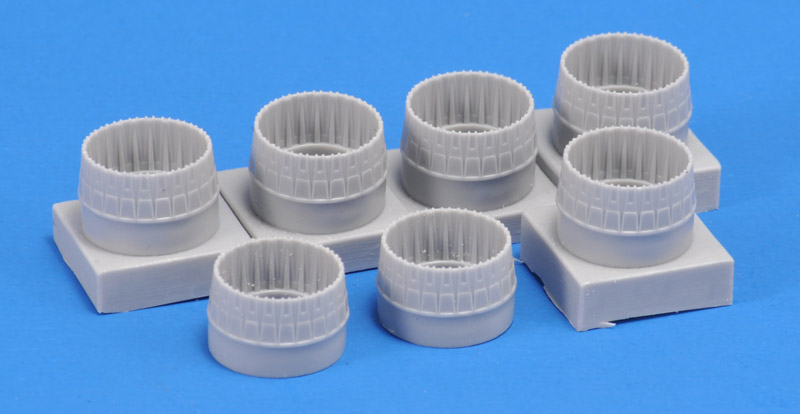
| I copied the Fine Molds F-4 J79 nozzle, and I now have plenty of nozzles for all my planned F-104 models.
Later I bought ResKit's J79 nozzle (for F-104A/C/D/J/G), but it looked a bit weird: the diameter looks too large. It doesn't fit in the Esci/Italeri kit, and barely in the Hasegawa kit. It fills the Hasegawa rear fuselage opening so tightly that it doesn't look realistic.
|
| I bought yet another 'early' J79 nozzle, by Reskit. It's beautifully made, but it a bit larger than for example the Fine Molds F-4 nozzle, as you can see. It won't fit the Esci model, and fits so tightly in the Hasegawa model that it doesn't look good to me eye.
| 
|
To be continued
Modeling links
Concluding this page, some links:
Return to models page

