Skyrim Skeleton Key game prop


I like the concept of building and/or collecting movie props, but I had no idea that computer game prop collecting also existed. One of my nephews wanted a 3D printed game prop for his birthday: a 'Skeleton Key' from the computer game Skyrim. He had found the STL files on the MyMiniFactory website. The design was quite large at around 230 mm, and he wanted it at half the size. I think it is also a more realistic size for a key anyway.


Construction

The start of the project: the 3D printed parts, done at half scale. I outsourced the job, and the parts were printed on a Formlabs Form 2 printer. The parts had problems: the key handle and the key shaft had an enormous number of supports, and the ring was printed incomplete. I assembled a ring from two failed prints. Shown here is a test fit of the three components. It was 114 mm long.

I should also mention that the engravings on the conical part were almost invisble on the 3D print. I rescribed them using a JLC razor saw, but maybe I overdid it: after base coat painting (see below) I was surprised how deep they had become. But in the end it worked out fine.
I had the key stem printed hollow, so I could insert a 1.5 mm spring steel wire, to make the assembly a lot stronger. Since the print was imperfect, I had to improve the teeth a bit. For this I used a mix of CA glue and talcum powder. It shows up as white in the photo. Later I did a second round of filling, since I had overlooked some defects.

Only later I found out that the chamfered parts at the right / top were printed incompletely. But I liked their look, and left them this way. A happy mistake therefore.
After assembly I used Apoxie to fill the gaps around the joints. Next was a layer of Humbrol medium gray enamel paint, since that gives the best adhesion, in my limited experience. The paint showed all the small defects still present. They were taken care of by (mostly) sanding.

However, the 'pimples' left behind by the support attachments were still visible after the first round of sanding. That shows they are a persistent and annoying problem with 3D printed parts.


Painting

My color reference is this YouTube video: Skyrim: How to obtain The Skeleton Key. I started painting with the dark purple on the end of the knob. I mixed the color from MRP acrylic lacquer, 60% Oxford Blue and 40% Insignia Red, then adding Sea Blue to make it darker.

After half an hour I could start painting the teal parts. I used a custom mix that I had prepared for a MiG cockpit, made from Humbrol enamel 2+47+221 in a 1:3:1 mix ratio. I could wipe away any excess paint using solvent, it did not affect the MRP paint.

Later I also did the small 'rivets' on the knob with the same paint. In the game it's difficult to see what color they are, but most replicas have them painted teal too. I used a toothpick cut off at the right diameter to apply the paint.
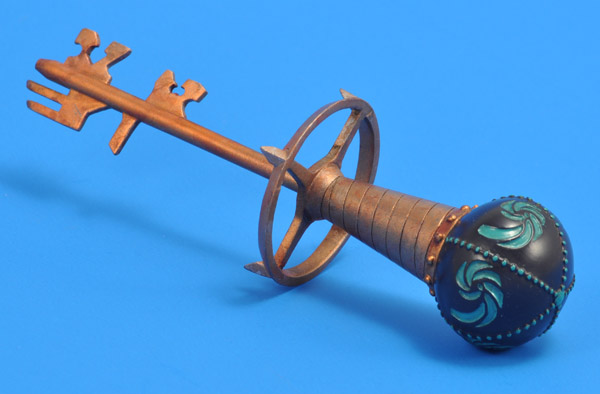
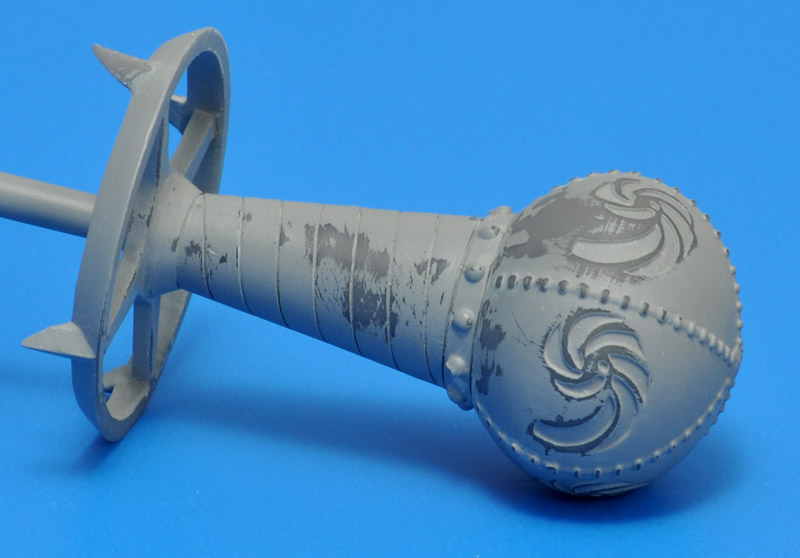
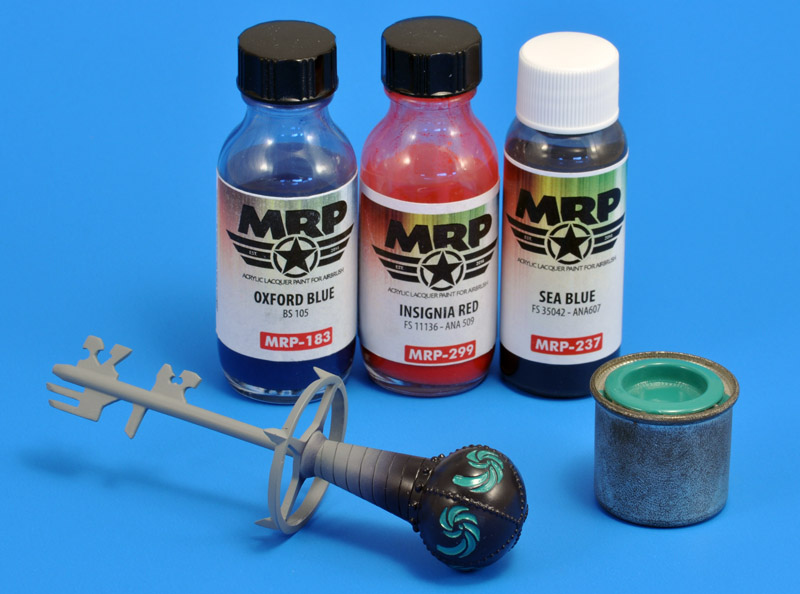
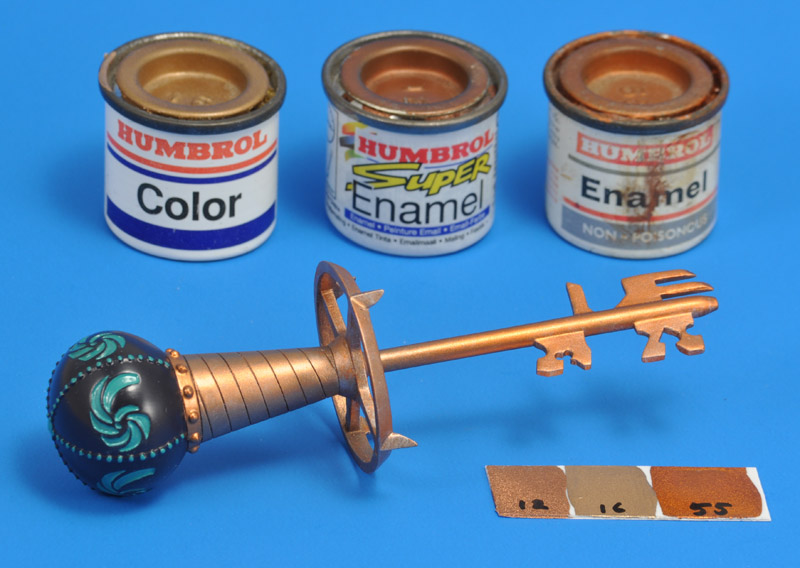
The remainder of the key was first painted MRP-209 RAL 7012 gray, followed by splotches of Humbrol 16 Gold, then Humbrol 12 Copper and lastly Humbrol 55 Brass. The latter was mostly concentrated on the blade of the key. I also used it on the strap between the handle's sphere and cone, to create a subtle color difference.

It is funny to see how old these paint tins are. According to my Humbrol tin evolution page, the tins are from (approximately) 1993, 2000 and 1979. I must have been in primary school when I bought the oldest tin. I think I bought it to paint the Matchbox 1/32 Bugatti 59, that had various details in that color. Don't worry, I do not know this for all my tins!

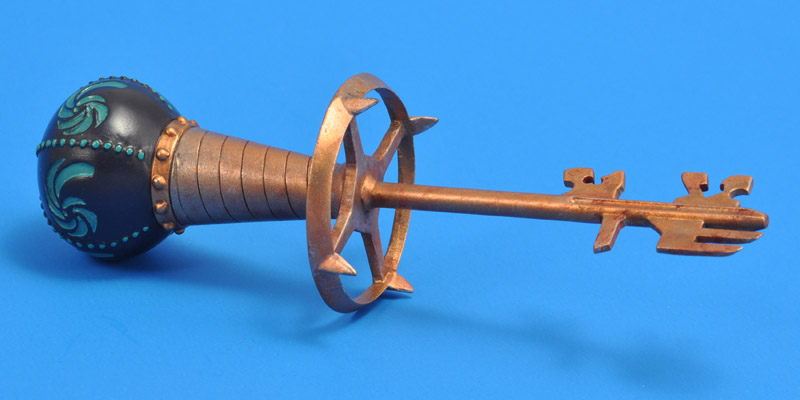
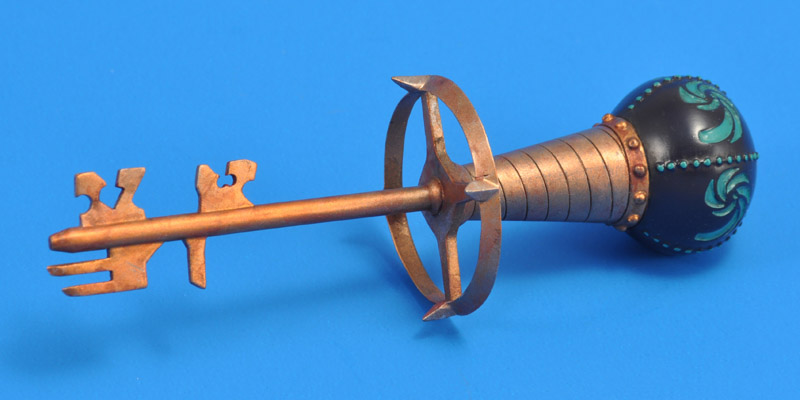
While the paint was drying, I drybrushed the parts with a mix of Humbrol 55 Brass and Humbrol silver. It started to look like an old mysterious key :-) The last step, after making this photo, was applying some washes in black grey (71.056) and burnt red (70.814), using Vallejo water-based acrylic paint.


Finished model

The acrylic washes resulted in nice color variation on the metal parts. But I also realised that I did not know how far to take the weathering. Maybe I already overshot the wear on the the game's key?
All in all it was an interesting project. I learned that supports are the enemy of 3D printed parts - the attachment points are horrible to remove, and several rounds of sanding were required until they were invisible. And the sanding in turn damaged the other details.

I was surprised by the variation of the paint types that I used unintentionally: first an enamel base coat, then an acrylic lacquer, some more enamel, next another round of acrylic lacquer and enamel, and lastly waterbased acrylic paints. They all co-operated fine, I'm happy to report.


Color inspiration links


For sale

I've had an extra set of parts printed, as a backup, but I did not need them. The printing is perfect, much better than the set of parts that I used to build my key. It's available for the printing costs: 15 euros.


Return to models page