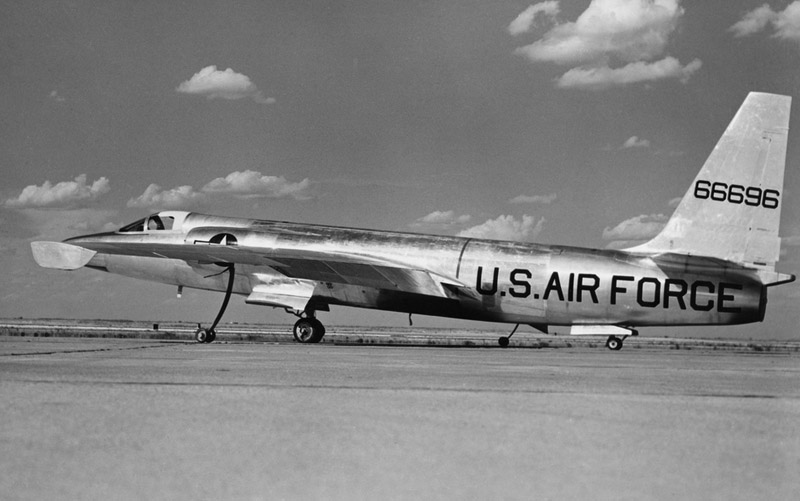
Seminar 1/72 U-2C
| For some time I had been thinking about building a U-2. First my interest was aimed at the prototype, but its bare metal finish and the very limited information made it a difficult project. I also liked the civilian registered CIA examples. With some Alps-printed decals I would be in business. And so I decided to do a dark blue CIA example. Finding an Academy U-2 proved to be rather difficult. It's long out of production, and not a single one could be found at various IPMS-Netherlands Nationals for example. In the end my modeling friend Eric sold me his Seminar U-2.
|
Model genesis
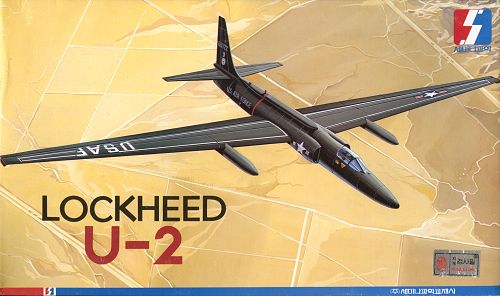
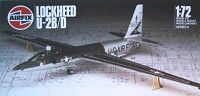
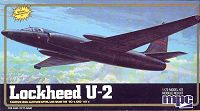
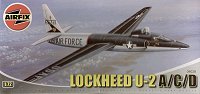
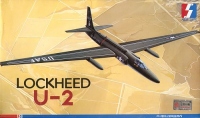
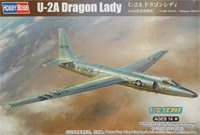
The genesis of this kit is pretty interesting. It all started with an Airfix model issued in 1984, that allowed construction of an U-2A or D (boxs says B/D) with small inlets. The same model was issued in the USA by MPC with a few extra parts (long 'canoe' spine, larger bulged intakes, extra cooling inlet and an extra bulged Q-bay hatch), allowing a C version too. Airfix reissued the model in May 2005, now correctly listed as a U-2A/C/D, including the MPC parts. Reviews and build reports of the Airfix/MPC kit can be found on
SMAKR (Derrick Winters) via the Wayback Machine,
SMAKR (Mark Braithy) via the Wayback Machine,
SMAKR (Kevin Ronayne) via the Wayback Machine,
Datguy on ARC Forums and Modeling Madness. The three box art scans are courtesy of Jerry Lawrence, Bill Banaszak and Eric Verschuur.
| 
| 
|
| Airfix 04028
| MPC 1-4311
| Airfix 04028
|
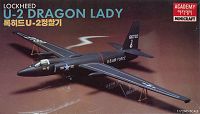
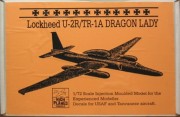
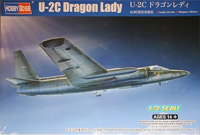
Academy copied the Airfix/MPC kit in 1987, rearranged the sprue lay-out, and gave it engraved panel lines. There are minor differences between the kits however. For example, the Airfix/MPC kit has a solid fin attached to the left fuselage half, whereas the Academy kit has fin halves attached to each fuselage half, Academy's pogo wheels are more detailed, and Academy's inlets are noticably narrower than the Airfix equivalents. A built-up example by Mark Davies can be seen on Hyperscale and IPMS Auckland. A very nice Academy all-black USAF U-2C can be found on Keith Goodman's website. Reportedly there is an Ace rip-off of the Academy kit, but I never saw solid evidence. Finally the Academy mould was sold to Seminar, also in Korea, who changed nothing except that they removed the Academy logo from the runners. The earliest report of this kit that I found is from 1999. I don't think Seminar models are distributed in Europe or America. My example came via Australia. Noteworthy is that the box sides show a U-2R photo, and the box art also resembles a U-2R somewhat, especially the nose, which the artist made too long.
| 
|
| Academy 1653
| Seminar 2000
|
Model quality
The quality of the Academy/Seminar kit is reasonably good I think. It's a fairly simple kit, with only a few main components and not too many smaller parts. I have never read any negative comments on the shape, so it seems there are no big problems there, except the flat canopy. The panel line scribing is done nicely, and so far I haven't found obvious errors. The kit has two sets of intakes (small U-2A and bulged U-2C), two different optional spines, and optional small slipper tanks. This allows about any early U-2 version to be built. The wings show some warpage. The fuselage has a large number of sink marks. The rear half of the vertical tail is much too thick, ending in a very overscale trailing edge. I guess the original Airfix single-piece tail is better in that respect. A contrail-checking mirror is not included. Two Q-bay hatches are included: one that strangely lacks any camera openings, and a bulged one without windows as used in the UK for tests of the Advanced Location Strike System. The canopy has a strange pimple in the middle of the canopy. More serious is that the canopy is too flat. Some parts and the sprues have some flash, but nothing too serious. The decals look pretty bad. During construction I found some small errors; refer to the build report below for these.
I performed a few measurements of the kit's dimensions. Fuselage length between the tip of the nose and the exhaust edge should be 203.4 mm according to the fuselage station plan in the Aerofax book, and I measured around 201.5 mm. A 1% error is quite acceptable I think. The fuselage width between the flaps scaled out within 0.5 mm, pretty good too.
The wing planform was a far more difficult subject to check. I could not find chord data in any of my sources. In the end I decided to calculate it, using the wing parameters of the CL-282 early concept: aspect ratio 10 and wing taper 0.25. For the CL-282, I found the root (centerline) and tip chords in 'CIA draft report Kelly Johnson': 136" and 34" for a 500 sqft wing. Scaled up for a 600 sqft wing of the U-2A/C and a 960" span (excluding wing endplates), I calculated root and tip chords of 144" and 36". (Note: I find the very round 600 sqft figure suspect, but it's all we have.) We can't measure the root chord on a model, so I calculated the wing chord at the inboard edge of the flap, Wing Station 37", and found 136". The WS37 and WS480 values translated into 47.9 mm and 12.7 mm respectively. On the model I measured 47.3 mm en 12.3 mm, say 0.5 mm too small. I can live with that!
Other U-2 models
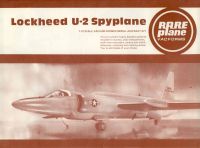
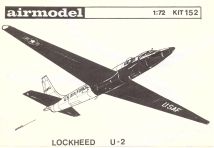
Apart from the above four more or less identical models, there are two more early U-2s in 1/72 scale. Rareplanes issued a vacform model of the U-2 in August 1979, and thus predated the Airfix model by five years. The kit is largely identical in layout, details and options to the injection moulded kits, and although it is a nice vac, it is not worth the extra work. Airmodel also made a vacformed U-2, reportedly a D, but I am not sure. Its catalog number was 152 (no longer listed on the Airmodel site), and it consisted of one sheet with fuselage halves, wing halves, and two horizontal stabilizer pieces, plus a clear vacformed canopy. No decals or small parts like the landing gear are included. Wilfried Eck of the "1. Plastikmodellbauclub Nürnberg e.V." built the Airmodel U-2. Squadron also issue the Airmodel vacform, and it seems these kits had mid gray instead of white plastic. The three box art scans are courtesy of Eric Verschuur, Larry Engesath and Ebay.
| 
| 
|
| Rareplanes
| Airmodel 152
| Squadron/Airmodel
|
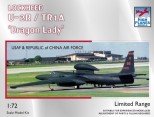
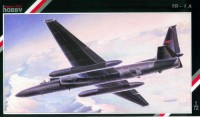
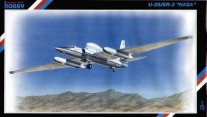
The second-generation U-2 in 1/72 scale is available from three manufacturers: Rareplanes, High Planes and Special Hobby. The Rareplanes vacform was first, issued late 1988 with white metal parts and decals. High Planes 7235 contains TR-1A and U-2R options, and was discussed by Pin on BritModeller. Special Hobby 72024 represents a TR-1A, and was built by Chris Bucholtz on Internet Modeler. Special Hobby 72070 represent a Senior Span U-2S and a NASA ER-2, and was reviewed by Mike Grant on the Roll Models site, by Carmel Attard on Modeling Madness, and by Rigid on the Airfix Tribute Forum.

| 
| 
| 
| 
|
| Rareplanes RP8001
| High Planes (72035 ?)
| High Planes 72035
| Special Hobby 72024
| Special Hobby 72070
|
In 2021, Hobby Boss issued a new U-2 model in 1/72 scale, the J57 powered U-2A version. In 2022 the J75 powered U-2C variant was announced. Reviews can be found on Britmodeller, IPMS Germany and Brexitmodeller. I haven't taken a good look, so I can't give a verdict yet. I noted four things so far. First: the capture area of the inlets looks too large to me for a U-2A. Second: the Q-bay hatch has zero detail, just like all previous 1/72 models. So the model has no camera windows, disappointing for a famous reconnaissance aircraft. Third: the under-fuselage inlets are in the U-2C configuration. The large inlet needs to swap sides, but it's molded integrally with the fuselage. Fourth: the 'shaded' area of the canopy is raised quite a bit, whereas it is completely smooth on the real thing. Generally speaking, I've learned not to get my hopes up too high with Chinese model manufacturers - they have produced far too many nice-looking models with serious shape errors and detail problems. Let's hope this one is done by the best team that Hobby Boss has.
In 2023, the U-2C version was released. A reviews can be found on Aeroscale.
| 
|
| Hobby Boss 87270
| Hobby Boss 87271
|
Selection of 1:1 aircraft
I knew I wanted to do a civilian-registered CIA example: I really like the contrast between the aircraft's mission and the "oh, it's only a civilian aircraft" registration. Photos of nearly every number between N800X and N809X exist. After a long study I selected N803X as the aircraft that I wanted to do. Assuming that the registration was assigned to a single airframe (which I doubt somewhat), there are some six photos of this single aircraft. The photos appear to show one and the same aircraft, with the exception of some small underfuselage items.
According to the 1983 Aerograph book, N803X was 56-6683, possibly 'Article 350', the 9th production U-2A (not counting the proto), assigned to the Agency. According to this quite detailed Pinetree Line page, Article 350 / 56-6683 / N803X was not used for East Block overflights by 'Detachment A' (Wiesbaden & Giebelstadt), but possibly it was by 'Detachment B' (Incirlik & Lahore). However, during the 1962 Cuba crisis two CIA U-2Cs were loaned to the USAF, which until then had never updated its U-2As to C standard. One of them was 56-6683, and on return from a flight over Cuba on 20 November 1963, it crashed north-west of Key West, FL. USAF Pilot Joe Hyde was killed. Note: the N803X registration was later used on U-2R 68-10329, during its first flight on 28 August 1967.
Canopy
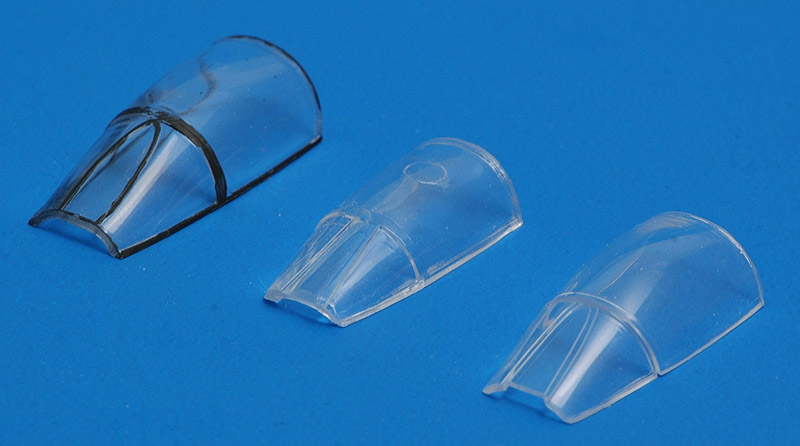
The Seminar canopy has a strange pimple in the middle of the canopy, possibly an ejector pin? The white sun cover will hide it most likely. In reality, the sun cover is fitted inside the canopy, but painting the kit's canopy on the inside will not give the desired effect: it will emphasize the non-scale thickness of the part.
The kit-supplied canopy (middle) appears to be too flat, with the windshield set at a too low angle. I decided to try to replace it with a Starfighter canopy, since the U-2 fuselage was developed from the 104 fuselage. Later I found out that the canopy is exactly the same: on page 220 of 'Remembering the Dragon Lady' it is stated that the U-2 canopy had the same part number as the F-104 canopy.
I tried both the Esci (left) and Hasegawa 104 (right) canopies, and they fitted pretty nicely. Of the two canopies, I liked the Hasegawa canopy best by far. The Esci canopy is some 5-10% larger than the Hasegawa canopy and indeed oversized when compared with a 1:1 Starfighter canopy & windshield.
| 
|
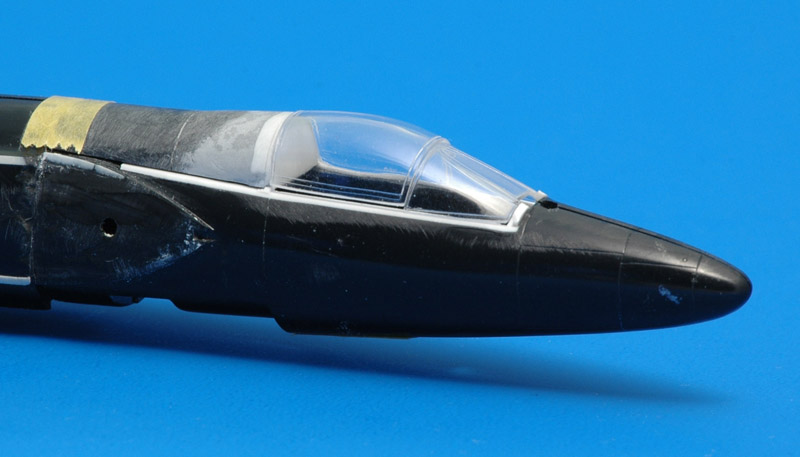
| The Hasegawa canopy almost drops in place, if I hadn't modified the model first to accept the oversized Esci canopy. I had to restore the canopy sill with white plastic card. The sheet metal behind the canopy has to be made a little taller too, with a kink in the contour. Possibly one could also use the rear transparent part of the 104 canopy. The kit's spine fairing behind the canopy has a continuous slope, which is not correct. I made a kink in the middle, so the rear half runs horizontal. This gives the whole cockpit area a slightly bulged look, which appears more realistic to me.
The new canopy really transforms the appearance of the model: it gives the model a face instead of a non-discript transparent bump. Plus it is moulded much thinner and clearer than the original canopy. A very good upgrade of the model! A contrail checking mirror needs to added to the new canopy.
|
Inlets
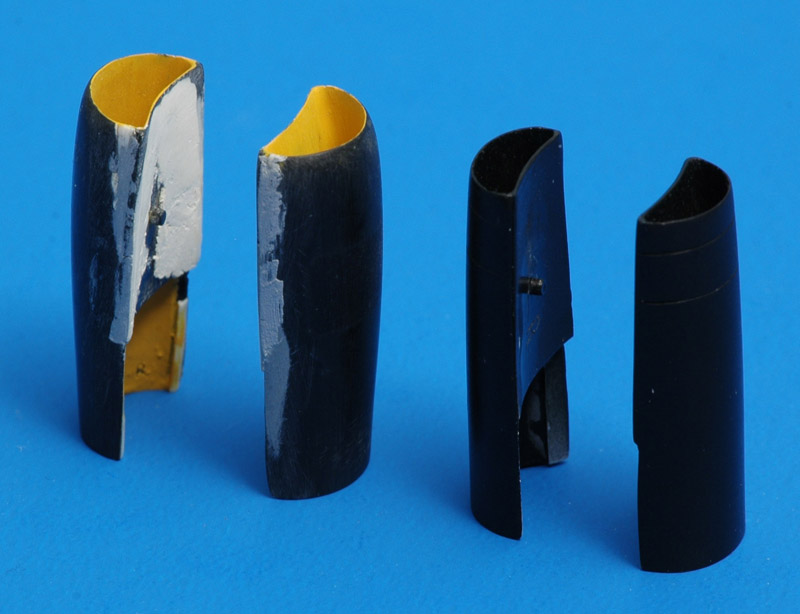
I built two sets of inlets, because I initially thought N803X had U-2A inlets, and then changed my mind to the interim U-2C inlets. For reference I will report my adventures with the U-2A inlets first - they are shown on the right.
In build reviews I had read about fit problems with the inlets. But no-one remarked that the Academy inlets are way too narrow, even for the small-intake U-2A version. And to compensate for the narrow inlet, the boundary layer slot is much too wide. I solved the latter problem by roughly halving the thickness of the wedge on the fuselage that creates the boundary layer slot. The inlet parts still fitted reasonably after that. To increase the width of the inlets, I glued strips of plastic card to the outboard parts. They formed a wedge that was about 1 mm at the front. The inboard parts were also slightly modified, removing the step in the interior, about 3 millimeters behind the forward edge. Although I expected lots of problems giving the wider intake a nice curvature around the widened areas, this was quite easy. The two panel lines were rescribed and the U-2A inlets were declared ready. The photo shows the inlets after being painted satin black, so you can't see the wedges. The cross section of the inlet opening is still not completely accurate: the corners should be sharper. I don't mean the radius, but the angle at which the outboard and inboard faces meet.
| 
|
| The kit's U-2C inlets have the same problem as the U-2A inlets: they are too narrow, and the bleed slot is too wide. The clearest photos of the interim U-2C inlets that I found are those of Powers U-2 wreckage on display in Moscow, and I used these as my guide. I assembled the parts with a tapered strip of plastic between them, just like the U-2A inlets. You can vaguely see that strip in the photo above. Looking back, the amount of widening is still not enough. Next I scraped and sanded the bulges off, creating the 'interim' U-2C inlets, seen on the left.
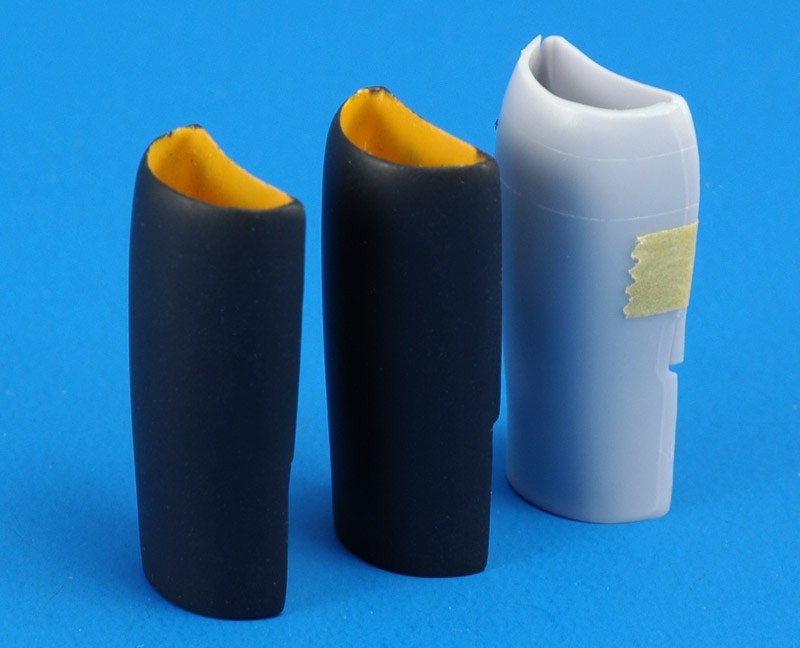
When I installed the inlets on the fuselage I noted that adding a wedge-shaped filler wasn't the right answer, since the fit against the (much reduced) bleed slot wasn't very good. I should have added a strip between the inlet parts. Instead I added inversely tapered strips of plastic card to the fuselage, at the upper and lower edges of the inlets (just visible two photos above). I used Milliput and Tamiya putty to make smooth inlet interiors, and painted it yellow in preparation for a chromate yellow interior. Later I changed that to 'quasi-infinite' inlets by filling the rear of the inlets with Apoxie, and creating a rounded and blended shape from the front. I'm doubting the color choice now, though. And I found out later that the Airfix U-2 inlets are a bit wider (shown on the right), and they would have been a better starting point.
In 2019 I learned on Hyperscale (AFV Club;s U2A/C Intakes?) that the U-2C inlets were approximately 32" in height and 20" wide, or 11.3 by 7.1 mm in 1/72 scale. Mine are 10.7 by 5.2 mm, so I need to widen them especially.
|
Fuselage
I was afraid that the long wings would crack the fuselage joints one sad day, when the model would fall or get bumped. Therefore I decided to reinforce the fuselage in the wing area. The first reinforcements are similar to frames or bulkheads in a real aircraft. I made 17.5 mm diameter discs of 1 mm plastic card, and installed them in both fuselage sides, in such a way that they would overlap during assembly. I plan to use epoxy glue to bond the discs together. The second reinforcements are plastic tabs to reinforce the glue joint of the fuselage halves.
The fuselage has sink marks near all the position pins, which require filling.
| 
|
|
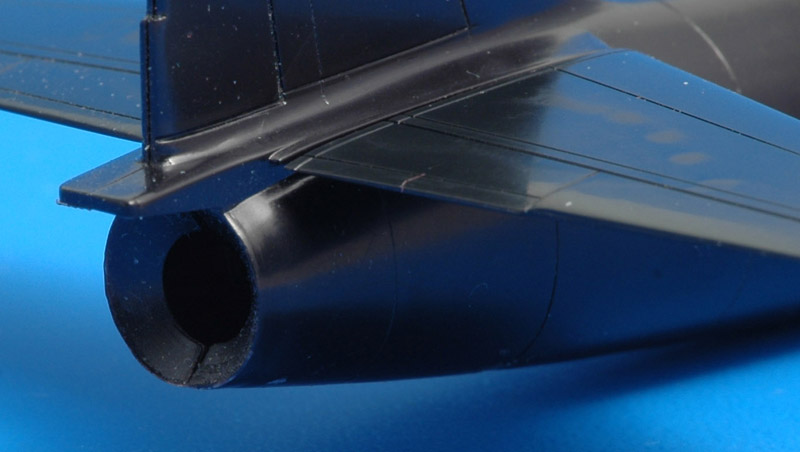
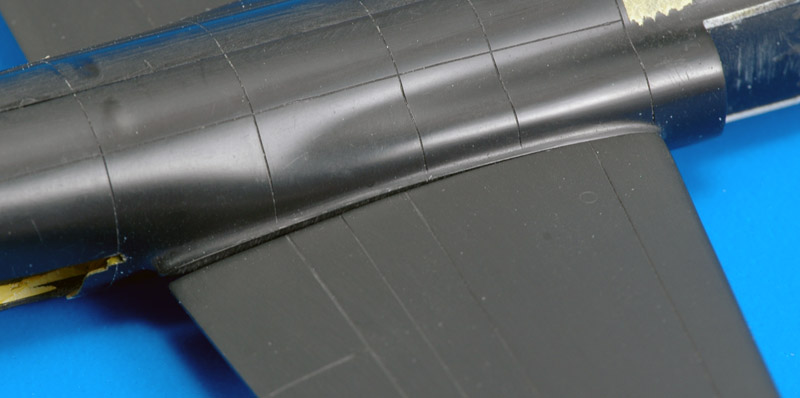
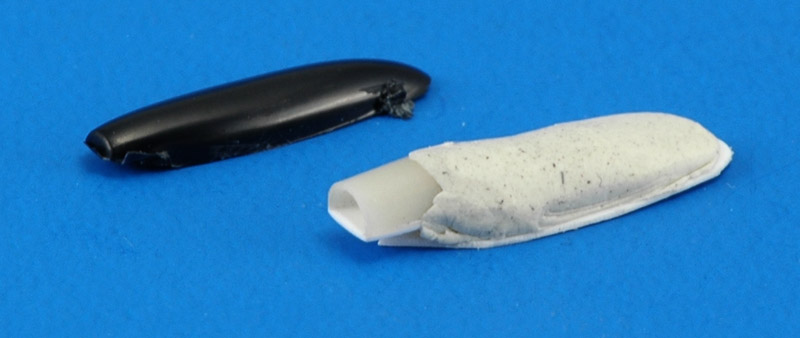
The kit has a strange cone-shaped exhaust. I later removed the cone-shaped area with knives and sandpaper. I still don't know whether the exhaust runs up to the edge of the fuselage, or whether it ends about 20-30 centimeters inside the fuselage. On the U-2R it ends inside the rear fuselage, but I still haven't found a good photo of the first generation U-2. Aerofax pages 83 and 120 show something but not all of two U-2C exhausts. Judging from the frame internal diameter, the engine exhaust has exactly the diameter of the rear fuselage opening. The U-2A exhaust appears to be smaller, judging from the photo on page 39 of 'Remembering the Dragon Lady'.
N803X clearly has an extended rear lower fuselage part ('sugar scoop'), shielding the engine exhaust. This shouldn't be too difficult to add. The Aerofax book has the fuselage station numbers of the extension. Note that two versions of the sugar scoop existed.
|
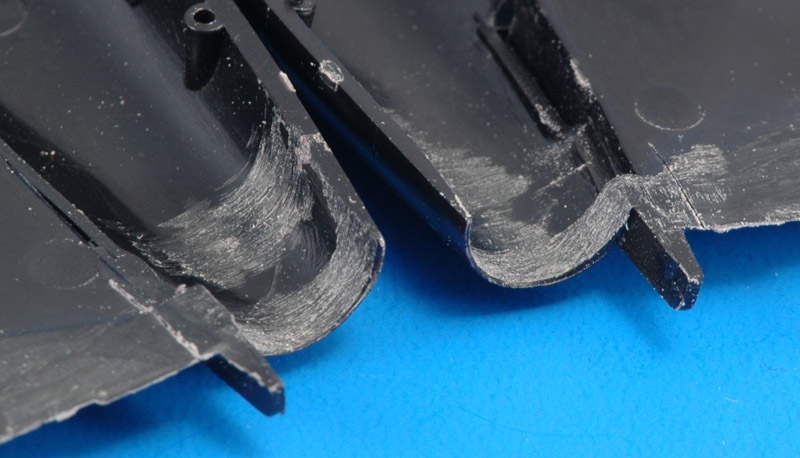
| I used a Dremel sanding cilinder to grind out all the excess plastic of the exhaust area.
| 
|
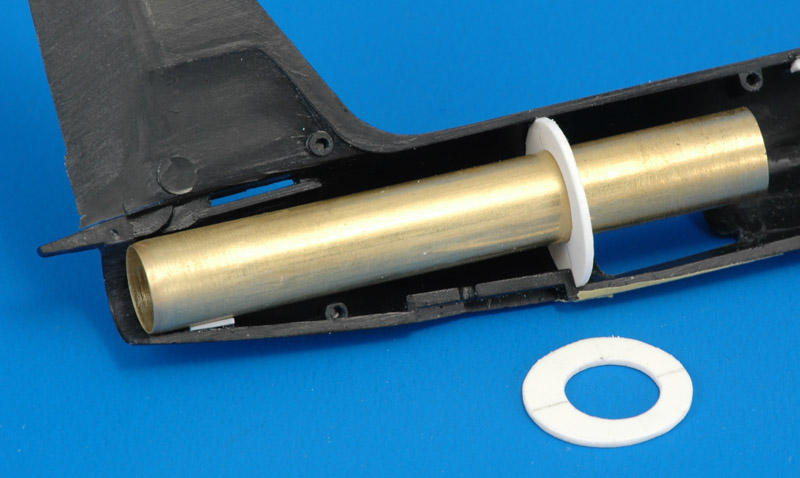
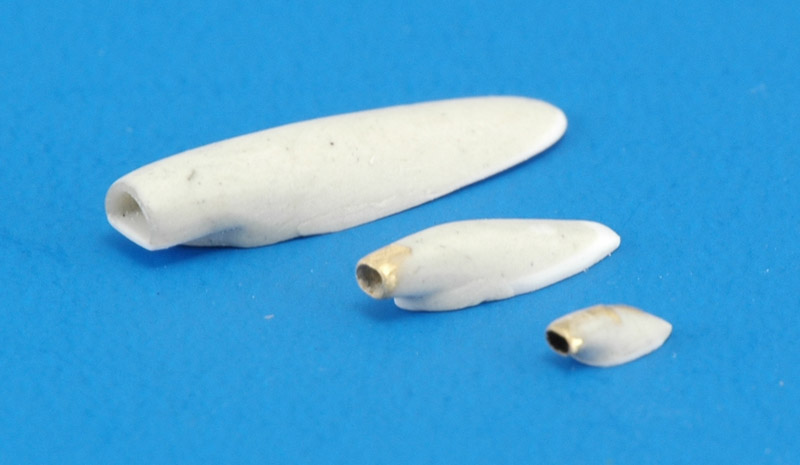
| I cut a 65 mm section of K&S Engineering 3/8" x 0.14" (9.5 x 0.36 mm) brass tubing. This was the largest size tubing that would fit inside the Academy rear fuselage. It is supported by a plastic bulkhead just ahead of the tail wheel well. I also looked at the Cutting Edge 1/48 exhaust, but since it represent both the J57 and J75 powered versions, I don't think it's very accurate.
|
Another issue to be sorted out is whether the U-2A and U-2C versions had different rear fuselage lengths, most likely because of the larger diameter of the U-2C's J75 exhaust. I *think* I see it in most photos, but I'm not 100% sure. In an Airfix Lockheed U2 thread on the Airfix Tribute Forum it is also mentioned by poster 'rantingpedant 1'.
There's some indirect proof: in 1/48 scale, the Hawk U-2A and the modified Testors U-2C have different rear fuselages I clamped the fuselages of these two models together (see photo), and established that the Testors fuselage was 3.5 mm shorter. Similarly, Cutting Edge set CEC48287 'U-2A Conversion' contains a longer rear fuselage to be fitted to the Testors model.
| 
|
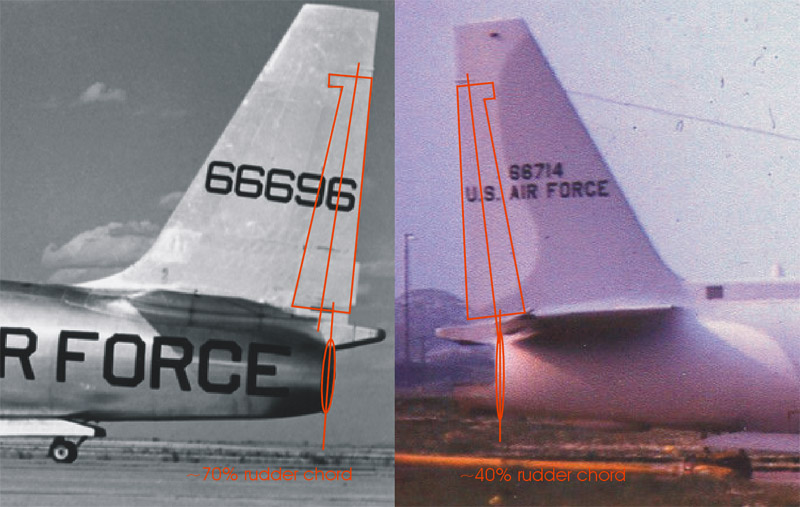
| I calculated the position of the exhaust opening in relation to the rudder root chord. In a random U-2A photo I measured approximately 70%, wheres a 'Pave Onyx' U-2C photographed in nearly perfect side view yielded approximately 40%. You can also see that the exhaust opening of the latter coincides with the trailing edge of the horizontal tail (or elevator) at the root. |
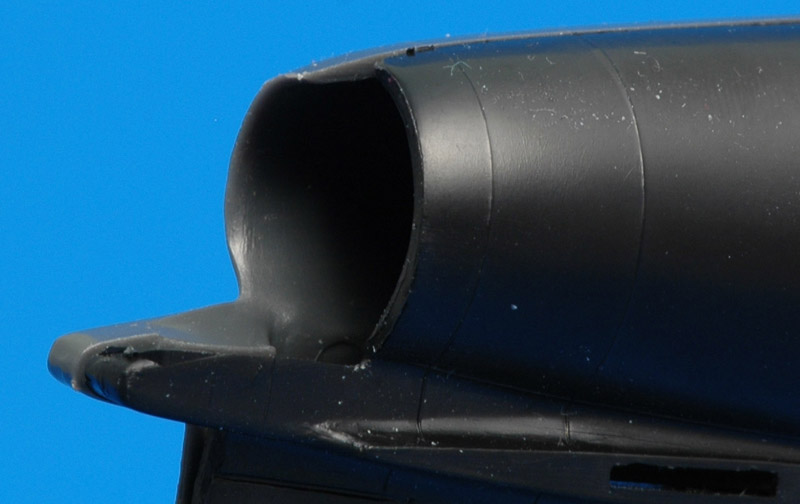
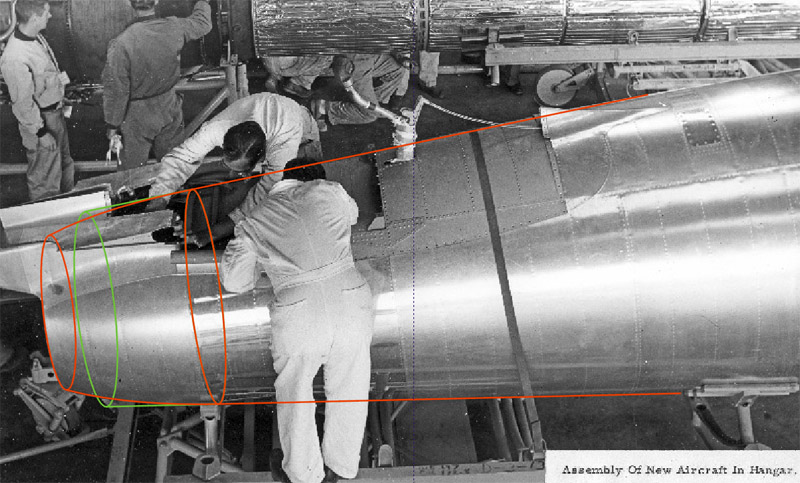
Regarding the rear fuselage shape, I only found definitive information for the J57-egined U-2A. The photo shows that the fuselage is a near-perfect straight cone, with a double-curved last section, leading to a relatively small exhaust opening.
It is my impression (but only that for the moment) that the shortened section of the J75-powered U-2C is straight like the rest of the rear fuselage. I sketched that in green.
In 2020, Norm 'ptolemax' did measurements on U-2C 56-6716 that is on static display on the main street at Davis-Monthan AFB. The tail diameter was 29", translating to 10.2 mm in 1/72. The model is very close to that.
| 
|
Wings
Not surprisingly, the long and thin wings present some problems. Cut from the sprues they have a slight S shape in front view, due to warpage. However, they weren't too difficult to assemble correctly. First I glued the small insert in position, that closes the slipper tank opening. The inserts fit pretty well, although others reported quite some problems. I filled the gaps with superglue. Next, I test fitted the large lower wing insert. These required some shaving to sit perfectly flush. Then I taped the upper wing upside-down to a stiff panel, and pulled the mounting tab down with more tape to make the wing's upper surface completely straight. With the part taped down like this, I glued the insert with super glue. The result: one perfectly straight wing. The wing does not return to its earlier S-shape, since the combination of upper and lower wing now makes a rigid 'beam'.
The thus assembled wing does have a few problems. Firstly, the leading edge is fairly rough, and it required several applications of super glue and sanding. Secondly, the wing parts have some sink marks. Just outboard of the lower wing insert, the wing has sink marks on both upper and lower sides. More difficult to solve are the (rather shallow) sink marks all along the forward part of the flaps. These sink marks give the wing a rather unnatural profile, and I think it is essential to remove them. Thirdly, the trailing edge is rather thick. I measured almost a millimeter there! Some serious sanding was required there, but now I have a nice looking wing I think. I filled the holes for the wing supports, but left the hole for the pogo gear open.
After all this sanding, I added the tip skid. It's fit was not so hot, and lots of superglue was used to fair it into the wing. I sanded the skid to about half its thickness, which makes the skid look much more realistic. Between the flaps and ailerons, Seminar moulded a raised strip, which was removed during the sanding of the trailing edge. I think this strip is a bad attempt at simulating the fuel dumps on both wings and an infrared / ECM antenna fairing on the right wing, according to drawings and photos. But many photos, including my photos of N803X, show nothing installed there. I will therefore leave the wing's trailing edges clean. And after working hard to achieve perfectly straight wing, I decided I wanted bent wings, as all U-2s have when at rest. Working slowly with a small hair dryer, I gave the wings about 4 millimeters of droop. I still have to check with a taped-together model whether this is sufficient.
| 
|
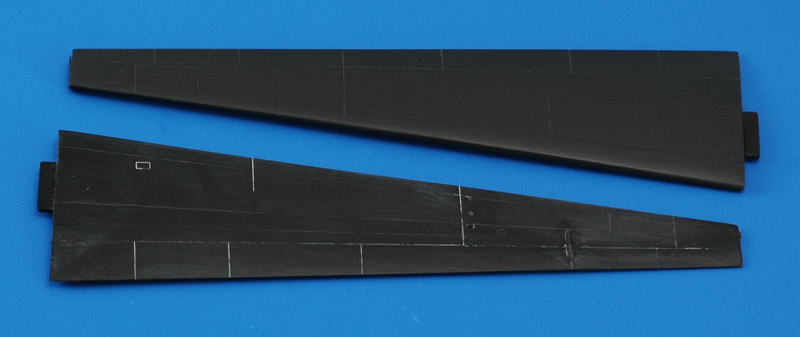
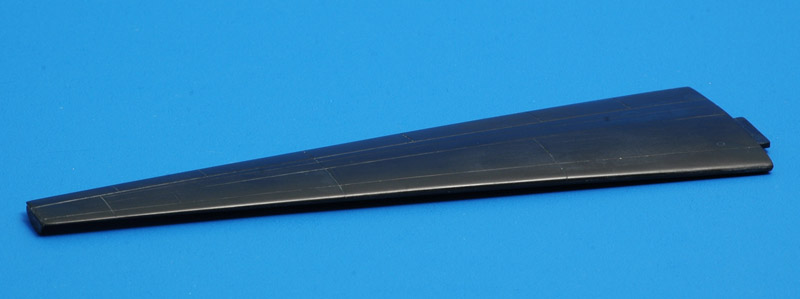
| After all the work on the wings, I painted one in Revell 9 coal black. It is shown with the other wing still in the process of sanding and rescribing. It was satisfying to hide all the work and crimes under a nice coat of paint.
|
At this point I noted a problem with the wing attachment. An elevated photo of a CIA U-2 showed that the incidence angle was quite large, and that the model did not portray this correctly. The trailing edge is at 80% of the height of the speed brake, and the photo shows roughly 50%. Now incidence angles are a pet peeve of mine, especially after my Monogram A-1E project. Unlimited horizons - design and development of the U-2 reports that "Incidence varied from 4 degrees at the root to 2 degrees at the tip". On the model I measured the distances from the bottom of the fuselage to the leading and trailing edges of the wing root, and found 10.3 and 8.3 mm respectively, with the wing root 46.3 long. This equals 2.5 degrees. To achieve 4 degrees, the trailing edge needs to be dropped 1.2 mm. I achieved that by opening the tab slot in the fuselage. It will mean rebuilding the wing root fairing.
And now that I'm researching the wing: Unlimited horizons - design and development of the U-2 quotes NACA 63A409 / NACA 63A406 (root / tip), whereas Aerospaceweb says it's NACA 64A409 / NACA 64A406 (root / tip). A Lockheed drawing that shows the first U-2 design (a shorthened F-104 with long wings) also shows NACA 64A409 / NACA 64A406, with 3 degrees incidence at the root, 1 degree at the tip.
| 
|
Speedbrakes
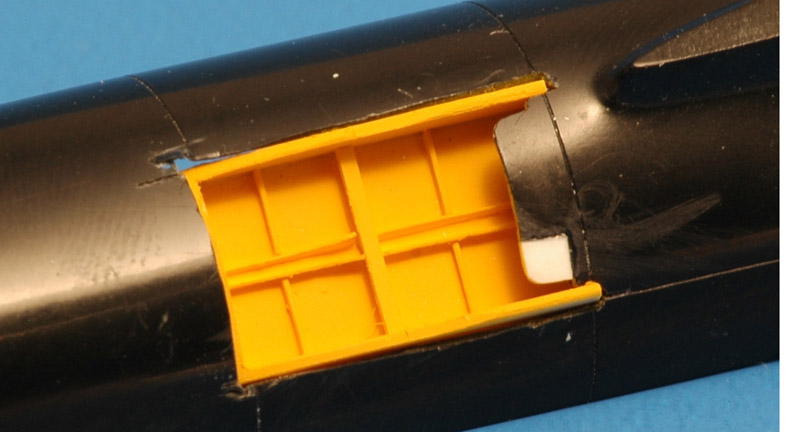
| Since my U-2 will be pretty boring with regards to details, I decided to do some extra work on the speedbrakes. The detailing of the speedbrake wells is not bad, but I wanted a more three dimensional look. I decided to build completely new wells, starting with a 9 millimeter wide three wall box. In the middle I added a vertical frame using two pieces of strip. Splitting the area left and right of the frame are vertical stringers. Lastly I added a horizontal U-stringer made by folding 0.005" card around an X-acto blade. I painted the wells in Humbrol's RAF trainer yellow, searching for a better chromate yellow match in the mean time. What remains now is some hydraulic tubing and the speedbrake hydraulic jack. The speedbrakes will probably also need rebuilds.
|
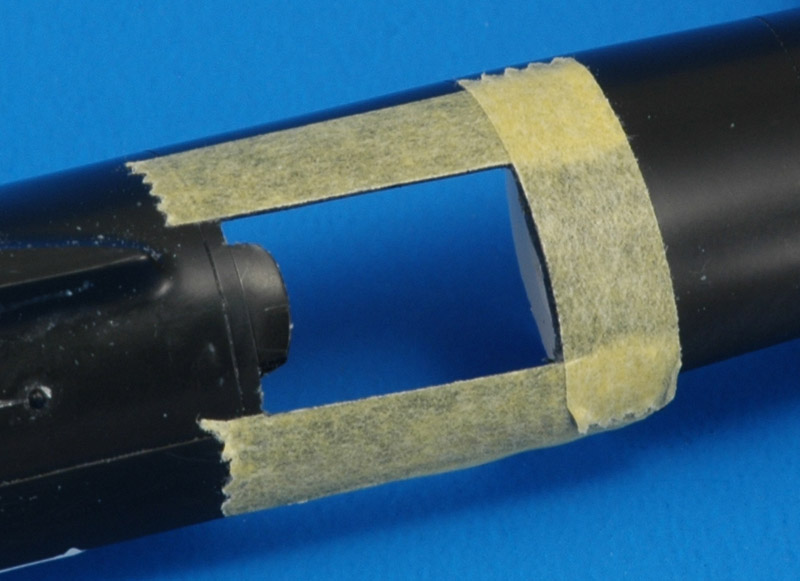
| To make room for the speedbrake, I cut away all the plastic up to 0.5 mm outside the outline of the original speedbrake. Tamiya tape was used to define the area to be cut away.
| 
|
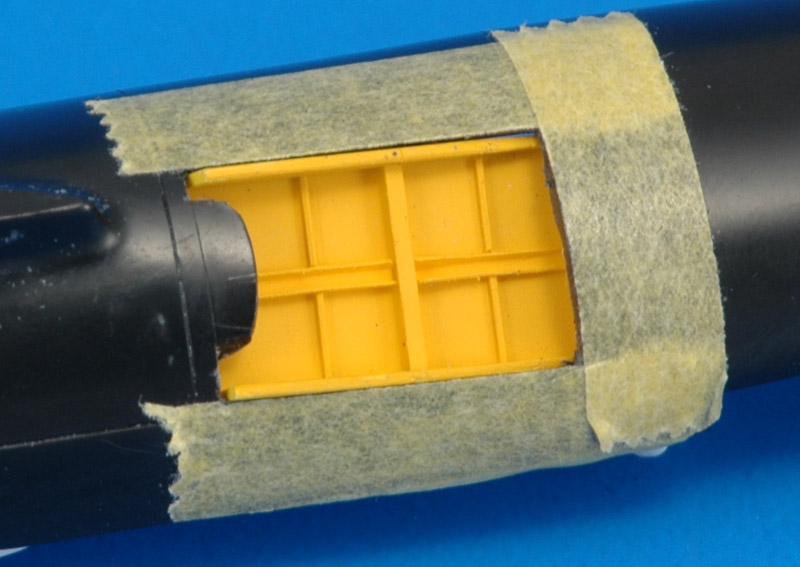
| Here's a rough fit of my scratch-built speed brake well, place too far aft.
|
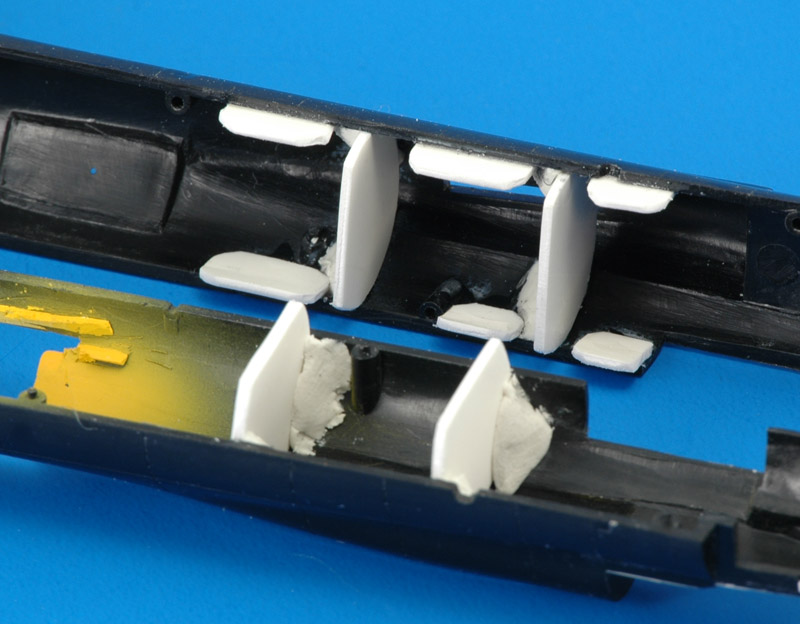
Small inlets
The J57 powered U-2A had a single large oil cooler inlet on the right side of the fuselage. On the J75 powered U-2C, this inlet moved to the left side, and a small oil cooler inlet was used on the right side. There's a third and smaller air inlet on the bottom of the fuselage, slightly offset to the left of the centerline. Luckily Seminar provides the two largest inlets, but the shapes and dimensions are not very accurate, and the placement instructions are not completely correct.
I decided to build new inlets. Construction of the largest inlet started with a piece of 3.5 mm tubing, cut off at the bottom and mounted on a curved piece of plastic card (matched to the fuselage curvature) and a first application of Apoxie. It is very rough at this stage.
| 
|
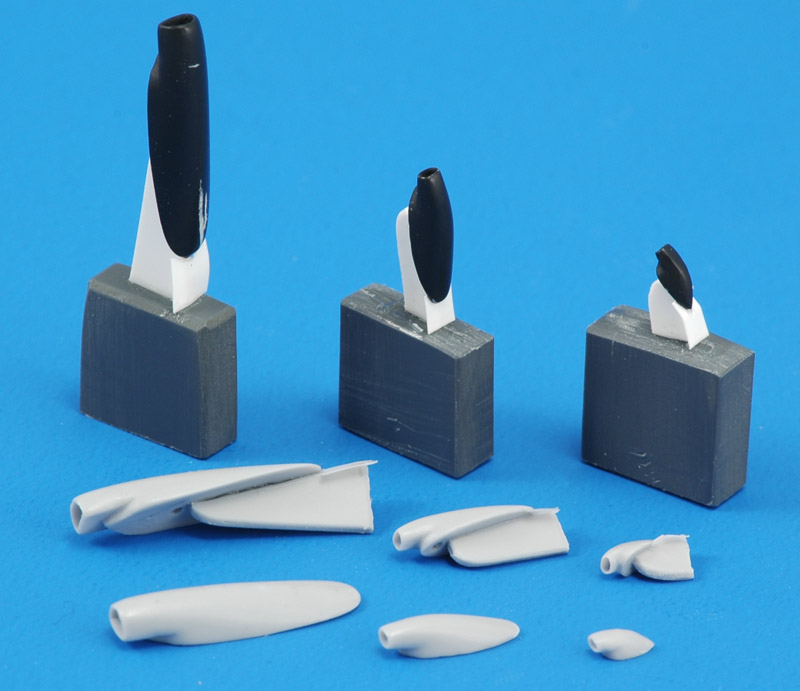
| Here's are the three inlets again after more refinement. I used a 2 mm brass tube for the medium sized inlet, with the edges thinned down and the shape made slightly oval. For the smallest inlet I used a piece of 1.5 mm Albion microtubing, pressed slightly flat, to make an oval opening. The rest of all inlets was sculpted with Apoxie putty.
|
More sanding, painting and sanding slowly improved the shape and surface quality of the set of inlets. Here's the results with a layer of black. I will cast a resin set, for use on other U-2 models. It starts to look like the resin set that Norm Dubay created for his Airfix model.
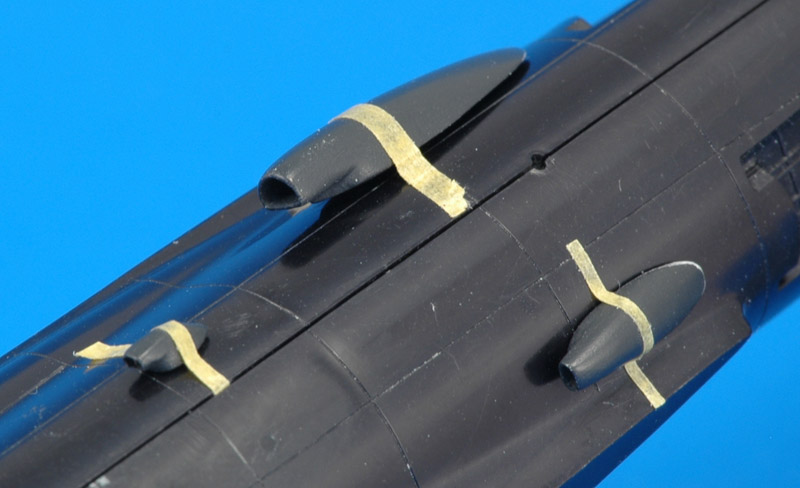
To align the inlets on the fuselage, I retained Academy's alignment pins, and drilled a corresponding hole in the base of each inlet. I added a further alignment pin for each inlet, on the panel line in front, but offset 1 mm to the right. I drilled 1 mm holes and installed a piece of stretched sprue, shortened until it resembled the existing pins. Of course the inlet parts got a corresponding alignment hole. The largest of three intakes was angled downward slightly.
| 
|
| Last step was to cast resin copies of the masters. They turned out very nice, if I may say so. Scratchbuilding in combination with resin casting can be a lot of fun! If you're building a U-2 too: I'm offering these inlets for sale.
|
Cockpit
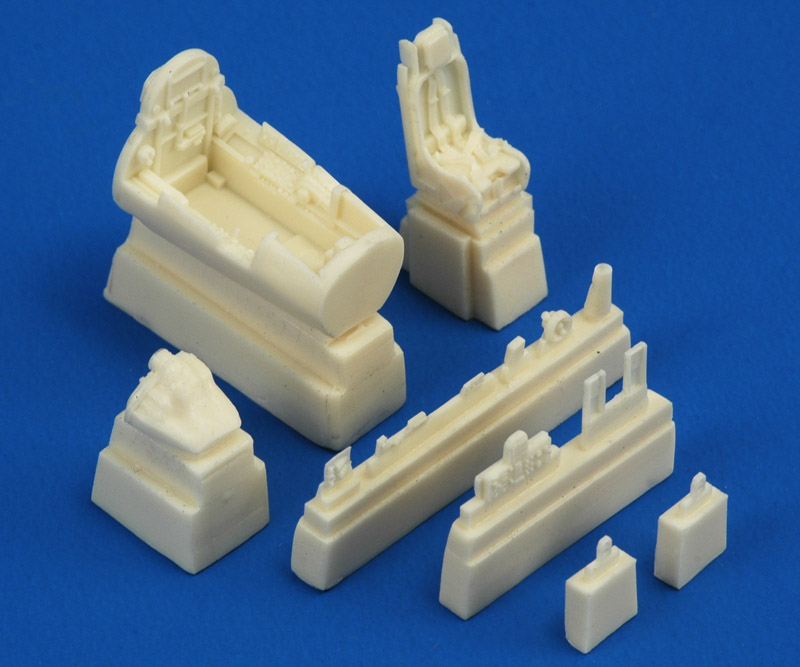
| Here at last: the former Cobra Company, now Lone Star Models U-2 cockpit set. It is beautiful!
| 
|
Q-bay hatch
The kit part that forms the lower hatch of the Q-bay has no camera windows at all, which is kind of disappointing for a reconnaisance aircraft! Interestingly, all my references up to say 2000 appear to be censored: not a single photo or drawing shows a Q-bay with camera openings, with the exception of two NASA Q-bay hatches in the Aerograph book. Only in Chris Pocock's latest book clear photos of for example the B-camera hatch are shown, but still I haven't seen a single photo of the A-camera Q-bay hatch.
In 1/48 scale, Cutting Edge sells a B-camera Q-bay hatch in resin (catalog number 48-289). It is the type with seven camera openings, of which four are round and three are square with rounded corners. According to the CIA's U-2 history book, jettisonable covers for the camera windows were developed to prevent the windows from getting dirty on wet runways. It was released at the same time as the pogos so that it could be recovered and reused. The flight manual however stated that the covers should be jettisoned when cruise altitude is achieved (U-2 Utility Flight Handbook, 1 March 1959, page 4-29). The handbook also states that 'Two types of lower equipment bay hatches are provided with proper window locations and sizes for the correspondig camera configuration. A tracker camera is mounted in the aft end of each hatch.' (page 4-31).
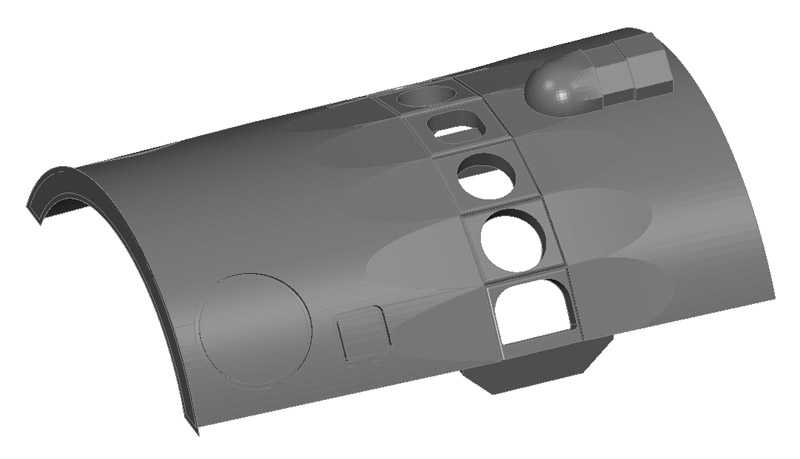
| I laboriously made 3D CAD model of the B-camera Q-bay hatch. A full report can be found here: 3D printed parts for the Seminar 1/72 U-2C. It has the scalloped flat areas ahead and aft of the seven windows, the tracker camera fairing at the rear, and the flush-fitting circular and square antennas, whose lines I added.
| 
|
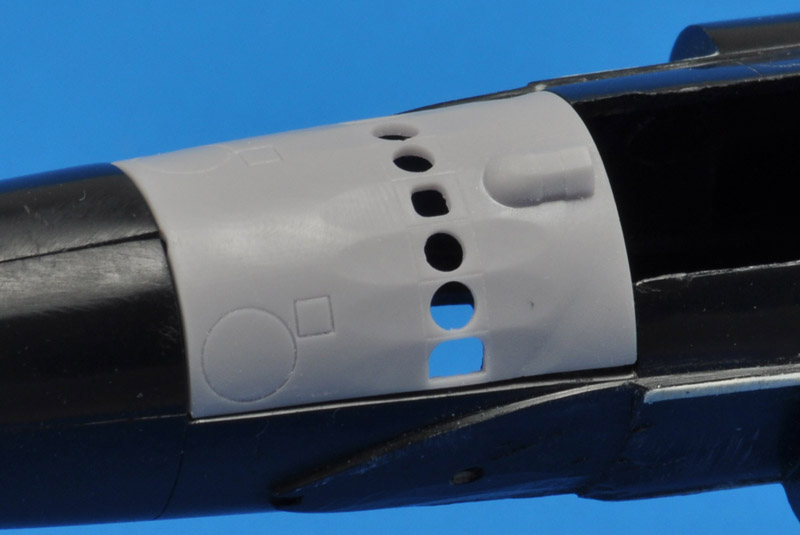
| Here's the printed part, a near perfect result I think. I'm also offering this part for sale.
|
Vertical tail
The trailing edge of the rudder is horribly thick, as can be seen in the exhaust photo. I scraped the rear half of the vertical tail much thinner, and made a sawcut below the rudder to allow the thinned edges to meet each other. I guess I took out about one millimeter of thickness!
Airco outlets
The airco outlets are absent on the model.
Colors
I had read numerous discussion on rec.models.scale about the colors of U-2s and SR-71s, and often a black with a weak blueish hue was mentioned. I was planning to paint my bird in a blueish black color, but I had to change the plans after consulting the relatively new sources. A downloadable PDF-version of The CIA and the U-2 program, 1954-1974 also reports that a dark blue color was chosen for CIA U-2s after tests (page 149). The instructions of Cutting Edge decal sheet 48-152 report the color was FS 35042. The Chris Pocock book 'Towards the unknown' has a definitely blue U-2 on the cover, and also mentions FS 35042. USAF U-2s never wore this color, they used a pure black. This photo on the Cold war black projects site shows definitive proof of the blue camouflage, showing both a black and a blue U-2. Further proof was provided by Tim Bradley, who posted on the Hyperscale forum a statement of someone who worked on the CIA U-2s in Taiwan: I have copies of these CIA papers, SB329, dated 8/29/58 and SB592, dated 11/9/61. Both list the paint as 'Lacquer Color Sea Blue ANA 607 18 Gal., Zinc Chromate Primer 5 Gal.' (SB being short for service bulletin).
I was afraid that 35042 would be too blue for modelers like me, too big of a shock. While building the model, I experimented to establish the best color to use. I first tried a 1:1 mix of 15042 and satin black (Humbrol 181 and 85 respectively), but this turned out to be almost purely black. Next was a 3:1 mix of Humbrol 181 and 85, which looked rather blue. Perhaps it looks better with a flat clear painted over? To be continued.
The speedbrake wells of N803X appear to be chromate yellow, a color also seen on other all-black U-2s. Most likely the inlet interiors are also in this color. These yellow parts will make quite a bold contrast I think!
The cockpits of early U-2s were painted interior green (at least side panels, the control yoke, rear bulkhead, canopy sill). Later models had painted medium grey cockpits. But even a recently used NASA U-2C had a partly green cockpit. Basically everything including and above the top longerons was green, the rest grey. The seat appears to have been grey in all aircraft.
Markings
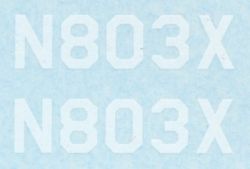
| I had the white serial numbers printed on an Alps printer. Rescue and walkway markings remain to be made or found. Rescue markings from an F-104 appear to be identical to those on the U-2, which is not surprising.
| 
|
| The following does not apply to my own model, but could be of general use.
I was always puzzled by the Navy style serial numbers on early bare-metal Air Force U-2As. Why would Lockheed do the 'U.S. AIR FORCE' markings in the correct USAF-prescribed font, but use (what I perceived as) the Navy font for the serial number? In 2018 I noted that there were quite a few USAF aircraft with this type of 'Navy' font lettering and serials, like the H-43B and the A-1E.
A still from an A-1E film clip was a breakthrough: I saw the font was subtly different. I redesigned the Navy font and found a much better match, see here. That made me decide to look again at the U-2 serial numbers.
|
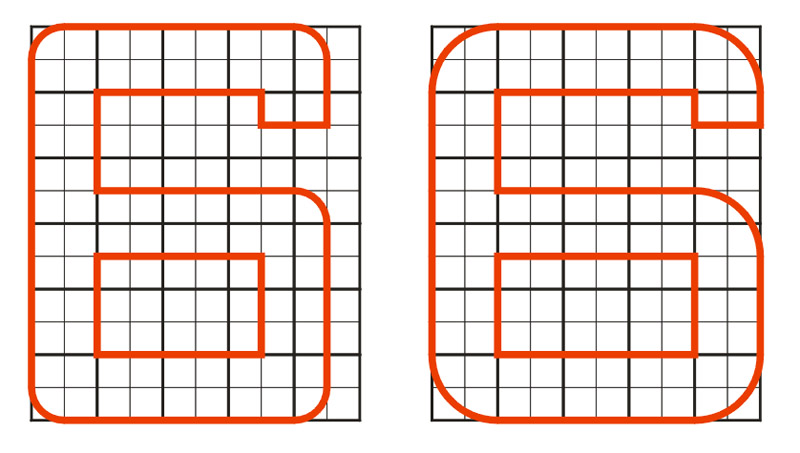
| First I tried the A-1E-style number, with a height-to-width ratio of 6 to 4.5 (Navy-style) and a radius of half the stroke width. Next I designed another version, with a height-to-width ratio of 6 to 5 and a radius equal to the stroke width. Both are shown here.
| 
|
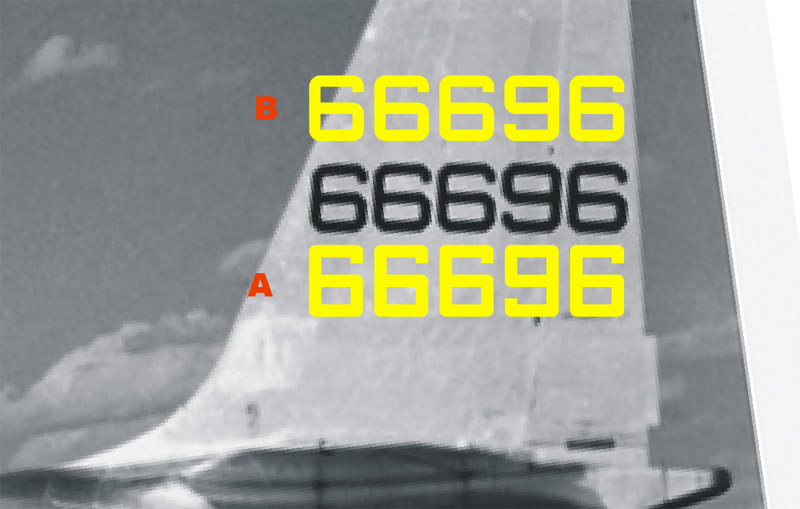
| I overlaid the photo with these two fonts, and concluded that the second version (B) was closest. It's still not a 100% match though, if you ask me.
|
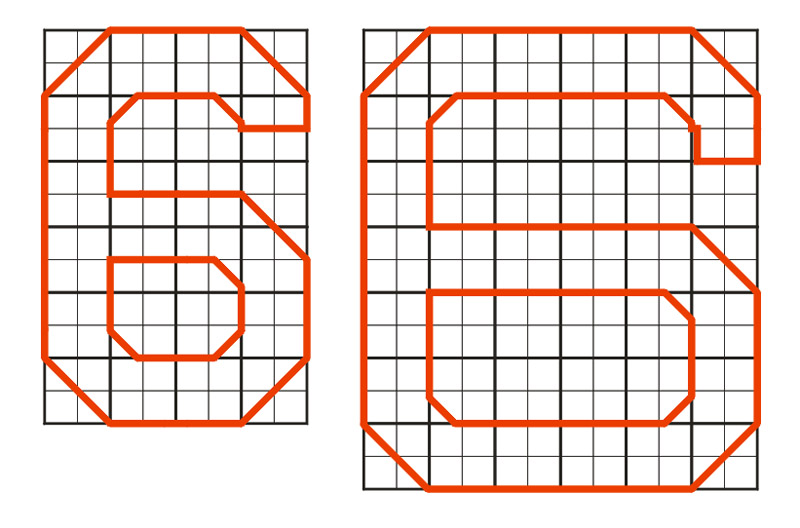
| Following negative comments on the rounded numbers, plus the uncertainty of the pixelated image of 66696, I tried a '45 degree' style lettering, but on a 7 by 6 square grid. The USAF lettering (left) has a 6 x 4 grid.
| 
|
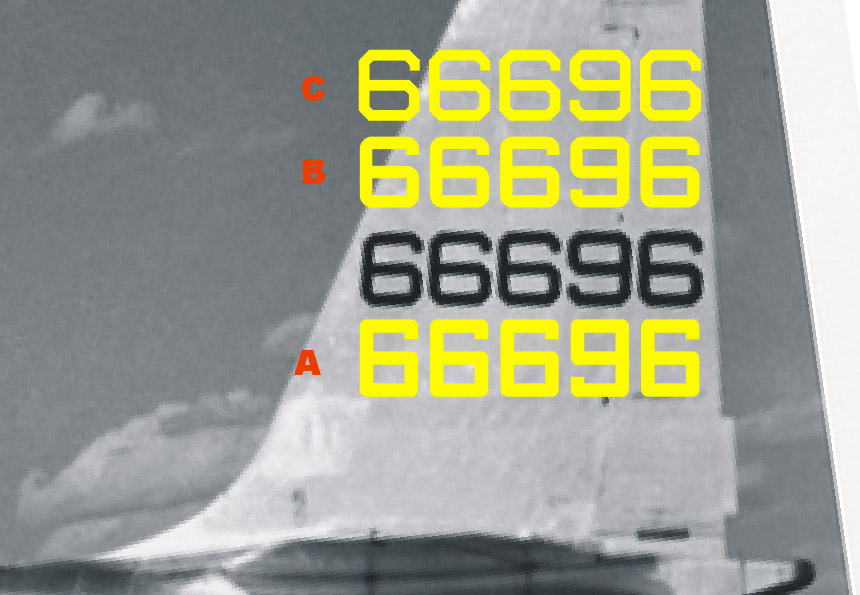
| The latest try (C) doesn't look bad, but the picture is too pixelated / grainy to be 100% sure. To be investigated further.
|
The answer came quick, when I was sent a hi-res version. The photo was not a first-generation print, but still it showed clearly 45 degree corners. I think some sort of overexpose (notice the color of the tail itself) also made the stroke appear a bit thinner than in the print above.
The conclusion is that the lettering is based on a 7x6 grid with 45 degree corners. How Lockheed arrived at that type of lettering is the remaining question. Possibly there was no Tech Order 1-1-4 or equivalent at that point?
| 
|
Aftermarket in 1/72 scale
Aftermarket accessories for the U-2 in 1/72 scale are limited to the following:
Cockpit set for U-2A/C aircraft by Cobra Company, mastered by Scott Battistoni, issued in 2012 or 2013. Review on Internet Modeler. Reissued by Lone Star Models in 2017.
U-2 external update set by Cobra Company. Reissued by Lone Star Models in 2017.
In 2013, a 1/72 scale U-2 white metal landing gear was offered on Ebay UK, no brand was mentioned
In 2013, on the old Hyperscale forum (database no longer exists on the new forum), Norm Dubay offered 1/72 U-2C interim intakes and a Q-bay hatch for the B camera. Norm also cast a cooling scoops set
In 2023, Eduard issued a photo-etch set (73799) for the Hobby Boss U-2C
The following 1/72 decals are/were available:
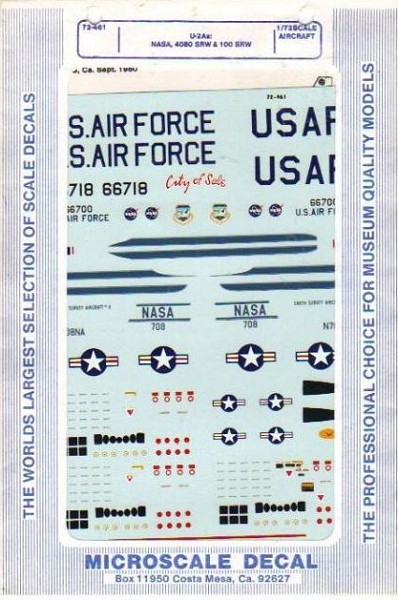
Micro/Superscale 72-461: U-2A, NASA, 4080 SRW, 100 SRW
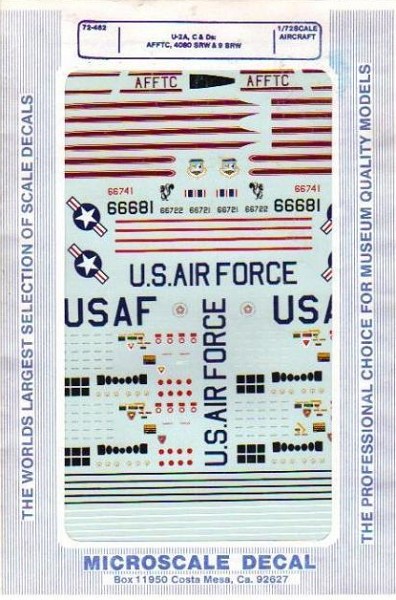
Micro/Superscale 72-462: U-2A/C/D AFFTC, 4080 SRW, 9 SRW
Wolfpak Decals 72-023: U-2C in the Sabre scheme
Wolfpak Decals 72-045: U-2C in dark blue CIA scheme, regular (N803X) and for carrier trails (N815X). Review on Modeling Madness
DrawDecals 72-U2-1: decals for U-2A 56-6696 of the 4080 SRW during an Australian HASP deployment (issued 2013)
DrawDecals 72-U2-2: decals for U-2A 56-6701 of the Edwards AFB Special Projects Branch / Aircraft Research Development Center (issued 2013)
DrawDecals 72-U2-3: decals for U-2D 56-6722 of the Edwards AFB Special Projects Branch / Aircraft Research Development Center (issued 2013)
Print Scale 72-475: decals for eight aircraft: U-2A NACA-320 prototype 1957, U-2A 55741 NASA, U-2R 68-10338 9SRW Beale, U-2R 68-10331 6SRS/9SRW Osan, TR-1A 80-01074, TR-1A 80-01082 bulldog on fin, TR-1A 80-01084, TR-1A 80-01099 and TR-1B 80-1091 white (issued 2023)
Aftermarket in 1/48 scale
In 1/48 scale, much more was available. Cutting Edge had an extensive line for the first-generation U-2 with twelve resin sets. Seven were discontinued in July 2006, the rest in February 2008 when Meteor Productions / Cutting Edge production was stopped. They are listed here because they can serve as inspiration for 1/72 scale, and I obtained the ones marked with an asterix.
CEC48287 'U-2A Conversion'. Includes flat spine, rear fuselage, and adapter pieces for the smaller intakes. Note this set requires CEC48293 too (*)
CEC48288 'U-2A/C Super Detailed Cockpit'. See Hyperscale review (*)
CEC48289 'U-2A/C B-Camera Q-Bay'. Includes masks for camera windows (*)
CEC48290 'U-2E/F 'Ram's Horns' Conversion' (*)
CEC48292 'U-2A/F Exterior Upgrade'. Includes short spine 'canoe', landing gear struts, wheel well, air brakes and wells, U-2C wing inserts, trapezoid and other antennas. See Modeling Madness review
CEC48293 'U-2A/D/E Seamless Intakes' (*)
CEC48294 'U-2C/F 'Coke Bottle' Seamless Intakes'
CEC48298 'U-2A/C Seamless Exhaust'. Includes rear wheel well (*)
CEC48299 'U-2C/F 'Interim' Seamless Intakes'. Applicable to all U-2Cs before 1965. These intakes are significantly different from the 'coke bottle' intakes in the Testors kit. (*)
CEC48318 'U-2 HASP Conversion'. Contains 'hard nose' and side scoop (*)
CEC48325 'U-2C 'Flat Spine' Conversion'. All U-2Cs were built with the flat spine; the long dorsal canoe was not installed until late 1965.
CEC48490 'U-2CT Conversion'. Adds a second cockpit to the Testors U-2C kit. Full airframe conversion, cockpit interior and ejection seat, and new clear resin canopy. It appears that this set was announced, but never issued
Cutting Edge also issued at least four U-2 decal sheets in 1/48 scale:
CED48149, with U-2A 56-6701 AFFTC, Edwards AFB; U-2C Article 360, CIA, May 1960 (the Powers a/c); U-2A 56-6715 4080th SRW; U-2A-1 56-6715, 4080th SRW, with HASP modification; U-2D 56-6722 6512th Test Group / ARDC. Reviewed on Hyperscale
CED48150, with U-2D AFFTC, 1967 Smoky Joe; U-2F Ram’s Horns 4080 SRW, Vietnam; U-2C N809X CIA; U-2A 4080 SRW overall gray; U-2A-1 HASP 4080 SRW, City of Sale, Reviewed on Hyperscale
CED48152, USAF Pave Onyx jets in the 'Sabre Scheme' of light and dark gray (100 SRW, 56-6692, -6700, and -6716), CIA U-2A N800X and N803X (overall sea blue scheme), overall black U-2F (4080th SRW, TDY in Vietnam), NASA U-2C 708 in 1980. Reviewed on Modeling Madness
CED48276, with CIA U-2As with spoof NACA and NASA markings, all markings schemes for the U-2CTs, and all markings carried by NASA ER-2s (U-2R/TR-1A) based at both NASA Ames and NASA Dryden. Reviewed on ARC
In 2013, on the old Hyperscale forum (database no longer exists on the new forum), Norm Dubay offered a resin 1/48 scale Powers' U-2 conversion set, with U-2C interim intakes, three cooling scoops, a Q-bay hatch for the B camera, and a flat fuselage spine.
In 2016, Caracal Decals issued a 1/48 scale U-2A/C Dragon Lady decal set (CD48118), with ten marking options, stencilling and common markings, plus half a sheet full of serial number digits.
In 2018, Lone Star Models showed 1/48 scale "Coke bottle' intakes under construction.
In 2024,
Print Scale issued two decal sheets for U-2s. Sheet 48-246 has decals for U-2R 68-10338 9SRW Beale, U-2R 68-10331 6SRS/9SRW Osan, TR-1A 80-01074, TR-1A 80-01082 bulldog on fin, TR-1A 80-01084, TR-1A 80-01099 and TR-1B 80-1091 white (issued 2023). Decal sheet 48-248 contains decals for three aircraft: U-2A NACA-320 prototype 1957, U-2A 55741 NASA, and USAF TR-1A 80-01099.
Magazine articles
I found a few U-2 modeling articles in magazines:
Fine Scale Modeler, May 1990 issue, had a two-page article by Paul Boyer about building the 'Ram's Horn' U-2 from the Airfix/MPC kit
Scale Aircraft Modelling, August 2001 issue, had a six-page article by Frank Cuden, building an Edwards U-2 with satellite dropping test equipment and a 'howdah' sunshield
Airfix Magazine, June 1984 issue, had a review of the Airfix model
Scale Models Magazine, October 1984 issue, has a two page review of the Airfix model by Mat Irvine
Scale Aircraft Modelling Magazine, July 2001 issue, has 17 pages on the U-2 (first and second generations) including 5 pages of drawings by Mark Rolfe of the first generation
Drawings
U-2 drawings that I found so far:
Aviation News, 9 June 1978, volume 7 number 1
Lockheed Blackbirds, by Thornborough and Davies, Mike Keep drawings
A, B or C?
It took me a long time to determine what version N803X was, but now I'm pretty sure N803X was an early U-2C. The older books on the subject of the U-2 all have different interpretations of the model designations. This online CIA document on the U-2 activities adds to the confusion, claiming that the J57-P31 powered U-2A was designated U-2B. More recent books finally agree on the following two basic versions:
U-2A: initially fitted with the Pratt & Whitney J57-P37 engines, as used in F-100 and KC-135. This engine was not really suited for very high-altitude flights (flame-out and restart problems, smoke in the cockpit), but the preferred -P31 was not yet available. The first J57-P31s were fitted to CIA U-2As from spring 1956 on, keeping the U-2A designation (although the CIA book claims they were called U-2Bs)
U-2B: now described as a proposed bomber version, not built
U-2C: starting late 1958, early 1959 all remaining CIA U-2As were converted to U-2C standard with J75-P13 engines. The last update was finished in 1962, Air Force models followed later. There were two versions of the inlets. Both had the same inlet area, but the later type also had a strong bulged shape behind the inlet opening, my guess is that they reduced spillage drag. The early type inlet largely lacked the bulged shape, and is therefore often misidentified as a U-2A inlet. Photos of Powers' aircraft wreck clearly shows this early inlet type. Cutting Edge used to produce a set of resin 'U-2C interim intakes applicable to all U-2Cs before 1965' (set 48-299) for the 1/48 Hawk/Testors kit
I found a few photos that illustrate the inlet issue fairly clearly. Jay Miller's Aerofax 'Lockheed U-2', page 56, has a photo of a U-2 approaching a tanker, Jay Miller's 'Skunk works', page 77, shows a U-2 on the tanker's boom. The former clearly shows the original small inlets, which cause a kink in the fuselage sides just ahead of the wing leading edges; the latter clearly has the enlarged but non-bulged intakes, and a continuous curve of the fuselage sides. 'Lockheed Blackbirds' by Thornborough and Devies, page 32, has photos of two U-2Cs, the upper with bulged inlets, the lower with straight inlets. N803X as seen in the photos below has the interim large inlets, best seen in the first photo below, and also in the one-but-last photo.
N803X photos
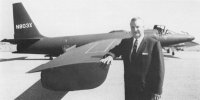
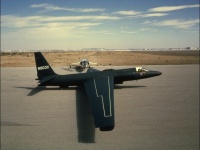
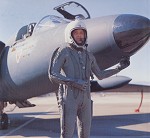
Lockheed staged a photo session with Kelly Johnson and Frank Powers, using U-2C N803X, and an F-104 in the background. I found five different photos of the shoot. The only color reproduction was found in 'A-12 Declassified'. It clearly shows that N803X was painted dark blue instead of black. Johnson's suit is not a bad match for the color! :-) The photo clearly shows the large U-2C inlet of the non-bulged type.

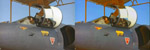
The second photo comes from the Aerofax book (page 19), showing Johnson posing with his creation. Note the F-104 in the background as in the first photo. Outlets just left of Johnson's face are probably airco related.
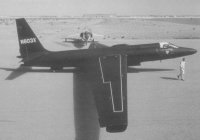
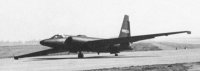
The elevated view shown below probably shows N803X after the Johnson/Powers photo shoot, moved forward a few meters. The walkway lines appear to be white or perhaps gray, with red 'NO STEP' markings (hardly visible, but they are there). A Cutting Edge 1/48 decal sheet also appear to have white walkway lines with red 'NO STEP' markings. N803X had no red turbine warning stripe.
A nearly identical photo in black and white was found in Osprey's 'American spyplanes' (page 9). The main difference is the crew man missing (or erased?). According to the caption, the photo was made at Palmdale. Note how much clearer the 'NO STEP' markings are. A possible explanation is the use of different film, panchromatic instead of orthochromatic black and white film. Ortho film shows red as black, pan film shows a realistic grey value. Another interesting observation is the lack of a RWR antenna and fuel dump pipe between the flap and aileron. The shadow probably shows it most clearly :-)
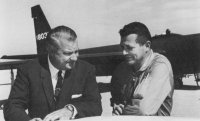
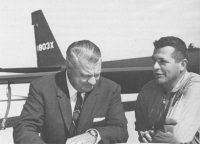
'U-2 in action', page 20, has this photo of Johnson and Powers posing a conversation. Since Powers was held prisoner some 18 months after his 1 May 1960 shoot down and released in February 1962, and the aircraft crashed in November 1963, the photos were probably taken in this time slot.
William Wagner's 'Lightning Bugs' (page 1) has a photo with a slightly different angle. Pogo gear has a 'remove before flight' tag attached.
Another shot of N803X, showing its right side. Antenna wire just visible. I think I see several 'Remove before flight' tags attached to the aircraft's landing gears.
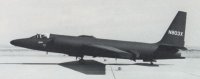
And yet another one, after landing on the taxiway. The large inlets can be seen again in this view.
This photo, published on the cover of 'The U-2 Spyplane - Toward the Unknown', was made with an unidentified U-2 fitted with slipper tanks. Again it shows a nice dark blue camouflage color. Note the orange-red pogo.
The next photo strongly appears to have been made on the same occasion (note for example the position of the sun), and identifies the aircraft as N800X for what it's worth. The camouflage color is undeniably dark blue.

A slide of N801X appeared on Ebay, and I think I see zinc-chromate inside the inlet. I made a second version of the photo with increased color saturation.
U-2 modifications
Chris Pococks' "50 years of the U-2" is the first reference that puts dates/years on airframe modifications. I'm adding them here as I find them while reading.
page 226: shield under exhaust increased from 90 to 150 degrees
page 226: ECM equipment (System 13A) moved from slipper tanks to bubble fairing behind tail wheel
page 236: August 1965 decision to re-engine SAC U-2As with J75, making them U-2Cs
page 236: improved version of J75-P13 developed as P13B, increasing thrust from 15,800 to 17,000 pounds, during 1965-1966. Inlets with widened opening were needed for best performance. 'Coke bottle' inlets with widened opening introduced on U-2C/F/G during 1966-1967
page 240: System 20: a rearward facing small pod on the right wing's trailing edge. It contained an infra-red detector, to detect exhaust plume of intercepting fighters. Tested during 1967 for U-2R, but also retrofitted to all remaining U-2s
page 246/247: provision for drop tanks added to CIA U-2C/F/Gs during 1965-1966, since slipper tanks were now used for ECM. Tanks were modified Sargent-Fletcher fire bombs. However, ECM was moved to fuselage by the time the drop tanks were cleared for use. Photos on pages 246 and 248
U-2 electronic systems
The downloadable book 'The Central Intelligence Agency and Overhead Reconnaissance: The U-2 and Oxcart programs, 1954-1974' lists U-2 electronic systems in Appendic C:
System-I (by Ramo-Wooldridge) used S- and X-band ELINT receivers to collect ground-controlled intercept and air defense signals. Weighing only 7.7 kilograms, this system was aboard all U-2s from 1955 through 1959. Seen here in 'The Inquisitive Angel'
System-II (by Ramo-Wooldridge) was a communications and navigation system, never worked properly and was canceled.
System-III (by Ramo-Wooldridge) was a 16-kilogram VHF recorder for communications intelligence (COMINT), was never used and was transferred to the Navy in 1958.
System-IV (by Ramo-Wooldridge) was a ferret device that recorded electromagnetic energy in the 150- to 4,000-MHz range was used on 16 missions between 1957 and 1959, when it was given to the Air Force. Seen here in 'The Inquisitive Angel'
System-V (by Ramo-Wooldridge) was similar to System-I but covered nine wave bands. The device was so heavy that U-2s using it could not carry a camera system. Used on only three missions and was replaced by the lighter weight System-VI
System-VI (by Ramo-Wooldridge) covered the P-, L-, S- and X-band frequencies and could be used with either the A or B camera. System VI was used from 1959 through 1966.
System-VII (by Haller-Raymond-Brown) was a missile-telemetry intercept system, could record up to 12 minutes of data from six simultaneous frequencies. This unit first saw service on 9 June 1959 and was used on another 22 missions during the next year. Following modifications to make System-VII suitable for use by the Navy, the designation was changed to System-VIII.
System-VIII - see System-VII
System-IX (by Granger Company) was an electronic-countermeasures (ECM) device for generating false-angle information in response to X-band radar pulses from surface-to-air missile radars. Also known as the Mark-30. One of these devices was aboard Gary Powers' U-2 when he was shot down.
System-X (by Haller-Raymond-Brown) was a modification of System-VII that was specially built in 1962 for a mission over the Soviet Union that never took place.
System-XI was an ECM device used by U-2s overflying China and North Vietnam during the Vietnam war.
System-XII was an ECM device used by U-2s overflying China and North Vietnam during the Vietnam war.
System-XIII was an ECM device used by U-2s overflying China and North Vietnam during the Vietnam war.
System-XIV was an ECM device used by U-2s overflying China and North Vietnam during the Vietnam war.
System-XV was an ECM device used by U-2s overflying China and North Vietnam during the Vietnam war.
System-XVI was a passive ELINT collector.
System-XVII (by Haller-Raymond-Brown-Singer) as a result of an October 1963 USIB requirement for the collection of antiballistic-missile (ABM) data from Saryshagan.
System-XX was an ECM system to counter acquisition and guidance radars of MiG aircraft. Reportedly this is the little pod between the flaps and aileron on the right wing.
System-XXI was a COMINT package that replaced the much older System-III.
System-XXII was an infrared jammer to counter air-to-air missiles.
Based on this overview I concluded that the B-camera Q-bay hatch that I designed was a combination of System-IV and the B-camera.
Modeling links
Academy or Seminar 1/72:
Airfix or MPC 1/72:
Hobby Boss 1/72:
Hawk, Testors or Italeri 1/48:
Jan Forsgren shows his Testors 1/48 USAF U-2A conversion on Hyperscale in part 1 and part 2. Jan discovered that the wing roots are not aligned in height, left and right, with the right wing root sitting lower. I checked it on an old Hawk model, and indeed found an 0.6 mm difference left and right, using the front edge of the wing tab slot as a reference. Jan notes a difference of 1.5-2.0 mm, but I think that's too much. With the fuselage 43.5 mm wide there, 0.6 mm gives an 0.8 degree angle if you stick something through both slots. One degree is quite noticable to the eye, and a quick check with the model confirmed this.
'DMC' shows his scratch-built additions to the Testors 1/48 U-2C on the Bitmodeller forum
Discussion about U-2C Frances G Powers 1/48 Article 360 on the ARC forum
Lockheed U-2A - HAWK MODELS 1/48 by 'vags' on the BritModeller forum. with an intersting drawing of his inlet modifications
Links
Return to models page