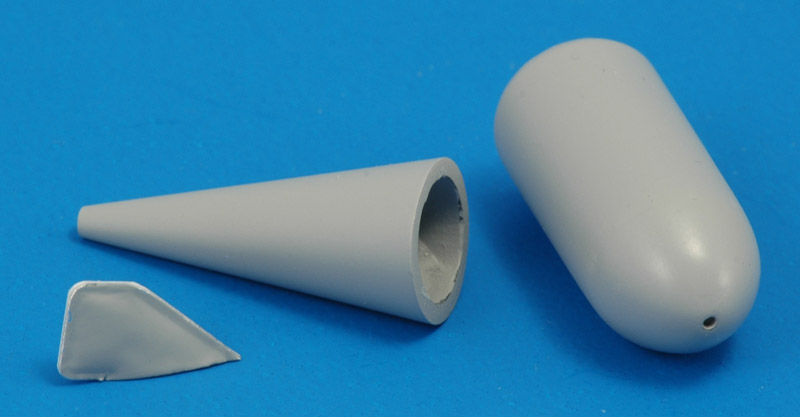
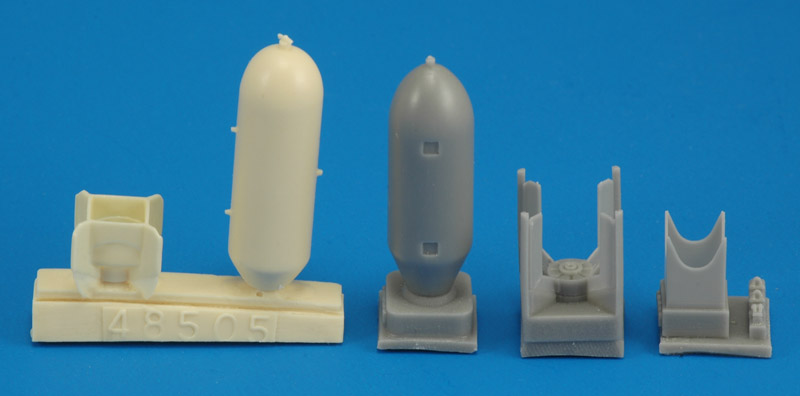
Monogram 1/48 F-84F 'stores configuration study model'


This is a subpage of the F-84F 'stores configuration study model' webpage


Conventional bombs

Two of three of the Monogram F-84F kit issues come with the 1000 lbs AN-M65 bombs as used by the RNLAF. The exception is the issue with the Mark 7 nuclear bomb, #5437. The swept trailing edges of the fins are not correct though.

IsraCast makes a nicer version in resin, and I decided to build these. They have nicer detail, but the pressed sheet metal tail section is too flat. Dimensions are very accurate: diameter 9.9 mm (spot on), fin span 13.9 mm (spot on), length 47.8 mm without fuze, that's 0.4 mm too short but it could be the fuze. The source of the reference data is the combined TM 9-1325-200 (Army) / TO 11-28 (Air Force) 'Bombs and bomb components' from 1966, page 2-25.
Here's the result, with all lugs removed and replaced with magnets. You can see on the fins that the masters were likely 3D printed. The bomb's dimensions are accurate compared to data from weapons manuals. However the representation of the pressed sheet metal fins is not very good. I did a better job on the larger AN-M66 bomb, see below.
The other bomb used by the RNLAF is the 2000 lbs AN-M66. True Details (48505) and Attack Squadron (48030) have it in resin, but fitted with the WW2 style box tail section. To my disappointment both are quite similarly undersize, around 10%. True Details' diameter is 11.2 mm, 91% of the real value (or 83% in cross section area), the length is 35.3 mm, 93% of the real value. Attack Squadron diameter is 11.3 mm, 92% of the real value (or 84% in cross section area), the length is 33.9 mm, 89% of the real value. Again the source of the reference data is the combined TM 9-1325-200 (Army) / TO 11-28 (Air Force) 'Bombs and bomb components' from 1966, page 2-25.
I don't have a lathe, so I took one of the resin bombs and built it up with 0.5 mm thick strips to arrive at the correct diameter while maintaining the shape. I looked in my scrap models collection for a conical piece, and found an Esci 1/72 F-104 that fitted quite well, so I cut the radome off.
The radome was made into a pure cone, with the correct cone angle. The bomb body is nice and smooth again after a few rounds of filling and sanding. Lastly I made a first prototype of the bulged sheet metal fins.
For the fins I found a nice technique to make the 'pressed sheet metal' shape. On a scale drawing I glued pieces of 2 x 1 mm plastic strip, butting the lines that outline the bulged shape. This formed a simple mold to press 0.1 mm aluminum sheet (from food dishes) into the desired shape, using finger or thumb pressure. The required pressure depends on the material thickness and the depth you're looking for, but it works very naturally. However the 0.1 mm pieces were extremely delicate, and not symmetrical left to right.
To solve the symmetry problem, I made a second mold (foreground) that could be used on either side, and would therefore give mirror image parts. I reinforced it with a piece of 1 mm plastic card on the outside. I switched to 0.2 mm aluminium sheet (also from food dishes) to improve the durability of the formed pieces.

After forming, I glued them against flat pieces of the same 0.2 mm aluminum sheet, and filled the cavity with casting resin. My luck was that this second layer of aluminum could be peeled off afterwards, leaving me with 'solid' fins that were still thin on the edges. I cast resin copies of these (oversized) pieces, to be glued together to finally have one fin with bulges on either side.
The left and right sides of the fin were assembled to make on complete fin, and four copies of it were cast in resin. A very laborious sub-project was finally done!
Using a small jig I glued the fins to the conical tail piece. It took about an hour to line them up accurately. The next step was Apoxie fillets for all fin-to-tailcone joints.
I couldn't resist assembling the provisional result. I was surprised how big it turned out, it's a lot bigger than the M65 bomb. The last details to add to the tail section were four longitudinal 'panel lines' and eight slots at the front, of two different widths. See two photos down for the result.
Next I made a silicone rubber mold, with the base of tail towards the resin chamber. This approach requires four thin sheets glued to the master, so the fins can be pulled out of the mold. I made a few castings, and the casting technique worked well fortunately.
Another provisional result, painted MRP-234 FS 34087 Olive Drab, overpainted with MRP-127 Matt Varnish, which is not very matt to my eye. I like the effect of the bomb case tail visible through the slots in the conical tail.
Here's the end results: two AN-M65s and two AN-M66s. The size difference is substantial I think. Fuzes are still to be fitted.


Return to F-84F 'stores configuration study model' page