| The Monogram F-84F model dates from 1984. The first issue, #5432 with Vietnam camo USAF model as box art, was molded in olive drab. My kit was the second issue, #5437 with a bare metal Streak in flight, was molded in light gray plastic. That second issue came with just three fuel tanks, not ideal if you don't want to portray a nuclear mission. Two more issues followed by Monogram (74018) and Revell-Germany (04526). |
|
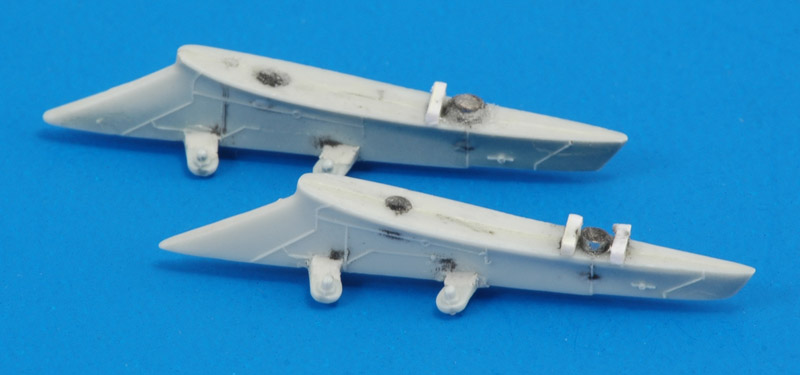
| I wanted the gear retracted, so I tried to fit the kit parts of the landing gear in the wing wheel well. The fit was quite bad, and I thought it would be less work to cut plastic card covers. I used 0.5 mm card so I could use the ledges around the edges of the wheel wells. Afterwards the rather floppy card was reinforced with a layer of Apoxie on the inside. | 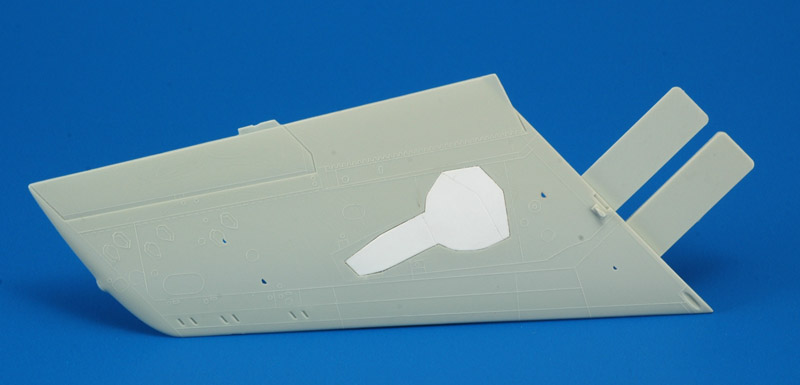
|
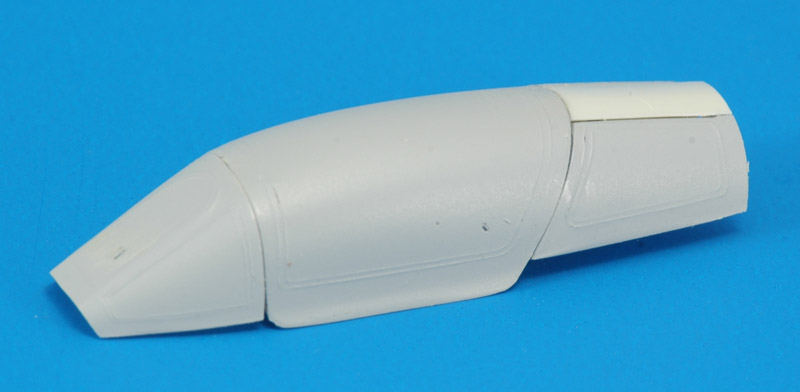
| The canopy would be painted anyway, so I painted the clear parts before assembly, making accurate assembly so much easier because you can see what you do. I skipped the whole cockpit interior. |
| To allow for all kinds of configurations, I installed magnets in the wings and pylons. Here I drilled 2 mm holes through the wing into the pylons, and glued as many 2 mm diameter and 2 mm tall N35 grade magnets in the holes as possible. Theoretically two of these magnets touching would exert a force of 0.8 Newtons. Wherever possible I stacked the magnets to increase the magnetic force. Apoxie (epoxy clay) was placed around each 'tower' of magnets in the wing. The pylons now attach with a satisfying 'click'.
I also bought some N50 grade 1 x 1 mm magnets, but they are really tiny and therefore difficult to handle. Maybe they will come handy for a 1/72 model. When they touch they exert a force of 0.16 Newtons (16 grams). | 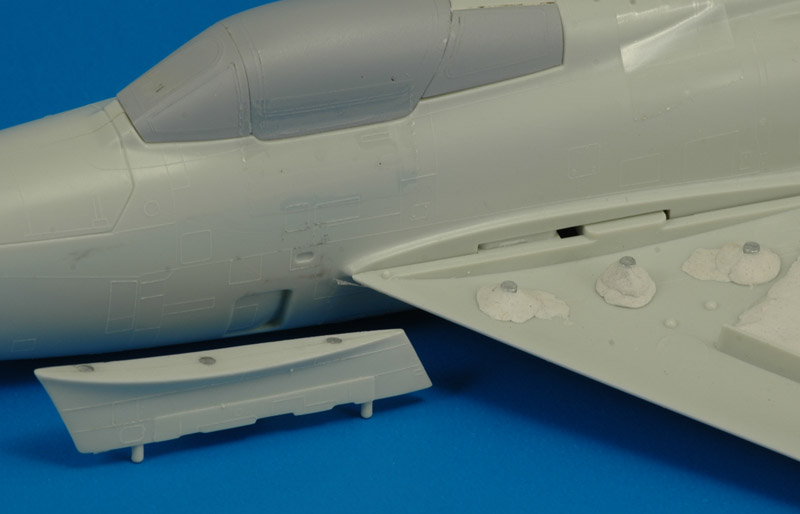
|
| At a late stage, when test-fitting the 5" HVAR rockets, I noted that the stores on the outboard pylon had too much nose-down attitude. After a bit of testing I decided to tilt the pylons, leaving the nose as it is and raising the rear end by ~1.8 mm. You can see the test phase of the modification here. |
| Here's a view with both napalm and 5" rockets fitted. I think the aligment of rockets and napalm looks like what I see in photos. A recommended update for the Monogram F-84F model. | 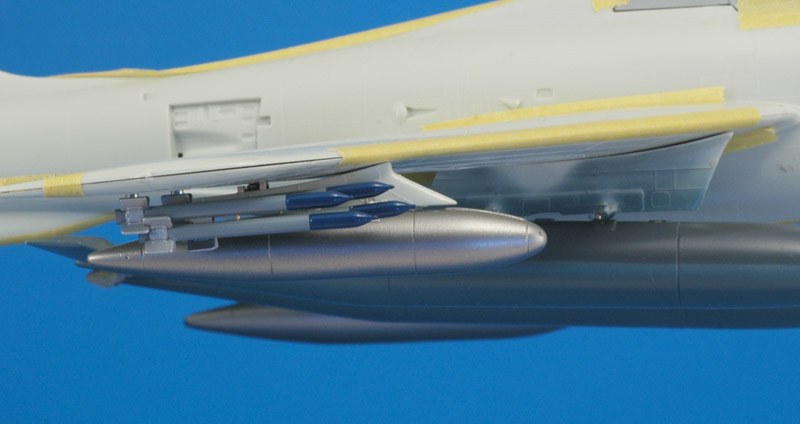
|
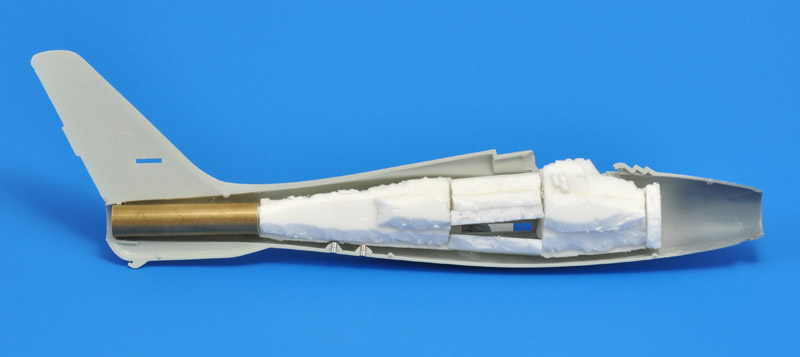
| I wanted to make a model with a solid feel, and a good sturdiness. Therefore I decided to fill the model with resin, something I had done a long time ago with a Monogram 1/48 P-47. To avoid a very heavy model, plus the risk of exothermic reactions that could melt the model, I filled it partially with some old Rohacell foam. At the back I installed a piece of K&S 15/32" (11.9 mm) brass tube with its forward end plugged, to serve as an exhaust and a solid mounting point for a stick (if so required). |
| I had some older Smooth Cast 305 polyurethane resin that I did not want to use for precision castings, since it would foam badly when left to cure. In other words, the resin had absorbed too much water. I could remove most of the moisture with one minute of deep vacuum though, which made it just usable for filling the model. The wings were also filled with resin, before attaching them to the fuselage. | 
|

| A last view of the bare model, before paint is applied. I count twelve magnets for the inboard and outboard pylons, eight magnets for the HVAR rockets, and finally two magnets for the ATO rack. Most of the magnets are stacks of two or three, to increase the magnetic force. |
| The horizontal tails are quite difficult to mount to the vertical tail. Monogram made overlapping tabs, to ensure the the tailplanes align in front view. But for the rest the mounting is vague, floppy and weak. I decided to install 1 mm spring steel wires on each side of the tabs. It required some careful drilling, but I think the plan works well. Still, the tailplanes will remain the most delicate parts of the model, and some damage is to be expected during its life as a 'stores configuration study model'. | 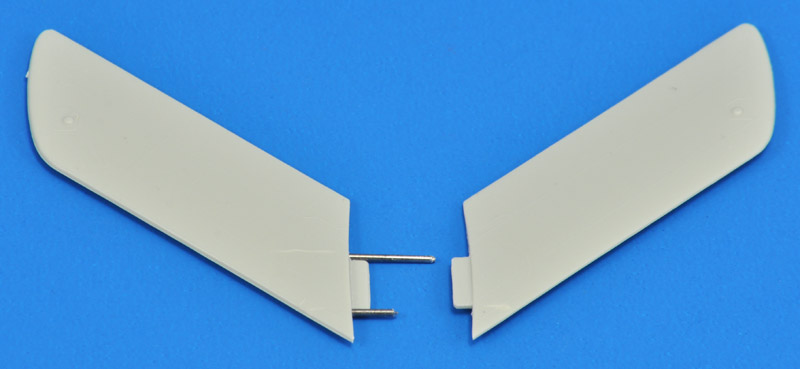
|

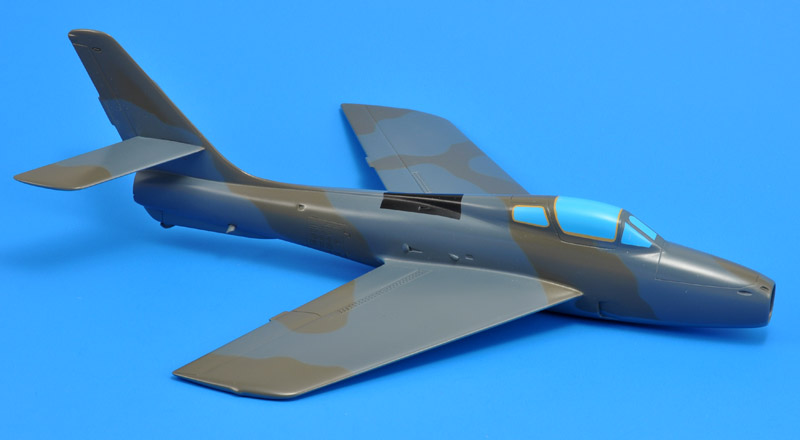
| Time for a grey base coat, to check the build quality. I tried something new to remove the sanding dust from the many tiny holes of the speed brakes and spoilers: the model was dunked in an ultrasonic cleaner. That worked well, I had a spotless model to paint.
As a 1/72 scale builder, I was amazed by the paint quantity required to cover a 1/48 model plus four pylons: I used 6 ml of Humbrol enamel. I must admit I applied a good coat, to have some thickness to sand small defects. The Humbrol 'Color System' booklet says 1 ml on average covers 190 square centimeters with a layer thickness of 0.06 mm. I roughly calculate 450 square centimeters for the F-84F, plus 50 square centimeters for the pylons, giving a total of 500 square centimeters. That means 2.6 ml should have covered the model, but this excludes the paint lost as overspray. Assuming out of the blue that 30% is lost, I should have used 3.7 ml. The actual 6 ml therefore should give me a paint layer thickness of 0.1 mm, which sounds about right for my purposes. The model looked quite pretty in light gray, but quickly it got a mottled appearance from all the corrective spot sanding. I also added the horizontal tail surfaces at this point, to minimise the exposure of these relatively delicate parts. |
| I made a mistake with a few of the magnets: when the hole was a tad too shallow, and the (last) magnet would stick out a bit, I sanded off the excess. What I didn't know then is that these rare-earth magnets have a corrosion-protection coating (often nickel), and corrode quite badly when this is removed. It seems that paint is no substitute for the nickel, and the corrosion continues, bulging and popping off the paint. This problem occurs on a number of places on the model. | 
|
| I bought the three camouflage colors from Mr Paint, and painted spoons to check their colors. Left to right: MRP-120 PRU Blue, MRP-114 Extra Dark Sea Grey and MRP-110 Dark Green. They show a a lack of contrast that looks perfect for the RNLAF F-84F. | 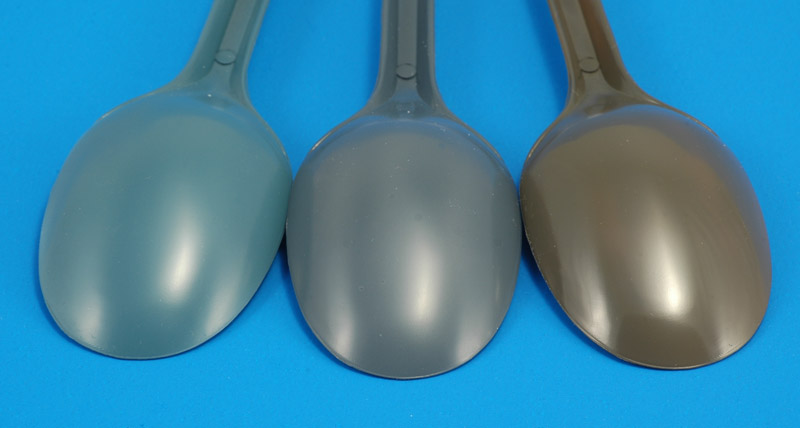
|
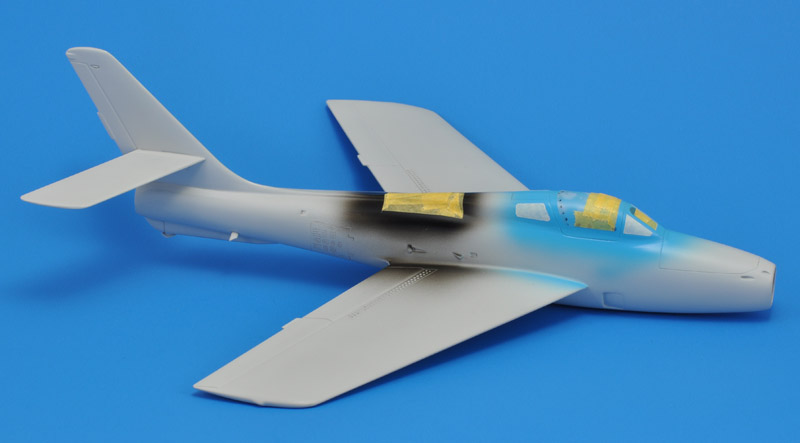
| Only after doing all the correction work with Humbrol 127 enamel, I switched over to MRP paint. I'm still learning how to use MRP, and for now I use an enamel base coat for maximum adhesion. I don't want to wear off the MRP at the edges, or pull off the paint with masking tape. Hence the enamel base coat, which has the best adhesion in my experience. You could call it a primer.
I sanded the whole model with 3M Softback Ultrafine sanding sponge (blue), to remove the roughness of the airbrushed enamel. This is definitely a drawback of my current methods. This was followed by MRP Fine Surface Primer Grey, that I also lightly sanded with 3M Softback Ultrafine, giving me a nice smooth-finished model. I finally had a model that I could apply the camouflage to. I applied MRP-005 Black for the radio-transparent panel on the back, and MRP-044 UkrAF Su-27 Blue for the cockpit transparancies. That last choice is a bit of a gamble: in 'solid models' I see transparancies generally painted black, silver or light blue. I picked light blue, but it could be ugly.. |
| After applying Extra Dark Sea Grey, I started masking for the Dark Green areas. I used 1.5 mm solder, fixed with Blu-Tack. I decided to do the masking in two sessions, to minimize the risk of accidentally bumping some solder and lifting it.
Previously I had scaled the paint scheme to 1/48 scale, allowing me to bend the solder to the correct pattern. I was OK using a generic color scheme, since I wasn't building a specific aircraft. | 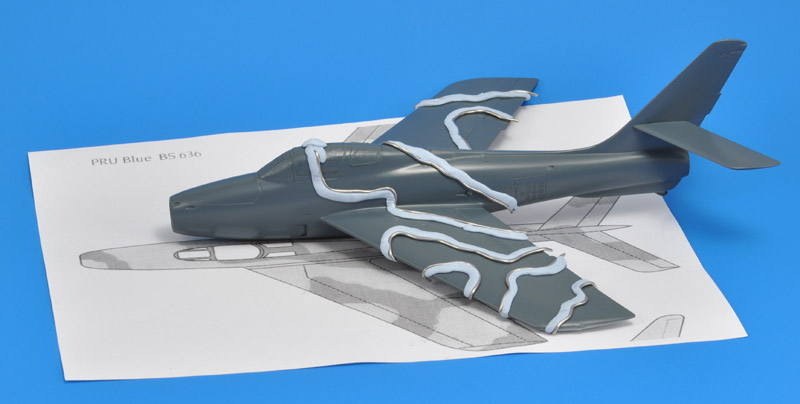
|
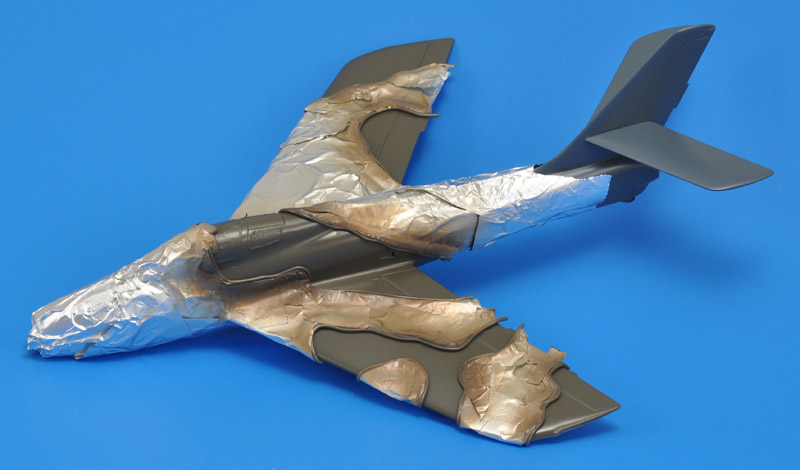
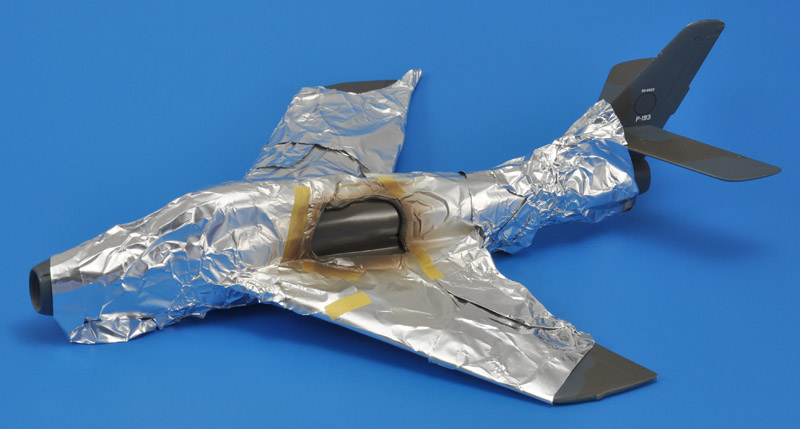
| The areas between the solder were filled in with kitchen aluminium foil. I try to cover as much of the Blu-Tack as possible, to minimize its contamination with paint. In the photo the paint just had been applied, and immediately afterwards I removed all the masking. Both solder and Blu-Tack can be reused. |
| After all the Green parts were masked and painted, the masking and painting of the PRU Blue was performed. I did the undersides of the tailplanes separately. | 
|
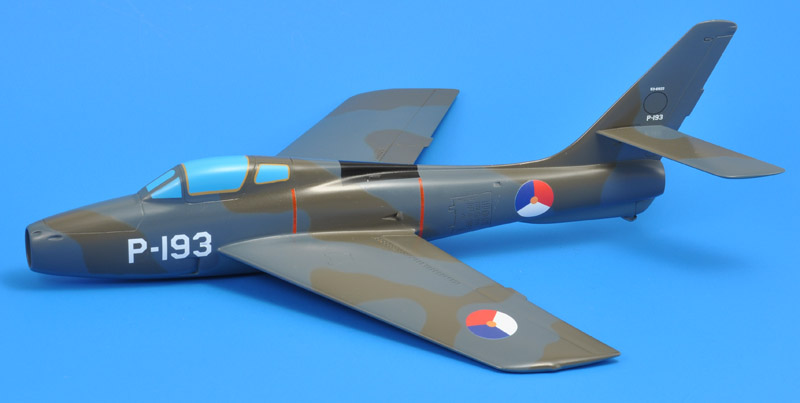
| The result was nice technically, but as usual with a freshly painted (read: unweathered) model, I don't like the result much. The colors are screaming at you, it looks boring, it's unrealistic, just meh..
A word about the sealant stripes. In photos, I only saw them around the canopy and rear-view windows, yellowish and greyish respectively. I used one greyish-yellow color for both, to avoid going overboard with the accuracy. I used Jammydog 0.5 mm micro masking tape, applied around the masking for the transparancies. |
| Shown here is my artwork for a custom decal sheet, that included the F-84F decals. Years ago I designed a set of 1/100 RNLAF F-84F decals for a friend, and I used these as a basis for my 1/48 model. It also solved the problem of picking a serial number - I simply used what I had made earlier. I left off the squadron badges, and instead used just black circles, in view of the possibly strong squadron associations of the pilots that I wanted to interview.
According to my research, the fuselage roundels were 750 mm on both the silver and camo finishes. The wing roundels were 1200 on the silver scheme, but I could not find the size for the later camo scheme. Modeldecal set 29 has 18.6 mm roundels, which translates to 893 mm, and I rounded off that number to 900 mm. That size makes the roundels fit between the front and rear spars. On the top side the roundel is placed in the middle of the aileron, on the lower side it's just outboard of the pylon. A note for future builders of a camouflaged Dutch Streak: all those models I've seen so far used the wrong size for the wing roundels! | 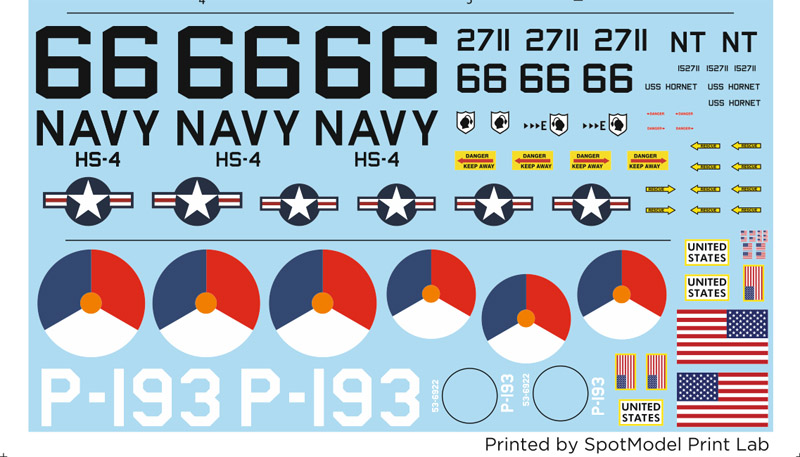
|
| My artwork was custom printed by Spotmodel. One problem was that the white backing is visible around the blue parts of the roundel, but I saw that only when it came off the backing paper - i.e too late. The 2' turbine stripes were an afterthought, and I made them using an old Scalemaster stripes set. Maybe I should do the 1" gun hatch stripes too now? But I don't want the model to look like a detailed scale model - it's a play model! |
| Before applying a protecting clear finish (Alclad ALC-312 semi-matte), part of the Scalemaster stripes fell off. It turned out that they had near-zero adhesion. Since they are 30+ years old, this was not a complete surprise. The clear coat did a good job of giving the decals the same glossiness as the camouflage. But the thickess of the custom decals is still visible from some angles. | 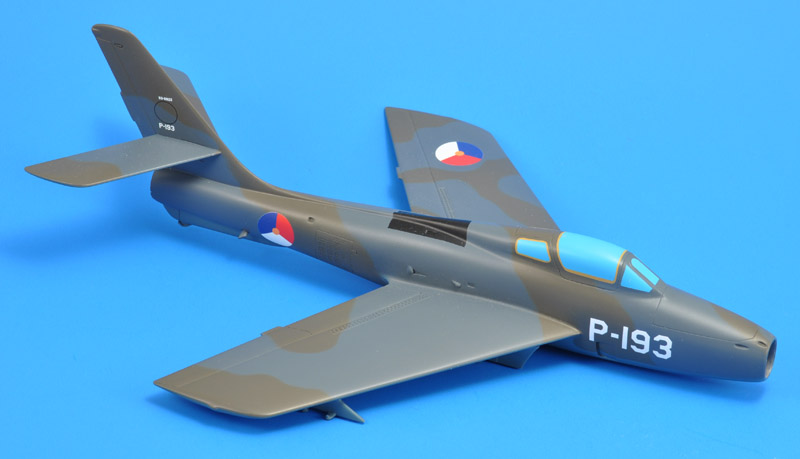
|
| After a couple of months I took the model out of storage, and noted a strange raised area on the mid-fuselage. Initial thoughts were that internal pressure had caused it, so I drilled two holes, but nothing came out. More poking revealed a thin layer of chewing gum-like resin beneath the plastic surface. I remembered that I used rather old resin, and it foamed a few percent in volume. Maybe the resin had more problems?
After some more thinking, I now think it could have been a badly mixed batch. The problem only occurs in one spot of the model. If all the resin was off, it should have occured everywhere. But why the did the problem only occur on the sides of the fuselage, and not all around? To be continued. | 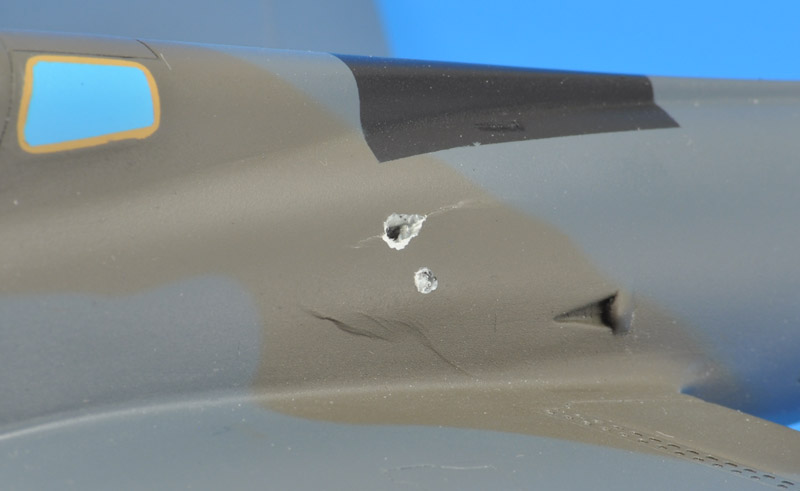
|
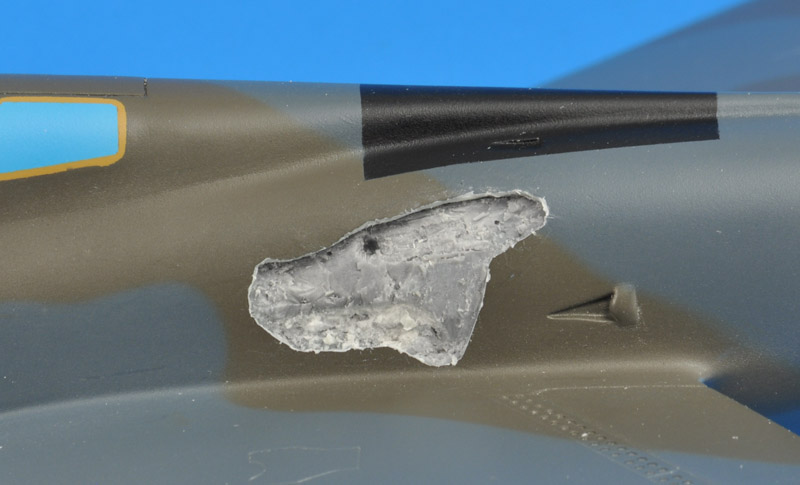
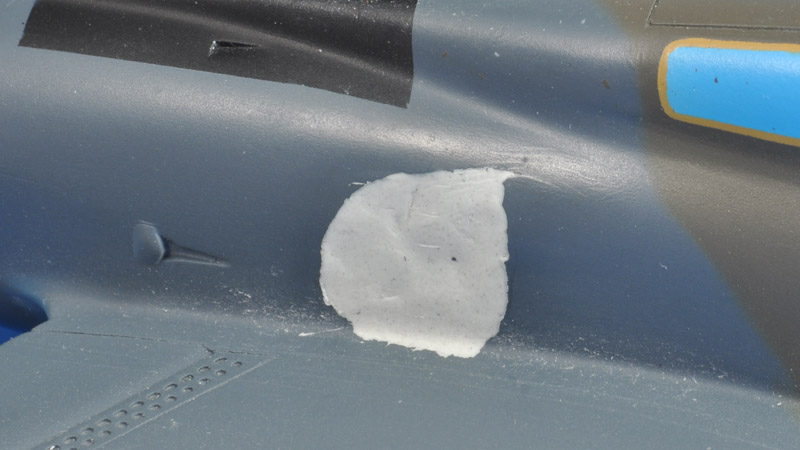
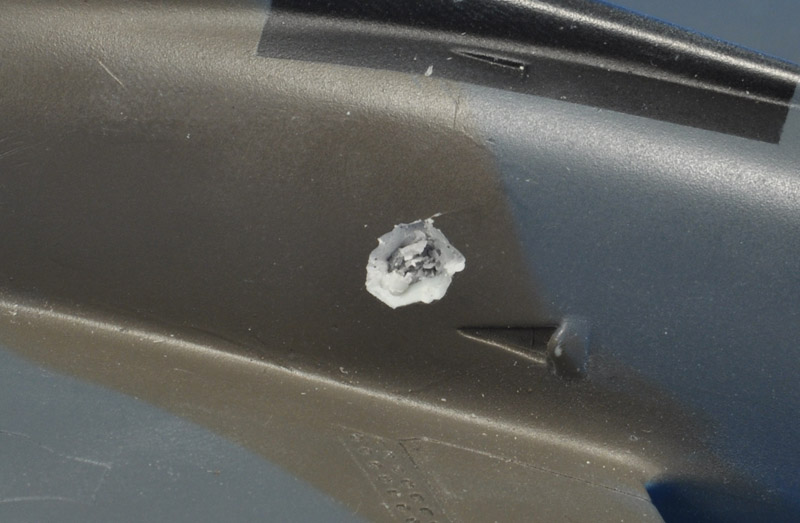
| More poking showed that the plastic had softened by the polyurethane resin. I removed all the damaged plastic I could find, but I'll never be 100% sure I caught it all. At the same I wanted to keep the repair managable in size. |
| The gaping hole is now filled with Apoxie Sculpt, with only some sanding to be performed on the front edge. Judging by feel it appears I've made a smooth filling, but paint will show the truth. | 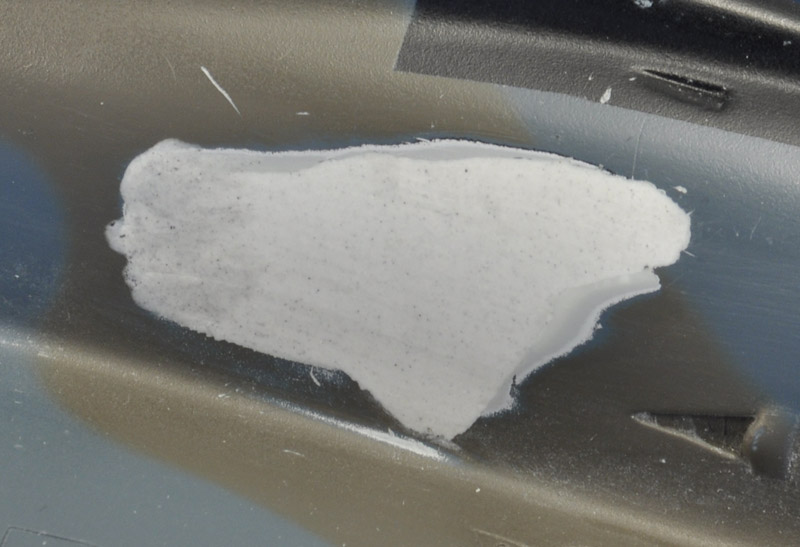
|
| I made a mask to paint a patch on the model using the original color, MRP-110 Dark Green. Later I did a similar thing to paint the MRP-114 Extra Dark Sea Grey areas. |
| Lastly the areas were overpainted with Alclad ALC-312 semi-matte. It blended in the freshly painted areas nicely, and showed that the repair was a success. | 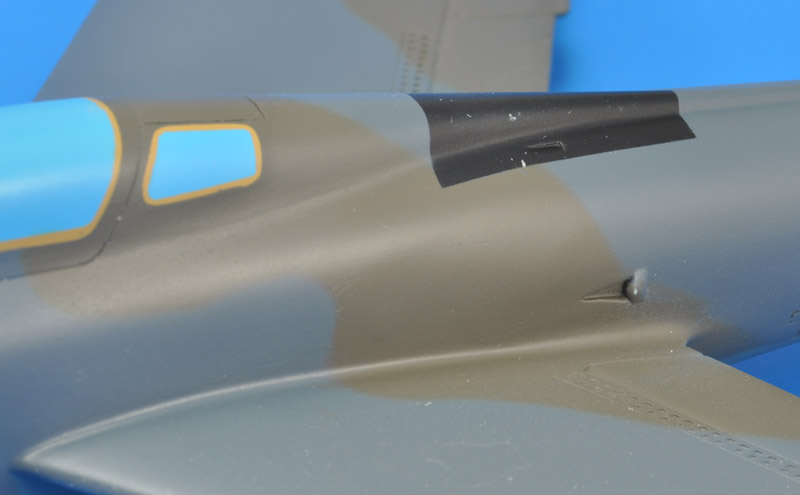
|
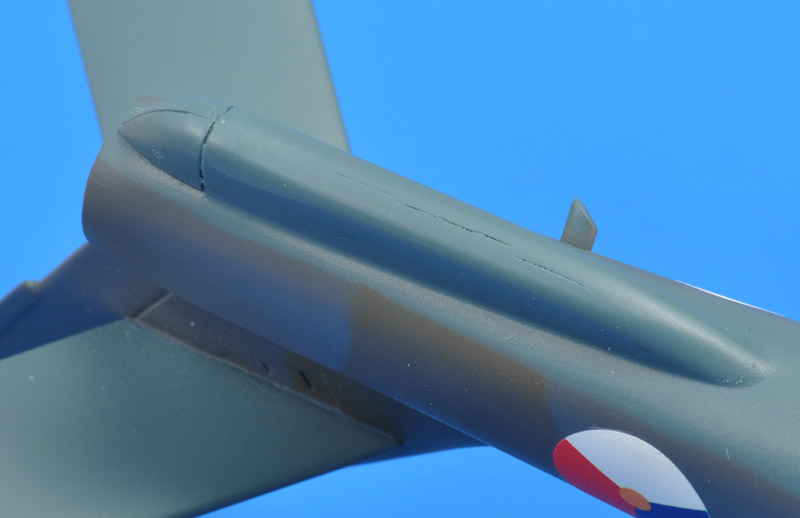
| Another potential problem area is the dragchute fairing, where cracks are developing. If this continues, it might be necessary to build a new model. Since my pilot interviews will be done by then, I could build a normal detailed scale model, instead of making more repairs to this 'play' model. Luckily I did not see any worsening in this area. |
| The resin rot continued: the spot on the right fuselage side grew considerably over two-three months. Time for another heavy repair! | 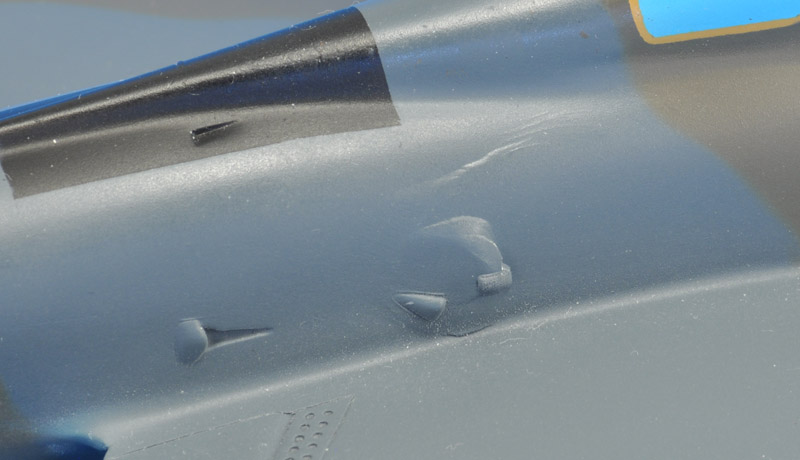
|
| The affected area was cut out, and filled with Apoxie. This is first rough filling. The second should be done very carefully to minimise subsequent cutting and sanding. The finishing was similar to the first repair, and not shown here. |
| Two months later, another pimple appeared, this time on the lower side. It felt the same, like chewing gum. Sigh.. Maybe the model needs an early retirement.
The spot was ground out with some margin, filled with Apoxie Sculpt, and resprayed with MRP-120 PRU Blue followed by Alclad ALC-312 semi-matte varnish. | 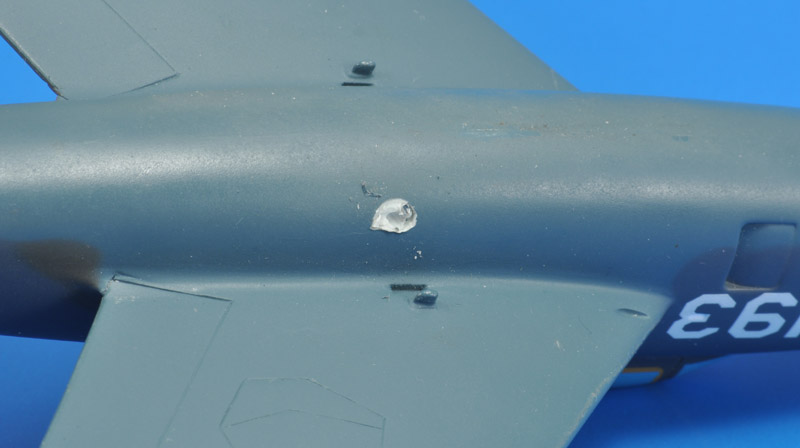
|
| Another year later, and a new but smaller pimple appeared on the left fuselage side.
It's a good thing this model was required for pilot interviews, otherwise I would have scrapped it. |
| Two years later, pimples appeared on the fuselage-wing joint. The fuselage side is also deforming a bit. It just doesn't stop. | 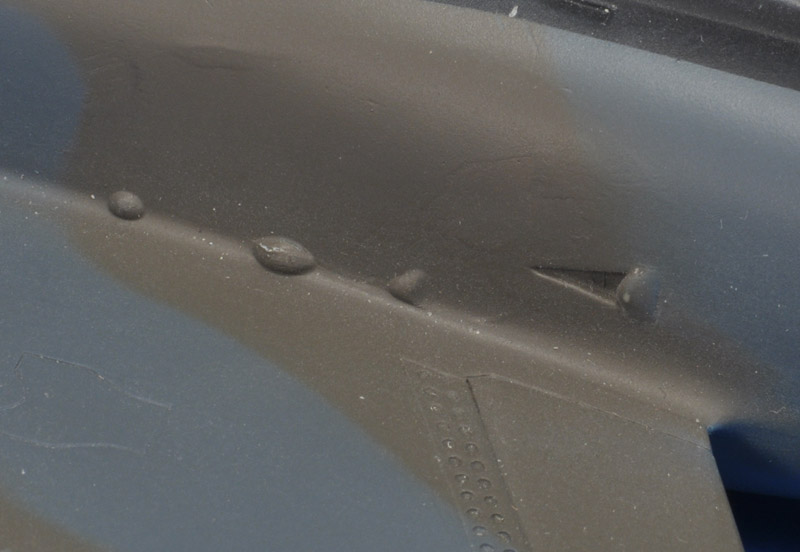
|
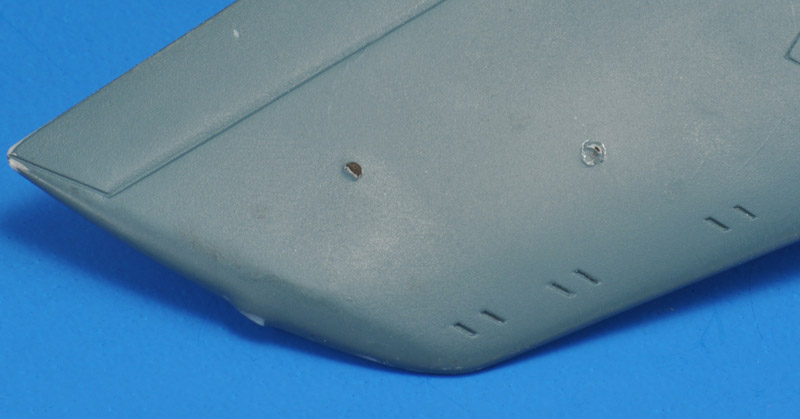
| There's also a smaller problem going on with the magnets for the outboard stores. Initially, I suspected it had to do with the casting resin that I used to fill the wing. |
| But after a year or so, I concluded that these are magnets that I sanded flush after installation. The sanding removed the protective coating (nickel?), and even paint will not prevent the rusting of the magnets. I don't see another solution than drilling them out, a nasty job. | 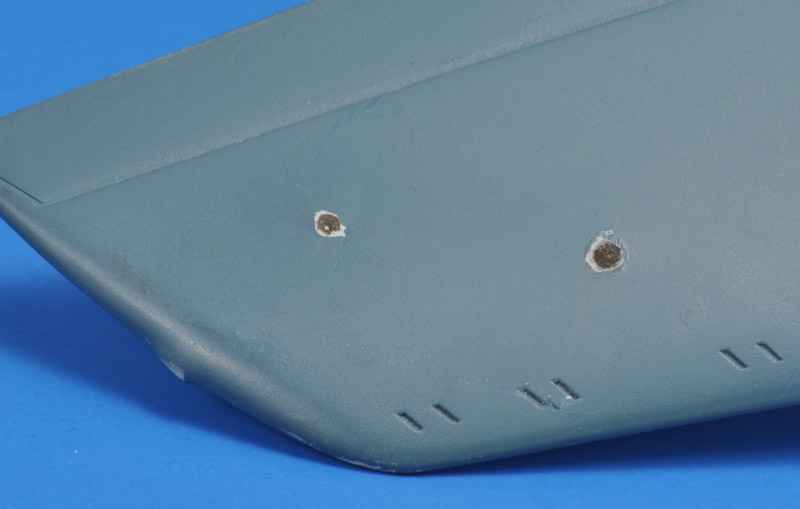
|