LS 1/72 BD-5J
I believe it was the 'Encyclopaedia of Military Models 1/72' by Tom Young and others that inspired me to try find this model, the smallest 1/72 model available. I love the contrast it presents when I hold it nose-to-nose against a big single-seat fighter, like my YF-22 model. I think the finished model really needs a 1/72 figure to show just how small the real thing is. Through the research of this model I also got very interested in the history of this remarkable home-built aircraft, and its technology. While building this model, I built a second one, as a present for its owner Juan Jimenez. The links below will guide you to my other BD-5J pages.
|
| 1/72 BD-5J under construction
| 1/72 BD-5J N3038V finished
| BD-5J census
| BD-5A/B factory engines
|
The kit
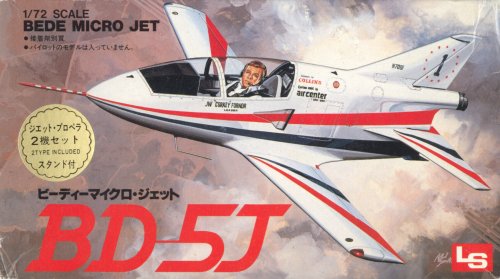
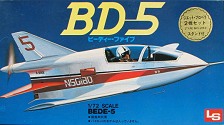
I think the LS BD-5J is the smallest 1/72 kit available. The model was issued in 1983. Unfortunately LS went under a couple of years ago, so this kit is pretty rare. LS made two versions of the kit. Kit A193 has the jet powered BD-5J on the box top, and A194 has artwork of the prop-driven BD-5B (note: it shows N501BD with an air scoop on the fuselage side that only N503BD had). The contents of the two versions are identical however: each box contain complete kits of a long winged prop-driven BD-5B (12 parts), and a short-winged jet powered BD-5J (10 parts). A friend bought kit A193 for me at the IPMS-UK Nationals in 1995.
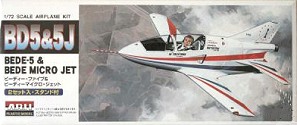
It had been reported for some time that ARII owned the LS molds, and in summer 2003 they finally reissued the kit. The box is now twice as big, and inside you will find no fewer than four BD-5's! You get two jet-powered 5J's and two prop-powered 5B's. Contrary to some reports, you get all parts for four aircraft (including four landing gears). The box contains two stands only however, but that shouldn't be a problem. The decals are identical to those of LS, but the printing is sharper, which is most noticable in the small lettering of the Acrostars aircraft. A drawback of the sharper decals is that some spelling errors are revealed :-) On the negative side, the canopies are not as clear as the original issue, and one has a pimple on the inside. Kit number is 32107, and in Japan it costs 1000 Yen. See Hobby Link Japan for more details.
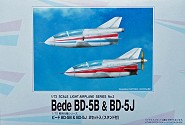
In summer 2011 the same model set was reissued under the MicroAce label. It is reported that MicroAce is a brand owned by Arii, specialising in model trains. Like in the Arii reissue, the box contains four models. Decals are identical, and the clear parts show the same mediocre clarity too. Catalog number is 32108, and in Japan it costs 1200 Yen.

| 
| 
| 
|
| LS A193 (1983)
| LS A194 (1983)
| ARII 32107 (2003)
| MicroAce 32108 (2011)
|
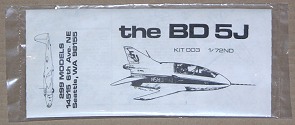
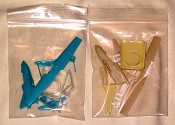
There are two more BD-5 models in 1/72 scale. The oldest was produced by 299 Models, run by Terry Moore from Seattle. It was a limited run injection-molded kit using cast epoxy molds, with a vacformed canopy, sold bagged. There were two versions: a prop issued in 1981 with the short-span A-wing (catalog number 001, no decals in mine) and a jet in 1982 (catalog number 003, apparentlty with decals). Some 1500 were produced, but production was stopped when the LS kits came out. An advert in Fine Scale Modeler, Fall 1983 issue, reports that 200 BD-5J models are left, at 2$ each. The other BD-5 model is a resin model by 'Pylon1 Air Racing Accessories'. They appear to be straight resin copies of the LS/Arii/MicroAce models, in both prop and jet versions. Various resin colors are used, such as blue, goldish brown and white. They appeared on Ebay in 2012.
| 
|
| 299 Models (1982)
| Pylon1 (2012)
|
Anigrand from Hong Kong is a producer of resin models, and in 2003 they had a BD-5J listed as a new release. But after the re-release of the ARII / LS kit, the announcement disappeared. As far as I know, there are no BD-5's in other scales. Back in 1996, Robert Beach considered producing a vacuum-formed kit in 1/48 (see Google's rec.models.scale archive). Large-scale RC models of the BD-5 exist in several scales (or at least plans to build them).
References
I started building this little kit at a time when I could only find very limited BD-5 information, mainly in some issues of Jane's all the world's aircraft. Since then the information explosion on the internet occurred, and with it the fantastic BD-5 web site maintained by Juan Jiménez. It contains several hundred photos and lots of other information. I haven't digested all this new information, but it could prove some of my detailing to be incorrect. In 2006,
BD-5Builder.com came online and looks to be another useful source of information.
Another nice source is Aeroplane Monthly from September 1974. In a ten page article the story of the early years of the BD-5 program is told, including the first glassfibre prototype with a butterfly tail, and the second proto with sweptback tailplanes. It includes a nice cutaway of the BD-5B.
I'm building my model as the the Bud Light Jet N210LL, as flown by Bill 'Burner' Beardsley. I would love to lay my hands on one of two videos about the jet: 'Burner, Once a Blue Angel' or a shorter version called 'Airshow view from the Cockpit'. Please contact me if you happen to have one of them.
Construction
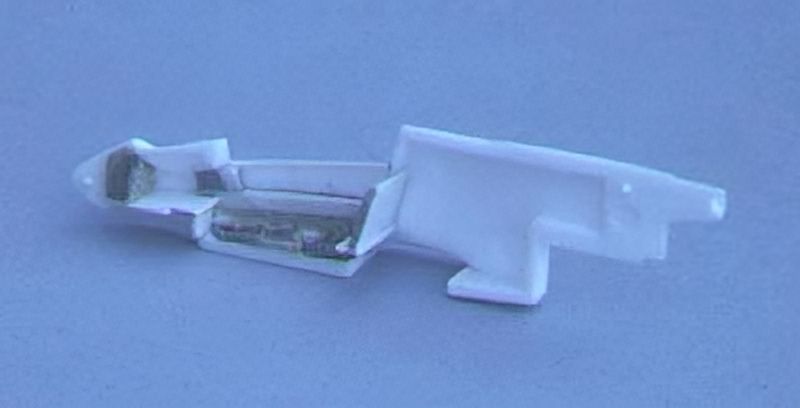
| I started by thinning the cockpit walls, and then added a top longeron. Next I made side console from plastic card, the width about one millimeter. Then I extended the rear cockpit bulkhead down to the seat level, to prevent see-through effects. A nose landing gear well or opening was completely absent, so I cut out the opening and created a box with card. The top of the box also serves as the front cockpit floor. The model is a definite tail sitter, so I filled every possible space in front of the main landing gear with pieces of lead, and filled left-over spaces with Milliput. The assembled model now balances around the leading edge of the wing, well forward of the main landing gear.
| 
|
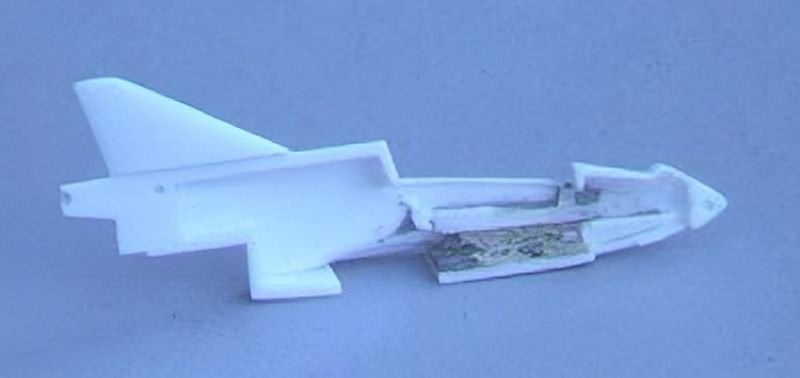
| Left fuselage halve. It received the same treatment as right fuselage halve. The integrally moulded pitot tube broke off in an early phase. It's too short anyway (see the cross-sectional view below), and later I drilled a hole in the nose, to accept a steel wire pitot tube later.
|
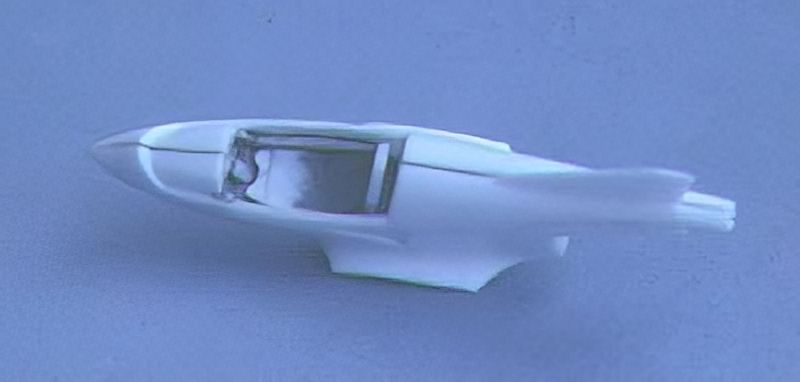
| The fuselage halves temporarily assembled. The seat is now inserted too. The seat has three modifications. From a cross-section drawing (shown at the end of this page) I learned that the seat should recline more, so I filled the middle part with putty (blue Tamiya putty is clearly visible). I also added a front end 'lip' to the seat from a small piece of card. The last modification was to scrape two slight dents in the seat to simulate the impression made by the legs of the pilot. I learned later that many BD-5's have custom seats, so my modifications don't represent a standard seat (if it exists). The seat back position depends on pilot's length, as does the reclining angle. On the front end of the seat part, the nose gear box is represented by a little knob. I extended this a little. The width of the side consoles can also be seen in this picture.
| 
|
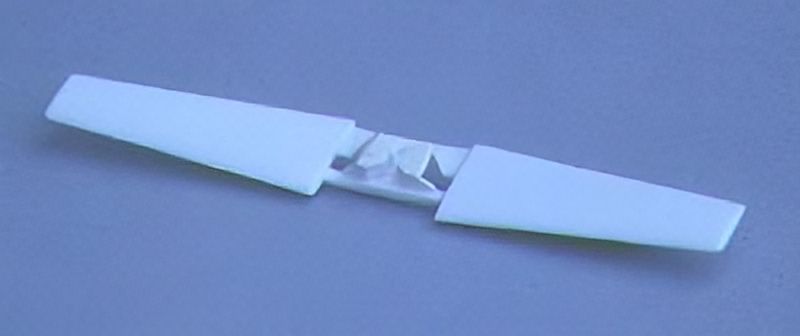
| The wing. The main landing gear openings (depressions actually) were cut open, and boxes were built from small pieces of card. The cross-section drawing showed a 3 mm height of these boxes, but I limited it to 2 mm. Since the wing was 0.5 mm, I added 1.5 mm. The boxes are partially closed by more card; on the inside they are closed by the fuselage parts (as can be seen in the next picture).
Note: from construction photos on the BD-5 web site I learned that the separate landing gear boxes do not exist on the 1:1 aircraft. It appears to be one large rectangular open box, instead of two separate polygonal boxes, with the tubular spar just in front of it.
|
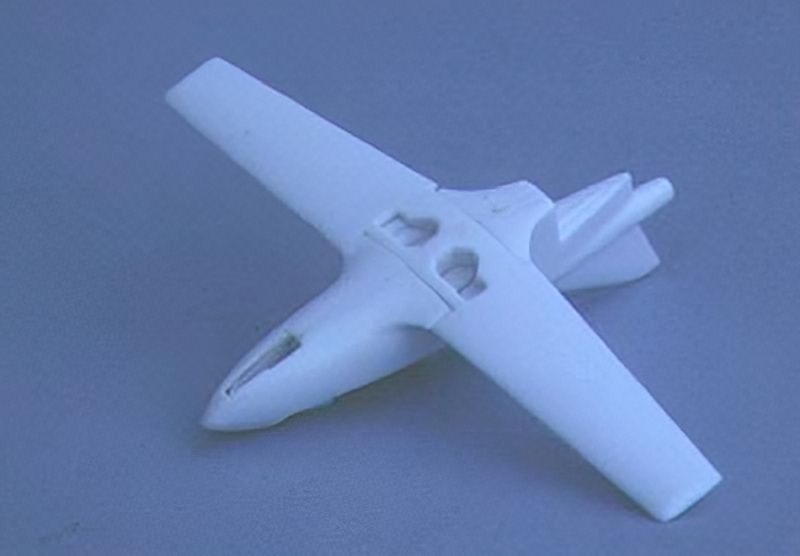
| In this photo, fuselage and wing have been glued together with CA (super) glue. After the assembly of the fuselage, I added the wing with great care. I first attached it using tiny drops of CA glue, then thoroughly checked the alignment (both dihedral and plan view). This proved to be perfect, and more CA was used to create a definitive assembly. The fit of the wing is not perfect: some Milliput will be needed to make things flush. The boxed-in main gear wells and the newly-created nose gear well can be seen clearly here. The rear fuselage/elevator part is not added yet.
| 
|
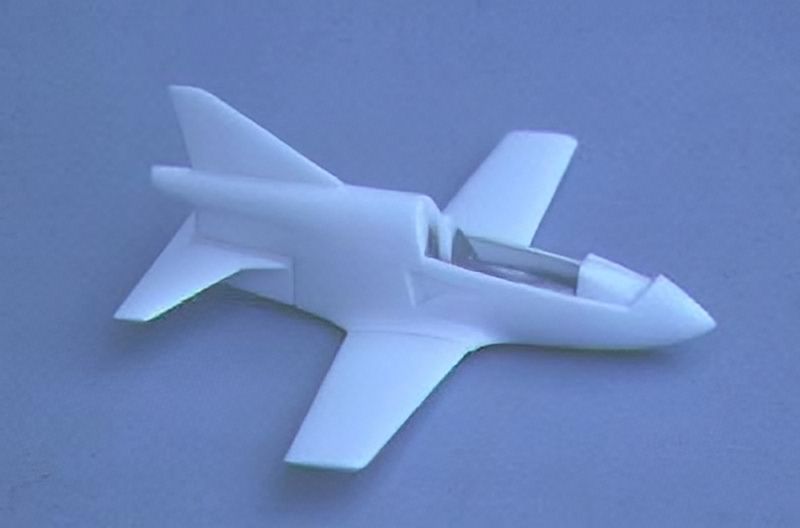
| The nearly complete model, with the lower rear fuselage/elevator part temporarily added. I scored along the elevator-rear fuselage edges to create the impression of a moveable elevator. Perhaps I will cut it off completely using a razor saw, to pose it in another position. The whole model has to sanded lightly to remove a 'cast' effect, not unlike that of some DML/Dragon models. The wing roots are a little thicker than the wings (as can be seen in the photo), and it needed scraping and sanding.
|
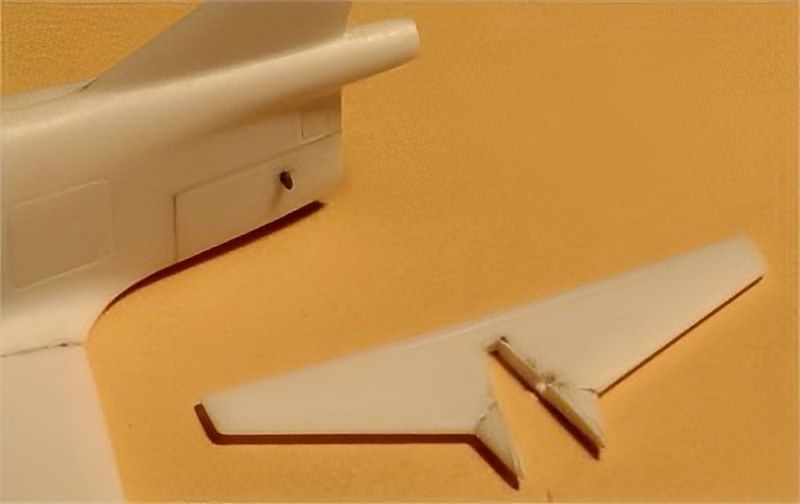
| After a long break from working on the model, I started it again in 2002. First job was to add the lower rear fuselage/elevator. I decided to make my model a little more interesting by cutting off the elevator, and make it posable. I used a razor saw to remove the elevator, being extra careful not to break at the rear side, where it is very narrow. I sanded the part smooth and glued it to the fuselage. The gaps were filled with CA. During the sanding of the gaps I realised how much easier things are without the elevator in the way. Then it was time to install the elevator again. Although thin, the razor saw had removed some material, and I restored it using my thinnest plastic card (just visible in the photo). Some more fiddling and my elevator was a snug fit again. From a cutaway drawing I decided where to put the elevator's pivot; I drilled a hole and glued a short piece of 0.5 mm steel wire in the hole. I cut tiny notches in the lower side of the elevator, and now it snaps in place and is posable. It looks very nice indeed.
| 
|
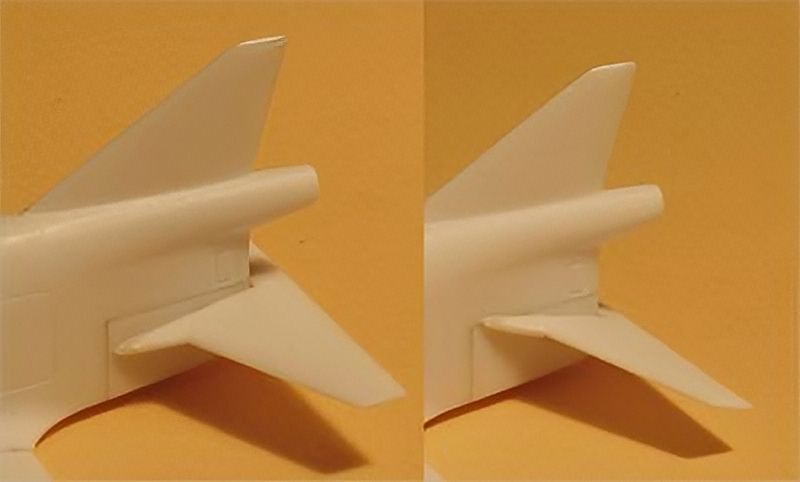
| This photo shows the posable elevator. I haven't decided yet which position looks nicest. It appears that the normal position while parked is trailing edge down.
Another unfinished job was the lower wing - fuselage connection. It required quite a few applications of CA and sanding before things were flush. I scribed panel lines at the outboard edges of the wing root fairings. The wings are removable, so there is a panel line there. It is unlikely there is a panel line on the inboard side of the fairing, considering how much putty is used on the 1:1 aircraft to smoothen joints!
|
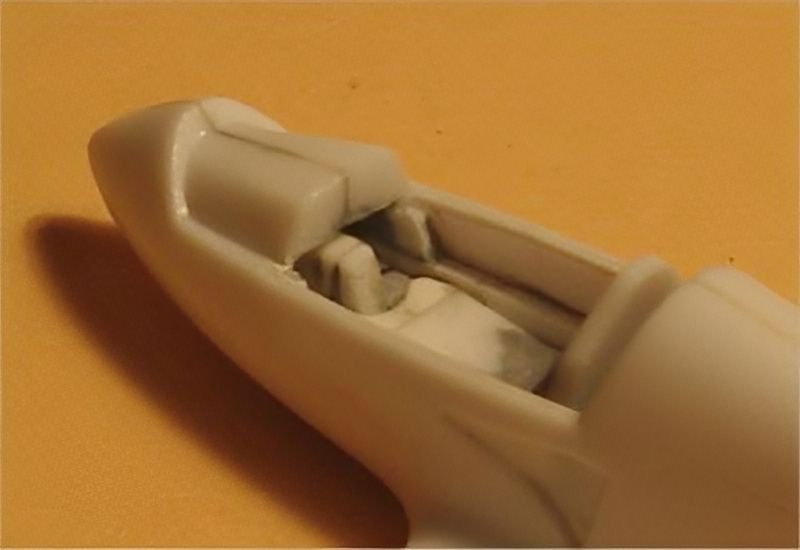
| One more view into the unfinished cockpit. I'm not sure yet, but I think the instrument panel has to be moved towards the rear. I plan to use Reheat bezels to create a realistic instrument panel. I hope the bezels are small enough for the tiny panel!
| 
|
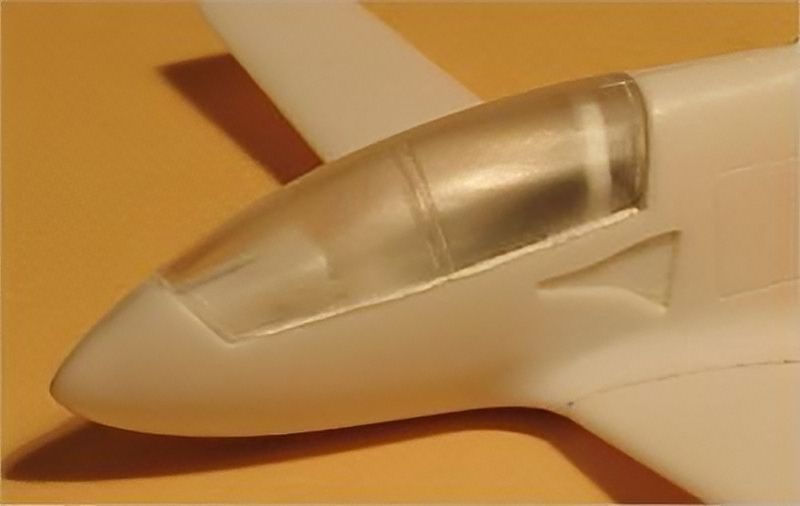
| Last main item to finish is the canopy. Here things get ambitious again. I really want an open cockpit, and although the canopy isn't thick at all, it is still too thick for my purposes. I want to vacform a new one, preferable in a negative mold like my Mosquito canopy. I scribed the raised panel lines on the canopy, and gave it a sanding, in preparation for polishing later. To be continued.
|
Although I am a long way from installing the landing gear, some remarks about the doors that were posted on the YahooGroups BD5 list. The main landing gear usually has no doors. They are difficult to keep closed during high-speed flight, and because of their aerodynamics they increase gear retraction forces considerably. The speed penalty usually does not outweigh the problems. Only a few BD-5J's have MLG doors installed. The nose landing gear doors also show variations. The 5J usually has a complete set of doors, but many prop 5's lack the rear door.
To be continued
Decals
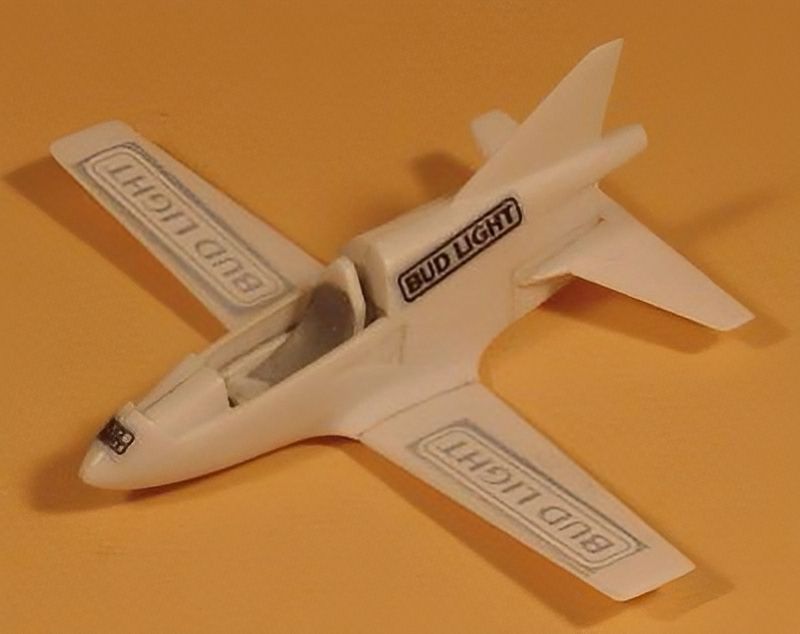
I will most likely finish my BD-5J as the Bud Light jet, N210LL. I made vector graphics artwork based on a Bud Light logo found on the Russian logo site. I am still working on the smaller decals like the serial number and small company logo on the tail. The photo on the right shows a test fit of sticker versions of the decals, to check the dimensions. It looked fine to me.
Note that there were at least three versions of the Bud Light sponsor markings on N210LL. I chose the version that was easiest to print on an Alps printer.
| 
|
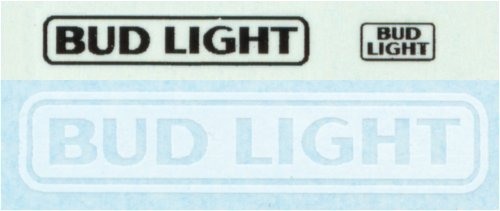
| Here are the Alps-printed decals for the Bud Light sponsoring. They turned out very, very nice! I am confident that the remaining decals will be great too. More decals can be seen further down the page.
|
Late 2007, Thrust Decals came out with three Alps-printed decals sheets for BD-5J's: the Bud Light jet,
Coors Light / Silver Bullet jet and the Pepsi sponsored jet. You can find more details on the real jets in the 'BD-5J overview' below. Thrust Decals closed shop in summer 2008, and sold the company to Draw Decals. Late 2009, Draw Decals reissued the the Bud Light jet (set BD5-1) and Coors Light / Silver Bullet (set BD5-2) jet.
In the summer of 2008, CanMilAir came out with a decal set for a
ficticious Snowbirds team from 2015 flying the Bede BD-5B/J. The set provides markings for two complete aircraft with position numbers from 1 to 6.
BD-5 wings
Another piece of reference material: the various wings. The LS kit contains the 'B' and the 'jet' wing. As far as I've been able to find out, there are the following wings that can be fitted to the fuselage:
| Type
| Span
| Area
| Aspect ratio
| Use
|
|
| (ft)
| (m)
| (ft^2)
| (m^2)
| (-)
|
|
| A wing
| 14'4"
| 4.37
| 32.2
| 3.0
| 6.4
| The early kits had both A and B wings included, but the A-wing was discontinued early 1974. The A wing has the same ribs as the B-wing, but the pitch has been decreased. Also found an area of 30.5 ft^2.
|
| B wing
| 21'6"
| 6.55
| 47.4
| 4.40
| 9.8
| for BD-5B, standard wing. Also found areas of 40.75 and 45.79 ft2
|
| Jet wing
| 17'0"
| 5.18
| 37.8
| 3.50
| 7.6
| for BD-5J. The J wing has the same ribs as the B-wing, but the pitch has been decreased.
|
| D or G wing ?
| 17'0"
| 5.18
| 38.0
| 3.53
| 7.6
| GA(W)-2 wing section, J-wing span. Reduced wing area because of higher maximum lift coefficient and higher cruise drag of the GA(W)-2 profile, resulting in the same stall and cruise speeds as the BD-5B. Stressed for +/- 6G. For BD-5D (planned series built certified version) and BD-5G. 18 feet span also reported.
|
| S wing
| 27'10"
| 8.48
| 60.0
| 5.57
| 12.9
| for BD-5S sailplane version (N504BD). 'The BD-5 story' page 103 reports 'about 31 feet' span, but all other sources report around the 28 ft mark
|
The kit's paint schemes
The LS bit offers two decal options for both the BD-5J and BD-5B. Here's what my research has turned up about these options:
The two BD-5J options represent both aircraft of a Corky Fornoff / Bob Bishop team, called the Acrojets. These aircraft are modified BD-5J's, sometimes identified as Acrostar Specials. They carried registrations N70CF and N21AP respectively. I haven't found anything about the current whereabouts of N70CF, but N21AP now flies as part of the Freedom Jet team, usually busy simulating cruise missiles in military exercises! From recent photos of N21AP it can be concluded that the LS box-art is quite accurate when it comes to the extra hatches and small NACA air intakes. These should be added to the model. Also, they appear to have a small additional aerodynamic surface at the rear lower end of the fuselage (anti-spin strakes?); a small piece of plastic card will take care of that. A long antenna is placed under the fuselage, simple to scratch from a piece of thin steel wire. Photos show small black dots on the wing, possibly fuel filling points? All in all, the model is quite accurate in representing these aircraft.
The BD-5B options are N501BD and a USAF example. Starting with the later, these white decals aren't mentioned in the instructions, and I haven't found any photo that resembles the depicted aircraft. There is a bare-metal BD-5B in a museum in USAF markings, but its marking are black and different. Then N501BD. The very first BD-5 proto was N500BD, with aluminum wings and a aluminum/glass fiber fuselage, painted red with a black and white checkers band. It never flew out of ground effect, since the tail configuration was inadequate. N501BD was the second prototype, completely built from aluminum. It made its first flight on 11 July 1972. Initially it had sharply swept separate horizontal tails (60 degrees on the leading edge), but this was later replaced by the one-piece tail (like that of the kit). It had a Kiekhaefer 440cc engine (from a snowmobile) first, but it was replaced by a 650cc Hirth industrial motor. I don't know which engine version the LS kit represent.
The blocks on the sides of the fuselage (to be painted orange) seem to represent small air scoops as seen on N503BD. On N501BD, cooling air was supplied by small NACA inlet at the corner of the canopy. These were insufficient, and a P-51 style scoop was added under the fuselage later (possibly not on N501BD though). The NACA inlets and/or the scoop are missing from the kit. I'm pretty sure it had split flaps, as opposed to all later BD-5's with plain flaps, which means that there shouldn't be a panel line of the upper wing surface. It had no oleo on the nose landing gear, just a glass fiber leaf spring as on the main gear. The nose landing gear door was a single piece, hinged on the left side. The kit has an oleo nose leg and two doors connected to the nose leg, like later BD-5Bs. It was flown with both short and long wings.
N501BD's flying career ended on 8 October 1972: an engine failure resulted in an emergency landing on a road, ending up in a ditch. It had flown only 30 hours, but the third prototype (N502BD) was thought to be almost ready to take over the test flying, but that would take until 26 March 1973. N501BD was used as a display aircraft after that, and as the famous truck-mounted flight simulator. Concluding, it appears that the BD-5B model does not do a very good job in representing N501BD. The nose gear must be changed to a leaf spring, the upper panel line of the flap should be filled, small NACA ducts should be added near the rear canopy edge, and/or a P-51 style scoop should be added under the fuselage. Also, it should have exhausts on both sides of the rear fuselage. On the positive side, the model is largely correct for a later BD-5B: only the orange boxes should be cut off, and some sort of engine-cooling scoop should be added. There should be plenty of 1:1 BD-5B photos around to serve as inspiration.
Alternative paint schemes
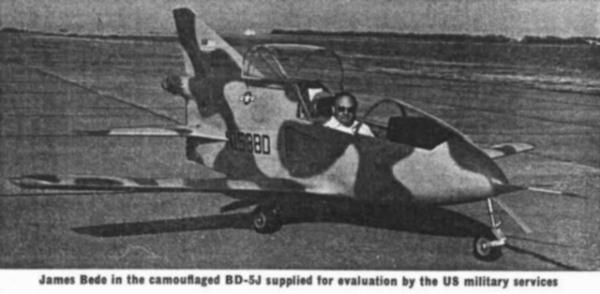
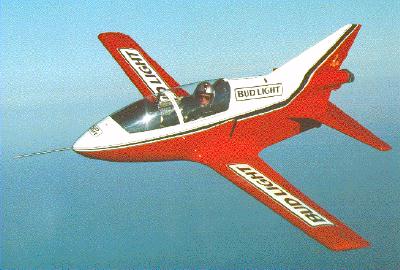
Shown below are two liveries of one aircraft, cn 5J-0004, first as N153BD painted as a proposed USAF version, colors unknown (from Jane's All the World's Aircraft), and later as N210LL with Bud Light sponsoring.
Fellow modeler Tony Landis has built N53EJ owned by Micro Aviation Services in the original Pepsi scheme. He designed a set of Alps decals for his model, consisting of the Pepsi logos and the N-registration for the rear fuselage, and white 'Microjet' and 'Pepsi' scripts for the right and left wings respectively. A cute set, that measures less than 30 by 30 millimeters by the way! Micro Aviation Services reported that the aircraft had the words 'Chill Out' on the nose, but since no photographs seem to exist that show this, it couldn't be reproduced.
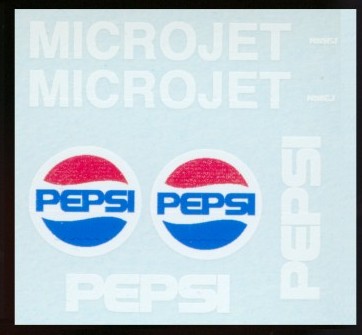
The resulting model can be seen below. Tony used the kit-supplied stand in a creative way to display the model in a flying attitude with the gear up.

Tony also kindly provided fantastic artwork of the 'Coors Light Silver Bullet' BD-5J N21AP as flown by Bob Bishop. IPMS Belgium had an article about this aircraft in their magazine KIT (issue 81).

Additional information
Some more information about the BD-5 was found in various issues of 'Jane's all the world's aircraft'. An interesting cross-section drawing was published in the 1975/76 issue. From this drawing I concluded that the seat of the LS kit should be more reclined.
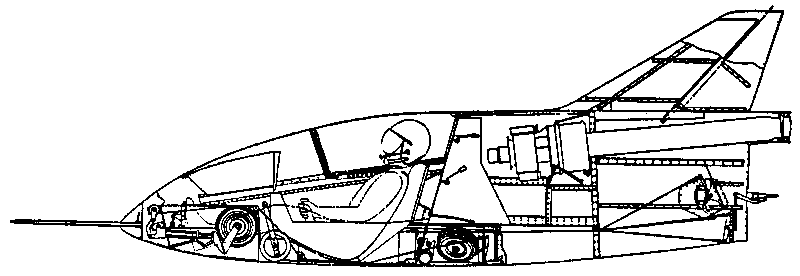
A three-view drawing of the BD-5A and BD-5B was published in the 1973/74 issue. Length minus pitot tube is 3.78 meters. The wing planforms are probably not correct. The A and B wings have the same ribsm but with a different pitch. The tip chord of the A and B wings is identical, and the drawing does not show this correctly.

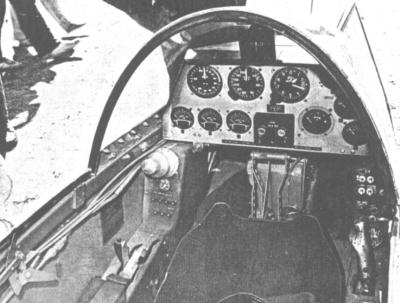
An interesting cockpit picture, taken from the TAB book "Complete guide to cockpits". It shows the instrument panel, the nose wheel well, the seat, the side consoles and the side stick. Note that the instrument panel lay-out varies from builder to builder, as can be seen on the BD-5 web site.
Links
Links to all web pages I know of that show the LS / Arii / Micro-Ace BD-5 kit:
Links to web pages showing BD-5 modeling (also RC):
And lastly some links to references:
Return to models page


