Hasegawa 1/72 Lockheed TF-104G Starfighter


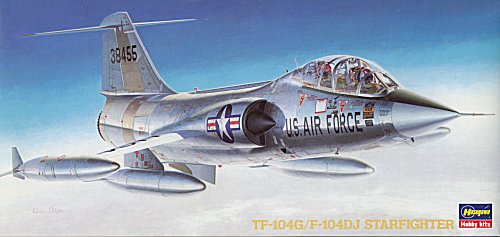
I love the 104, and that meant that the Hasegawa kits are irresistible. I have bought two TF-104G's so far. One is planned to become a Turkish TF-104G that I saw at an air show. The aircraft was in South-East Asia camouflage, very weathered, and carried a mixed set of tanks that were formerly German and Dutch, judging from the colors. The other model will become a Puerto Rico ANG F-104D in storage at Davis-Monthan. So far I only worked on the cockpit and fuselage. And after learning how to design Alps decals, I made a decal set required for this aircraft.


Construction

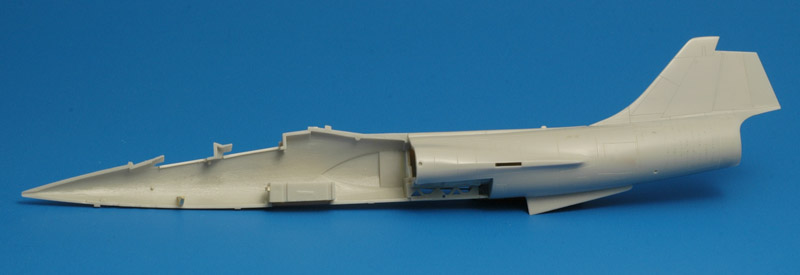
The first photo shows my way of dealing with Hasegawa's four-part fuselage. Hasegawa suggests assembling the front and rear fuselages separately, and butt-joining them later. This would be fine, if not that the butt-join is a bit vague, and it's easy to bond them at a wrong angle. And I want to keep the subtle banana shape of a 104.

Therefore I decided to join the right fuselage halves on a Verlinden scale drawing. This leaves a very weak joint, and I added some pieces of plastic card to make it a little more stable. Then I added the left rear fuselage half, leaving off the left front fuselage for the moment. The only problem of this assembly sequence is that the main landing gear cannot be sandwiched between the fuselage parts, and a small piece of the keel beam has to be cut away.
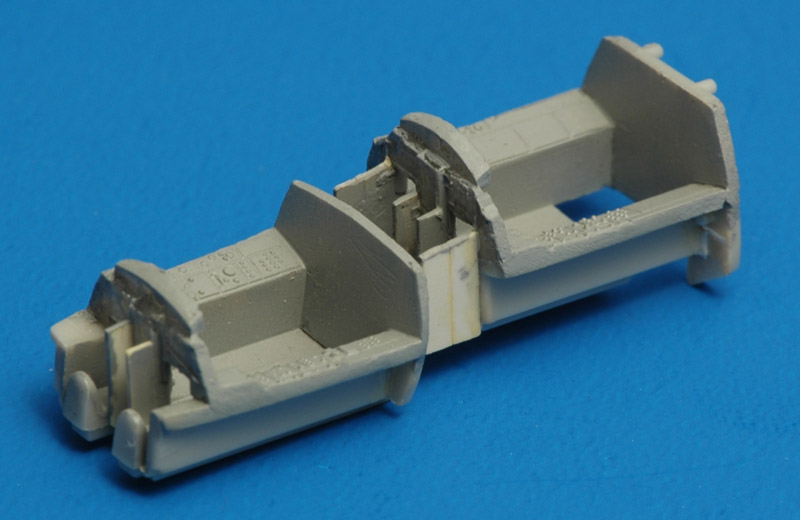
Next job is cockpit installation. The photo shows the assembled, modified and base-coated Hasegawa parts. A small but important modification is that the tops of both instrument panels need to be chamfered to fit under the coaming. The kit parts are chamfered the wrong way. I added a few pieces of plastic card to avoid ugly see-throughs. The lower right edge of the rear bulkhead was cut away, in order to make installation around the nose gear bay possible (if you know where to look, you can see it).
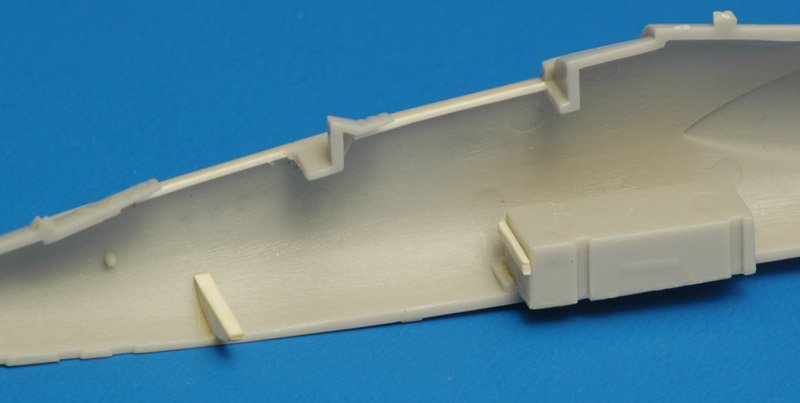
The fuselage halves were modified slightly before installation of the cockpit tub. The tub's position is rather vague, and therefore I added the nose landing gear bay first, since the tub rests on it. A small strip on the front side controls the vertical position of the aft end. Under the front cockpit I installed a small 'half moon' shaped piece of plastic card. I fine-tuned the vertical position by adding thin pieces of card. I also added a top longeron on the sides of the fuselage, made from plastic strip.
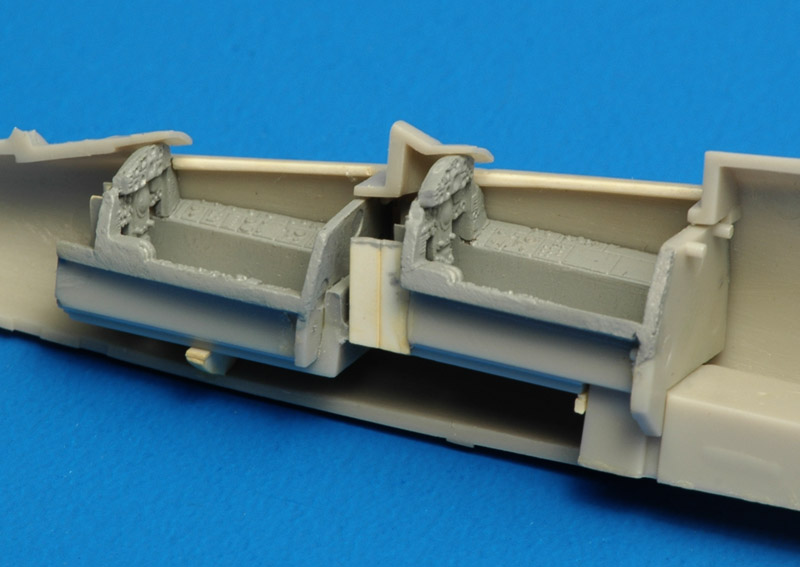
The cockpit tub now clicks in place, and can be removed again for detail work. To make the tub fit perfectly against the fuselage sides, I smeared Tamiya putty on the edges of the side consoles, waiting a while for it to dry partially, and assembled the front fuselage. The excess putty is then pushed away, and is cut off after disassembly. To be honest, I would use Milliput or Apoxie for such a job now. Also visible in this photo (but again you have to look for it) is small modification to the glare shields of both cockpits. They are open at the sides on the real thing, but Hasegawa moulded them closed. A simple saw-cut solved it. The photo also shows how nicely the tub is moulded by Hasegawa. I hope my painting skills will be sufficient to do it justice.
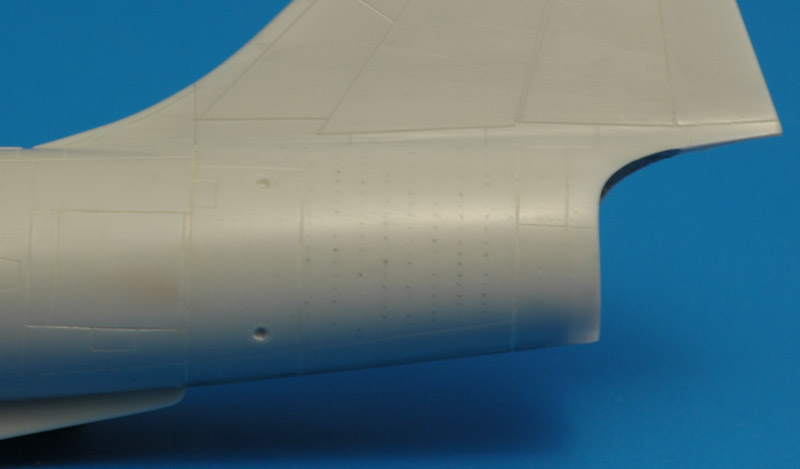
Then a part of the kit that I don't like at all. I'm talking about the stupid rivets on the rear fuselage. I really don't know where Hasegawa got the idea to do that. Of course the 104 is flush riveted there, as on the whole exterior, and some 'rivets' are actually spot welds. But I'm lucky that I'm not building their 1/48 104, which is even worse!

Anecdote: I spotted a 1/48 F-104 model at an IPMS meeting around 2000, and I was quite disgusted by its quality. The riveting on the fuselage and wings was horrible. I wondered whether it was some old stinking Revell model. Then someone told me it was the new Hasegawa kit. Puke!!! But I'm wandering off.

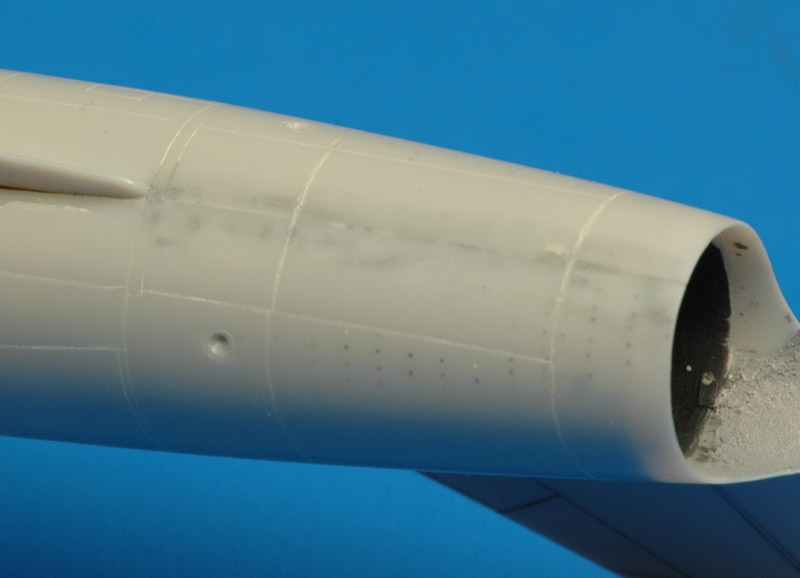
The rivets had to go. Filling these little bastards isn't easy at all. I tried Tamiya putty, but it shrinks and creates new but shallow rivets. Milliput is too dry to smear it into the small holes. In the end I used CA glue. All the sanding involved in this process had damaged the panel lines a little too, so some engraving was in order. Thank you Hasegawa. Not visible in the photo, but present, is a nasty shrink problem all around the fuselage, right through the speed brakes. Quite difficult to get rid off. It is caused by a ring inside the fuselage parts. Bad engineering by Hasegawa.
More problems on the rear fuselage. Behind the ventral fin, the fit of the fuselage halves is definitely bad. I think the right half is misshapen, it has a dent there. The fit ahead of the fin is also not perfect.


Decals

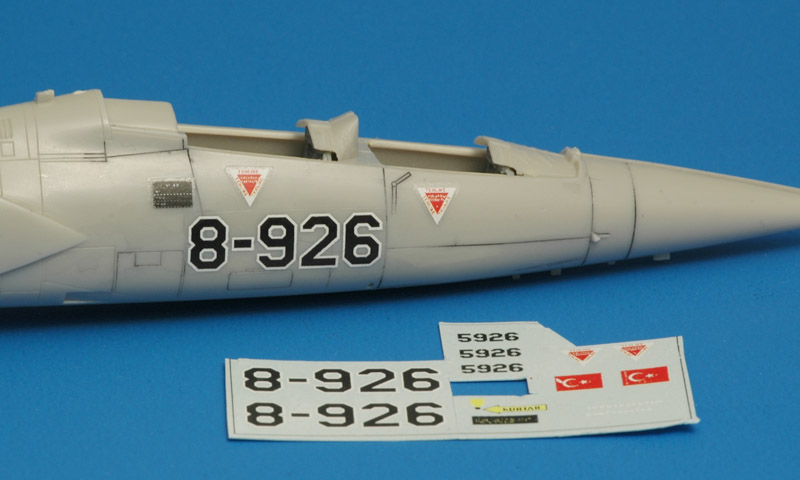
Working from my slides of 5926/8-926 of 181 Filo / 8 AHU, I designed the following decals. The white edging on the code number '8-926' was shifted on the real aircraft, but replicating that in the decal would probably only result in comments about badly printed decals, so I left that out with some regret. Starting with Amarillo USAF, the '2', '6' and '9' were all slightly changed. I checked the text of the smaller stencils with a Turkish NF-5B at an airshow, and I think most spelling errors have now been eliminated. Fellow modeler Kursad A. wrote to explain that 'TUGG TEZSEZEN' stands for 'Tuggeneral (Brigadier General) Tezsezen', back then the Balikesir base commander, and later the general manager of TUSAS Aerospace Industries. 'KD CVS TATAR' is short for 'Kidemli Cavus (Sergeant-Major) Tatar', likely the crew chief of the aircraft. Unfortunately I (again) made the mistake to design decals that are too small to read. For example, the smaller markings on the 'SILAH' panel are only 0.14 mm high. The larger 'SILAH' marking is 0.31 mm, which is just readable. But at least the decals will look realistic I think.
Determining the sizes of markings from photos is always tricky, so I decided to do a test-fit of the decals on the bare plastic model. Apart from some minor problems, the markings agreed well with my photos. To see the panel lines better during decal placement, I used gouache paint as a temporary wash.


Links


Return to models page