Revell (Monogram) / Hasegawa 1/72 A-1E Skyraider
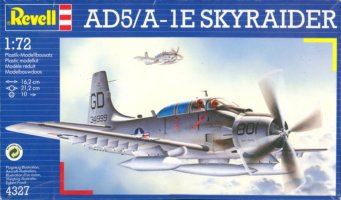
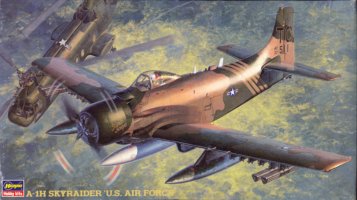
| I can't say I find the wide-body Skyraider beautiful, but somehow I really like the A-1E in a COIN-grey USAF livery. On the internet you can find several build articles of the A-1E in 1/48, kitbashing the very basic Matchbox A-1E with the Monogram or Tamiya A-1H. I wanted to do mine in 1/72, which also required serious kitbashing. The Monogram A-1E is old (1967) and not to today's standards, but when mixed with the Hasegawa 1/72 A-1H from 1996, something nice can be produced.
|
Differences between the single- and multiplace Skyraiders
I found the following dimensional changes in various references. It is possible that the references copied each others mistakes.
cockpit width: 9" extra (Squadron's Walk Around page 41, Warbird Tech page 53)
fuselage length: 23" extra (Squadron's In Action page 35, Osprey Skyraider page 98) or 9" extra (Squadron's Walk Around page 41, Warbird Tech page 53). None of these figures agree with the overall length figures quoted by Squadron's In Action, being 38' 10", 40' 1" and 39' 2" for the AD-2, 5 and 6.
engine location with respect to cockpit: 8" more forward (Squadron's In Action page 35, Osprey Skyraider page 98)
wing span: 50' is quoted by Squadron's In Action for all versions.
'Jane's All The World's Aircraft' has data on the AD-4 and AD-6 in various issues, but none on the AD-5, and thus doesn't offer any help.
Something looks wrong, but what?
Straight builds of the Monogram (Revell) model can be found on Meindert de Vreeze's site and on Modeling Madness: model by Scott Van Aken, model by Nicolai Plesberg and a preview by Frank Tauss. I assembled the kit with tape, and I did not like what I saw. Something was quite wrong with the model, but I could not point out where things went wrong. The overall dimensions are off (the fuselage should be longer and wider than that of the single-seat version), but the shape wasn't correct either. I tried really hard to find a good drawing of the A-1E, but all I have seen so far are not correct. I later saw two built-up models, and they too looked wrong, too skinny in a strange way. I put the model back in the box for a better analysis later.
In the mean time the Hasegawa A-1H/J was issued and I bought two, one for a straight A-1H build, and one for kitbashing with the Monogram kit. I planned to use at least the wing of the Hasegawa kit. When I held it to the Monogram fuselage, the combination still looked as wrong as before. Lots of looking and comparing later I found the fault of the fuselage: the wing's incidence angle is wrong. It attaches at about 0 degrees angle of attack, whereas it should have about 3 degrees. This moves the trailing edge down considerably, and thus a deeper fuselage is required. Finally I had a grip on the kit's shape problems! The engine cowling is another part of the problem: it's slightly undersize and tapers too much. Replacement with the Hasegawa nose seemed the best solution. The conversion shown below does not tackle the problem of the incorrect overall dimensions. I will leave that for someone else.
Dimensional confusion
In August 2003, Lance Braman published his Hyperscale 1/72 AD-5 article. Based on drawings, he reasoned that the distance between the engine and rudder post had remained constant during the redesign from AD-4 to AD-5, to keep the fuselages as identical as possible. That makes very good sense to me, and it gave him the required fuselage extension. He also found that the *whole* rear fuselage was missing about 4 millimeters in depth, and not just the section behind the wing's trailing edge, like I modified mine. He cleverly combined the Hasegawa A-1H fuselage with parts the Monogram fuselage to produce a correct AD-5 / A-1E fuselage. Overall this is the best attempt at producing a correct 1/72 A-1E so far! I don't agree with one detail however: the oil cooler outlet on the lower forward fuselage should have been filled.
Since 2003, kitbashing the 1/72 Hasegawa and Monogram Skyraiders has become more popular. Will Alcott wrote an article about his very pretty Monogram/Hasegawa EA-1F in the February 2005 issue of Model Aircraft Monthly, and Carl Armelin published a how-to article on the IPMS-USA site, also in 2005. One remark on Carl's article: I don't agree about the A-1E never having armor.
The best analysis of the A-1E / AD-5 dimensions and shape is presented in The Widebody Skyraider Redux, posted in 2014 on Tommy Thomason's TailSpin Topics blog. It is an addendum to The Widebody Skyraider from 2009.
Only in 2016 I found the dimensions of all Skyraider versions, when I came across Ryan Crierie's 'Standard Aircraft Characteristics' webpage with hundreds of official documents with the specifications of Air Force and Navy aircraft. Here I found the following data:
AD-4: length 38' 10 1/2" with the longitudinal axis horizontal and span 50' 1/4". That makes 11849 mm 15246 mm, 164.6 and 211.8 mm in 1/72 scale
AD-5 / A-1E: length 40.0' with the longitudinal axis horizontal, span 50.0'. That makes 12192 mm and 15249 mm, 169.3 mm and 211.8 mm in 1/72 scale
AD-6/7 / A-1H/J: length 38.9' with the longitudinal axis horizontal, span 50.0'. That makes 11857 mm and 15249 mm, 164.7 mm and 211.8 mm in 1/72 scale
| 
|
Therefore the A-1E is 4.6 mm longer than the A-1H/J in 1/72 scale. I measured my models without the engine and propeller installed, and found 160 mm for my A-1E and 161 mm for the Hasegawa A-1H/J. Therefore it appears that my A-1E is 5-6 mm too short.
A resin conversion set at last (2005)
Late 2005, RVHP from the Czech Republic issued a series of AD-5 / A-1E resin conversion sets:
The set for a USAF A-1E consists of two fuselage halves and some 15 resin cockpit parts, rudder, wheel wells, a vacform canopy, and decals for 602SOS / 56SOW (1969) and 4407CCTS / 1SOW (1966) aircraft. With a price of 30+ Euros they don't come cheap. Internet Modeler has a review of set 72136. I briefly checked one of the RVHP sets in the box. The castings looked good, the vac canopy appeared to be very clear, but the decal sheet looked rather simple. I was warned that the fuselage castings were rather thin and should be handled and assembled with care. Two small errors that I noted was the steps and oil cooler outlet were merely engraved on the side of the fuselage, instead of recessed.
In 2012 or 2013, RVHP stopped production altogether. Fortunately, production was be resumed late 2014, and a new website was opened. In August 2015, the AD-5 / A-1E kits were announced to be in production again, and in October I saw a big stack at the Aviation MegaStore.
Plastic models at last (2014+)
In 2014, the first CAD screen shots of a new Special Hobby model (catalog SH72164) were released on Modelforum.cz. The model was announced as a future issue in the MPM 2007 catalog. More photos can be seen on Photobucket. However, it seems this project did not (yet) proceed beyond the CAD phase. In 2020 it was announced again.
In 2017, Ukrop Models / Skale Wings / Scale Wings from Ukraine issued a 1/72 plastic injection model of the AD-5W (catalog number SW-VS001), see Britmodeller. Reviews on Tailspin Topics by Tommy H. Thomason. and IPMS Germany by Volker Helms.
Construction
| When I finally figured out how to modify the fuselage, I started packing the wing cut-out with strips of 1 mm card, with a strip behind them to act as a stop for the wing. Still lacking a good drawing, I had to do this whilst comparing the results with photos. I stopped after 4 mm of packing at the trailing edge. Next, I added a lot of Milliput from the packers towards the rear of the fuselage, and since the wing had moved so much down, I also added Milliput near the wing root. The transplanted Hasegawa nose determined the packing at the leading edge. To make the wing meet with the new nose, I had to add 2 mm card on the front end of the wing cut-out.
| 
|
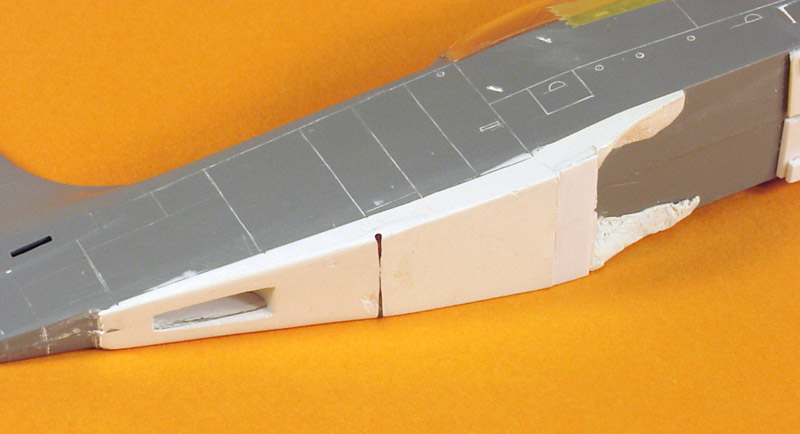
| Next I made the second iteration of the lower rear fuselage modification. I discovered a slight kink in the lower contour of the rear fuselage. To achieve it, I glued a piece of rod on the existing Milliput, and then added more Milliput. The tail gear bay is a box built from card that was glued in the fuselage. I used a Tamiya 1/48 kit as a pattern.
I will use the complete Hasegawa wing for my kitbash. It fits without modification on the Monogram fuselage - even the cutout for the fuselage is wide enough. That suggests that the extra 9" (3.2 mm in 1/72 scale) was ignored in the Monogram kit. On the other hand: nor the original Monogram canopy, nor the replacement vacform Falcon canopy would fit if the fuselage was widened.
|
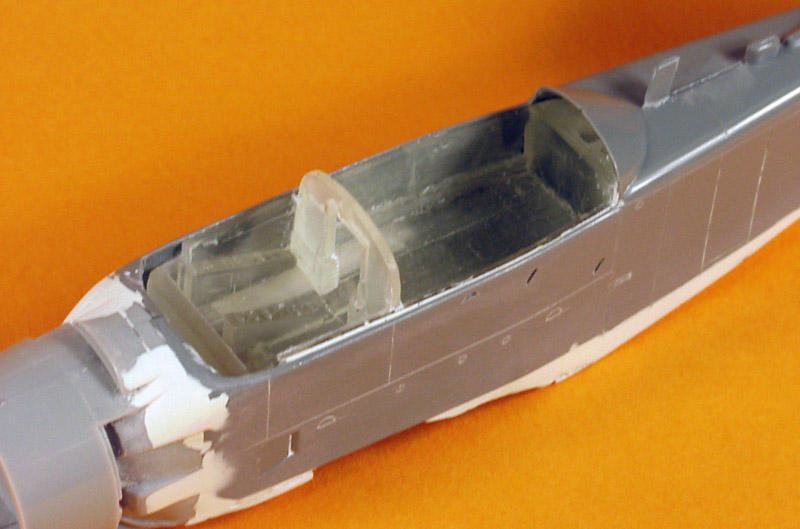
| In the mean time I had also obtained a Cobra Company A-1E interior set. As usual with resin cockpit sets, it did not fit inside an unmodified fuselage. From measurements of the kit exterior width and the tub interior width, I knew that I had to thin both the kit parts and the resin tub very considerable. Because the resin set was quite costly, I decided to cast a copy of the tub and the bulkhead (Cobra Company rest assured, I did not copy the other parts). Now I could sand away without much risk, also because my casting was from a tough epoxy instead of rather delicate polyurethane. Positioning the tub in the two fuselage halves was not easy, due to a lack of positioning aids, but I managed. The bulkhead was a very loose fit in the tub, and I had to use card on the sides to make it fit snugly.
| 
|
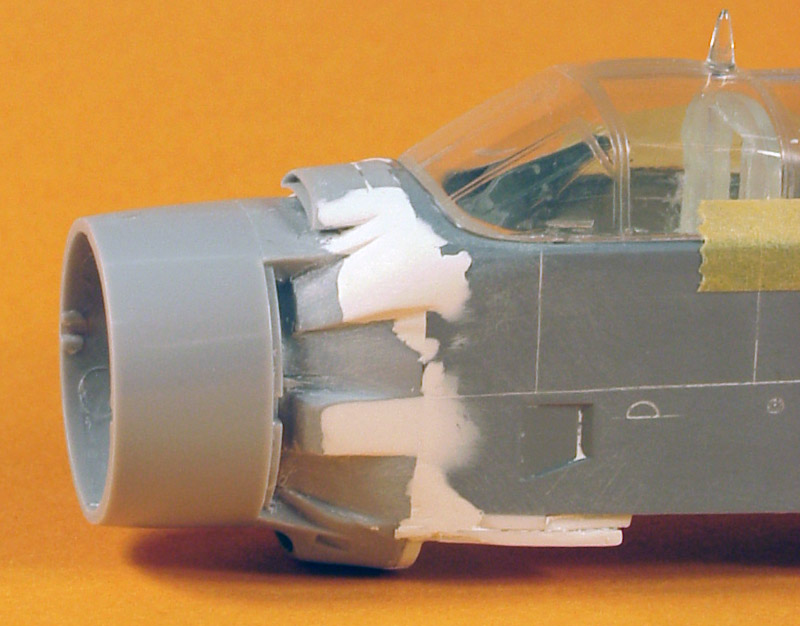
| The transplanted Hasegawa nose initially fitted horribly, largely due to the square cross-section of the A-1E fuselage and the rounded shape of the A-1H nose. But after lots of sanding, Milliputting and cutting it started to look natural. The exhausts have been removed to allow for the modifications, and will be replaced later. The carburetor intake ahead of the windscreen has been added and faired in with more Milliput. The shapes you see are very much like those on the real aircraft; it seems that the kit mating worked well.
|
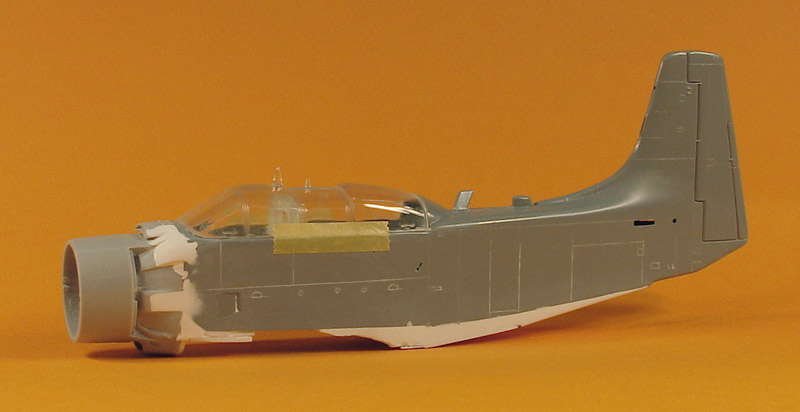
Overall view of the modifications so far. I also started scribing the whole fuselage, generally using the raised panel lines as a guide. The white Milliput sanding dust makes them visible on the grey plastic. The rather thick Monogram canopy is positioned on the model. That canopy is another problem to solve, but my friend Eric Verschuur came to the rescue with a vac canopy from a Falcon USN canopy set.
| 
|
|
The slots for the horizontal tails have to move down 2 mm to bring them to the same position with respect to the top fuselage longerons, as on the Hasegawa kit. And when I did move down the slots for the horizontals, it became clear that still something was wrong with the rear fuselage. The horizontals were much too close to the lower edge of the fuselage. It was clear that Lance Braman's fuselage modification was right. Out came the plastic card and Milliput again, and the lower fuselage modification was extended right up to the rudder. The rudder's lower edge was moved down some 2 millimeters.
|
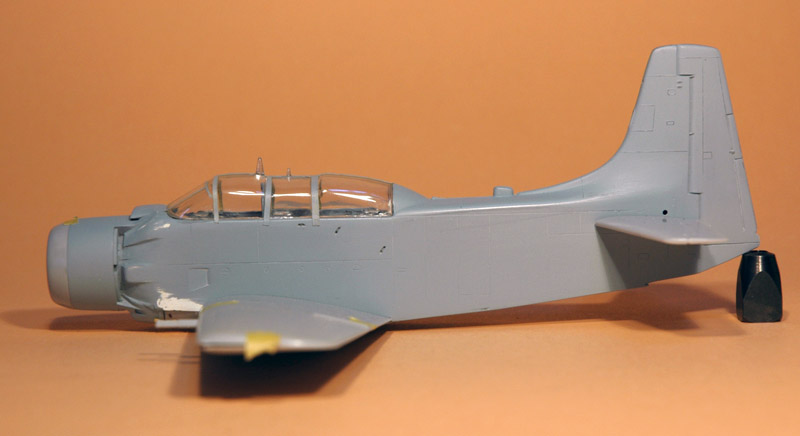
I painted the fuselage light gray at a later point, in order to better judge the new shape. First impression was that it looked quite good. Second impression was that I made the fuselage slightly too high, and I decided to remove a millimeter from the lower fuselage, and reduce the kink behind the speedbrake. I later glued 0.3 mm plastic card on the Milliput, to allow easier scribing.
After another coat of light gray and adding the canopy fitted with strips of gray tape, I again compared my model with photos (especially in-flight photos). My conclusion was that I had captured the A-1E fuselage shape pretty good now.
The only thing missing now is a fuselage extension. I am still doubting whether or not to do that. It will mean a lot of additional work, but it won't be very visible. Another modification that Lance suggested is to give the carburetor intake some slope towards the windscreen. I also noted that the carburetor intake is too short.
| 
|
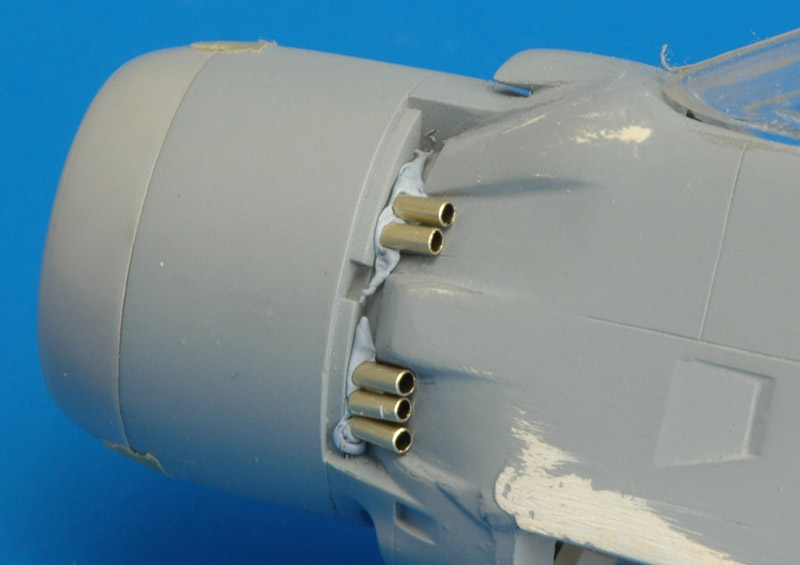
| Fast forward a couple of years, with a new background color. With our IPMS-NL Regio Zuid-Holland modeling club, we bought Albion brass microtubing in all sizes available. I used the 1.2 mm size to make a dummy installation of the engine exhaust tubes on my model. I noted from the photo that the knife engravings to snap the tube are sort-of visible, so I will sand the tube ends the next time.
|
In this Hyperscale thread there is some debate whether the dive brake was deleted on Vietnam A-1Es. I've seen A-1s without the dive brake, so it's definitely a possibility. To be sorted out.
When I start working on the wings, this post on wing antennas might be useful: Some AD questions
To be continued
Photos
I started this project in the early days of the internet. Therefore I had to work mainly with a small set of photos of USAF wide-body A-1E Skyraiders in Vietnam, from magazines, five in total. For the sake of history I'm showing them here.
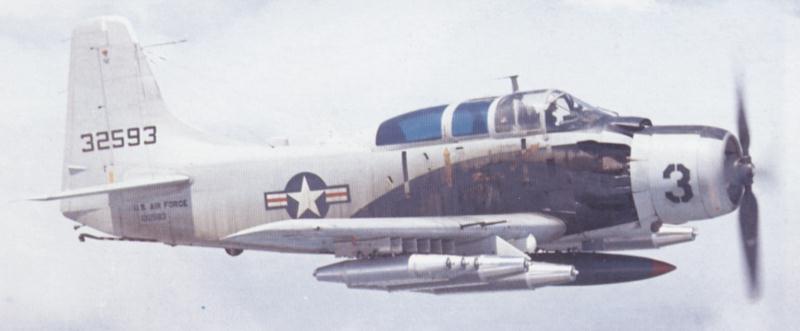
A-1E 132593 of the 1st Air Commando Sqaudron in 1964. It carries a load of ten napalm tanks. I think the napalm tanks are BLU-1 (750 lbs class) and BLU-10 (250 lbs class) types.
Source: USAF photo published in Air Enthusiast 36
| 
|
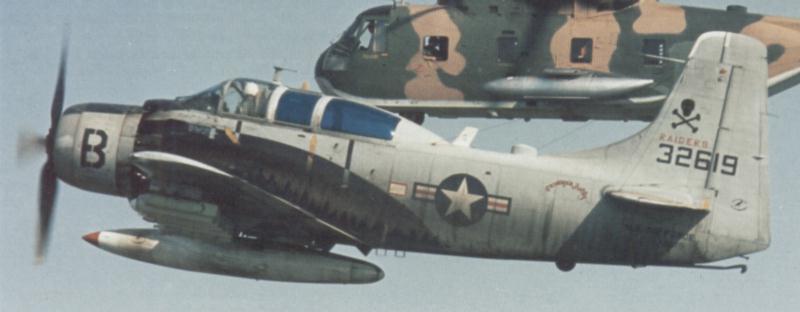
| A-1E 132619 of the 1st Air Commando Wing. Note the skull and bones and 'Raiders' on the tail. I would be curious to know what the text in front of the horizontal tail reads. The close up shows 'Carolyn's Folly'.
Source: USAF photo published in Air Enthusiast 36
|
A-1E 132668 of 602 Fighter Squadron (Commando) after a wheels-up landing at Bien Hoa. Note the skull and bones and 'Raiders' on the tail.
Source: USAF photo published in FlyPast, March 1989 issue
| 
|
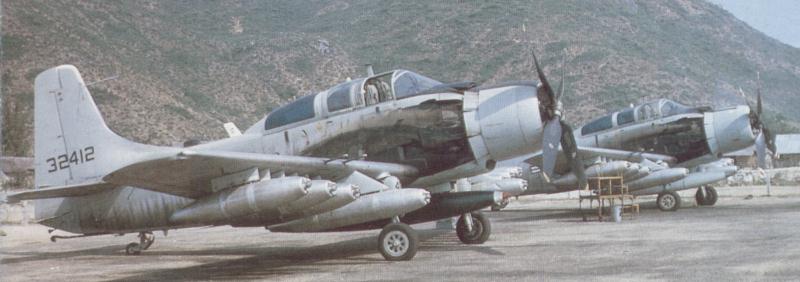
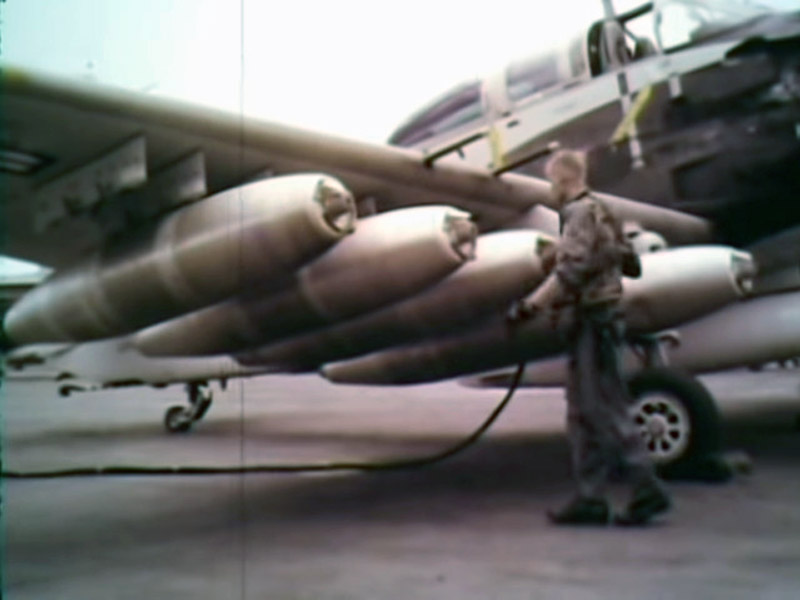
| A-1E 132412 and another one at Qui Nohn in April 1966, while belonging to 602 Fighter Squadron (Commando). The warload consist of eight napalm tanks: the long ones are 750 lb M116s, the short ones are BLU-11, a shorter, 500 lbs version of the M116.
Source: Perry Gower photo published in Air Enthusiast 36
|
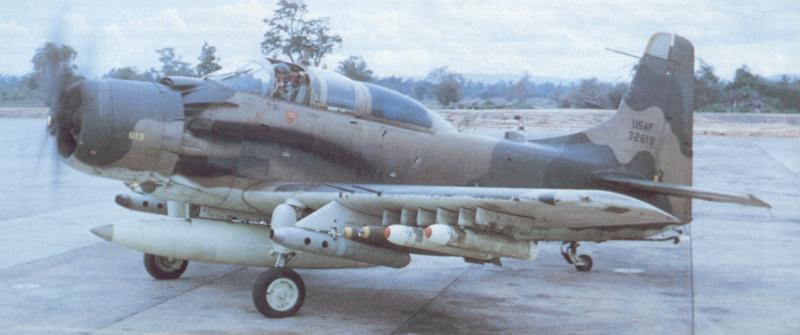
A-1E 132619 of 602 Fighter Squadron (Commando) taxying out at Udorn, Thailand, in 1967. The warload consists of SUU-11 0.30" miniguns, Mk 82 bombs and CBU-38 cluster bombs. The pilot is giving the finger to the photographer.
Source: Robert L. Russell photo published in Air Enthusiast 36
| 
|
Be sure to visit Byron Hukee's The Official A-1 Skyraider Site ! You will not be disappointed. If you want to see some unique A-1E photos and read about the Forward Air Controlers calling them in, visit Robin Michael's site (via the Wayback Machine).
Colors
The early Vietnam war Skyraiders were COIN gray overall, FS 36473, with a large part of the front fuselage painted black to hide the exhaust stains. A few early ones may have had a white underside, Navy style.
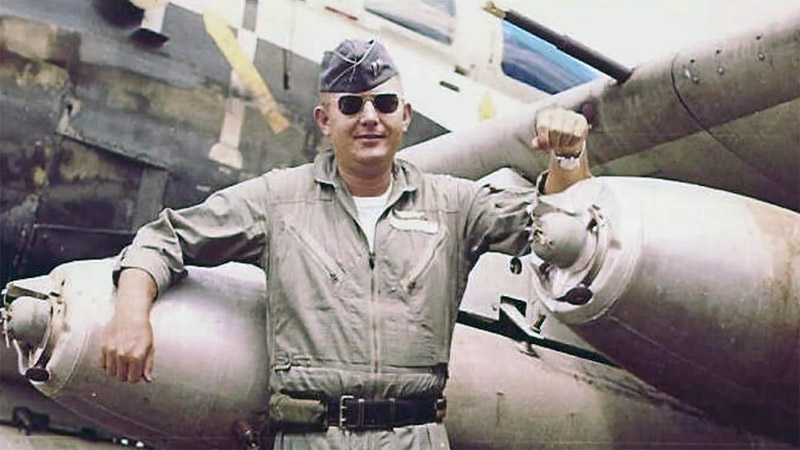
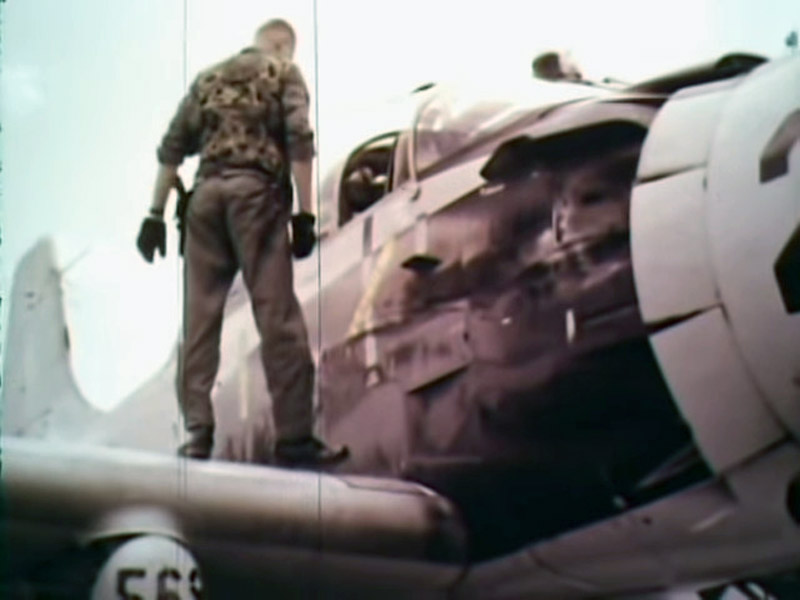
In this screenshot from Youtube video John Larrison A 1 Skyraider Pilot Interview, you can see that the leading edge is painted in a darker color.
| 
|
At another point in the last video, you can see the upper demarcation: Douglas A-1E Skyraider Vietnam 1965, narrated by Lt Colonel Thomas A. Dwelle.
The most likely explanation is the use of 3M Corogard, as a rain erosion resistant coating. It is used on many Navy aircraft, as explained on this Tailhook Topics page. Corogard is clear epoxy mixed with aluminum powder, that looks close to silver when new, to medium metallic gray or even light gray when weathered.
| 
|
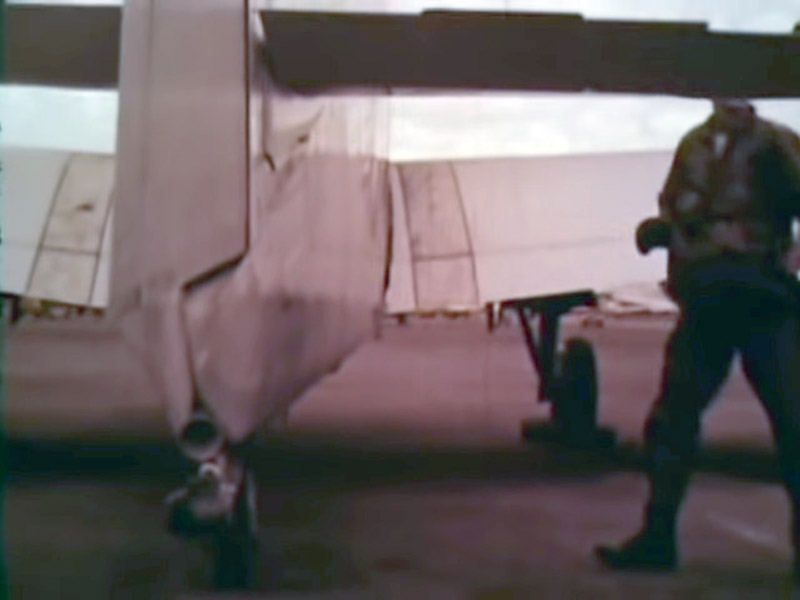
| The wing walkways visible on either side in the above videos are also of note. They extend over the flaps, which is maybe not very common.
| 
|
Markings and decals
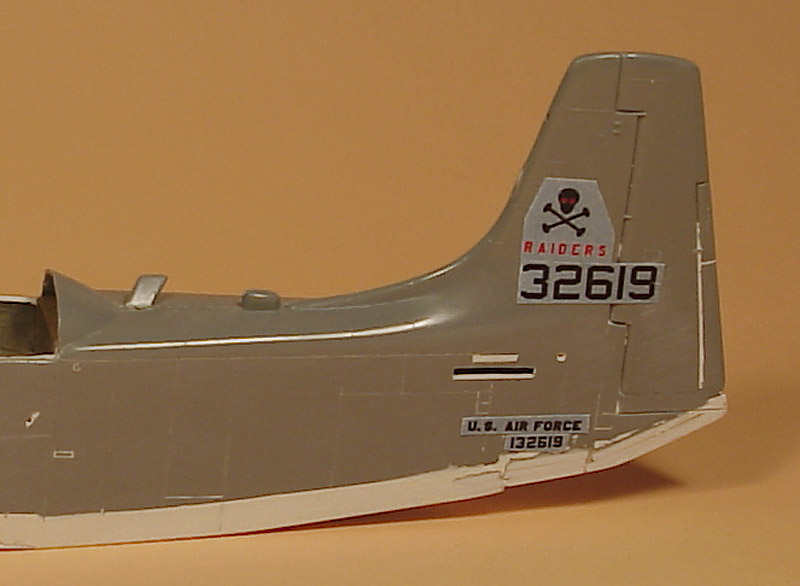
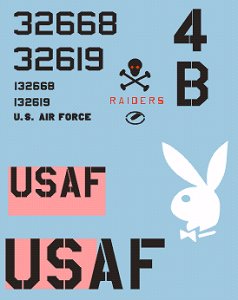
There used to be no decals for COIN-gray A-1E's in 1/72 scale, except for the decals that come with the original Monogram kit. Early 2003, I started to learn making decal artwork in CorelDraw, for subsequent Alps printing (to be outsourced). I haven't decided completely which A-1E I want to portray, so I made decal artwork for two Skyraiders. Shown here are decals for 132668/4 that belly-landed at Bien Hoa, and 132619/B, as seen flying alongside a CH-3 in a photo.
The design of these decals was interesting. It turned out that the large and small serials are in a US Navy font (Longbeach), which I made just a little fatter. The small 'U.S. AIR FORCE' under the tail is in a fat stencil version of Amarillo USAF font. The skull and bones were drawn over a scan of a photo, and 'RAIDERS' is in Amarillo again, with increased pitch (kerning). I am still fighting with the size of the USAF logos for the wings, and recently I noted a Playboy bunny logo on the prop blades of some A-1's. I don't know which unit used them, but I already grabbed the logo from the Russian logo site. Three-digit numbers for the MLG doors are missing from my artwork.
| 
|
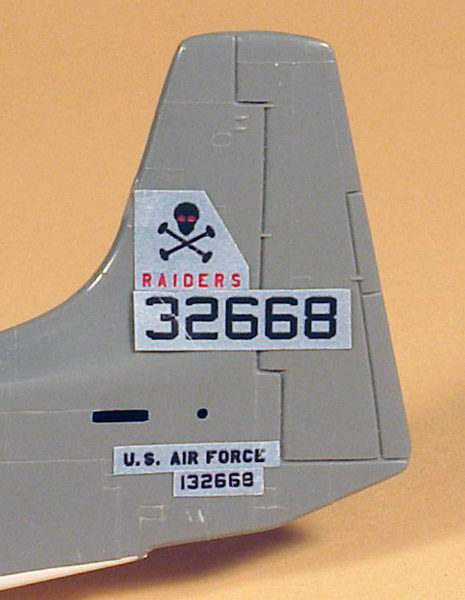
| I applied sticker versions of my decals to the model, to visually check the dimensions. First impressions are that the large serial may be a tad too large, and the skull and bones a little too small. Note that the print quality is that of a 300 dpi inkjet, and not comparable with the final Alps decals.
|
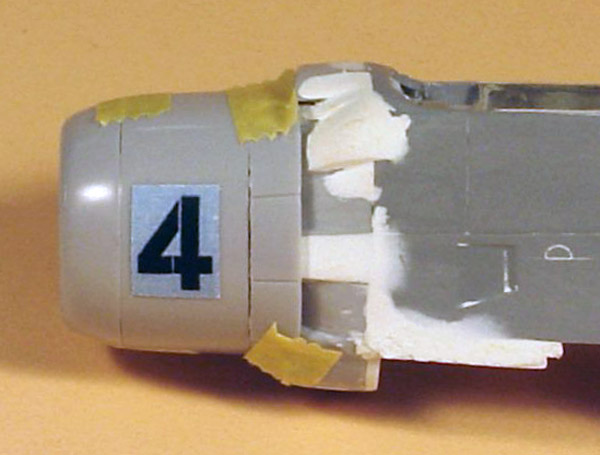
| Most A-1E's had a large number or letter painted on the cowling. I believe the '4' started life as Amarillo, widened, and modified into a stencil version. The model also needs 'USAF' decals for the wings (working on them), and of course stars and bars, which I will take from a commercial decal sheet.
| 
|

| And these are the actual Alps-decals decals, custom printed by Tango Papa decals. I am very happy with the results. The only items missing are the 'RAIDERS' and skull markings, since these will be printed when I have more color decals to print.
|
In 2008 Mr. Jerry Ehnert Sr. kindly wrote me to reveal the story behind the skull & bones and the Playboy bunny. Unbelievable that this kind of information surfaces after 43 years! Mr Ehnert arrived at Bien Hoa in April 1965. Late 1965 the application of the skull & bones on aircraft started: "I'd been there five months when I went north to Qui Nhon, a small detachment, four aircraft. I and another guy came up with the skull & bones. The 'Raiders' lettering was done at home base we figure. Deal was we traded one aircraft every Sunday, incoming was our target. 132619/B by the Jolly Green copter [as seen in this photo] was the last one, we were told to stop by home base." The Playboy bunny marking was painted on one of the prop blades for a reason: "The bunny was done for maintenance reasons. Prop man had checks to do after each flight. Our perimeter was close so he done this to make the number one blade easy to locate at night. He got permission to continue." During this time the cowling markings were changed: "It was once 1, 2, 3, 4. For whatever reason they went to the Alpha-Bravo. These were the flights." Mr Ehnert confirmed the basic design of the skull and bones decal was correct, just eyes (possibly smaller), no mouth. The markings were applied with very basic tools: "We had stencil paper and a dull pocket knife." Thanks again to Mr. Jerry Ehnert Sr. for writing!
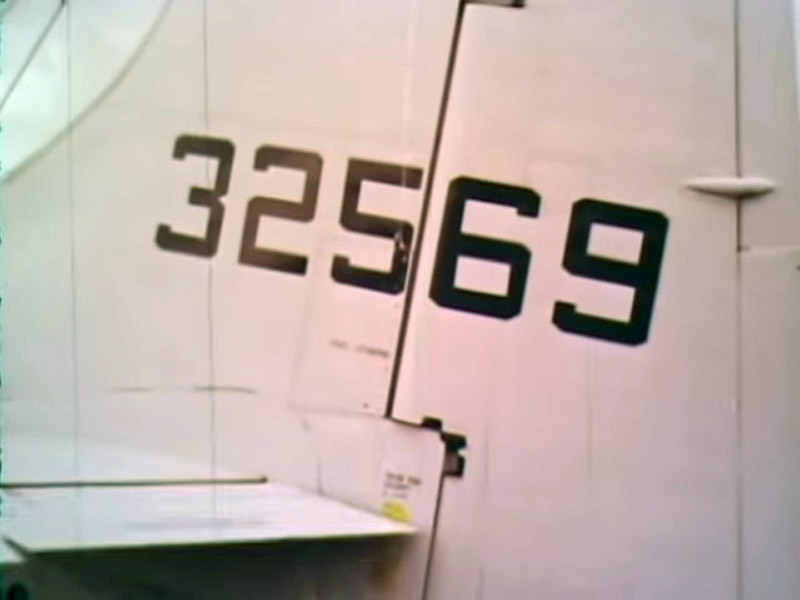
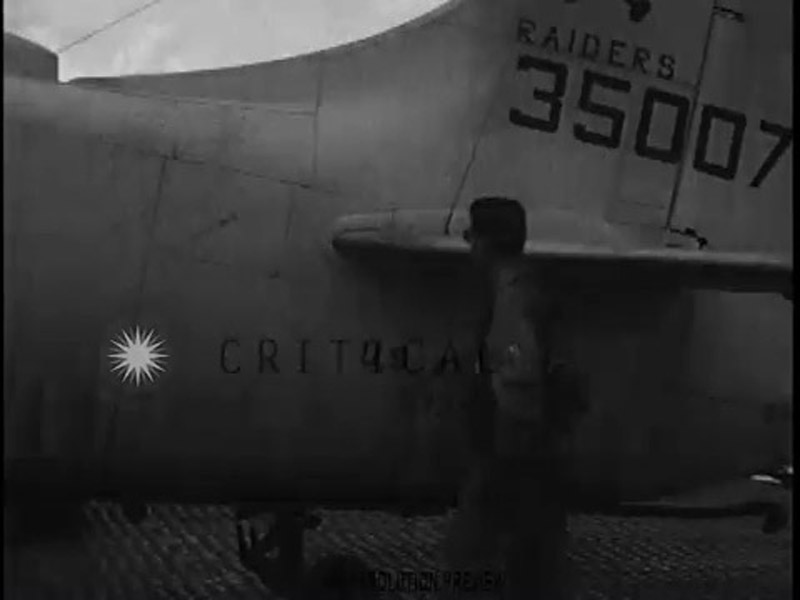
| In 2018 I saw a few interesting USAF films on Critical Past. It included a short view of the tail section of an A-1E, and I noted that the serial number 35007 was different from the US Navy font (that we call Longbeach nowadays). It looked like it had the same height-width ratio (6 to 4.5), stroke width and basic design, but the 30 degree cut-offs at the corners were absent. Instead I saw round corners.
| 
|
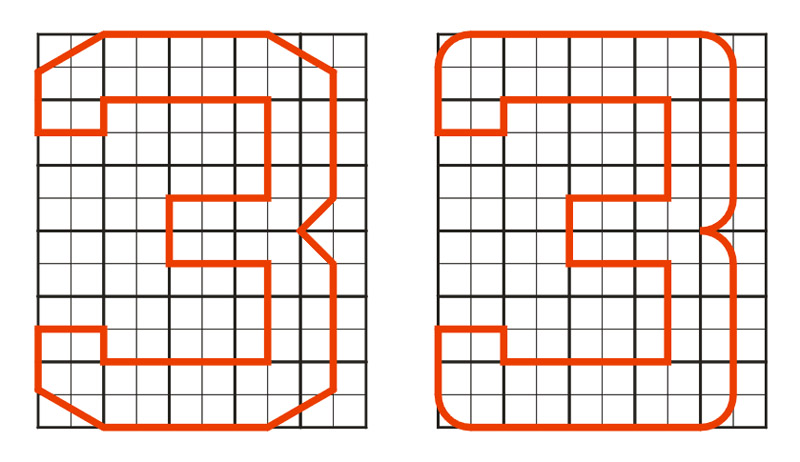
| I decided to try to draw it on the same grid that is used for the US Navy font. I used half the stroke width for the radius. Shown here is the number 3 of both designs.
|
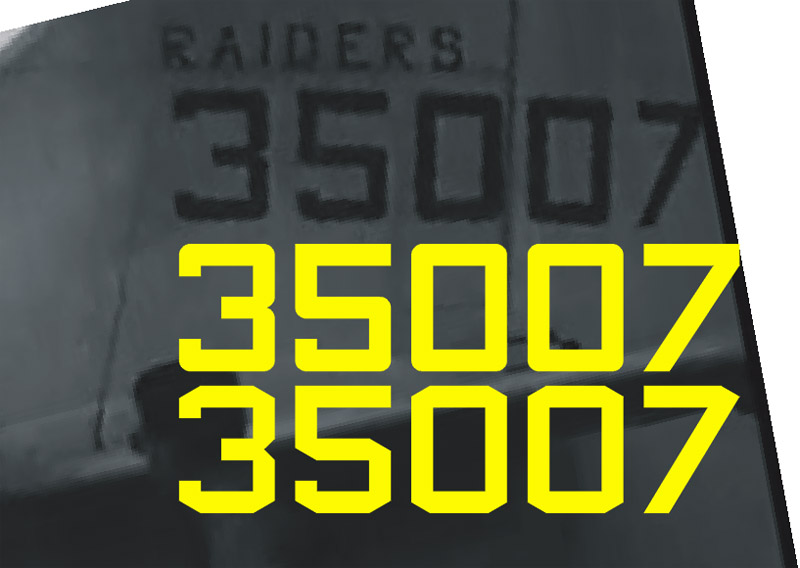
| I pasted both fonts on the photo, and saw that my 'new' font was very close, and a lot better than the US Navy font. I will therefore have to revise my old decal design.
| 
|
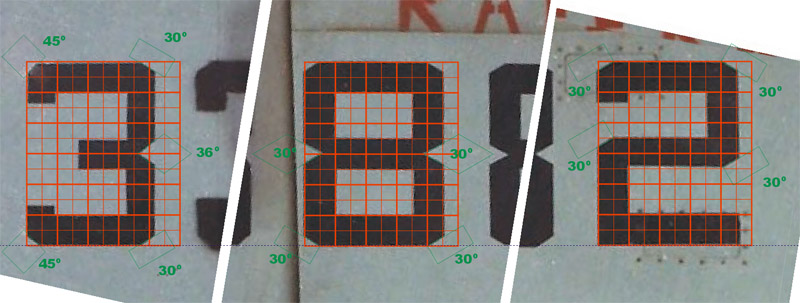
| Through a thread on ARC more information became available, in the form of a high-res photo of A-1E 33882 (52-133882). The '3' comes up a bit short on the 4.5 blocks length, but that could be the result of the rudder being deflected. The '8' and '2' conform pretty well to the 6 x 4.5 grid. However all corner cut-offs deviate from the standard because the are only half a stroke wide. On the '3', the corners on the left are 45 instead of 30 degrees, and the cut-out in the middle of the right side is a weird angle of roughly 36 degrees. My best explanation is that these numbers were done with masking tape instead of templates, and the work was done quickly, angles being judged by eye.
|
Decals update
Around 2010, or earlier, Wolfpak Decals 72-036 was issued, with decals for the A-1E of Bernard Fisher (serial number 32649). It is reviewed on Modeling Madness.
In 2016, Caracal Decals issued a A-1E / AD-5 Skyraider decal set (CD72053), with seven marking options, five of which are USAF aircraft
Propeller
The Hasegawa propeller has blades with a suspect shape. Solutions were discussed on the Tommy Thomason's TailSpin Topics blog.
Fuel tanks
All questions about fuel tanks used on the Skyraider are answered by the article Douglas Low-drag External Fuel Tanks on Tommy Thomason's TailSpin Topics blog. Here's a summary, with kit details.
The real 150 gallon tanks have a length of 179.36" and a diameter of 21.5". This translates to 63.3 x 7.6 mm in 1/72 scale. Attack Squadron issued a set of two (catalog number 72033), as did Freightdog (catalog number 72026).
The real 300 gallon tanks have a length 225.81" (199.62" bobbed version) and a diameter of diameter 26.5". This translates to 79.7 / 70.4 x 9.3 mm. The Hasegawa tanks measure 81.0 x 9.4 mm (with fins) and 70.5 x 9.5 mm (bobbed), Tsukuda measures 80.7 x 10.2 mm and Skale Wings are 80.5 x 9.3 mm. Based on the measurements, all tanks are therefore meant to be 300 gallon tanks. I haven't found 150 gallon tanks yet. In 2014, Attack Squadron from Poland issued set 72014 with three resin US Navy 300 gallon Douglas fuel tanks. Around 2020 it was reissued by Brengun.
Stores
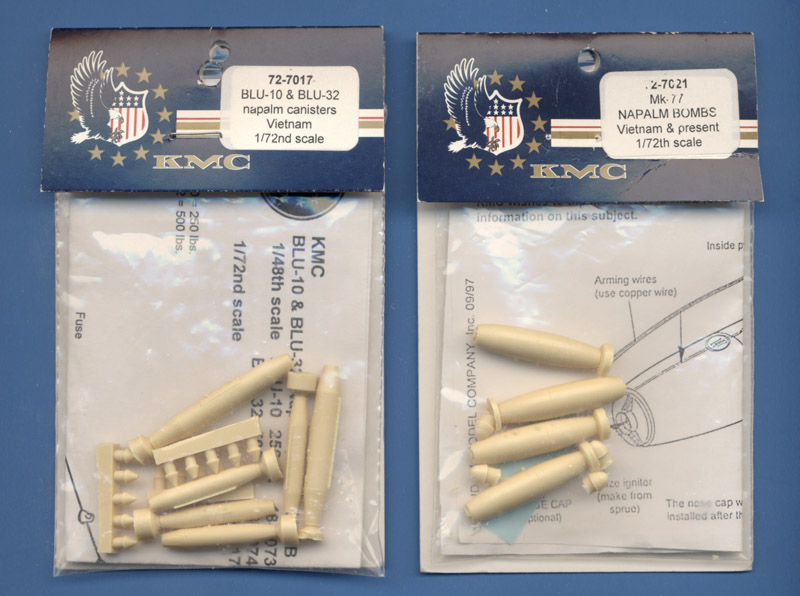
I may decide to build a napalm-loaded A-1E. When I started this project, the only napalm tanks offered in 1/72 were those by KMC, and I even did not know whether they were suitable for the A-1E. Nevertheless I bought both sets, 72-7017 (BLU-10 and BLU-32 cannisters), and 72-7021 (Mk 77 bombs). The sets are nicely detailed, but it appears that the molds were worn badly, and the parts are on the edge of being usable. It will be quite a job to assemble one perfect bomb from each set, and make my own copies of those.
Another source for napalm bombs is the Academy 1/72 A-37 kit.
The 750 lbs M116 and shorter 500 lbs BLU-11 with bare igniters, that can be seen in most early photos like in the Corogard discussion, are not availabe in any scale. I've designed them as 3D models, but printing them is on hold.
| 
|
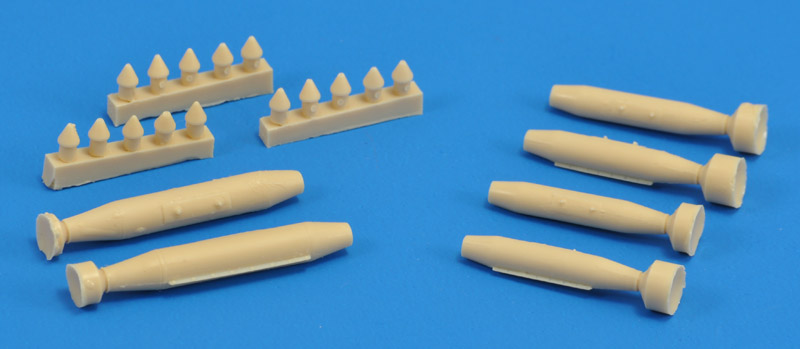
| The BLU-32 is the larger of the first set. According to manual TM9-1325-200 from 1966 the BLU-32 is a welded version of the BLU-23, factory filled with napalm-B. The BLU-23 in turn is a smaller version of the BLU-1. It's a 500 lbs class weapon, 15.75" diameter and 119" length, which makes 5.6 mm and 42.0 mm in 1/72 scale. I measured a length without end caps of 36.6 mm. The end caps are 3.1 mm each, making a theoretical 42.8 mm total. Diameter is 5.5 mm on average. I conclude that the dimensions are close to correct ones. The model is not symmetrical: the front section (I think!) is 6.8 mm, the other end is 7.6 mm long. I yet have to find a photo that shows the shape well enough. The same goes for the flange on the lower side - I'm not sure it should have that. No filler openings are present.
The BLU-10 is the smaller of the first set. The BLU-10 is a smaller version of the BLU-1. It's a 250 lbs class weapon, 12.5" diameter and 88" length, which makes 4.4 mm and 31.0 mm in 1/72 scale. The quoted length is probably with end caps installed, possibly these were left off on slower aircraft like the A-1. I measured a length without end caps of 26.0 mm. The end caps are 3.1 mm each, making a theoretical 32.2 mm total. Diameter is 4.6 mm on average. Again I conclude that the dimensions are close to correct ones. The model is not symmetrical: the front section (I think!) is 5.4 mm, the other end is 6.9 mm long. I yet have to find a photo that shows the shape well enough. The same goes for the flange on the lower side - I'm not sure it should have that. But the flange might be visible in WarbirdTech 13, page 60, if they are BLU-10s, that is. No filler openings are present.
|
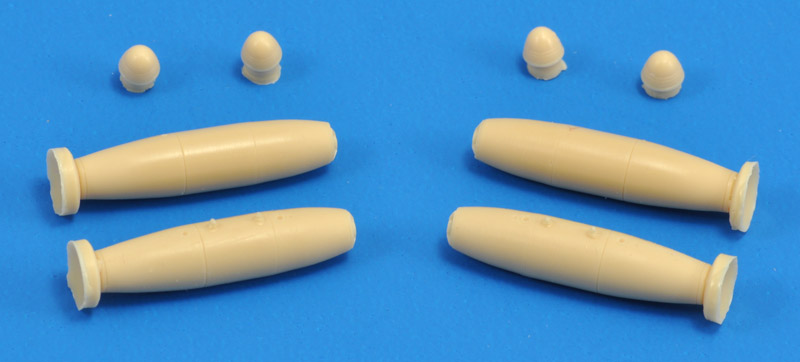
The label sticker simply says 'Mk-77 napalm bombs', but the instruction sheets specifies them as 'Mk-77 Mod.2'. US Navy manual OP-2216 'Aircraft Bombs, Fuzes, and Associated Components' from 1960 does not list a 'Mod 2' version of the Mk 77. The Mk 77 Mod 0 is a 750 lbs napalm bomb, that looks a lot like the USAF M116. The Mk 77 Mod 1 is a 500 lbs version. The Mod 2 is probably of a later date, and it is listed in later US Navy manuals, but I haven't found weight and dimensions.
The Mod 0 and Mod 1 versions could be fitted with a rounded nose cap and/or a conical tail cap. The KMC kit contains the former but lacks the latter. I measured a length without end caps of 29.0 mm and a diameter of 7.0 mm. By deleting the nose and tail caps of the drawing in OP-2216, I calcalute a 'bare' length of ~81" or 28.5 mm. OP-2216 quotes a diameter of 18.63" which translates to 6.6 mm. No filler openings are present.
| 
|
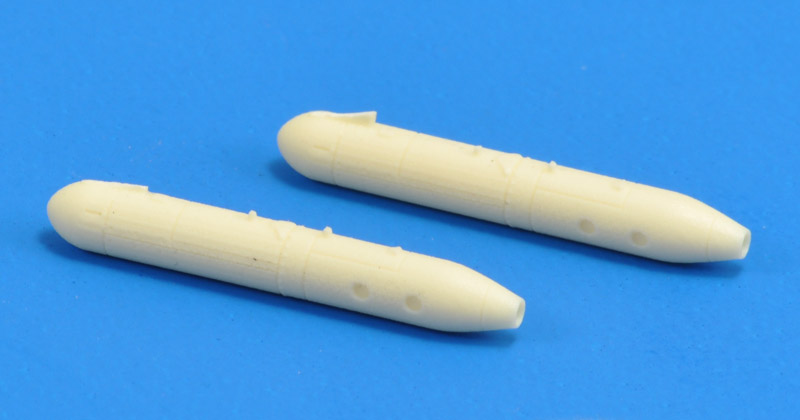
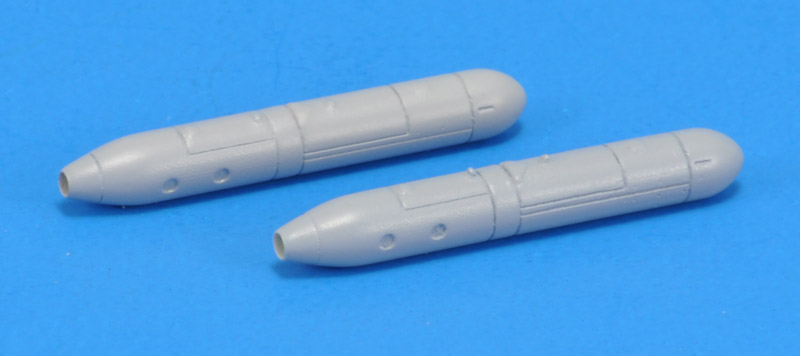
| A very common store on the USAF A-1 is the SUU-11 gun pod. In 2019 I bought the Air-Graphics SUU-11s (catalog number AC-104). They turned out to be 3D printed; the design looks great but the printing is quite coarse, with thick printing layers showing. I'm afraid that the required sanding will destroy the finer details. The trend to sell original 3D prints instead of resin cast parts is one that I don't like much.
The SUU-11 gun pod can also be found in the Special Hobby 1/72 AH-1G, or the Revell reissue of the same model (04956).
|
| I didn't have much faith in cleaning up the 3D printed parts, but I'll admit that they look excellent now. The parts were twice coated with Tamiya Fine Surface Primer and carefully sanded and rescribed, then finished in MRP paint. But all this work could have been avoided if the manufacturer had done his job.
| 
|
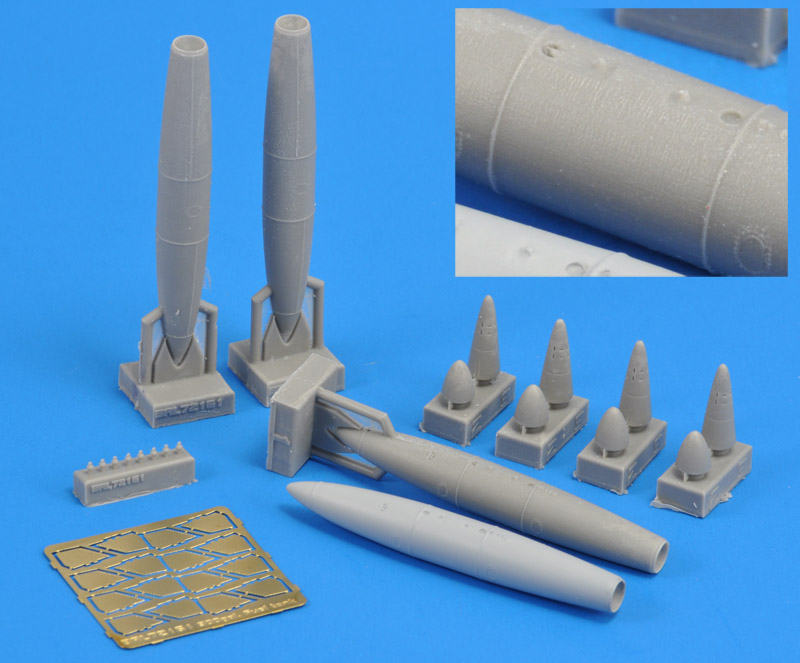
| Brengun issued a set of four Aero-1D shape 300 gallon tanks (catalog number 72161). The shape and details are really nice, but I really don't like that they cast a 3D printed master, with the layers still showing. It looks like a scaled burlap sack! At the front the first tank that I sanded laboriously and carefully, then sprayed with Mr Surfacer 1000.
|
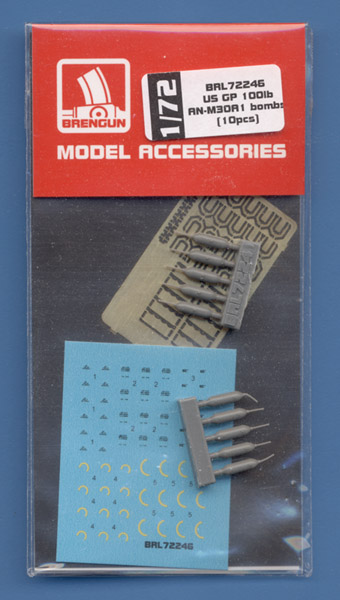
Another set by Brengun: AN-M30 100 lbs bombs, that I thought was another common store on the USAF A-1 in Vietnam. But that was the somewhat similar 100 lbs AN-M47, with the same shape and body diameter (8.1"), but increased length. The M30 had a 30" long bomb body, but I haven't found the bomb body length M47 yet. The M47 was often used as a white phosphorus 'smoke bomb' (e.g. Warbird Tech page 76, Osprey Air Combat p179), but it also existed in a napalm-filled version ('incendiary bomb'). Both used the same designations, either AN-M47A3 or AN-M47A4. Color codes indicated the filling. OP 2216 says the base color was blue-grey, with a mid-section 1" yellow band indicating WP, and a mid-section 1" purple band indicating napalm. Theater photos show a light greenish bomb body color (reportedly FS 34558), or very light gray (like FS 36622). The set is reviewed on IPMS-USA by Chris Smith.
I'm still looking for the even smaller bomb that was used in sticks of three with a metal strap around them (e.g. Warbird Tech page 88, Osprey Air Combat p179). Wayne Mutza's 'A-1 Skyraider in Vietnam' pages 25, 31 and 35 says it's the 20 pound AN-M41 fragmentation bomb, six of them forming an AN-M1A2/3/4 cluster. In 2023, a 3D printed 1/48 version was issued, see Hyperscale: Another new product here. 1/48 M41's mounted on M1 bombrack. Used on A-26's, Skyraiders. Maybe the rack is too small to do properly in 1/72 - M41 bomb diameter would be 1.2 mm, length 7.7 mm.
| 
|
Links
Return to models page


