Airfix 1/72 A-1H/J Skyraider
I can accurately pinpoint the moment of getting infected with Advanced Modelers Syndrome (AMS): it was when I started rebuilding the old Airfix A-1H/J into something more accurate. I think I was 15 years of age, and I spent the next few years fiddling with it. The inspiration came from a Modeldecal sheet, that my local hobby shop sold cheap. For a long time I used its tiny drawings as a guide for the modifications! Later I upgraded to a 'Skyraider in action' booklet, which was pretty much all that was available on the subject, in pre-internet days.
History overtook my modeling attempts when Hasegawa issued a much better model in 1996. I stopped work on the Airfix model, but the process of improving this old model was an excellent learning school. I'm still proud of the conversion work that I did. This page shows a comparison of the original and my modified model.
|
Construction
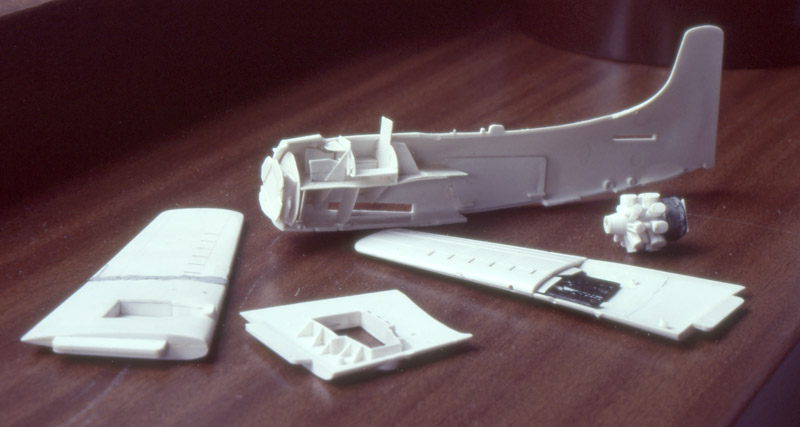
In those days, I had good photo equipment for aircraft spotting, but it wasn't really suited to model photography. I tried it a few times, but the results were disappointing. This is probably the only photo (slide actually) that I made during the construction phase.
My techniques were definitely 'under development' at that point. I see a laboriously-built plastic card cockpit, a bit messy with triangular gussets everywhere. The wings were reinforced internally with thick pieces of black plastic (probably from the Ertl 'Rubber Duck' truck) and I see a scratch-built plastic card wheel well, again with lots of gussets.
| 
|
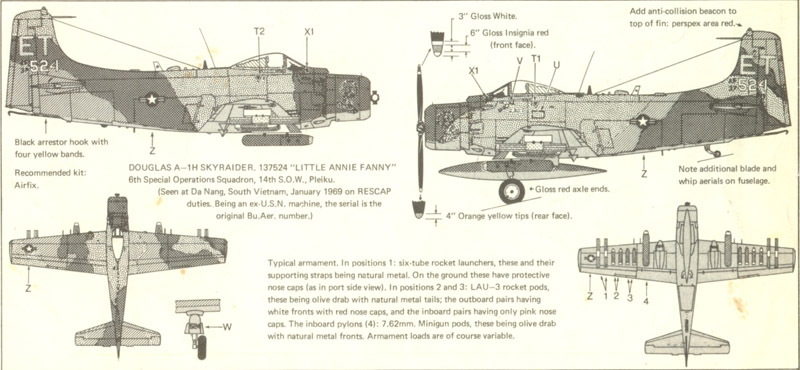
| For a long time these Modeldecal instructions (sheet #10 from 1971) were my only reference. Modeldecal was far ahead in providing detailed instructions and suggestions for improvements. Many current decal brands can still learn a lesson from these old sheets.
|
Comparison
| At an advanced stage I bought a second kit as a parts donor, since I had broken the prop of the first kit while playing with it :-) I assembled the second model roughly to serve as comparison. The Airfix Skyraider is a pretty old model (first issued in 1968), with raised panel lines and lots of rivets. The wings can be folded, but the hinges are very inaccurate.
| 
|
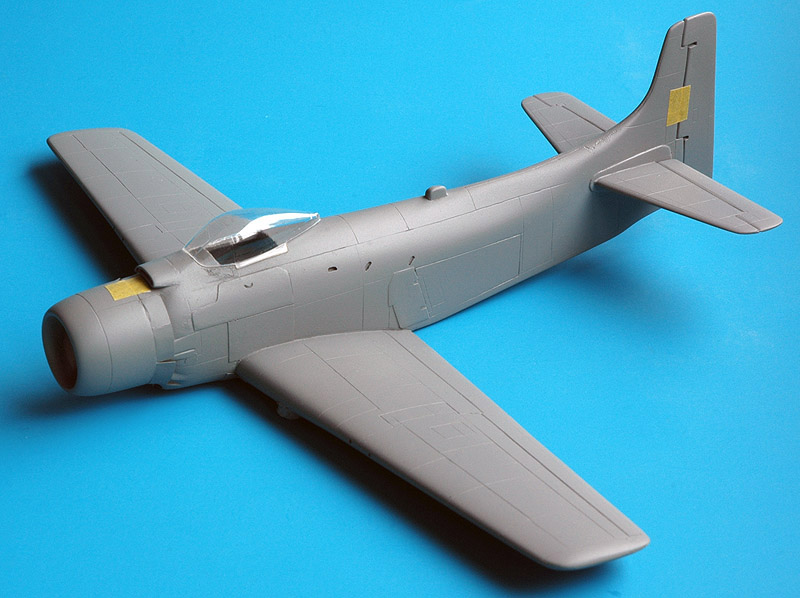
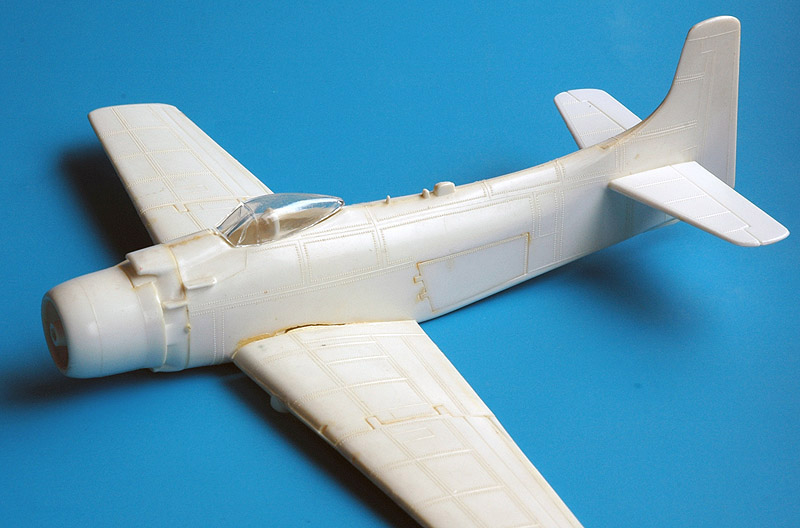
| And here's the model that I modified extensively. A couple of years ago, after it rested in a box for years and years, I airbrushed the model in a neutral grey to judge its build quality. In this view you can see rescribed panel lines, added armour plates around the cockpit and a reinforcing plate ahead of the speed brake.
|
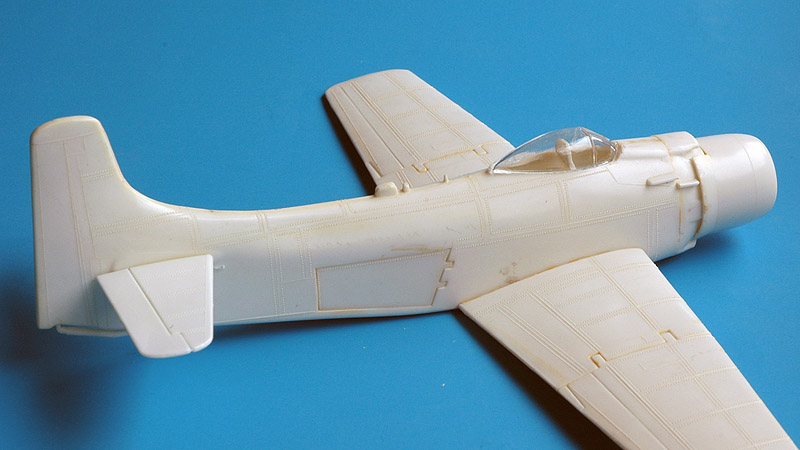
| This rear view of the unmodified model shows the ugly canopy that is set too far aft, and a speed brake that I glued too deep inside its well (or is that the fault of Airfix?).
| 
|
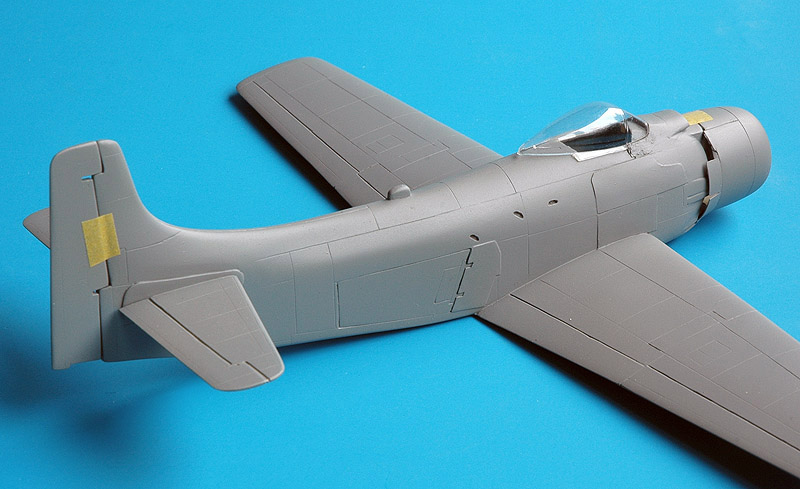
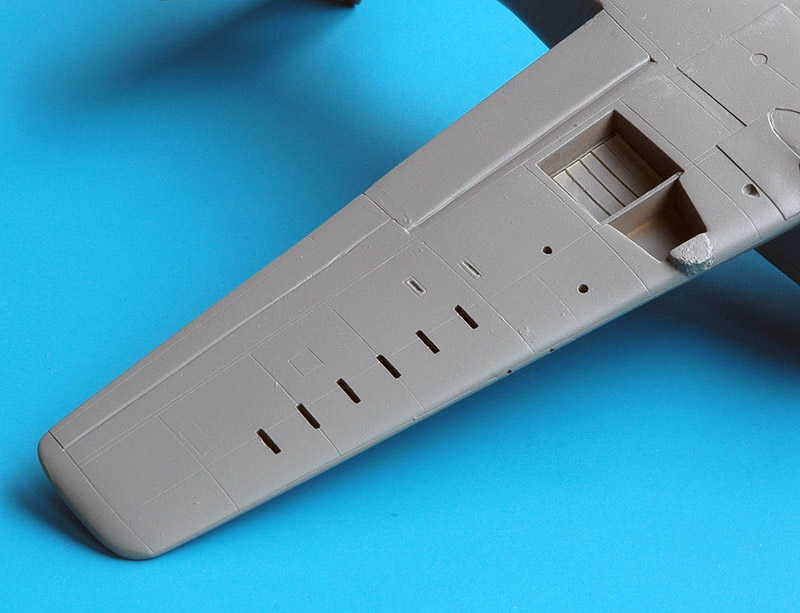
| I had to scratch-build a new rudder because I destroyed the original while trying to unwarp it with hot water that was far too hot. The horizontal tails got scuff plates made from plastic card. The grab holes leading from the speed brake to the cockpit were painstakingly engraved. The cowl flaps were replaced by thin ones from card, and the exhaust flame blanking plates were removed, but never replaced with thinner ones.
|
| The belly of the original kit doesn't look very promising. The fuselage parts didn't fit very well, the wings fit roughly against the fuselage, the wheel wells are empty, and rivets and raised lines all over the place.
| 
|
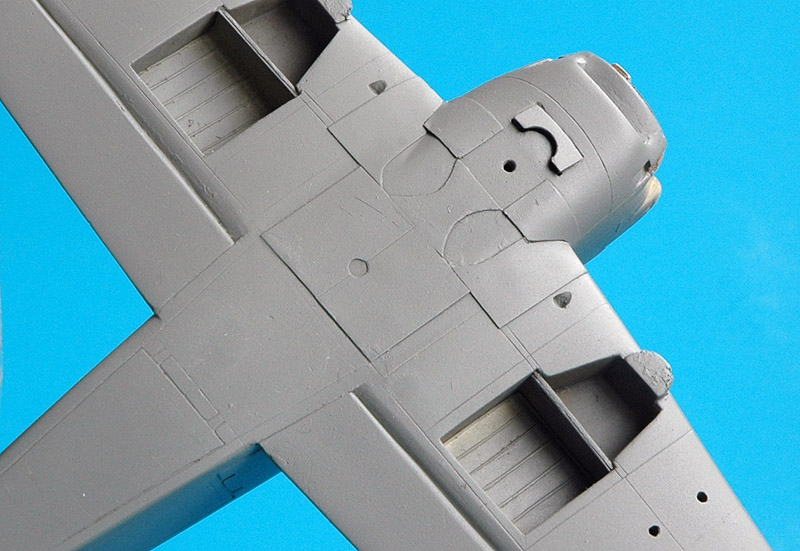
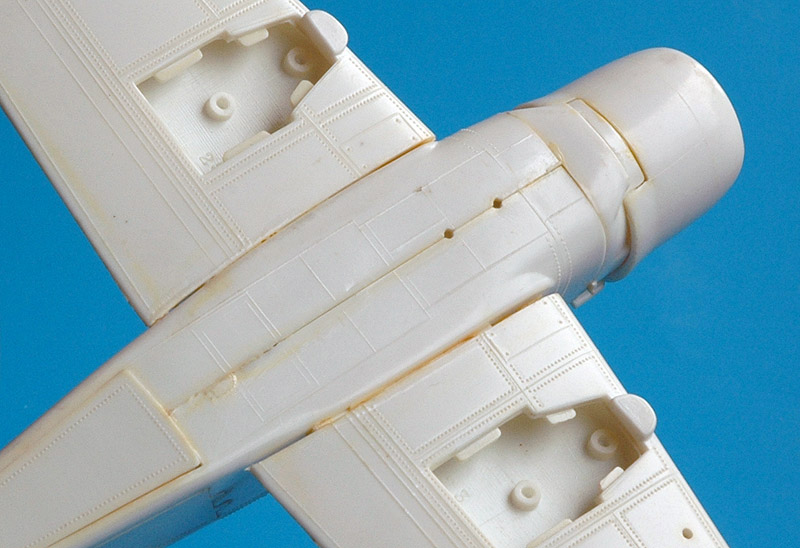
| The wing-fuselage joint was improved a lot. Armor plating was added to the belly, but I'm not 100% sure the shapes are correct. An oil cooler exhaust flap was added, and the oil cooler inlet shape was improved. The wheel wells were detailed with a spar and chordwise stringers. Lastly, the area ahead of the flaps was rounded off.
|
| I had lots of trouble with the folding wing. The model's wing thickness doesn't taper linearly along the span, especially around the hinge. I used lots of filler there, but scribing in filler just doesn't work very well.
| 
|
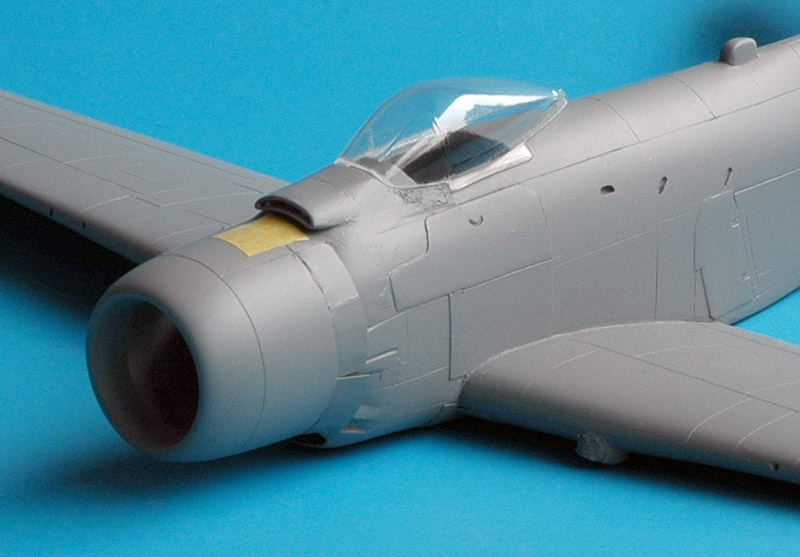
| A detail photo of the nose section. The biggest modification is that I moved the whole cockpit forward a couple of millimeters. The thick Airfix canopy was replaced with a very nice Squadron vacform canopy.
|
Colors and markings
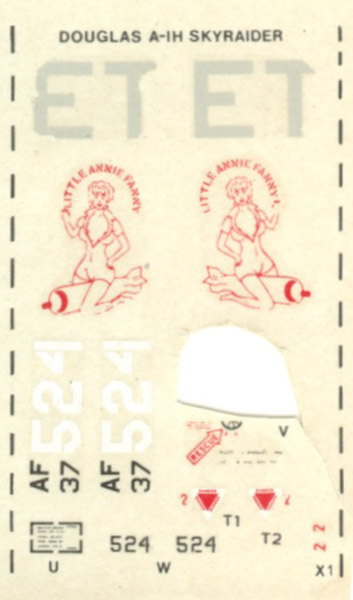
| This is the part of the decal sheet for the A-1H, from Modeldecal sheet #10. As you can see, the decals are quite badly damaged from sticking to the instructions or the protection sheet. The sheet also covered an RF-101C, an F-105D and an EC-47N. As far as I remember, these decals were the only markings available for a USAF A-1 for a very long time. Much later Superscale issued sheet 72-477 with one 56SOW, two Navy and one VNAF A-1's. Carpena (later renamed Colorado) sheet #25 had decals for A-1's of 522SOS and 56SOS ('The Proud American'). In 1999 Eagle Strike issued sheet 72004 with five USAF Skyraiders, four A-1H's and one A-1E/G.
| 
|
Construction stopped
In 2017, I found the thread Airfix Skyraider - Resuming work after about 20 years by 'Possibly Apocryphal' on the Britmodeller forum. His work on the Airfix Skyraider has amazing similarities with mine!
While building the Airfix kit, I heard about a Tsukuda Skyraider kit, that should be much better detailed than the Airfix kit. I searched high and low for it, but in pre-internet days, I could not find one. When the Hasegawa kit came out in 1996, my search stopped, but I never forgot about it. Imagine my surprise when in 2018 a club member from my IPMS chapter was giving away surplus half-built kits, including a Tsukuda Skyraider. Twenty-two years had passed since the search stopped, but I was still very happy to finally obtain one. So happy that I made a Tsukuda 1/72 A-1H Skyraider review.
Return to models page