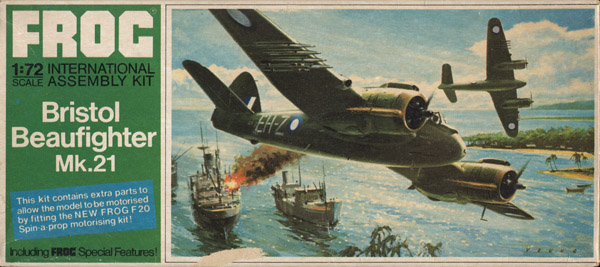
Frog 1/72 Beaufighter Mk 21 'Spin-a-Prop'
| My model club, IPMS-NL regio Zuid-Holland, on occasion helps modelers to sell their surplus models when they have to downsize due to age or health. In one of these sales, the Fred Bakker collection, I bought this Frog 1/72 Beaufighter, out of curiosity about the 'Spin-a-Prop' feature. I had read the Lines / Hellström book about the Frog history multiple times - it was my first book about kit collecting. I wanted to see how this 'Spin-a-Prop' worked, and decided to build the model around it. Luckily my kit included the electric motors, that the original owner must have bought separately. I want to build it straight from the box, warts and all.
|
Kit collecting
My first book about kit collecting (to which I have not yet succumbed) was about Frog, and I've read the book a couple of times front to back. But I had never built a Frog kit! When in 2024 our model club organised a kit sale for a retiring modeller, a Frog Spin-a-Prop Beaufighter was offered, among 200 kits. That caught my eye, mainly because of the Spin-a-Prop feature, that I had never seen in real life, and also did not understand its workings. The kit even included the electric motors, that were sold separately back then.
Only while building the model, I formulated what I wanted to do with this 'tribute' model. Firstly, the motors should be functional. Secondly, I wanted to build the kit without improvements, and retain the raised panel lines to the maximum, by very careful building, filling and sanding. Thirdly, I wanted to use all the weapons supplied, although it probably would never be loaded to the max in reality. It's mostly to show off the model in its full glory.
The model
Frog issued their 1/72 Beaufighter kit in three versions:
F191 was the first issue, in 1969, that could be built in three versions: NF1, F6C or TF10. It had decals for three RAF units: 604 Sqn (black all over), 227 Sqn (middle stone, dark earth) and 235 Sqn (sea grey, slate grey) respectively. It had two sets of horizontal tailplanes, with zero and twelve degrees dihedral.
F291 was next, in 1971, with a modified bulged nose shape (for the autopilot installation), Spin-a-Prop provisions, and zero dihedral tailplanes deleted. Decals are for two Royal Australian Air Force units: 22 Sqn and 31 Sqn (both foliage green overall).
F291 was revised again in 1974, no longer mentioning the Spin-a-Prop option (maybe F20 was no longer sold), and sold until 1977, the end of Frog as a brand. Decals options stayed the same.
I found it difficult to judge a 1969 kit, since I usually build much more modern kits. The fine raised panel lines are the first thing that caught my eye. How to restore them if you need to sand? The cockpit is almost nothing, with a rear bulkhead that the real thing did not have. There are no painting instructions except for the overall colour schemes - no instructions what to paint the cockpit, landing gear, weapons. The gun ports are just shallow dents. There's a mistake in step 8A / 8B: battery hatch (44) is show backwards with regards to the installation of the torpedo.
The cowlings must be undersized: Jane's 1951-52 says the Hercules engine has a 52 inch diameter (1321 mm) for all versions. Add maybe one inch all around for the cowling, and you get 19.1 mm in 1/72 scale. The Frog cowlings are 17.0 mm at the front and 17.5 mm at the rear, therefore considerably underscale. The cooling gills of the cowlings are moulded with large gaps between them. I don't know why, but they made me think of Guy Verhofstadt, the EU idiot. Another weak point are the tail wheel opening and bulge, both absent.
If you want to compare the Frog kit with those of other manufacturers, see Unofficial Group Build: Beaufighter!
Spin-a-Prop
| In the late sixties, Japanese electric motor manufacturer Mabuchi developed a special motor, designated RM-01. The motor had one instead of the usual two magnets. You can see it in the offset position of the motor axle. This results in the engine having only two prefered positions when it's stationary. In that position the motor's brushes don't connect, so there's no electricity flowing. You cannot start it by switching on the electricity - instead you have to flick it manually! It will rotate only in one direction. The earliest mention of this motor that I found was in Popular Science, 1969 issue. I think the motor is no longer in production, and I cannot find them on Ebay under the 'Mabuchi RM-01' designation. Airfix also used these motors, but for much larger 1/24 aircraft models.
| 
|

| The RM-01 is of course perfect to motorise a small propeller aircraft model: by flicking the propeller away from the neutral position, you can 'start' the motor. In 1970, Frog added provisions to add RM-01 motors to three 1/72 kits: Beaufort, Beaufighter and Ju 88. The motors had to be bought separately, with catalog number F20. There were two types of packaging. Two links:
|
Construction
For the interior, I used the parts for the version without Spin-a-Prop, because I wanted to use an AAA battery holder, instead of jamming an AA battery between two bulkheads. Therefore I used parts 33 and 34, but I raised the rear floor by 2 mm to make a bit more room for the battery holder.
I used the photos of the Bristol Beaufighter A8-39 RAAF ANAM 2016 walkaround as vague inspiration. The cockpit was painted a near-black, mixed from MRP-005 and MR-209. The rear fuselage was painted a vague approximation of the peculiar green, mixed from MRP green, yellow and light grey (26+122+104). It doesn't matter much, you barely can see it, and it's very dark inside. MRP-127 Super Clear Matt
| 
|
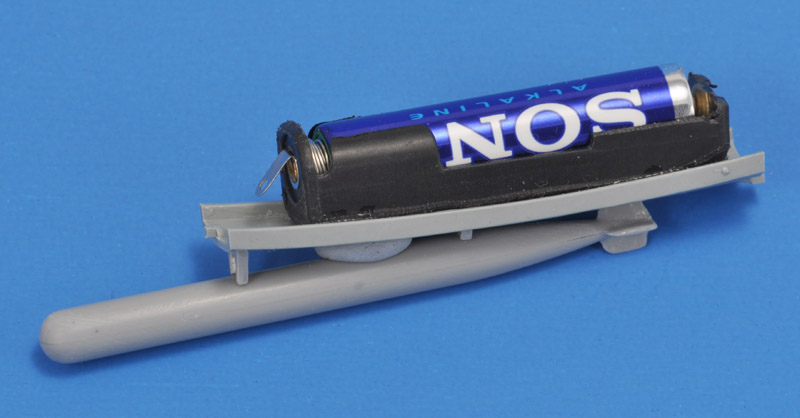
| Here's the battery hatch, meant for a single AA battery, but modified to take a single AAA battery in a battery holder. The torpedo makes for a nice handle of the battery hatch.
|
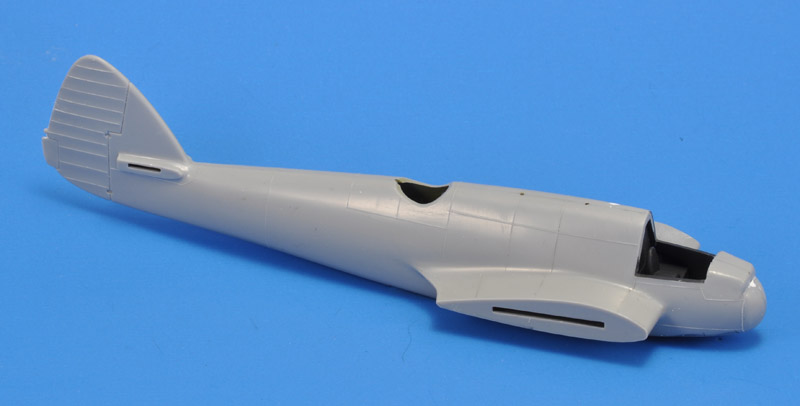
| The fuselage halves fit well, and were glued with thin CA. I managed to keep the raised panel lines intact, even at joints. But an unfortunate discovery was that the panel lines became faint near the joints, by design. It therefore looks like the builder has partly sanded away the raised lines.
| 
|

| The front fuselage is rough, and requires both sanding and filling. Behind the cockpit there's a deep shrink area, also filled.
|
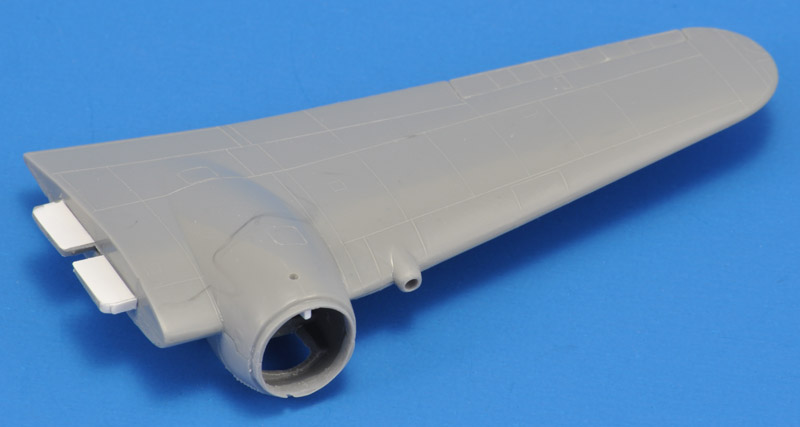
| With some care, the wings assembled nicely. The left wing sat a tad too high in the slot of the wing root, therefore I ran a file through the slot. Some shimming with 0.1 mm plastic card was required.
| 
|

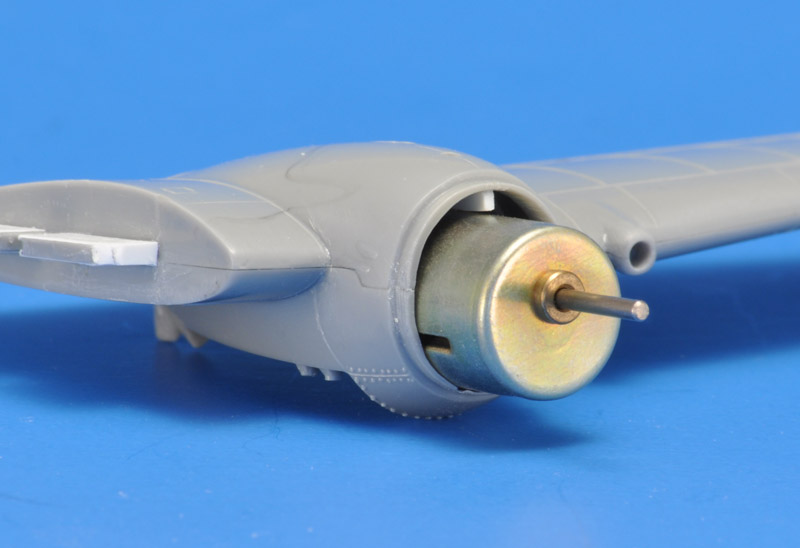
| When test fitting the electric motors, I found what I feared: the front cowling parts were designed for a motor with a concentric shaft, but the motor's shaft is offset approximately 1.4 mm. The motor would be tilted inside the nacelle to line up with the hole in the engine's crankcase, and thus the props would be aligned wrong. Inverting the motor would help a bit, but is impossible since one of the electricity tabs on the rear would hit a spar-like part inside the nacelle. Therefore the motor has to move down 1.4 mm.
|
| I started grinding at the bottom side, grinding partly through the landing gear mountings, and grinding away nearly all of the lower side of the mounting lip of the nacelle. Then the motor sat low enough to be aligned with the nacelle, and with prop aligned correctly.
| 
|

| The motor shaft is now centered perfectly on the plastic Hercules radial engine. I've seen several built-up Frog Beaufighters where this is not the case, and sometimes the whole cowling is glued on at an angle.
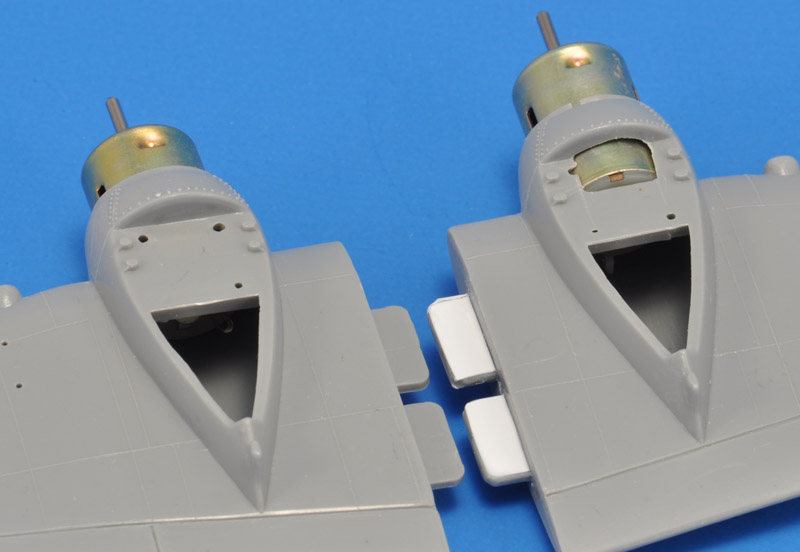
The cowl flaps are pretty horrible, but I decided against changing anything, except removing the flash.
|
| Left and right side of the photo are respectively original and modified. The back of the electric motor can now be seen in the wheel well. Oh well..
| 
|
| Both wings required a bit of sanding of the lower halves before they fitted properly against the wing stubs. I used thin and thick CA, depending on the widths of the gaps.
|
| I wanted to hide the wing joint with a raised panel line. As an experiment I tried Albion 0.1 mm nickel-steel wire. One improvement for the next time is to anchor the wire end in small holes, since I ripped loose the ends multiple times.
| 
|

| The tailplanes were installed with a 12 degree dihedral, using a cardboard template.
|
The carburetor inlets on the engine nacelles had large sink marks on their sides, and required some Apoxie Sculpt. I could not resist carving openings at the front, one of the very few improvements I've done. I also filled two sink marks on the wings.
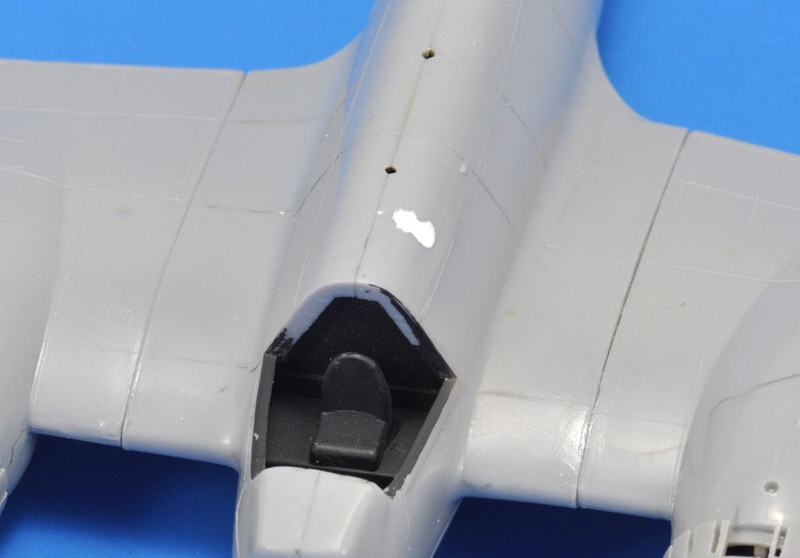
The coaming of the rear gunner's canopy didn't mate well with the clear part. The coaming was built up with Apoxie, and then the wetted canopy was carefully pushed in, and removed again. Once the Apoxie had hardened, the excess was cut and sanded away.
| 
|
Painting
| First job in the paint shop was to apply Tamiya Fine Surface Primer, mostly to check build quality. As usual, it revealed a number of spots that needed more work. I improved a number of spots on the model, but didn't go to the n-th degree.
| 
|
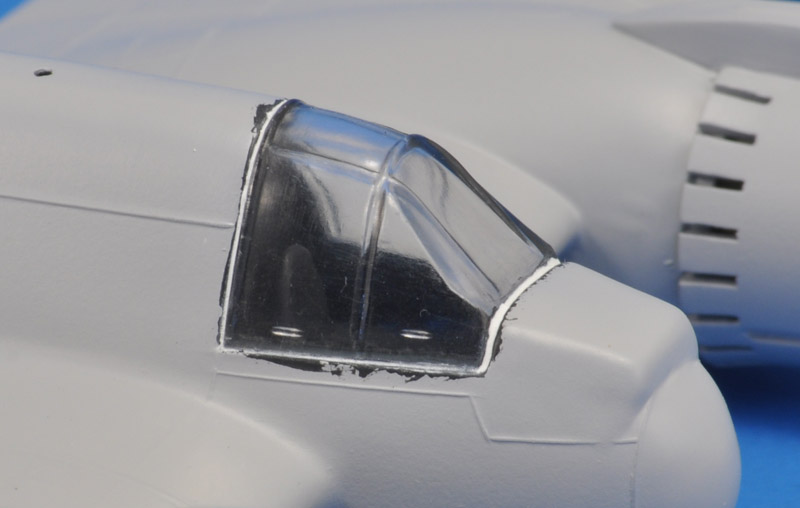
| Next was the mounting of the transparancies. I painted the edges of the transparancies and the fuselage Revell 9 coal black. Next I used Apoxie (a Milliput equivalent) to fill the considerable gaps. This was the first step of filling, another round was necessary.
I wonder about the two ridges inside the canopy, that were also present on the other side. Are they maybe handles, or a moulding defect? If the latter, they could be imprints of ejector pins. But now that it's glued on, I can't check whether there are ejector pin markings on the canopy part.
|
| Dave Klaus' Color guide says 'RAAF Foliage Green' closest FS match is 24092. I held my FS 595B fan deck against samples of the old Humbrol enamel range, and found 30 Dark Green a good match. I did not have a tin of it, but I did find a tin of HB1 Dark Green, 40+ years old and still alive! A paint sample matched FS 34092 well enough, so the paint was decided upon. Humbrol 149 probably would have been my second choice.
| 
|
It will be difficult to find a somewhat realistic solution for the large landing lights in the leading edges, and the wingtips lights. I'm trying to keep close to straight-out-of-the-box, so I won't replace them.
For the very unrealistic cannon parts, I plan to put simulated fabric patches over them. Here's one modeller that did something similar: Bristol Beaufighter MK X, 31 Squadron, RAAF, 1944 on Hyperscale
Build process to be continued
Decals
My kit came without decals. I drew my own set over a picture of the kit decals. The kit decals have the serials in grey, I made them white for a bit more variation on the rear fuselage.
Unfortunately I could not find a photo of the real aircraft.
I designed a mask for the gun ports, that are just shallow dents. The real ones are well visible in this short video of A19-144: Bristol Beaufighter Mk XIc A19-144 JM135 at The Fighter Collection
| 
|
Weapons
3" rocket colours: Of Beaufighters and rockets on BritModeller.
Modeling links
Reference links
Return to models page