Esci 1/24 Lancia Beta Monte Carlo
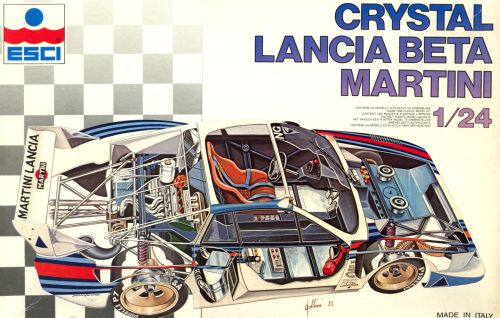
| My oldest car model is this Lancia Beta, that I bought in 1987. I don't recall the reasons for buying it, but back then that did not matter much! For its time it was a highly detailed model (more than 100 parts), and its clear body parts made it something special ('Crystal' is the trade term for virgin clear styrene). The model is pretty rare now, and I spotted one on Ebay late 2014 that sold for 250$ - I'm not so sure it is worth that much!
|
The kits
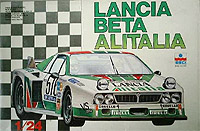
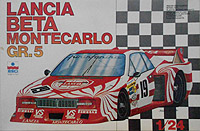
Three versions of this Esci model exist: first the 'Lancia Beta Alitalia' rallye car version was issued, followed by the 'Lancia Beta Monte-Carlo Gr 5' version in a red-white scheme with a modified nose and tail, as raced during the 1980 season. The 'Crystal Lancia Beta Martini' version with a clear body followed in (probably) 1983, representing the car raced in 1981. All three are marked as 'Up to stock exhaustion' in the 1985 catalog, and are absent in the 1986 catalog. An overview of all liveries can be found on the fantastic Racing Sports Cars site.
| 
| 
|
| Esci 3014 (?-1985)
| Esci 3017 (1981-1985)
| Esci 3044 (~1983-1985)
|
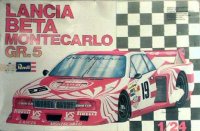
At least one version was also sold by Revell, probably as Revell-Esci, with just the company logo added to the box.
|
| 
|
|
|
| Revell H2374
|
|
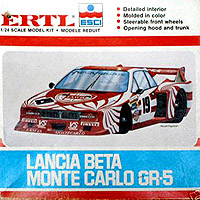
The Esci model was also sold in the USA by Ertl, in a new 'square' box.
|
| 
|
|
|
| Ertl-Esci 8263
|
|
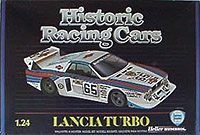
The Martini version was re-issued by Heller from 1986 on. Heller added a raised 'Heller' symbol on the underside of the fuel filler position. This suggests that the mould was sold to Heller, instead of Esci supplying injection moulded parts for repackaging. Reportedly it was produced with a softer plastic type compared to Esci, also more warping is reported along with less clear windows. The decals are of much reduced quality compared to Esci.
|
| 
|
|
|
| Heller 80741
|
|
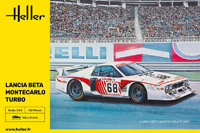
Heller reissued the model in late 2025, with a new decal set, for a Lubrifilm / CS Computer Systems sponsored #68, that participated in the 24 Hours of Le Mans in 1981.
|
| 
|
|
|
| Heller 80741
|
|
Construction
I did most of the construction work a very long time ago, when my experience was very limited, and hence mistakes were made. Because the engine cover was badly warped, and wouldn't fit properly against the body, so I glued the engine cover to the cockpit section. It's a small wonder that the assembly isn't twisted now, with the warped engine cover twisting the cockpit.
Another modification was performed on the louvres on the front wings. The plastic was scraped thinner on the inside, creating larger openings. However, the modification lacked subtlety, and the louvres are now a bit irregular. I also attempted to airbrush the model gloss white at some point, but the results were quite horrible, and most of it was stripped off again.
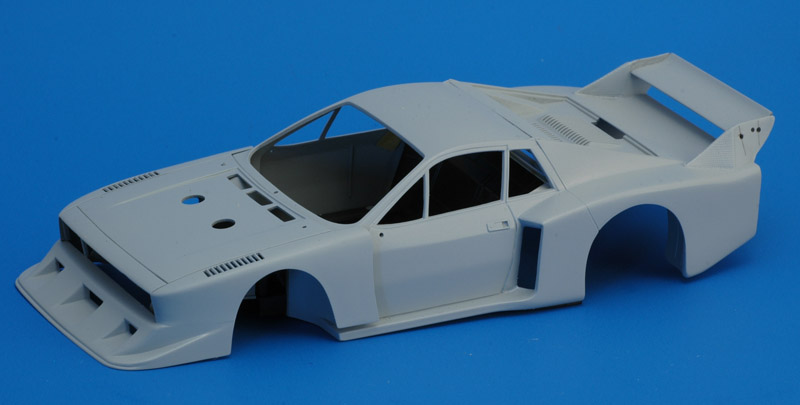
After years of rest I did a bit more work on the model. First the problems from the past needed to be solved. More sanding and filling and sanding and filling. The clear body is rather problematic to work with, you just can't see what you are doing. Therefore I sprayed it completely with Humbrol 1 base coat. After some sanding work, and a layer of Humbol 127 light grey, it looked as follows. I still like the shape of this little car!
| 
|
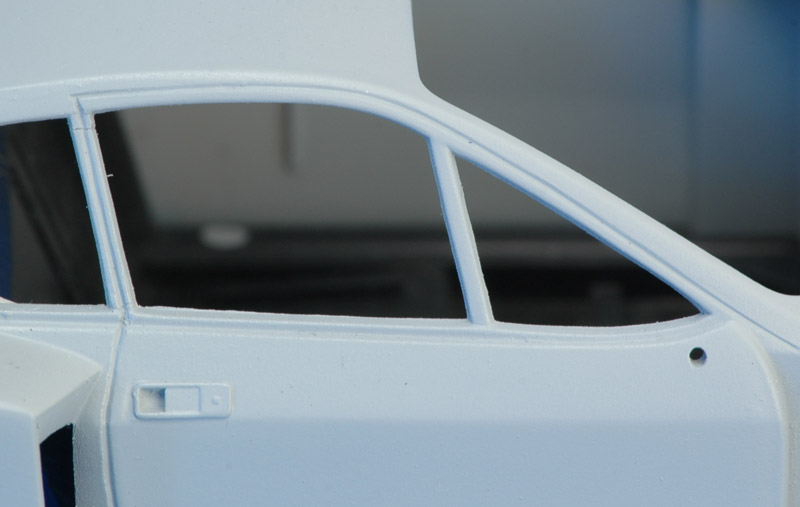
| I realised that the door lacked an engraving around the window area, and I scribed it in. Only later I noted that a rain strip was also missing. It will most likely make my engraved line invisible.
|
The rear of the engine cover was one of the areas where I performed near endless sanding, way back. I just couldn't make parts 14, 15 and 16 fit nicely, or the glue joints would fail after some work.
Most of that fight is no longer visible, but not forgotten.
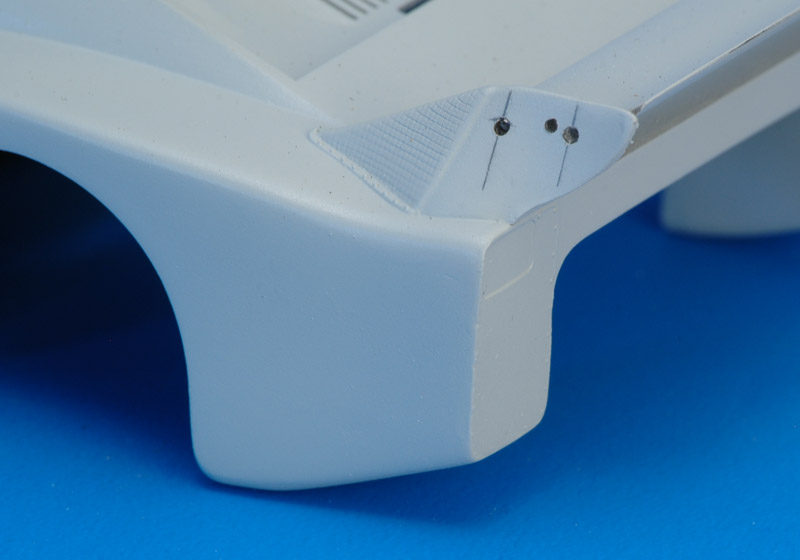
Long ago I had glued the rear wing to the wing posts, but that would make painting the model difficult. I removed it, and installed 1 mm pins to fix its location while making it removable. Looking back, I should have used a smaller diameter pins.
| 
|
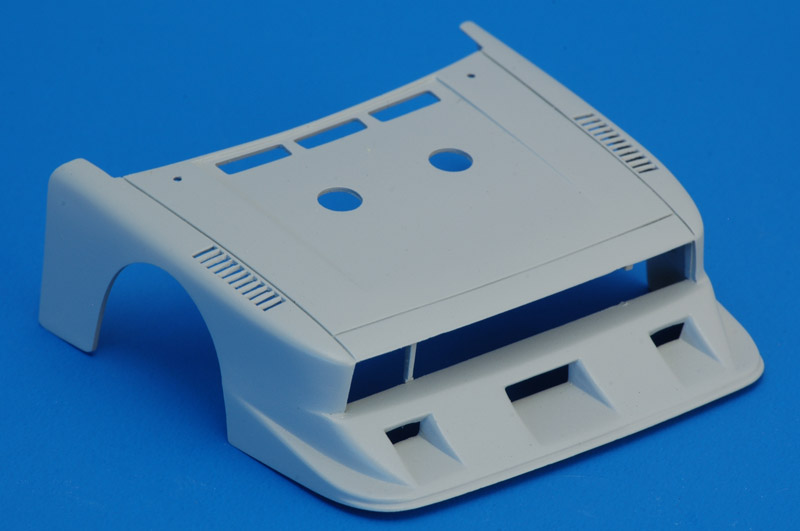
| The nose cover was one of the worst parts after base-coating, with bad filling, scratches, shrinkage areas and more problems. I used putty, CA glue and Humbrol 1 as fillers. After a careful sanding it looked like this. The photo also shows an early modification, where I cut away most of the head lamp area, that strangely lacked detail.
Compared to photos, the leading edges of the three inlets in the air dam sit too low and too far forward. The other edges should be more rounded too.
|
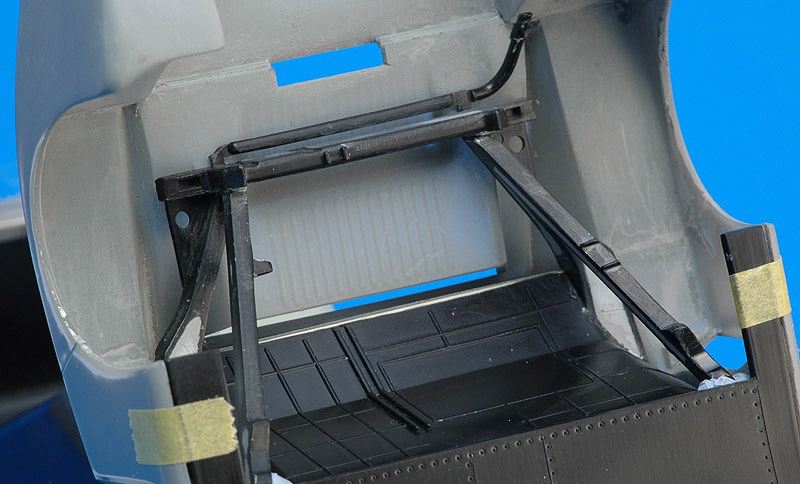
| The engine bay shows lots of parts filled up with putty, since they suffered badly from mould shrinkage. And I broke the anti-roll bar. But the level of detailing is quite nice, I think.
| 
|
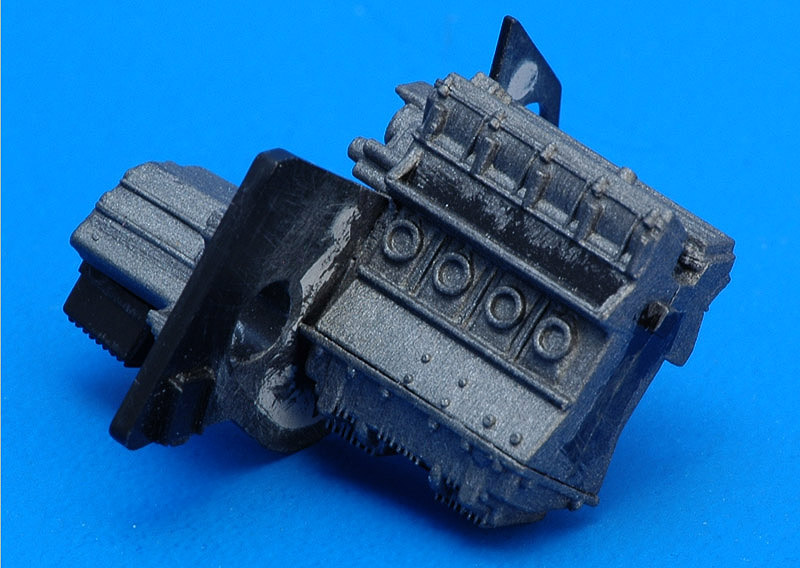
| The engine was assembled at an early stage, and handpainted it either Humbrol gun metal or Revell H91, I don't recall exactly. No more work was performed on it since.
|
Change of plans
Initially I planned to finish it with the kit decals, in my case Martini sponsoring on a white car. But then I saw the turquoise 'Fruit of the Loom' sponsored car driven by Hans Heyer, and I knew I had found a new livery for my model! I started looking around for suitable logo decals, and found out that Esci once had a BMW 320 in 'Fruit of the Loom' colors (kit number 3005, Carling Black Label or Fruit of the Loom colors). My modeling friend Julian Herrero from Spain had these decals as left-overs, and was kind enough to send them! And Gary McNutt from the GPMA mailing list sent me a slot car decal set that had Fruit of the Loom decals too. Thanks guys! This leaves a number of other decals, but most of them are single-color decals, that should be relatively easy to make on an Alps printer.
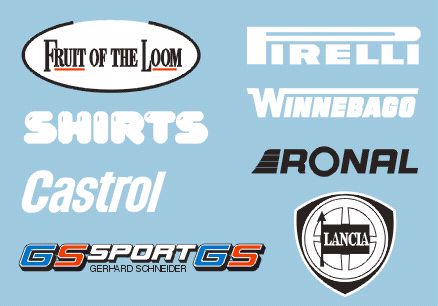
Early 2003 I started making decal artwork for the car, using CorelDraw vector graphics. Shown below is the artwork for the major decals. The 'GS Sport', 'FotL' and 'Shirts' decals are largely self-made, the rest are standard logos obtained from the incredible Russian logo site. In September/October 2003 Modelers from Japan issued a resin Lancia Beta (catalog number 2433) with a decal sheet for the Fruit of the Loom car. Unfortunately this sheet could not be bought separately, so I will have to finish my Alps decal artwork. The last big job is to draw all the fruit items in the 'Fruit of the Loom' logo. I already made CorelDraw crash while drawing the grapes, so wish me luck :-)
DecalDoc sells a 'Fruit of the Loom' decal set for the Lancia Beta. Tailormadedecals issued a custom-printed sheet for the BMW 320 in the 'Fruit of the Loom' markings, but it is no longer listed on their website.
Other modifications necessary are NACA inlets ahead of the front wheels, and black strakes on the sides of the hood.
Search for Ronal wheels
Apart from the decals, the wheels will present another problem; they look very complex and I don't think any other kit has them. Shown below is a set of photos of the real wheels. They have 20 spokes, and I think (but haven't measured) that the dish + spokes part is almost identical in size for both front and rear wheels. For the record: Esci's wheels are 15" and 18" diameter (deducting approximately 1.6" for the tire retaining lip).

In April 2003, the wheel problem was partly cracked, when Kin-Chun Fong (Gary) wrote me that the wheels were 'Ronal' wheels. This Scala 43 page shows four different Ronal wheels of a similar style. John Cully commented that Ronal wheels were used on a large number of 1980's German Group A racers, like the BMW 635, Ford Sierra XR4Ti and RS500 and others. Kin-Chun Fong then proceeded to find a number of 1/24 kits that had wheels similar to the Beta's Ronal wheels: The Hasegawa XJ-S TWR racer has BBS wheels with 15 spokes, Fujimi has a wheel set (19147), Renaissance (France) issued a resin wheel set (24073) that has some similarities, and lastly the Fujimi Dome Zero (1979 Le Mans), which has 16" rear wheels with 18 spokes. The wheels in these kits are close, those of the Dome probably the closest, but none are real Ronals. The Dome wheels will be difficult to convert into 15" front wheels especially. John Cully reported that Monogram kit #2287 BMW 635 'Group 2' has a set of typical 'discs' of a Ronal type design. The search continues!
Late 2005, another lead developped, with thanks to Eric Verschuur. Some kits of the late seventies/early eighties Pontiac Firebird contain wheels that appear to be Ronals, even with the correct number of spokes (20). So far identified are:
- Monogram #1400 (snap-tite 1979 Firebird Trans Am), #1418 (snap-tite 1981 Turbo Firebird), #2407 (1/20 scale 1981 Daytona 500 Pace Car Trans Am),
- MPC #6323 (1979 Firebird) 1980 Indy Turbo Pace Car)
- Lindberg #6503 (snap-tite 1979 Trans Am)
This Pontiac Firebird Trans-Am site has a very extensive listing that I need to study some more to find the best suitable wheels. It's possible that I need 1/32 wheels for my Beta?
In 2013, Renaissance Models issued a set of Roues Ronal 15, ecrou central, 24RON2, that come close but are still not 100% correct.
In 2016, Asuka Model from Japan announced '1/24 Euro Style White' wheels in its 1/24 Orange Wheels series. Catalog number is OW-10 for the unplated version, OW-11 for the plated version. Although not identified as such, these look a lot like Ronal wheels. They can be built as 16 and 17 inch versions (~18 and ~19 mm as measured over the flanges that retain the tire, the flange diameter is larger than the wheel diameter). Hobby Search lists them with photos.
In 2019, I found a Scale Production 16"+19" BBS/Ronal Racing Gr.5 wheel set, that seemed perfect for the Lancia Beta. The set allows one to build either BBS E50 wheels or Ronal Racing wheels, sharing resin rings and aluminium central wheel hub nuts. The BBS wheels have photo-etched wheel inserts, the Ronals have polished white metal inserts. The set can be bought with or without rubber tires. I inspected this set, and noted that the Ronal inserts are very flat, not showing the dished shape of the real wheels.
Inspiration
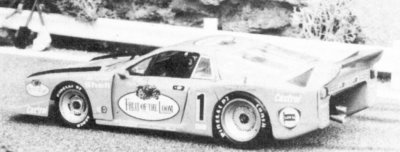
I found a photo in Modell Magazin 6/84 that shows an Esci Lancia modified just like I plan to do. The model was built by the 'WMS Modellbauteam Düsseldorf" according to the caption.
Thomas Hamann report
Fellow IPMS-NL regio Zuid-Holland club member Thomas Hamann is building the Beta too, and compiled a report of his findings so far. He is building kit 3017, and some errors appear to have been corrected for my 3044 issue. The finished model is shown on the Modelbrouwers forum.
Body
General:
test-fit the bodywork extensively on the chassis, and file it until it fits
Front:
drill holes for the pins that attach the nose.
Center:
after assembly of parts 11A and 12A to the body, the openings for the air intakes behind the doors have annoying seams, that need to be filled.
mount the door interiors (parts 15B and 16B) high enough, otherwise you'll need to saw off a millimeter or more from the bottom.
the bodywork is too high compared to the chassis at the rear. This can be remedied by removing some material where the bodywork meets the firewall in front of the engine. Add tabs on which the rear bodywork can rest, otherwise you will not get the rear aligned. Possibly add mounting points for pins for the rear bodywork above the rear window.
the position of the rear window is incorrect, it should be moved aft and slanted a few degrees, so it fits against the rear deck. Add triangles to fill the gaps created on the sides. Add a 1 mm thick styrene strip to the top edge of the rear window. Remove the bottom part of the window frame and replace it with a 2x4 mm styrene strip that extends the bodywork to the rear.
Rear:
the rear bodywork attachment is absent, so you either glue it in the closed or open position, or cheat a bit and add a pin attachment like I did.
the wing is a bit too narrow and therefore does not fit well. Widening it with a piece of 0.5 mm thick styrene helps.
the lower part of the bodywork (part 16A) does not fit very well on the upper part (part 15A), so to get everything tight, a fair amount of filling is required.
Chassis
Front:
the pins for bodywork are best replaced by 0.5 mm brass, due to some annoying shrinkage dents around the pins that need to be removed.
the radiator pipes (part 30B) does not fit properly and must be shortened somewhat.
a piece must also be removed from the chassis (part 1A, center bodywork) to make room for the radiator pipes (part 30B).
the square cross-section pipe (to be painted yellow or sand) needs to be modified slightly because otherwise the radiator pipes (part 30B) will not fit.
the brake cooling ducts need to be added. [Note: in my 3044 issue one is instructed to make them from electrical wire (not included) wound around a sprue.]
Center (interior):
the painting instructions are not correct. Look up photos and use them as a guide.
dashboard and dashboard mounting should be test-fitted, also in combination with the bodywork, otherwise it will not fit. Dashboard can be narrowed slightly (0.5-1 mm) to improve fit.
mount the pedals as far inboard as possible, otherwise the bodywork will hit the side of the pedals. Pedals are actually not correct, but you don't see much of it.
the seat is incorrect (too high), and is also missing three holes for the lower parts of the five-point belt (which should be red, seat black). Scratch-build the belts or use an aftermarket set.
the steering wheel works, but turns in the wrong direction!
the roll cage is completely missing. Be careful here, because there are various roll cages for these cars. The car I'm building has a single straight tube that runs diagonally along each door, at the rear approximately at the middle height of the door interior, down to the front. It also had a single diagonal bar behind the rear window.
Rear (engine bay):
the engine support frame (part 7D) mounts correctly against the firewall, with the engine offset to the right, relative to the center line. However, it seems that many other parts are designed with the assumption that the engine is mounted on the centerline:
the unequal-length drive shafts (part 26B) looked OK in terms of length, but turned out to cause problems later, when adding the rear wheel suspension.
the lower wishbones (part 25B) are to be glued to the engine support frame (part 7D) but doesn't mate at all. I added an extra piece of plastic card.
the support bracket for the turbo (part 23D) has a similar problem.
the exhaust manifold (part 31D) has to be modified to mate with the turbo (part 23D).
the intercooler pipes also need modifications: the inlet manifold (part 8D) needs to be lengthened 1-2 mm, and the turbo-intercooler pipe (part 44D) needs to be modified too.
the oil tank is missing a feed pipe
the assembly of the turbo and exhaust, consisting of turbo compressor (part 18D), turbo turbine (part 23D), exhaust manifold (part 31D), turbo air inlet (parts 3D and 4D) and exhaust (parts 5D and 6D) is done with small pins on the parts. These do not fit correctly. I cut all pins off, drilled new holes in the right place, and used brass rod as replacement pins. The turbo air inlet (parts 3D and 4D) must be oriented such that its wide flange is parallel with the rear support frame (part 1D).
omit the part that connects the turbo inlet to the rear wing support (part 17A). This should be built into the rear bodywork, but that is not possible with this kit - ESCI has made a mess of this.
the radiators have incorrect or non-existent mounting points. On the real car they are attached with various rods, among other things. If you copy it from brass, you can place the radiators correctly.
the radiator pipes are also missing from the left radiator; these are hoses that connect somewhere to the engine. [Note: there are two stacked oil radiators, with a strip in between. The top one appears to be for the gearbox, the lower one for the engine]
the subframe around the exhaust pipe (parts 1D and 2D) does not fit anywhere at the bottom attachment (see point 1 again!). The top subframe (part 1D) is okay as long as you center it properly. The lower subframe (part 2D) doesn't mate with the engine support frame (part 7D). Additionally it interferes with the exhaust (parts 5D and 6D). I chopped part 2D into pieces, made a new mounting block (7x4x1.5 mm). I also added various supports for the exhaust and turbo.
the rear suspension results in wheels that sit 2-3 mm too high, have positive camber and mismatched lower suspension arms. Cut off the shock absorbers and lengthen top and bottom by 1.5 mm. Raise the wheel spindles at the bottom by 1 mm. If necessary, trim the rear wishbone. Secure everything with pins. When gluing, make sure that the wheels are straight, seen from both above (toe in or out) and behind (camber). I glued everything together in steps.
all kinds of hoses are missing and various details are wrong, but I left that alone.
Modeling links
Other links
Return to models page


