Custom decal design service example:
A-6E VMA(AW)-332 'Moonlighters'


A customer wanted decals for his Trumpeter 1/32 A-6E model, of VMA(AW)-332 'Moonlighters' at Iwakuni, Japan. He had served in the unit as an avionics technician from 1975 to 1976. AOA Decals was working a set that included suitable markings (sheet 32-036), but they postponed the printing indefinitely. The customer contacted AOA, but they did not want to share the artwork. Custom decals were the only option left, with the drawback of much higher cost than an aftermarket decal sheet.


Reference photos

The customer sent several photos, this being the one I used most for the decal artwork. There were small variations in the unit artwork on the tail, and one had to be selected.

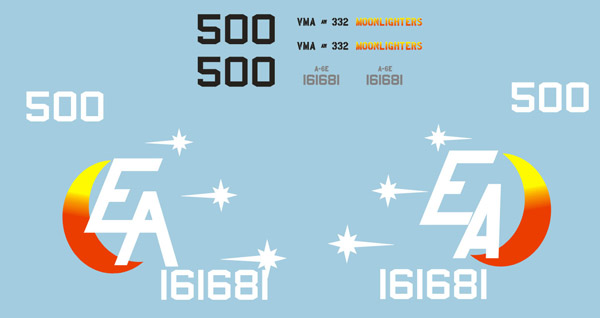
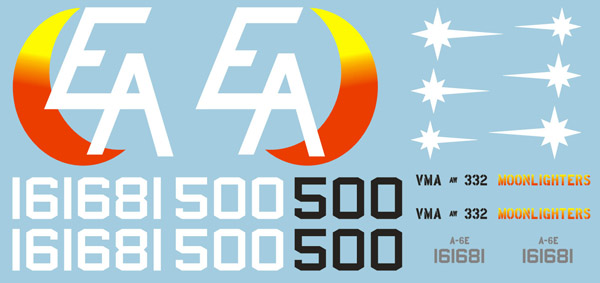
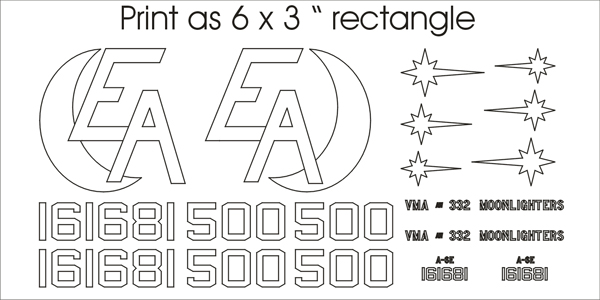
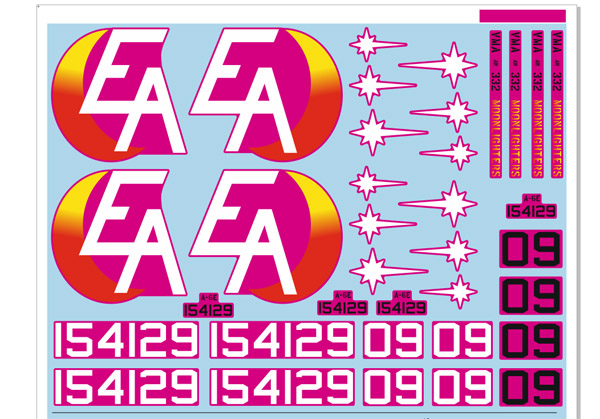
Note that the customer only needed a small set of markings, since all the other decals are included in the kit:

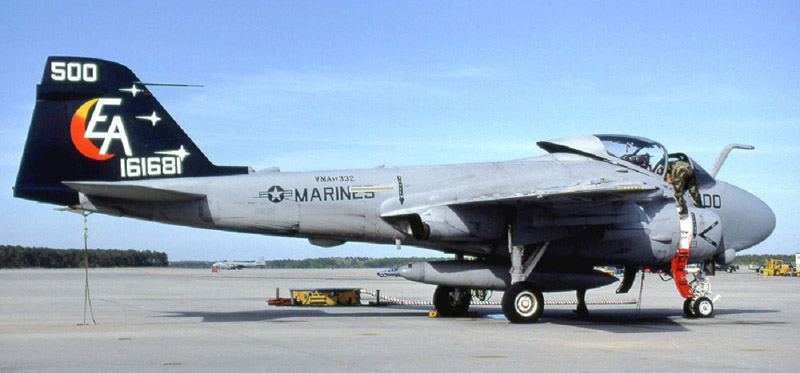
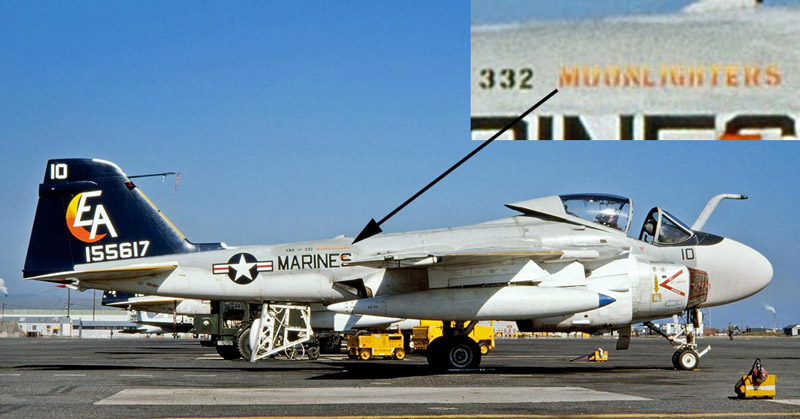
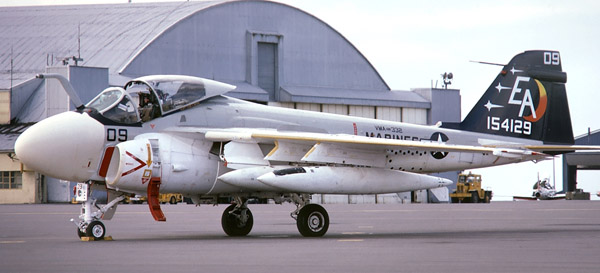
a. BuNo (large) on vertical tail, white (2)
b. BuNo (small) plus a/c type on rear fuselage, black (2)
c. Modex numbers, black and white (2 each)
d. Unit text on fuselage 'VMA(AW)-332 MOONLIGHTERS' (2)
e. Unit tail markings: EA plus quarter moon (2)

Therefore, it would be a relatively quick project.
This photo shows the special unit markings on the rear fuselage. Interestingly the lettering was done with a stencil that looked like a lot like a Reese's stencil. And I had used that before on my AQM-34 Firebee models. If I had not known this stencil font, the design would have taken a lot more time.


Artwork development

I use an old version of CorelDraw, a popular vector graphics software. Shown here is the first version of the artwork. It was mostly drawn over the photos, as witnessed by the relative positions of the markings. For the numbers I used the US Navy font as defined in MIL-STD-2161C. This standard also listed the prescribed sizes of the various markings, like 12" for the large BuNo and 30" for the unit letters. The artwork had two versions of the 'EA' letters, and a first version of all other markings, for the customer to judge.
The second version had 10% thinner 'EA' letters, and the decals were rearranged, so it started looking like a real decal set.
I made a outline version of the above, for test-fitting on the model. The rectangle size helps to ensure that the markings are printed the correct size. The customer test-fitted and then approved the decals.
Only then I realized we had made a mistake. The customer wanted to build a hi-viz era aircraft, but I had picked BuNo 161681 to replicate, since most photos showed that aircraft. But upon closer inspection, BuNo 1616181 was a low-viz aircraft, with a hi-viz tail. I went looking for another BuNo, preferably with a 509 or 09 Modex, and found this aircraft on Airliners. The set was revised one more time, with new BuNo and Modex numbers, leading to the sheet shown below.


Preparations for printing

After the artwork is finished, there is one more step: to prepare the artwork for decal printing. The preparations depend on the custom decal printing company, and the printer they use. I had these decals printed by SpotModel in Spain, and they supply a template with instructions. According to these instructions, I made three layers, shown staggered here for one decal: the bottom layer with a white undercoat (note that black decals don't require a white undercoat), a middle layer with the artwork, and a top layer for the decal film (the template uses purple). I generally make the decal film 0.5 mm larger all around.


Result

Her's the end result that was sent off for printing. This project was done in one evening, with a total of two and a half hours spent on artwork and communication. It required some twenty back-and-forth e-mails to sort everything out. Communication is not to be underestimated in the time/cost calculation.


Return to the 'Custom decal design service' page