'Donn Yost' airbrush technique

| My biggest modeling discovery of 2021 was the 'Donn Yost' airbrush technique. For 25 years, I'd been trying to spray gloss enamel paint from Humbrol, Revell, and other brands without getting orange peel or drips. And I never really succeeded, which is why I've never airbrushed a car model body. I knew the problem was largely with the airbrush: it atomizes the paint very finely, too finely, in fact.
|
Droplet size theory
Allow me get technical for a moment: the smaller the paint droplets created by the airbrush, the greater their total surface area, and the more thinner evaporates during its few centimeters of travel from the airbrush to the model. I dare say that in most cases, all the thinner that you added is gone before the paint reaches the model. And I think some of the thinner in the paint itself has also evaporated. As a result, the paint arrives thicker (more viscous) on the model than it was in the tinlet! And that prevents the paint from spreading smoothly. That's why I'd been searching for years for an airbrush that atomized less finely, but unfortunately, I couldn't find one.
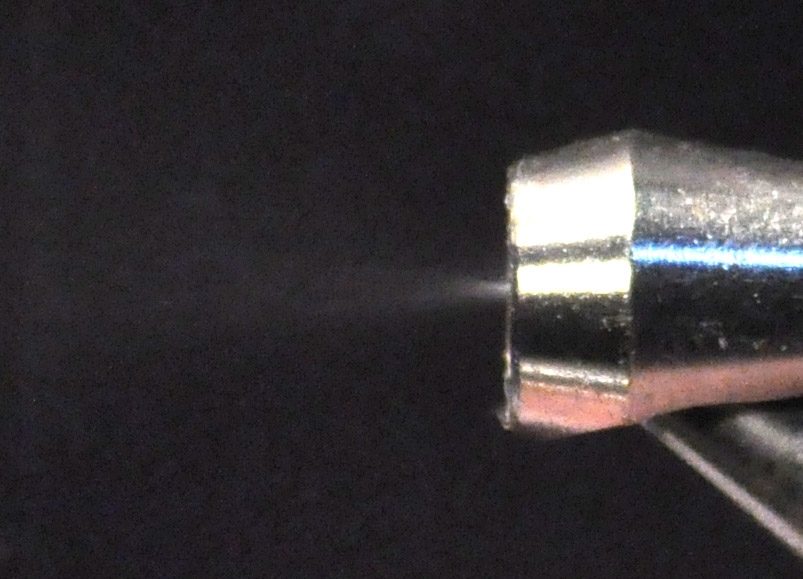
| I'll spare you the calculations, but every time the droplet size halves, the total area of the droplets doubles, and (roughly) evaporation doubles. But the great unknown is what size the droplets actually are. Maybe this can be established with high-speed photography? I gave it a try with my pretty normal equipment (Nikon D90), but even at 1/4000 second shutter speed, the spray moves too fast to capture it.
| 
|
Breakthrough video
In 2021, I saw this video: Paasche H airbrush - The scale model workhorse !. The modeler in the video sprayed a super-smooth car body in one go, following the 'Donn Yost' method. No orange peel, no buffing, no sanding, no polishing, nothing! The recipe: a Paasche H airbrush and a 1:1 dilution with lacquer thinner. I immediately understood why the Paasche H was so important: it's a rather basic airbrush that atomizes coarsely. I ordered one straight away.
Donn Yost passed away in 2023, here's on obituary from his model club: Remembering Donn Yost.
Paasche H airbrush
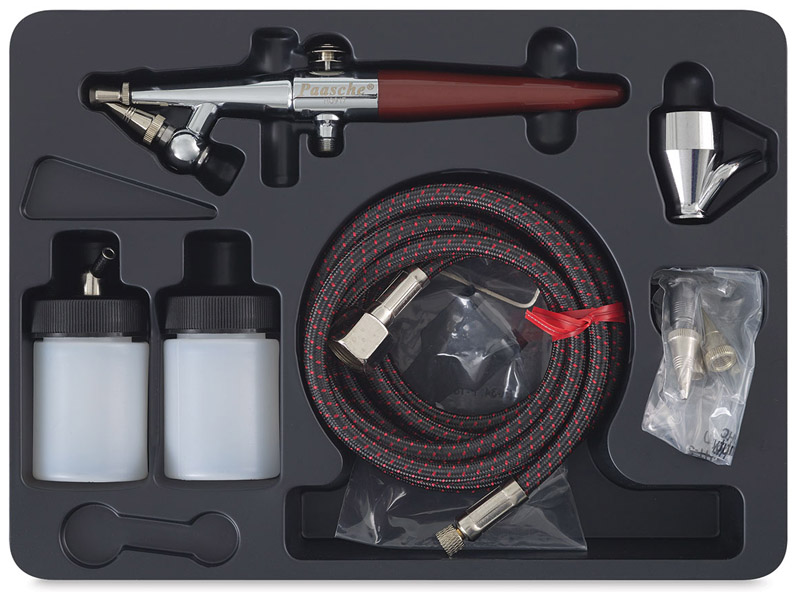
This is the Paasche H set that ordered for 60 euros. I made one small modification to mine: I painted two stripes on the nozzle, so I could see how many turns I made.
There are many videos about the Paasche H, but I recommend The Myth of the Paasche Model H by Paul Budzik.
I haven't experimented yet with the three different needle/tip set, I simply started with the intermediate 'H-3' set with three rings (as in the picture). The H-3 set consists of an HN-1-3 needle, an HT-3 tip and an HC-1-3 aircap. The manual says it has an 0.64 mm opening, and that it's meant for 'medium fluids'. Maybe I'll try the 'H-5' too one day, that has an 1.06 mm opening, and is meant for 'heavier fluids'.
In the article 'Paint like a pro' in Scale Auto (Enthusiast), December 2015 issue, Donn Yost himself reports that he uses the 'H-5' head and needle assembly. He also states that he uses no primer at all.
| 
|
Experiments
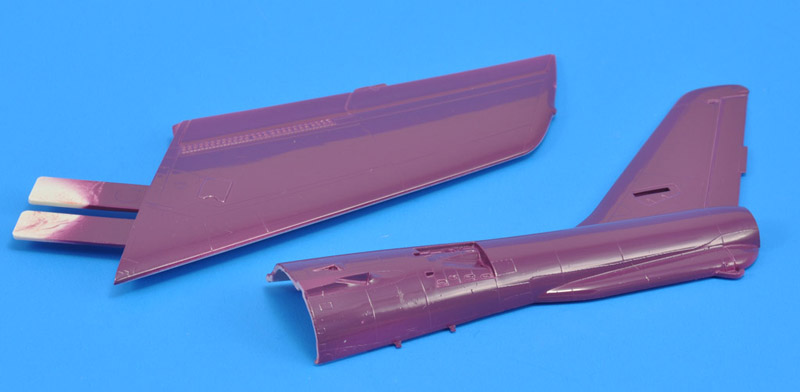
I tried a random Humbrol color (H68 Purple) on some Monogram F-84F scrap parts, and indeed, it worked perfectly. No drips, no orange peel, but a mirror-like shine - Eureka!
I had dialed my compressor at 1.5 bar. The color building layers were done with the nozzle 3/4 to 1 turns open. For the final wet layer I used 1.5 to 2 turns, giving a paint flow comparable to a spray can. That surely takes some getting used to, if you come from working with a 'normal' airbrush. Paint consumption is also much higher, of course, so prepare enough paint! Another aspect is whether your spray booth can keep up - mine can't.
| 
|
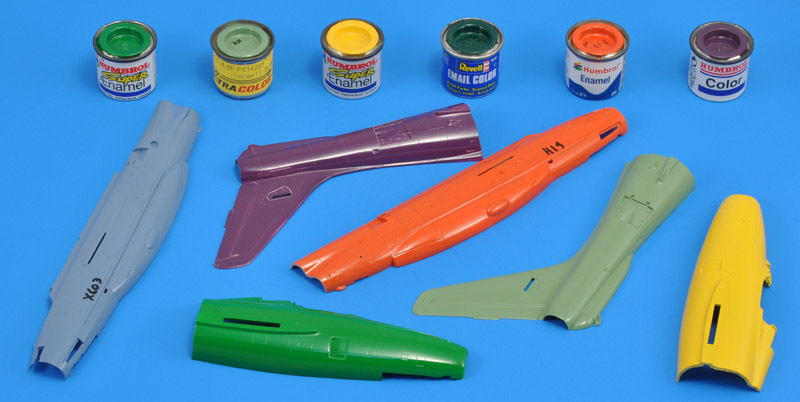
| I did more experiments, and the technique worked with all the enamel brands I own: Humbrol, Revell, Model Master, and Xtracolor.
Another interesting experiment would be to spray clear coats this way. I think that many clear coats go on too dry, with orange peel, which changes the glossiness. The Donn Yost method could show the real glossiness.
|
Return to models page