Airfix 1/72 Mosquito prototype
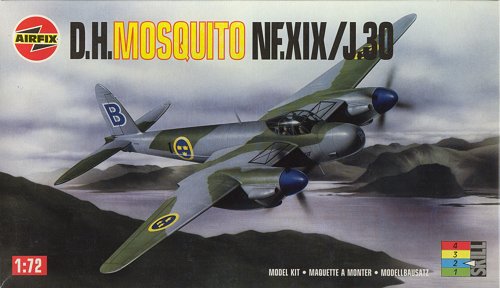
| As a gift for a friend, I'm building the prototype Mosquito, as it appeared on its first flight. It then had the factory serial E0234 (later replaced by RAF serial W4050) and was RAF Trainer Yellow overall.
|
Mosquito kits in 1/72
The Airfix Mosquito is a rather dated model, but it was the best available at the time I started this project. I found a kit review in the March 1973 issue of Aircraft Illustrated. Overall the reviewer considered it a vast improvement over the previous Airfix Mosquito, and the best Mosquito yet. His criticism centered on the plan view of the fuselage, more specifically the tapering of the fuselage. This tapering should start at the rear spar, but on the model the tapering starts at the wing's trailing edge. This results in a slightly 'fat' fuselage, and the inboard side of the flaps don't have the required 1.5 degree angle. Also, the model has small fairings inboard of the flaps that shouldn't be present. Lastly, he judged the wheels and landing gear to be too wide and too small in diameter, giving a balloon appearance.
I built my model from the Airfix kit, using some components from a Matchbox Mosquito I got from fellow modeller Berry. The kit represents the fighter version and needs many modifications to bring it back to the original prototype bomber configuration. Apart from the bomber nose and canopy, the nacelles that are shorter at the rear are the most obvious modification. The Airfix model is quite old and rough, and needs quite some attention to make it look nice. I did all the conversion work myself; about halfway through, Paragon introduced a resin set, but I decided against buying it. It is a nice set though, see the end of the page.
Even worse (for me) was that both Hasegawa and Tamiya issued 1/72 Mosquitos some time later. Of course these models are much nicer and more detailed than the old Airfix kit, but I had progressed too far with my Airfix model to switch to these new models. The new models do have their problems however. Personally I would not build the Tamiya kit. Its detailing is really fantastic, but the overall shape is pretty bad. The rear fuselage is too much of a straight cone, the vertical tail is not correct, and worst, the radiator part of the wings is way too long, spoiling the fine lines of the Mosquito. I've also heard the comment that the forward fuselage is too thin (skinny). The Hasegawa Mosquito is much better shape-wise, but has little detailing. It seems it has a more correct fuselage shape than the Airfix kit. However, the cross-section ahead of the canopy is way too square on the top side, the two fairly strong folds should not be present. The Hasegawa model would now be my clear choice when building a 1/72 Mosquito, but I would add some detailing sets.
Resin conversion set - that I did not use
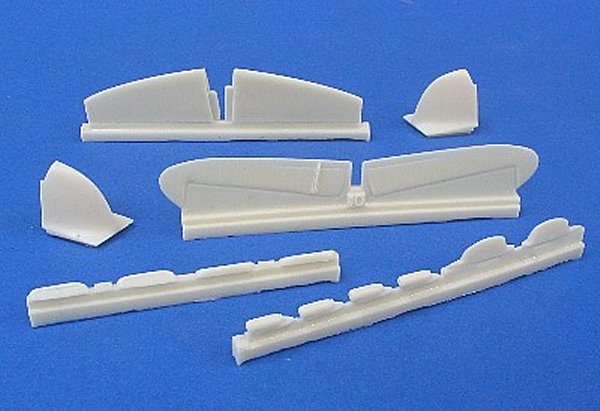
| Paragon Designs from the UK produced a resin conversion set for the Mosquito prototype (catalog number P72028). It is long out of production. This and the next photos were borrowed from the Luchtvaart Hobby Shop / Aviation Megastore. I was already too advanced my model before I heard of this set, and thus did not use it.
| 
|
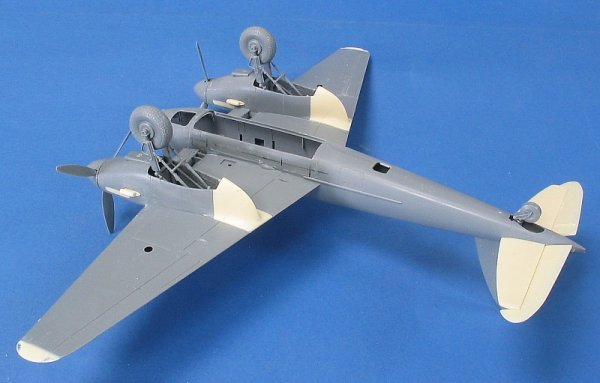
| Here the parts are seen installed.
|
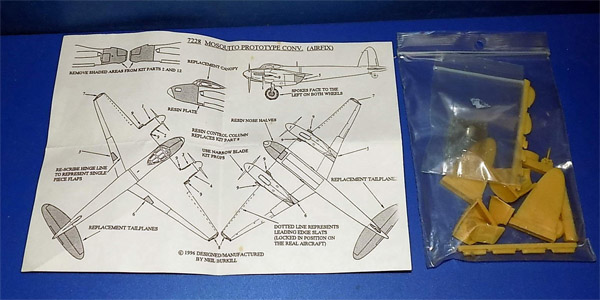
| Later I found another picture of the set, and it was more extensive, with bomber nose parts and vacfom parts I think. And the horizontal tails are one piece, whereas the above photos show separate elevators.
| 
|
Airframe construction and modification
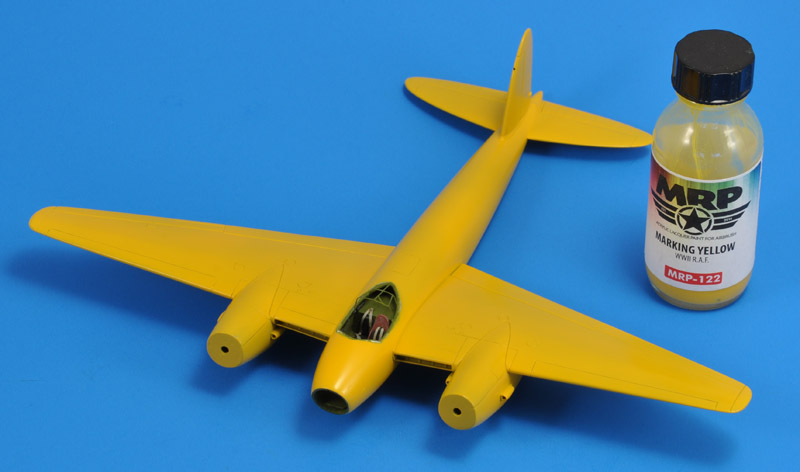
| I made some digital photos during the very prolonged build process, but they are too horrible to be shown anymore. Therefore this report starts near the end of the build. I can't show the major modifications that preceeded, like attaching a Matchbox 'bomber' nose to the Airfix 'fighter' fuselage. Here's an overall view of the model, after painting it with MRP-122 Marking Yellow.
|
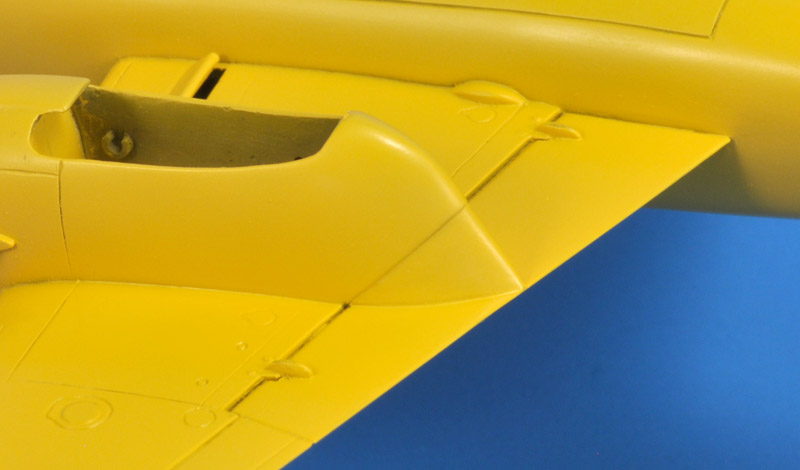
| This is my interpretation of the prototype's flap and short nacelle shape. Since I wanted to portray the prototype during the first flight, I built the short nacelle. The shortened nacelle rear ends were made by cutting off the rear end of the kit nacelle, and gluing a small part of the cut-off back in place. The whole area was then filled with Milliput and sanded into shape. Note that the upper rear part of the nacelle would move together with the flap, and slide into the lower rear part of the nacelle.
| 
|
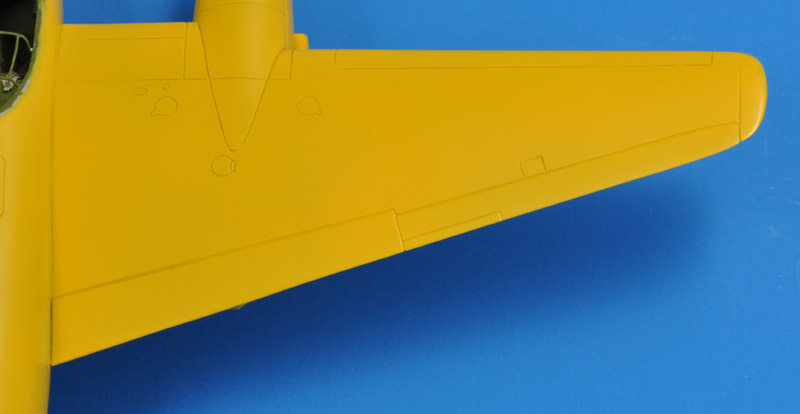
| The flap is now a one-piece item, made possible by the short nacelle. The flaps (and the whole wing) were scribed, and all raised detail was removed. I also added panel lines for the leading edge slats that the E0234 had, but never used as far as I know. The wing tips were shortened and given a new 'square' contour. Wing tip lights (two each) may have to be added.
|
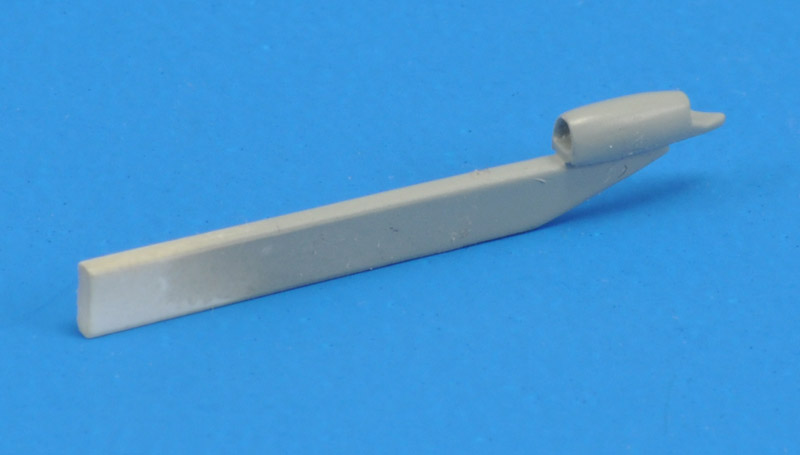
| One more detail of E0234 that required scratch building are the exhausts. E0234 had smooth nacelles, with internal manifolds, exiting in small single exhausts on each side of the nacelle. I made a master from a piece of tube and card, followed by lots of Milliput and spray painting. The master was glued on a strip of plastic card, and another silicone rubber mould was cast.
| 
|
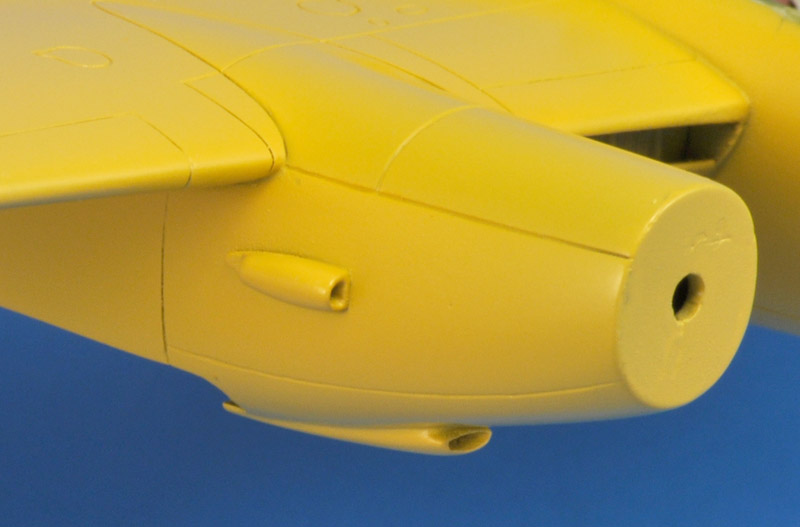
| I cast epoxy resin copies of the master exhaust, and here's one installed on the nacelle side.
|
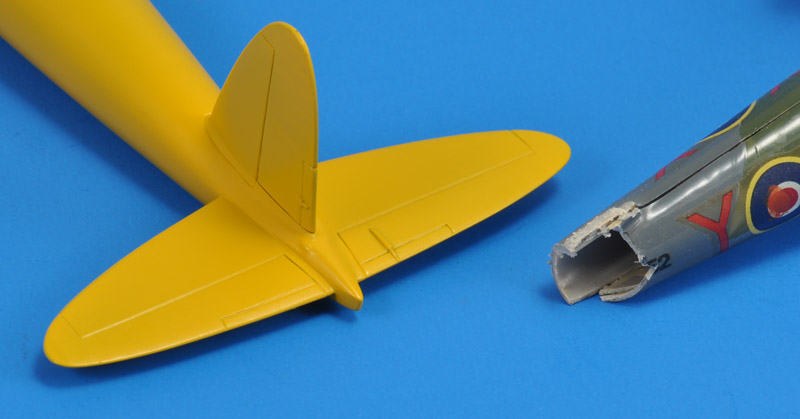
| The horizontal tails were replaced by Matchbox ones, which had a much nicer fabric effect. I shortened the tails some 2 millimeters on the root side, since the prototype flew with smaller tailplanes for a while.
| 
|
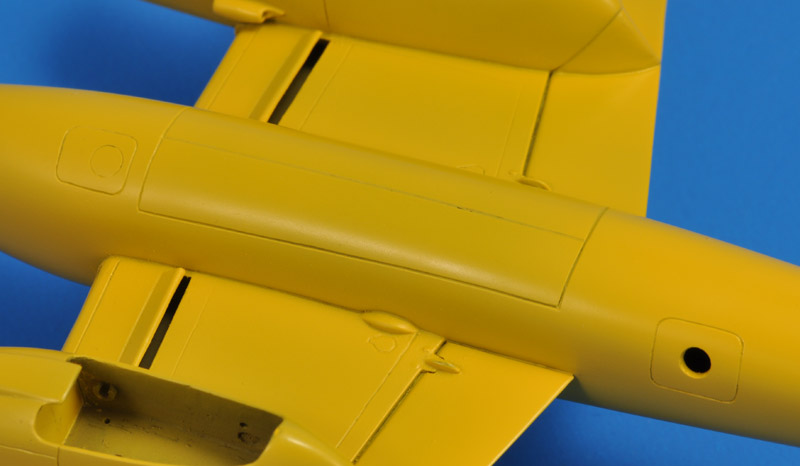
| The Airfix 'fighter' bomb bay doors were split for and aft; I modified that to 'bomber' bomb bay doors split left and right. In front of the bomb doors, the cockpit access hatch was scribed in. The window in the hatch was masked with Cheap Chocolate Foil. Similarly the rear hatch was scribed in, but the window is not installed yet.
|
Cockpit
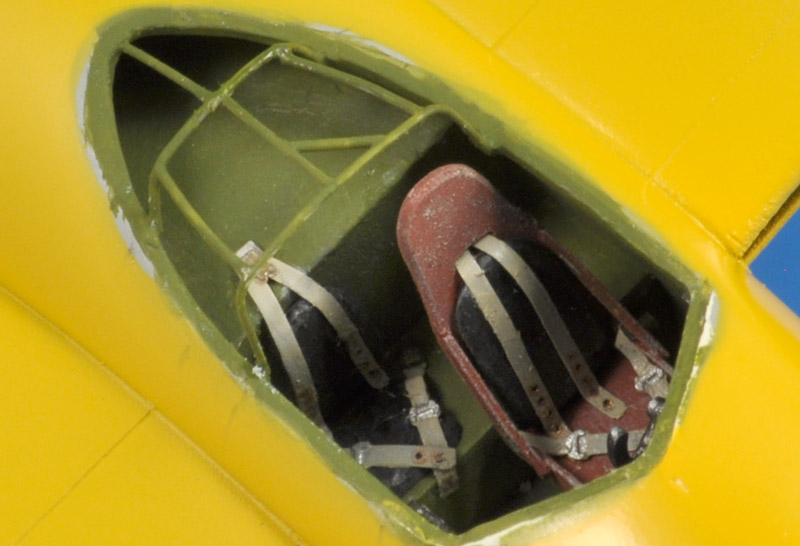
| I started the cockpit by removing the 'wing roots' that intruded into the cockpit. Next I built the wing carry-through structure (the torsion box) from plastic card: a flat front spar and a curved upper skin. The navigator sits on another box structure, namely the forward end of the bomb bay, also built from plastic card. The pilot seat was scratch-built from (again) plastic card.
| 
|
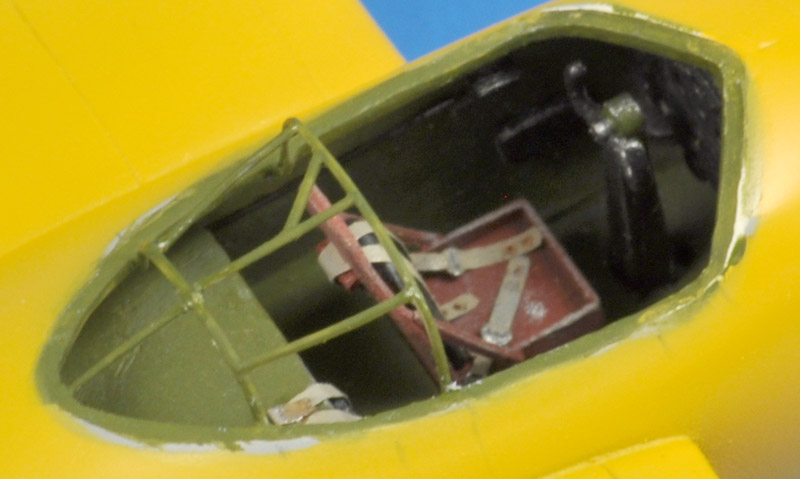
| I glued in the original Airfix floor. Not visible here is the rectangular hole in the cockpit floor that leads to the cockpit hatch. The kit's instrument panel was cut back considerably and glued in.
|
Canopy
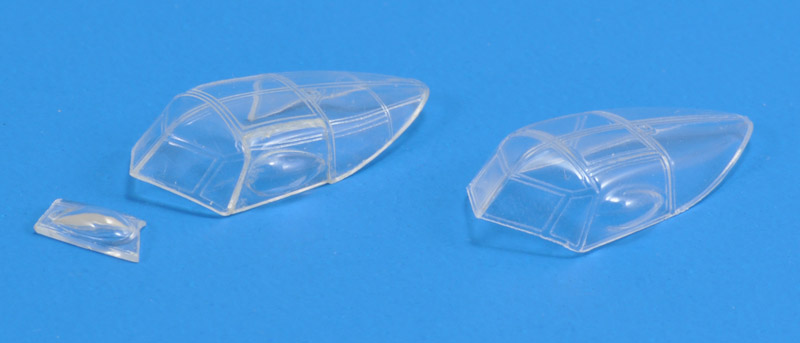
The canopy seemed like a never ending story. I needed a bomber canopy, but the Matchbox canopy (seen on the left) had a blister in the escape hatch, instead of in the side windows. I bought the Aeroclub vacform Mosquito bomber canopies, but these were of low quality and had very vaguely defined side blisters. The only solution I saw was vacforming one myself, something I hadn't tried before. Note that this all happened before Tamiya and Hasegawa decided to issue their 1/72 models.
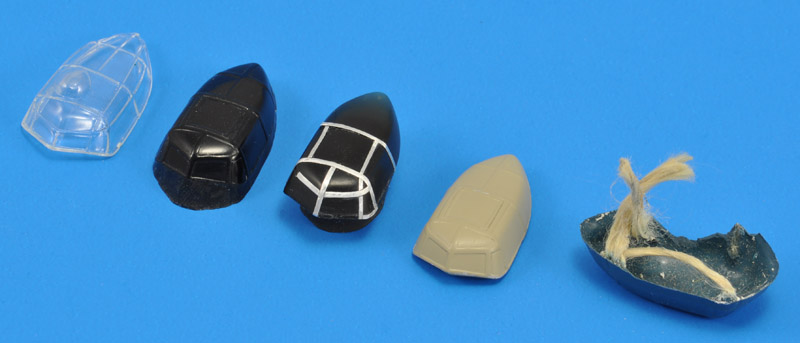
I definitely wanted to do female vacforming. I had done some heatforming over positive moulds, but the results were not very convincing. Female vacforming requires a negative mould, so a lot of work would be in order. The amount of work was quite silly to be honest, but I had long wanted to try vacforming, so I went ahead. First thing to do was to make a master. The Matchbox canopy was incorrect for my purposes, due to the top blister. Also, I had found out that the Mosquito canopy featured many internal frames, and the Matchbox canopy had too many frames on the outside. I made a silicone rubber mould of the Matchbox canopy, and cast an epoxy copy in it. This copy was sanded down to remove all frames, and then 0.1 mm thick aluminium foil strips were used to build fewer new frames. The black canopy in the middle was the test bed for this technique. The master was then painted, as seen on the right. The rightmost canopy is discussed below.
Looking back, the windscreens are not correct, being too tapered.
| 
|
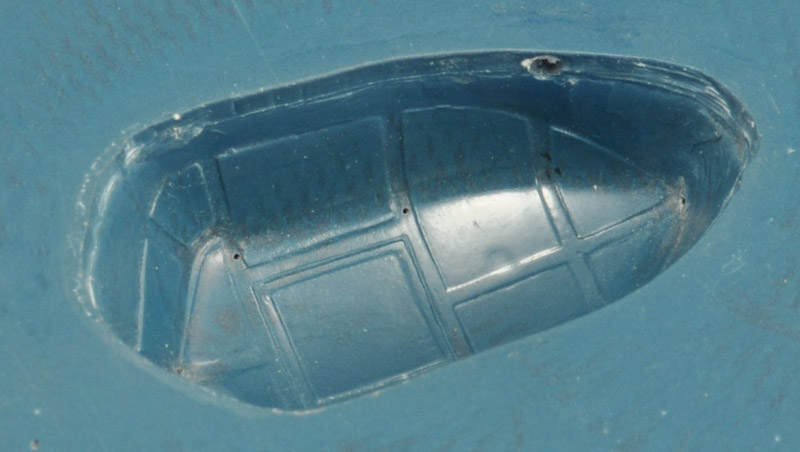
| Having a master, I had to make one more step before making the glass fibre negative mould. The problem was that my master canopy had undercuts, which would prevent releasing it from the hard negative mould. Therefore I made a silicone rubber mould using the master. In this mould I cast a special thin-walled copy. The thin walls would allow me later to bend the master slightly to make it release from the glass fibre mould.
The thin-walled copy was filled with clay, and put on a piece of sheet metal, all of it wiped with release agent. A blue gel coat epoxy was brushed over this, followed by small patches of glass fibre and epoxy to make a hard mould. After curing tiny 0.3 mm holes were drilled in it, for air evacuation. The result can be seen on the left.
|
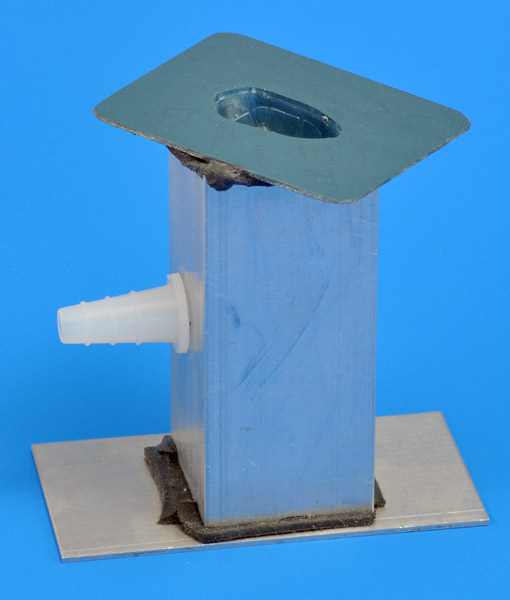
| I hadn't figured out completely how to actually do the vacforming itself, but I found a really simple solution. First, the mould needed some sort of air box beneath it. I built this from a piece of aluminium square tube and a piece of sheet aluminium, stuck together with Terostat tape (aka Tacky Tape). A small hole was drilled and a nozzle added, and it could be connected to a vacuum pump.
| 
|
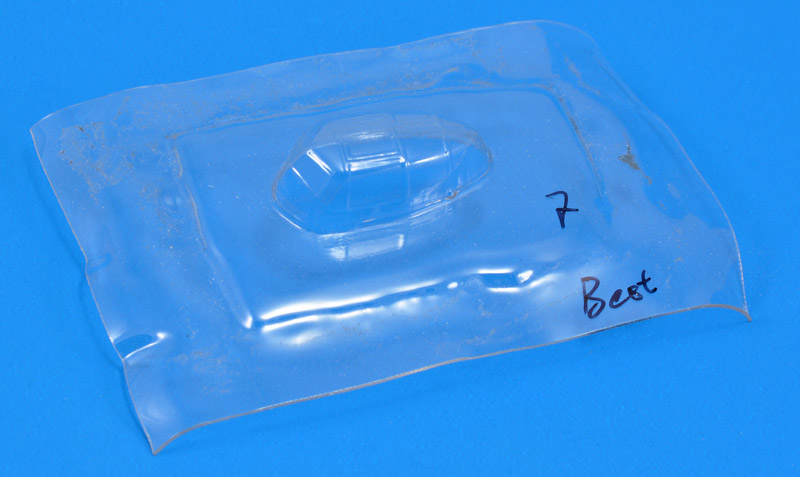
| The vacforming itself was very simple. I put Terostat tape around the edges of the mould, and stuck a piece of polycarbonate sheet on it. This was then heated with a heat gun (paint stripper) until soft, after which the vacuum pump was switched on. Voila, one canopy. It took a few canopies to find the right heating time. Unfortunately, the first products had lots of bubbles in them. This turned out to be absorbed water, boiling during the heating phase. Drying of the sheets at 100°C solved it completely. From then on the canopies were close to perfect. Not quite the level of Falcon vacform canopies, but the canopies were of pretty good quality.
|
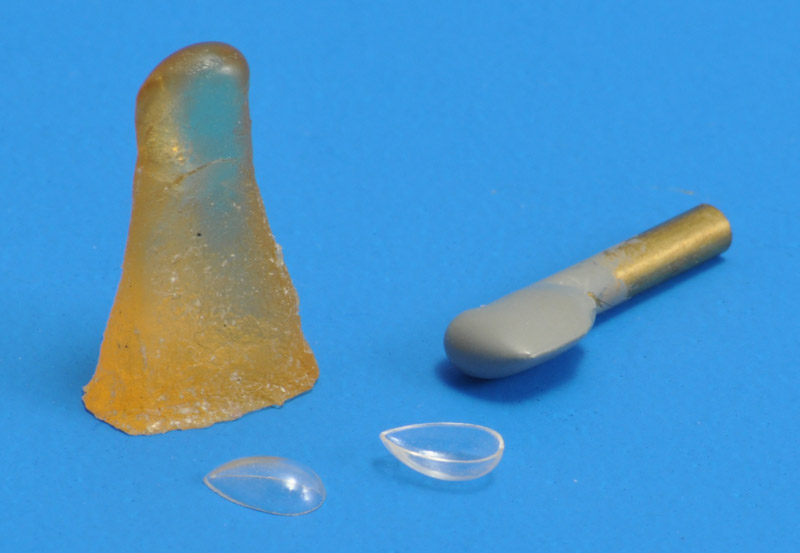
The canopy story isn't finished yet though. The side blisters were still lacking. I didn't dare to incorporate them in the canopy master, because both the master and the vacformed copies would have never released from the mould. So I decided to make the blisters separately, and add them later to the canopy (another challenge). Seen on the right is the blister master, left an epoxy copy, and in front two stretch-formed blisters.
At this advanced point I had to make a tough decision: I decided to scrap the vacformed canopy. The reason is that I made the master's windscreen windows too small (take a look at the tan master), and this has too big impact on the appearance of the model. It's like a portrait painting where the painter got the nose wrong. I long had my doubts about my windows, and I don't want to find out after painting that they are indeed wrong.
| 
|
| A Tamiya canopy was ordered from Japan. It was quite a job to make the somewhat smaller Tamiya canopy fit on the Airfix/Matchbox fuselage, but after many hours it finally fitted like a glove. However, I used the wrong glue to install the small side windows, leaving milky white areas, that were very visible. Grrr..... This caused a long pauze in the model's construction.
A long time afterwards I found another solution. Rob Taurus from the Czech Republic produces an amazingly sharp and clear vacformed Mosquito canopy. It even has integral side blisters - I wonder how they release it from the mould without scratching them! As you can see, it's a replacement for the Tamiya kit, so it should fit on my model. It is show on the right.
I decided to use a Hasegawa bombardier's window, if only to make this officially a four kit kit-bash :-)
|
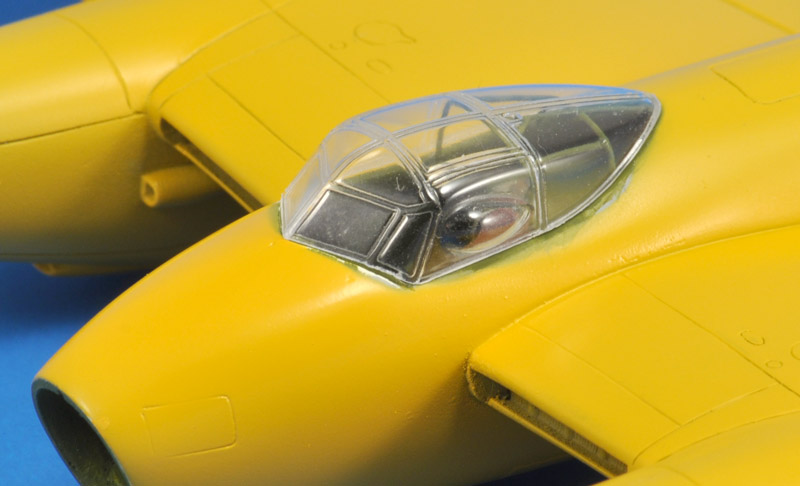
| Here's the Rob Taurus canopy positioned on the fuselage. It fits perfectly in the shape I created for the Tamiya canopy.
| 
|
Wheels and landing gear
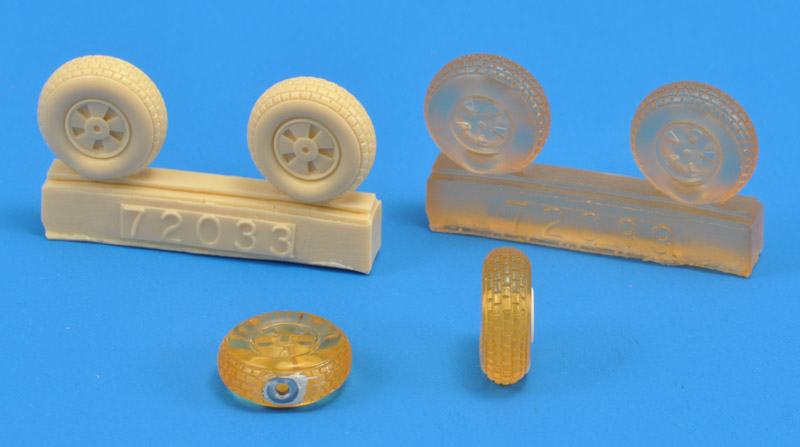
After studying photos of E0234 I decided that True Details' Mosquito tyres were the best choice. They are very nice detailed, but they were egg-shaped for some reason, and the bulges were horrible. I decided to modify one tyre to get rid of the egg-shape and the bulges. It wasn't easy at all to make the tyre round and unbulged, and it took me three rounds of modifications and spray-painting before it looked flawless. I made a mould of this modified tyre to cast two copies. The original TD set is shown on the left side of the photo, the recast in clear (but yellowed) epoxy on the right, and the modified wheels at the front. Note the absent of bulges. I think it was worthwhile.
Unfortunately, I later found out the wheels were still not completely correct. True Details modelled spokes on both sides of the wheel, forgetting that at least one side should show drum brakes. The spoke detail on one side was drilled out, and a discs cut from plastic card were glued in their place. I also cut openings the wheel bottoms to install small nuts. This will ease mounting the model on a base later.
| 
|
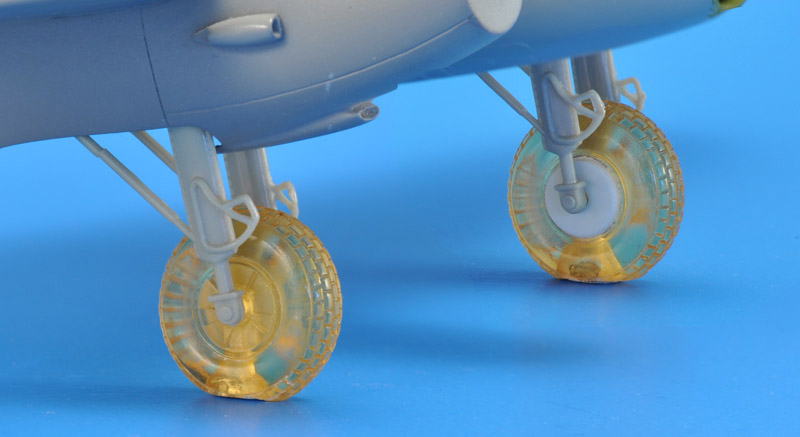
| The landing gear was another difficult item. The Airfix landing gear legs are too long, and I modified the parts so they would sit 2 mm deeper in the wells. They are pretty wobbly if you can't glue them together for fitting, and making them fit was a frustrating experience. In the end I put brass pins in the legs, that fit in corresponding holes in the wheel wells. I can now try to align everything. The photo shows a test fit of the legs and the modified True Details wheels. It may look a bit strange because the doors are missing.
I noted later that the wheels aren't correctly installed in this photo. The wheels were both installed with the 'spokes' on the left side, and the brake drums on the right side. Strangely, Scale Models International, September 1981, page 444, reports the exact opposite.
|
Colours
As far as I know now, the RAF used one yellow colour, 'Identification Yellow'. It is also called 'Trainer Yellow' and 'Marking Yellow'. It was used, among others, on the lower side of prototype aircraft. Because of this, I assumed that the prototype Mosquito was painted overall in this colour. I used MRP-122 'Marking Yellow' for my model, on top of several coats of Humbrol enamel paint. Three-quarters of a full bottle of MRP-122 were required to cover my 1/72 model - amazing.. I really hope that this is due to yellow being a 'difficult' colour.
Markings
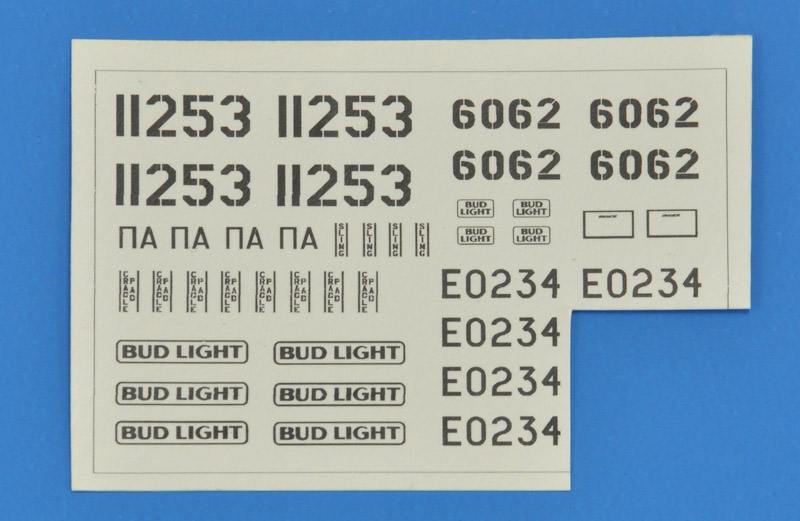
| For a long time I searched for decals for the serial number, but I never found any. But then I found a solution in Alps decals. I learned how to prepare decal artwork with vector graphics: starting with an RAF font found on the internet, I reworked every letter and number to make them identical to what I saw in the photos. And here they are: my own 'E0234' serial numbers, Alps printed by Luca Beato! Also visible on the sheet are decals for some other modeling projects (BD-5J, X-1 and RF-84F). A set went to Scott Bregi, who was building the prototype too. His Tamiya-based model can be viewed on Hyperscale.
| 
|
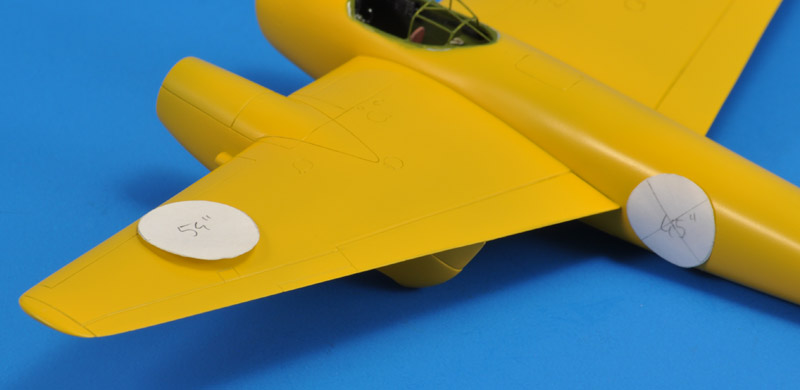
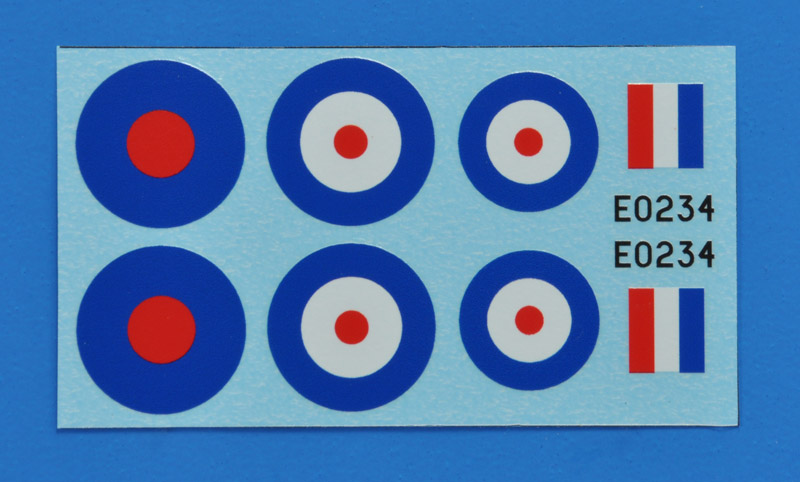
| After a lot of puzzling, I also found the sizes of the roundels. I assumed that standard roundel sizes were used, and used circles of these sizes to test-fit on the model, and compare that to period photos.
fuselage: 45" Type A, blue-white-red, at ~ 2 mm behind the wing's trailing edge
upper wing: 54" Type B, blue-red, at ~35 mm from the wing tip
lower wing: 54" Type A, blue-white-red, same position as on upper wing
fin flash: standardised size 24x27", blue-white-red, red to the front, blue against rudder hinge gap
the serial number starts / ends where at the leading edge of the vertical tail
|
| This leads to the following set of markings. I had these decals custom-printed by SpotModel.
| 
|
One thing I haven't completely figured out is which red and blue colours were used for the roundels. Quoting from 'The IPMS Color Cross-Reference Guide' by Dave Klaus, there were three eras with their own colours. FS 595 codes are also used because the colour names changed:
| Era
|
| Red
|
| Blue
|
| 1935-Sep 1939 - aluminium painted aircraft
|
| 'Identification Red (Bright)'
| FS 11105
|
| 'Identification Blue (Bright)'
| FS 15056
|
| 1935-Sep 1939 - camouflaged aircraft
|
| 'Identification Red (Dull)'
| FS 30109
|
| 'Identification Blue (Dull)'
| FS 35044
|
| WWII
|
| 'Identification Red (Dull)'
| FS 30109
|
| 'Identification Blue (Dull)'
| FS 35044
|
| Post-WWII
|
| BS-381C-538 'Post Office Red'
| FS 11136
|
| BS-381C-110 'Roundel Blue'
| FS 15056
|
Summarising, there were two sets of colours. On black & white photos you cannot see the difference.
E0234 made its first flight at Hatfield, 25 November 1940. So following the above it should have dull roundel colours. Also, I don't think Type B roundels were ever painted with the 'bright' colours.
To be continued
Modeling links
I found a few other models of the Mosquito prototype:
Return to models page


