| In 2006 I learned about the 3D printing services of Printapart who use a InVision HR printer. I was surprised by their pricing: this company makes 3D printing affordable for the modeler! In the past I had worked on the ENAER Namcu / Euro-Enaer Eaglet, a composite two seat trainer aircraft. When I met two former Euro-Enaer colleagues years later, it turned out that 3D files existed of this aircraft. It wasn't company property, since this aircraft was designed and built using 2D drawings. We simply had to print a model of it! |
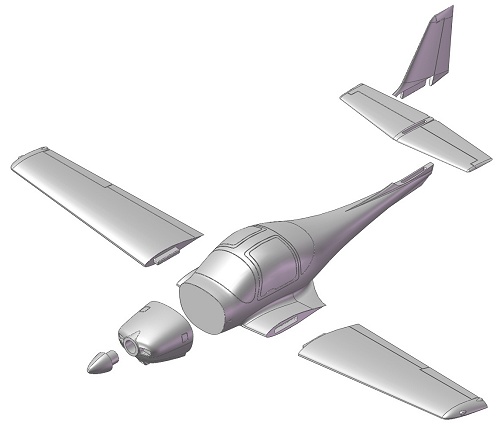
| The 1:1 scale Eaglet was designed and built in the 2D CAD era. However, in his spare time, Euro-Enaer CAD engineer Niels Schoen made a 3D model of the Eaglet. This model was reduced by Maarten Korenromp (another Euro-Enaer engineer) to 1/72 scale and given scribe lines where appropriate. It was broken down so it could be used to make silicone rubber moulds for subsequent resin casting. Most parts were given tabs or slots, to facilitate the assembly of the cast model. An exploded view of the seven parts is shown here. | 
|

| The files were uploaded to the Printapart website in April 2008. And after a week or so, this is what we received: a complete Eaglet in 1/72 scale! The cost for the printing was 70 dollars. The white-colored left side of the fuselage and cowling requires some explanation. During the printing process, a wax is used support overhangs. Printapart cleaned off this wax this wax thoroughly, which leaves a white surface that is slightly rougher than the normal blue surface. With this knowlegde, it is clear that both the fuselage and cowling were printed with the left side down. |
| This photo shows the minute size of the model, and in the door / side window area you can see the small steps that are the result of the layered printing. | 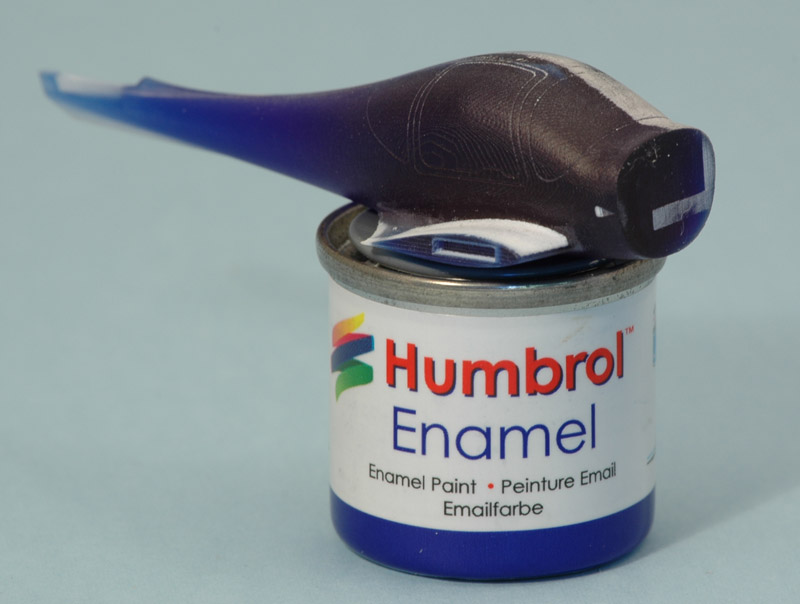
|
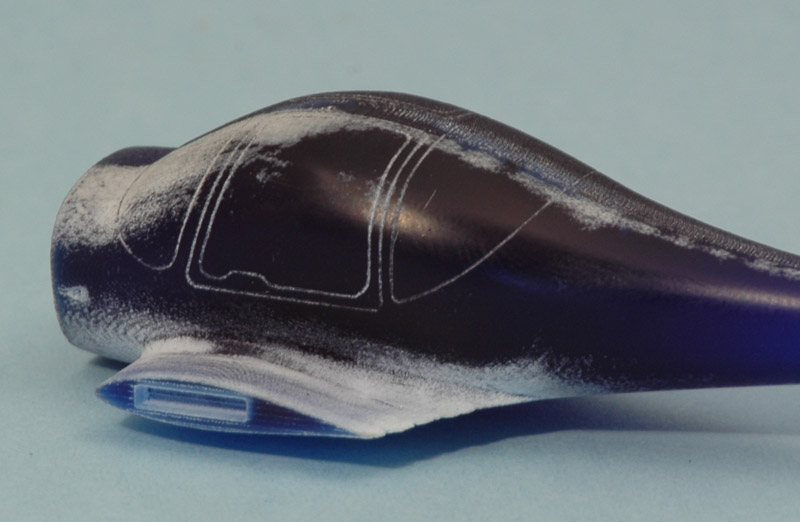
| On the left side of the cockpit, I started the careful sanding to eliminate the steps. The material sands very easily, so easy that I nearly lost the scribe lines. I had to scribe them deeper before continuing. The photo also shows that sanding the model removes the white discolored material. |
| We were in quite a hurry to try 3D printing, and we made one deliberate mistake: the thickness of the trailing edges of the flying surfaces was scaled down 72 times, to almost nothing. We should have made them thicker. Not surprisingly, the trailing edges are missing about one millimeter, and crumbling further and further.. | 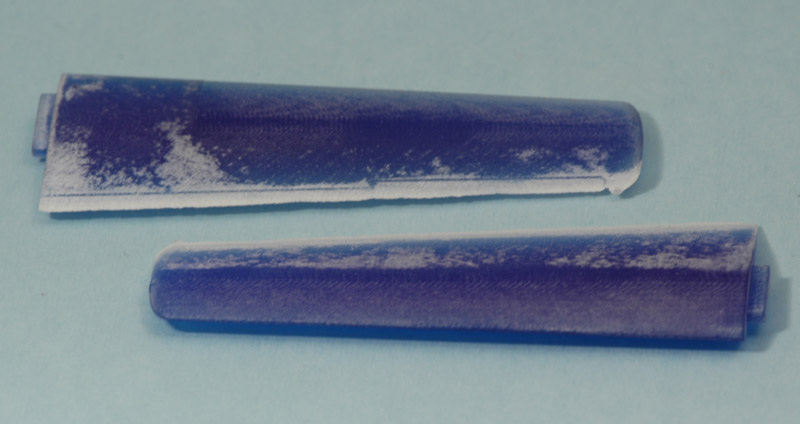
|
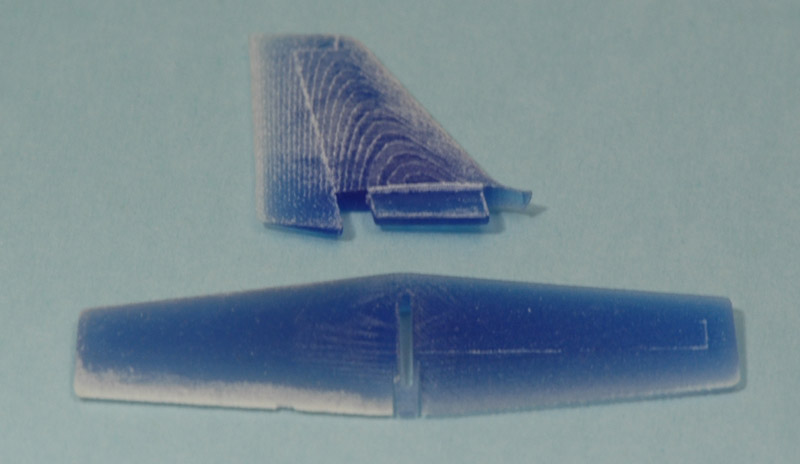
| The tailplanes nicely show the tab and slot that allow easy assembly of the model. For some reason they don't suffer from the trailing edge problem as bad as the wings. |
| I started restoring the trailing edges with thin plastic card. The wings were reinforced on the lower side only with 0.1 mm card, the tail planes with 0.05 mm card on both sides. The strips were then faired in with white Milliput, shown here on one wing root only. | 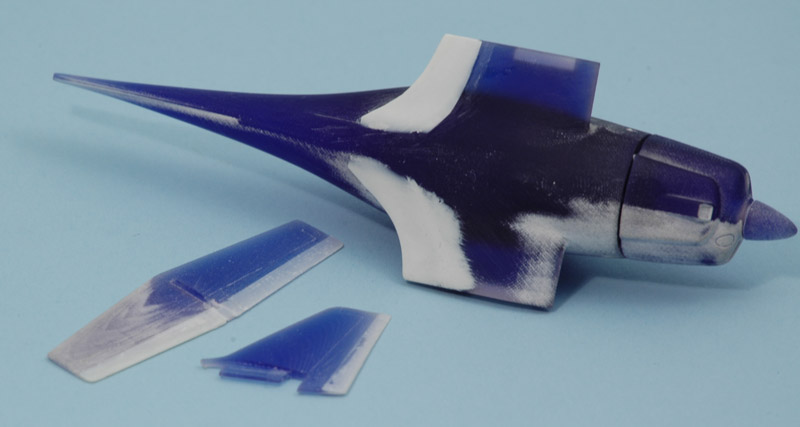
|
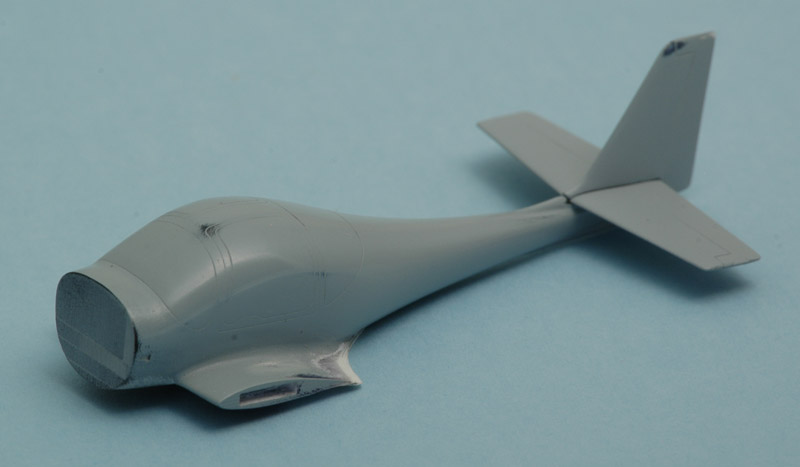
| The next step was to paint the parts as a check of the surface quality. It showed that the steps resulting from the printing process were still visible in some places, despite sanding. Therefore another round of sanding was required, with the paint filling the steps nicely. I also noted that some parts were slightly warped, like the vertical tail and the right-hand wing. I also reshaped the wing roots at the trailing edge, since the real plane looked a bit different in that area. |
| The puttying and sanding of the lower side of the fuselage was also covered with a layer of paint to check the quality of the work. Not completely ready yet.. | 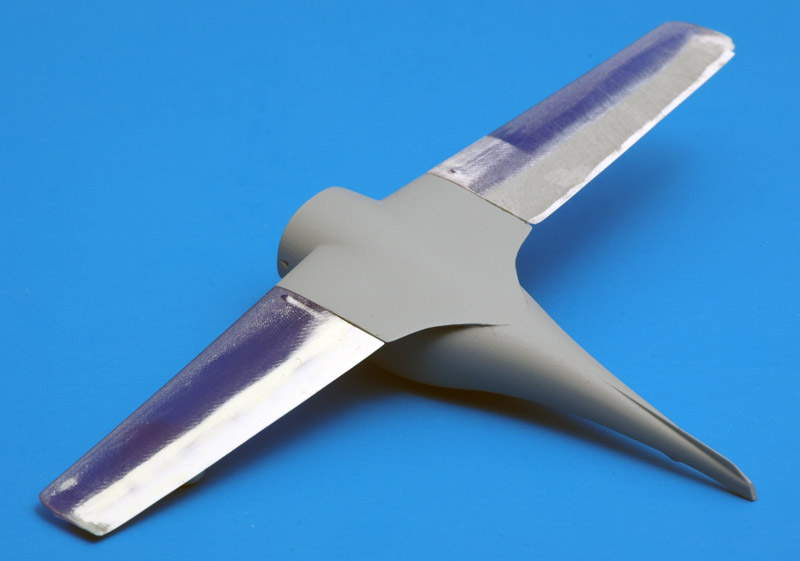
|
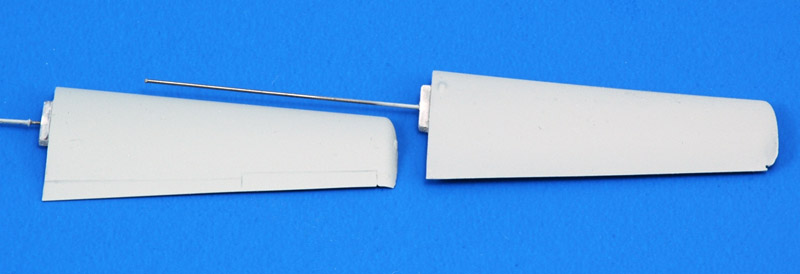
| The wing's trailing edges were still a mess even after my first repair attempt. I the mean time I had learned to use steel wire on trailing edges, to make them both straight and strong. I used 0.2 mm wire here. That was followed by the usual painting and more sanding routine. What you see here is the upper side of the right wing (with flap and aileron) and the lower side of the left wing, where the flap and aileron lines had disappeared in the process. I also need to repair the wing tips. |
Printapart who printed my Eaglet. Printapart is no longer active, the site redirects to FineLine Prototyping
Shapeways is another 3D printing company that caters for modelers, and allows you to sell your designs through their huge webshop
Moddler is a 3D printing company specialising in figure printing. Their machine's resolution is 600 dpi (0.042 mm) in X an Y and 1600 dpi (0.016 mm) in Z direction
Wicked Resin provides rapid prototyping services
RedEye On Demand also provides rapid prototyping services, but possibly only to industry?
I.Materialise from Belgium is big player in rapid prototyping
Anza Design in the USA offers 3D printing and more
Plunkett Associates in the UK offers 3D printing and other technologies
Fabbaloo a blog about 3D printing
Chuck Doan's abandoned roadside garage with lots of 3D-printed parts and fantastic weathering
Small Scale Shop that sells 3D printed models in 1/144 and 1/350 scale
Combat Group Dynamix sells 3D printed models in 1/144 scale, alongside conventional resin cast models. Internet Modeler has reviews of the 1/144 German sWs and 1/144 Flak-SW 36
3D printed 1/24 Ariel Atom by Norm Larson on the Model Cars Magazine Forum
3D printed 1/25 car parts by Joseph Osborn on the Model Cars Magazine Forum
ARC forum discussion with great information
3D printed 1927 Miller 91, Gould Studio's design by 'gulfclk' on the Automotive Forums, very high quality parts
PrintedPlanes / Inner-Leaf 1/500 aircraft models from Australia