Hasegawa F-4 Eggplane


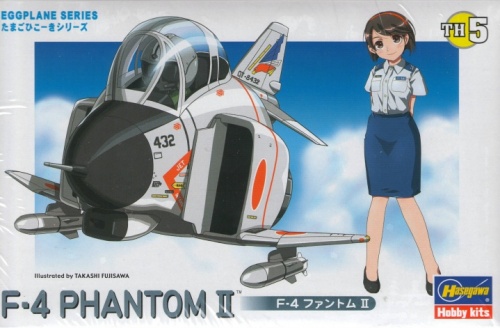
I've always liked Hasegawa's eggplanes, but never bought one when they were first issued. When they were reissued in 2008, I obtained the F-4 model. These eggplanes are often advertised as a good cure for Advanced Modelers Syndrome (AMS), but I guess I got a placebo. Hence I modified it quite extensively to suit my taste. The model was also used for a club project with fictitious shop displays.


The model and Advanced Modeler's Syndrome plans

Although I picked the F-4 because I liked it best in the jet eggplane series, I was not completely happy with the Phantom's shape. The inlets are really too big, and the same goes for the nozzles. The model is a caricature of a caricature! The F-15 model suffers this problem even worse.

I took a side view photo and studied the possibilities for modification in CorelDraw. This looked promising, so I decided to go for a fairly big plastic surgery. Another problem is the crew: there's no backseater. Having a full crew required making a copy of the pilot figure, since there are no eggplane pilots in my spares box.

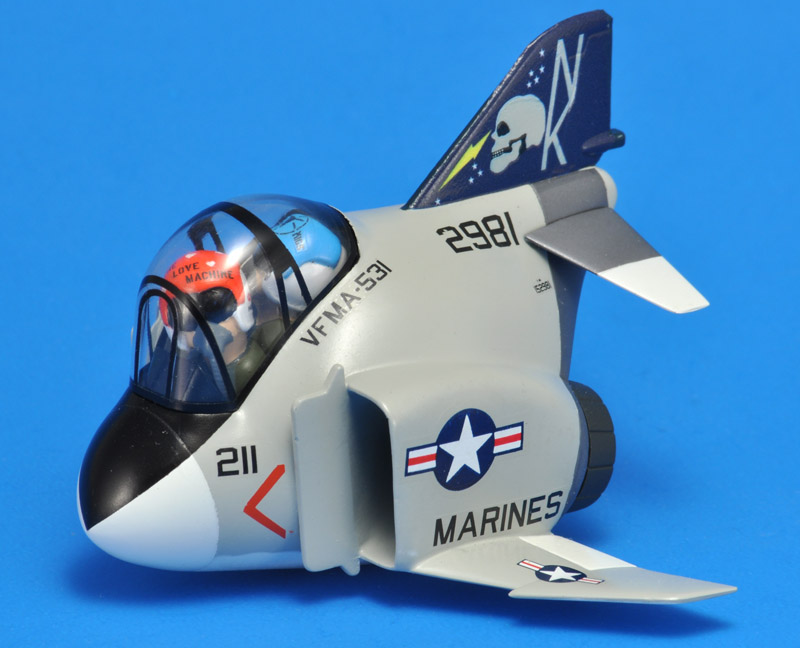
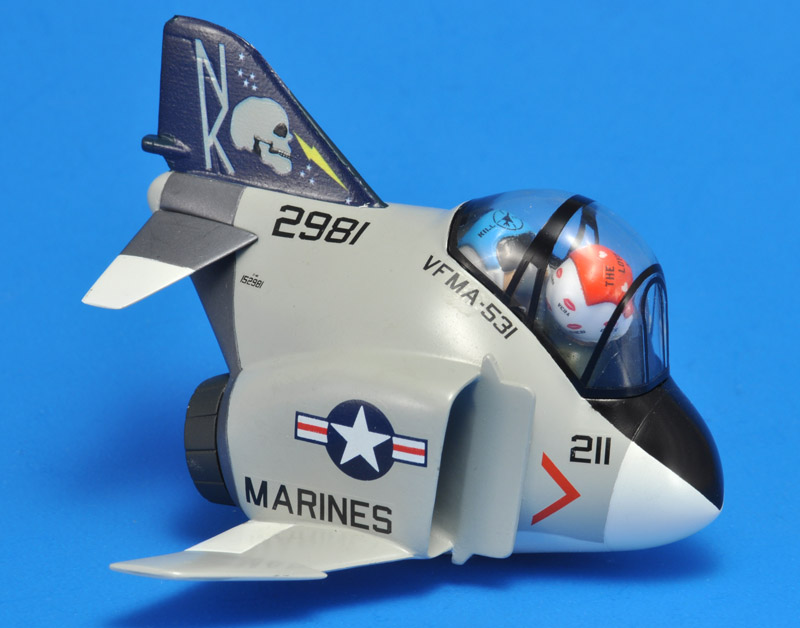
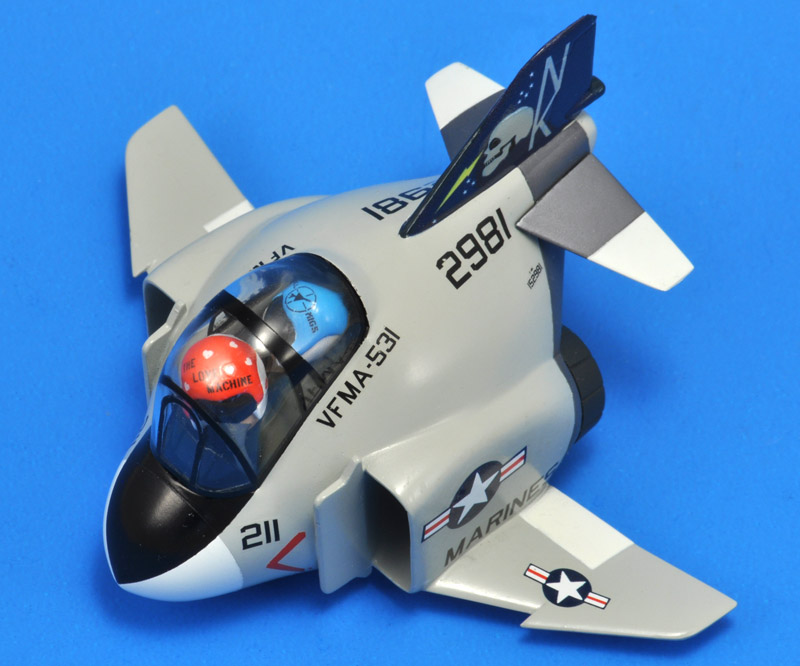
Regarding the markings, I wanted my silly eggplane to look as bad and macho as possible. Browsing through an F-4 book I found what I was looking for: the markings of Marines squadron VMFA-531, with a big skull on the tail. It also meant that the F-4E would have to be modified to make it resemble an F-4N somewhat.


Construction

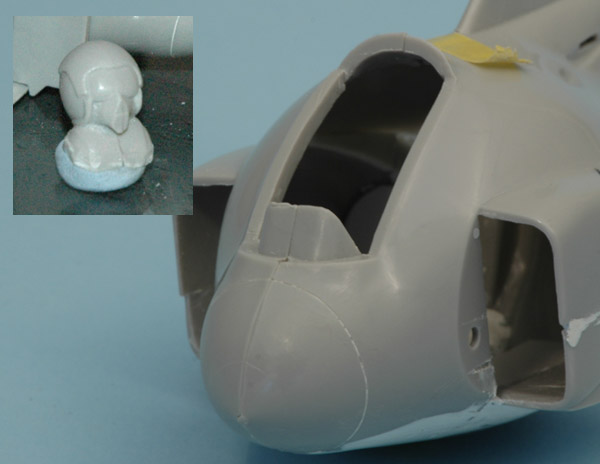
I started with the pilot, who was molded integrally with the fuselage halves. I removed him using various scribing devices and saws. Next the cockpit opening was cleaned up. The pilot was assembled, and the rather soft detailing was improved until I had a reasonable pilot's head. The upper torso was later cut away because it prevented a more active posing of the heads. A copy was cast to obtain a backseater. A simple cockpit tub would be added later.
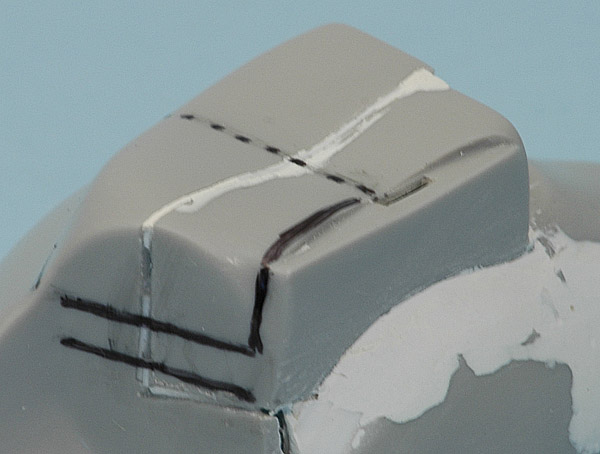
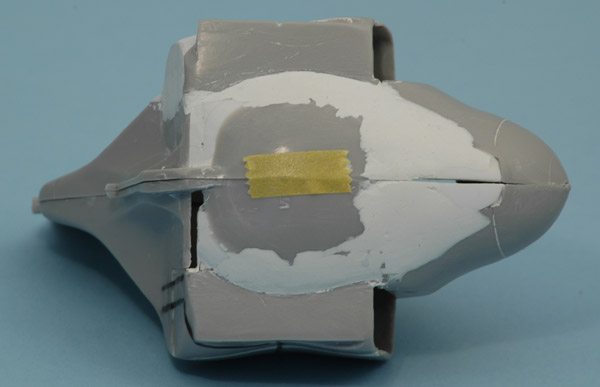
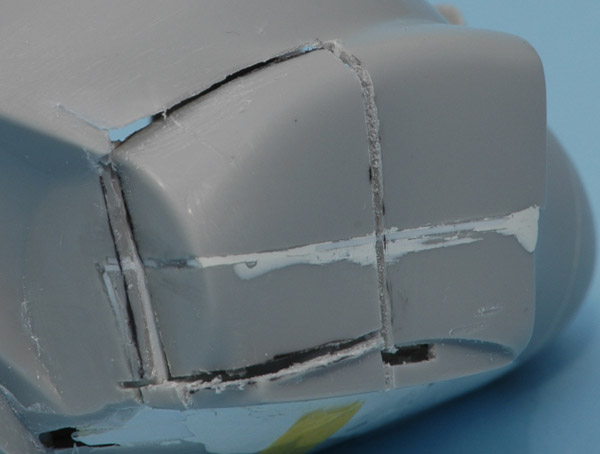
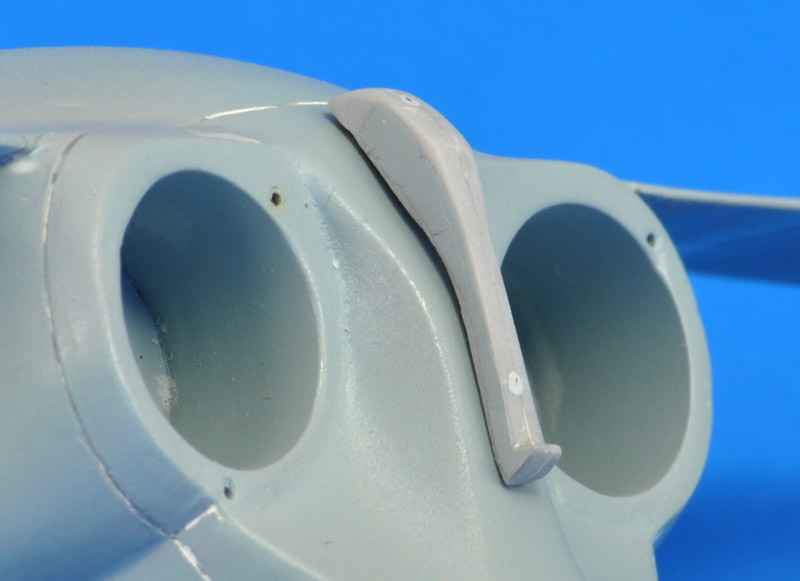
The inlet height was modified by removing a piece of around 4 mm from the inlet side, and moving the lower part upwards. The sawcut is visible as a white putty line halfway up the inlet side and on the rear of the fuselage. The front edge of the lower and upper intake no longer matches, and it was later restored with a piece of plastic strip.
The lower fuselage was roughly reshaped with Milliput, extending the egg-shaped part until it met the inlets again. The gun pod under the nose was also cut off, and the hole closed with plastic card. The radome is quite big actually, and I think it better represents the big-nose early Phantoms than the F-4E/F/G. The F-4N's infrared sensor will be added later.
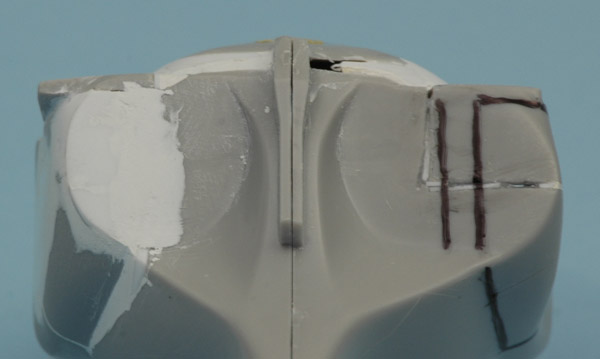
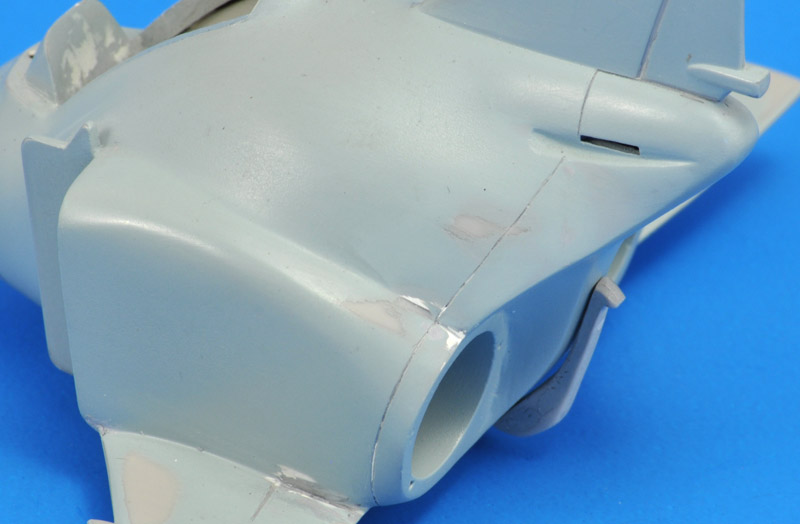
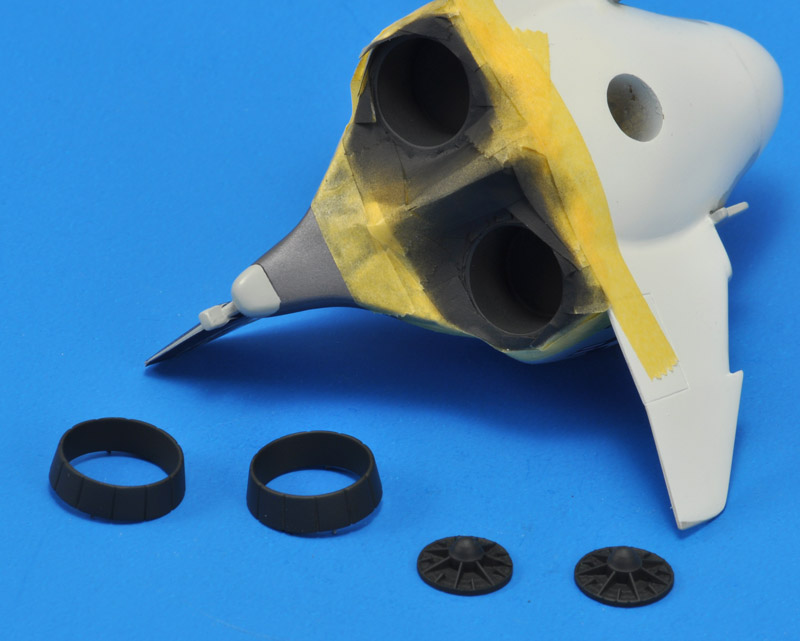
More difficult was the operation to make smaller nozzles fit the model. I had decided on using the 17 mm diameter nozzles from an eggplane SR-71, replacing the 20 mm diameter F-4 nozzles. This meant the rear fuselage was too wide now. It required a three sawcuts and one partial cut (serving as a hinge) to allow bending of the inlet duct. The fuselage side was made straight with Milliput, removing the strange pinched shape that Hasegawa came up with.
This rear view shows the modification one more time. Note the change of the upper fuselage meeting the nozzle area. Some scraping was required there.
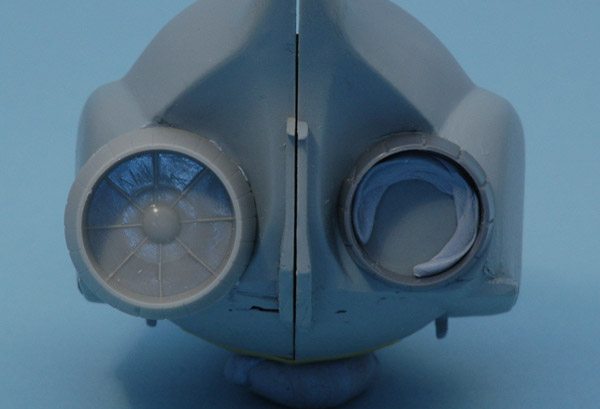
Just to show how much smaller the SR-71 nozzles are compared to the original nozzles, here's a rear view with both nozzles attached.
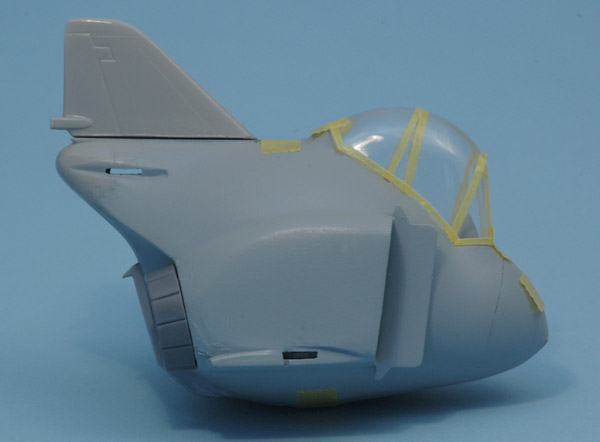
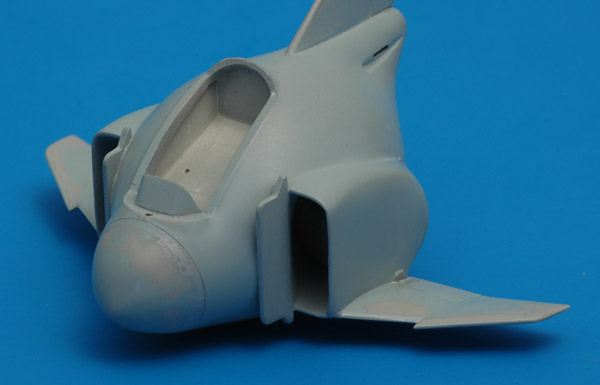
The preliminary result of the plastic surgery is best judged in a side view, after base-coating the model with a light gray paint to hide the worst scars. The inlet modification was a lot of work, but for me it was worth it. The smaller SR-71 nozzles are also test-fitted. They were fairly long, and gave the impression of long F-4E/F/G nozzles instead of the short F-4N nozzles. Therefore one millimeter was cut from the base.
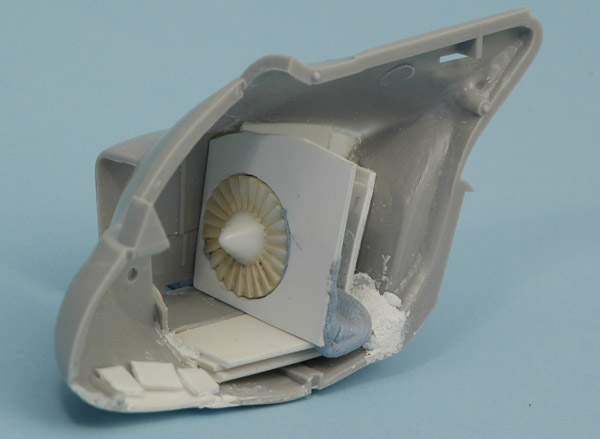
On ARC I spotted Phil Silverback's Phantom eggplane with engines visible through the inlets, but I couldn't see whether the model had inlet ducts extending to the engine face. It looked really good, and when I thought about it, it wasn't too difficult. I mounted a piece of plastic card with a circular opening (as shown in the photo). After removal of the engine compressor I created a rough oversized inlet duct from plastic card (not shown). The last step was to plaster the rough duct with a lot of Milliput, sculpting a smooth duct by using the inlet opening and the circular holes as guides for my constantly wetted brush handle. The compressor faces are from an Airfix S-3 Viking from the scrap box. The look a bit turbo-fanish but they fit well with the distorted eggplane concept I think.
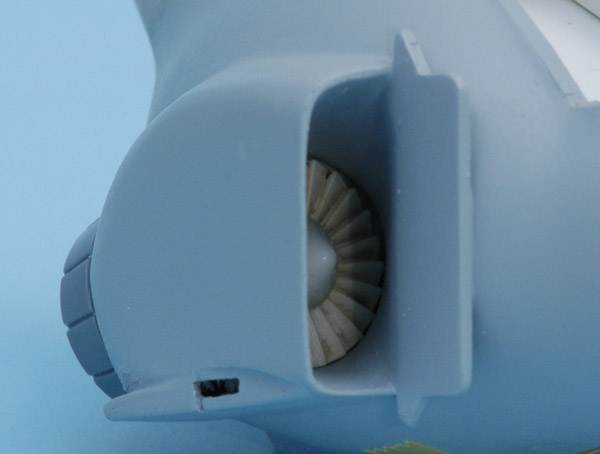
And here's the end result, after the Milliput sculpting and painting of the inlets. It was fairly easy and I'm sure I will use the technique again on a 'serious' model.
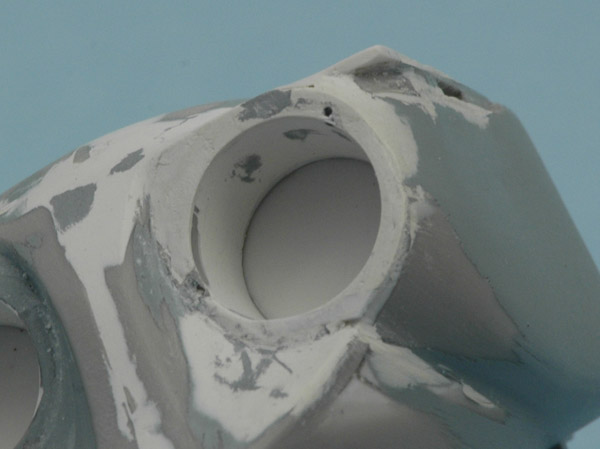
I think it was again on ARC that I saw an eggplane (F-16 I believe) with a deep exhaust. That made me realise that there was a big mismatch between the deep inlets and the shallow exhausts of my model. Therefore I decided at a late stage to deepen the exhausts. I couldn't find a piece of tube of the right diameter, so I did the next best thing. The technique was identical to that of the inlets: I glued a piece of plastic card with a hole where the turbine face would go, and filled the area between the card and the nozzle with Milliput, shaped with a wet tool. I also removed the tail hook, since the halves didn't line up nicely. You can also see the amounts of Milliput used in the construction of this model :-)
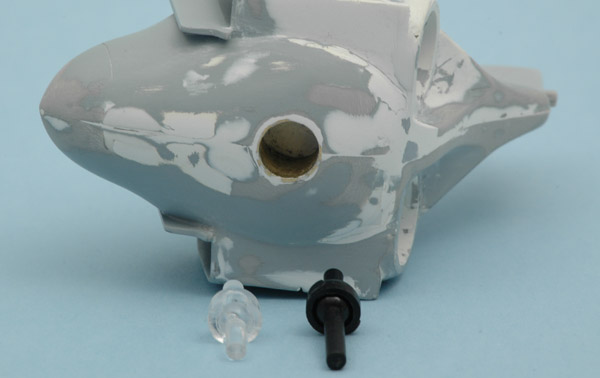
So far I hadn't given much thought about how to display this model, but a 'flying' model seemed like the best idea. I wanted to install a Matchbox stand-type ball joint, but didn't have one at the time, so I prepared the model by installing a short piece of K&S brass tube. In the end my modeling friend Eric kindly supplied me with two ball-joints, one of clear polystyrene and one of black polypropylene.
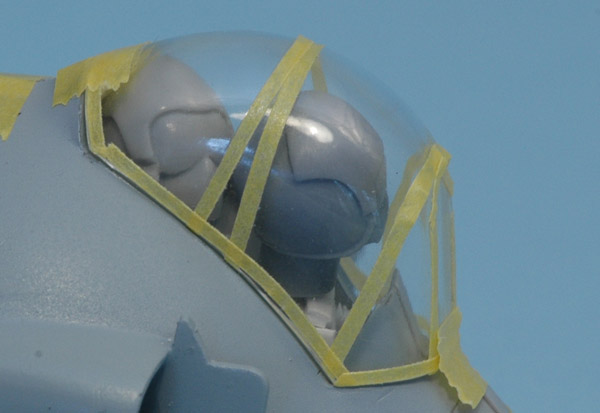
Using the extra cast pilot head/helmet, I could figure out how to place the crew in the cockpit. Space was very tight, and they are like in a bobsled :-) I posed the navigator looking to the right and the pilot looking to the left. Initially I had them turned their heads 45 degrees, but that made a 'Where did that MiG go?!?' kind of impression, so I reduced the angles to roughly 20 degrees, creating just a bit of variation in the cockpit. Later I sculpted new upper torsos using Milliput. Having a neck between the torso and the head/helmet also improved the looks I think.
The wings were attached, and another round of sanding and filling was started. I'm not sure how the wings fit on an unmodified Egg Phantom, but I had to do quite some work to make things fit seamlessly, especially on the lower side. But with the end in sight, the job was done without complaining too much.

Last task before painting was some work on the panel lines. I removed all of the raised panel lines on the wings and vertical tail, moved the radome panel line 1 mm aft to increase the radome size slightly, and scribed lines to define the bare metal areas around the exhausts.
I also scribed a panel line to outline the bare metal parts of a Phantom. The shape is very much a compromise since the shape is so different. The scribing was complicated by the various materials used so far, and their different hardnesses.

Not yet done here was an extra panel line to define the small parachute housing cap. It was an awkward shape to scribe for sure, but it worked.
The arrestor hook was separated earlier, and now it was time to attach it again. I installed two brass pins to fix its position, and make it removable for painting. The bottom end of the hook was shortened a bit.


Colors and markings

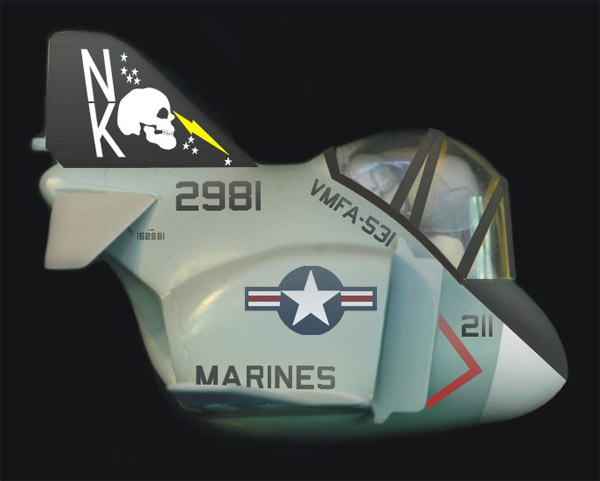
I made a side view photo and overlaid it with the planned markings in CorelDraw. I started with the VMFA-531 markings, that I redrew as vector over a bitmap picture. The rest of the markings were easy, just Navy style lettering and a star & bars. The white radome may not be typical of an F-4N, but I liked it better. I'll probably go for black-painted canopy framing, although I haven't seen it yet in VMFA-531 photos. Seen here is the first version of the proposed markings.

For the record: Microscale has a regular 1/72 decal sheet for a VMFA-531 F-4N (72-310) but I did not try to buy it. But by coincidence I obtained the sheet much later, when a former club member donated all his remaining models and decals to the club.
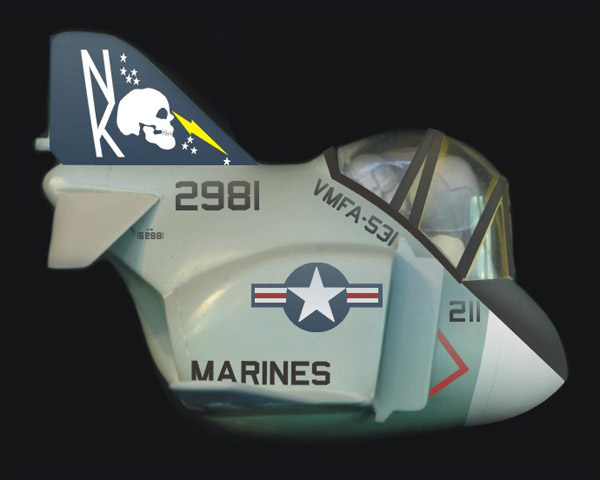
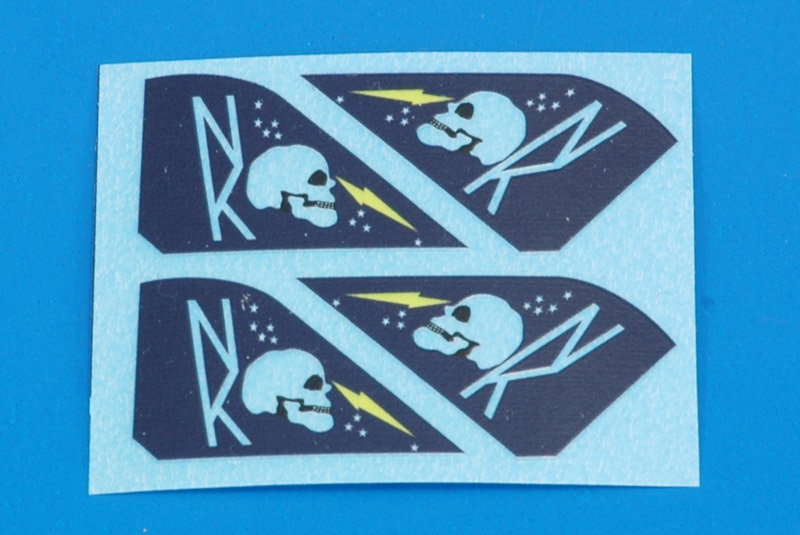
I got a note from ARC member 'Grey Ghost 531', who was in VMFA-531 during the F-4N period. He suggested changing the tail color from black to insignia blue, and making the 'N' and the 'K' on the tail touch each other. Both corrections were made to the decal artwork. I also learned that the NK code was used while VMFA-531 was at the USS Coral Sea from the spring of 1979 until late summer of 1980. He confirmed that VMFA-531 F-4Ns always had gull gray canopy framing, and pointed out that an F-4N should include a fairing under the radome and DECM fairings on the intakes. Most likely I will add these details. Shown here is the second version of the proposed markings. I also drew in the canopy frame to study the effect of black canopy framing. I'm not convinced yet.. Also I enlarged the radome in the drawing, and reduced the warning triangle ahead of the intake.

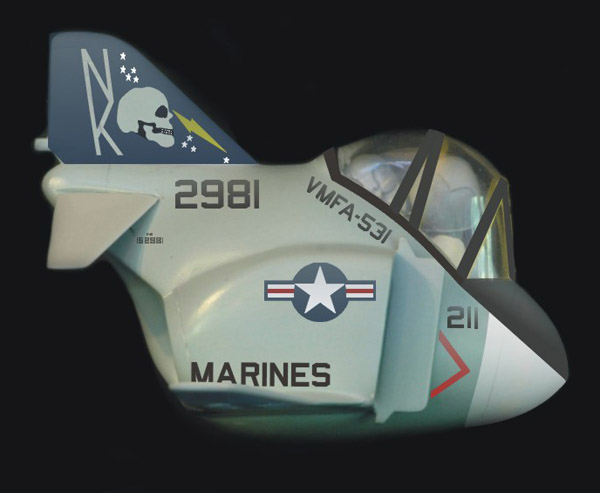
More corrections on the tail artwork. 'Grey Ghost 531' remembered: "When the aircraft came in from depot maintenance the tail was over all gray. The paint shop would mask off the skull and "NK" and then shoot the insignia blue. They then had stencils for the eyes and the gap between the cranium and the jaw which were sprayed black and then another stencil for the teeth which where sprayed white." A big problem is that I can't print gull gray nor insignia blue with an Alps, so maybe I will have to use incorrect markings. In this version I reduced the size of the stars & bars.

I had two sets of tail decals printed by SpotModel. The Insignia Blue color came out nice.

Decals for the pilot visor covers are also planned. One problem is that the visor cover can't be black, since the visor itself is black too. Therefore copying the skull tail decal was not possible, or I have to reverse the colors.
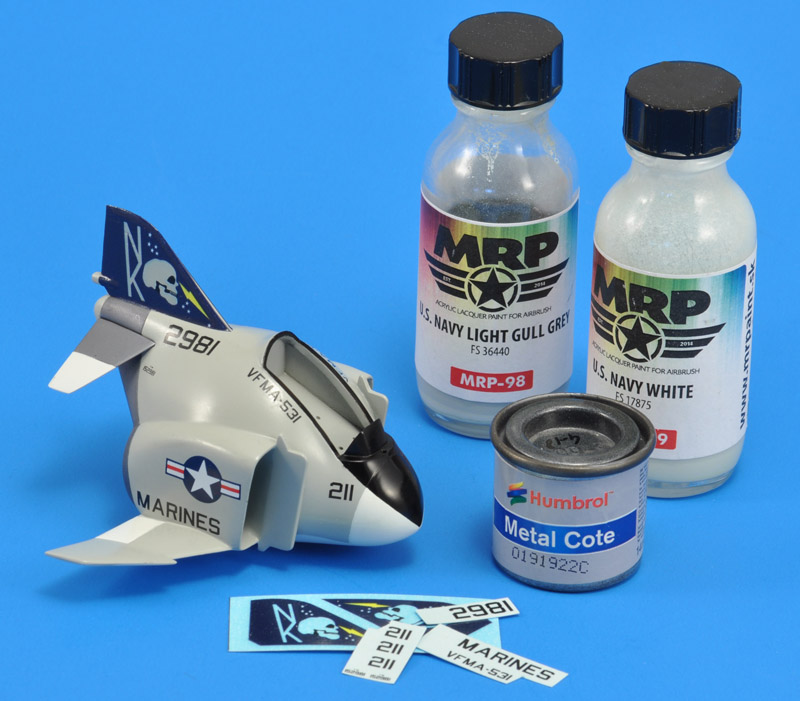
Unfortunately, I forgot to photograph the model during the painting process. In summary, I used MRP-098 FS 36440 Light Gull Grey for most of the model, then painted the radome and upper side of the flaps with MRP-135 Insignia White, followed by the anti-glare panel in MRP-005 Black (I included the canopy sill). Next was MRP-135 Insignia White for the underside, and I ended with Humbrol 27003 Polished Steel for the aft fuselage.

Decals were next. I started with the custom decals for the vertical tail. These grow 8% during the wetting, but that was anticipated in the design, so they fitted almost perfectly. I will need to paint the small gap at the leading edge however, plus the trailing edge. Next were the big star-and-bars from Microscale sheet 72-84, I used the 25" ones. This was followed by all the black decals that I had printed on my Alps before it broke. Last were the 15" star-and-bars on the wing, again from Microscale sheet 72-84. For all decals, I first applied a bit of Future floor polish to avoid silvering. This works well, but it leaves some glossiness stains, requiring a subsequent clear coat.

Touch-ups of the blue tail were done with a mix of Humbrol 181 FS 15032 and 14 French Blue.
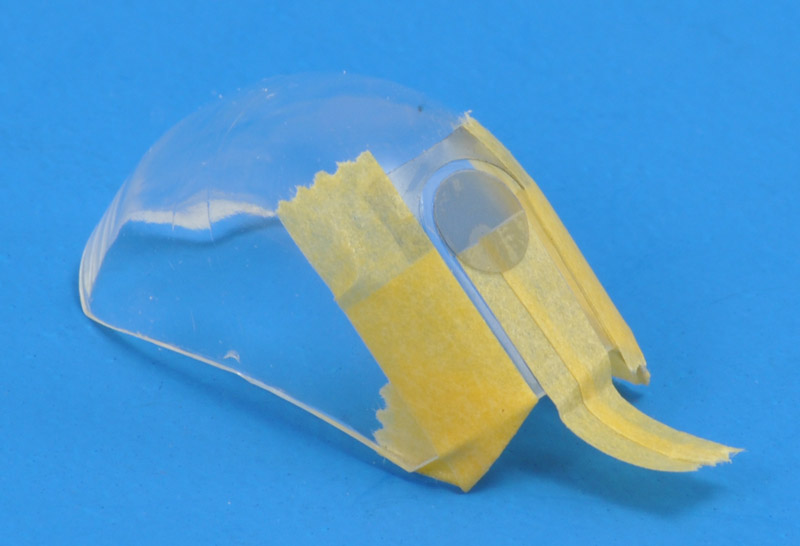
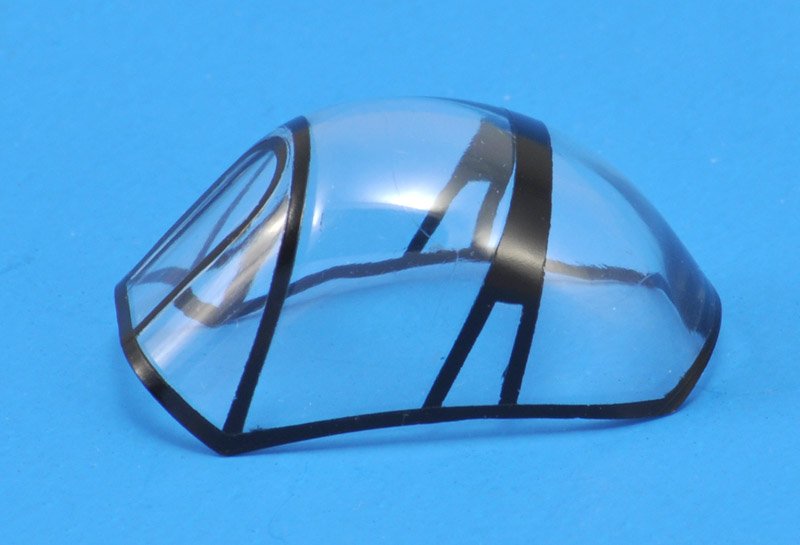
The canopy is not easy to mask. I decided to do the windscreen first. The key ingredients are the brilliant 'circular vinyl painting masks' by Arctic Decals (ARC72-FR05 and 06). I used the outside of a 7 mm circle to mask the outer contour, and a 6 mm circle for the inner contour. The rest was done with Tamiya 6 mm tape. For all the canopy frames, I followed the kit's panel lines exactly.
I used MRP paint, but there was a risk: errors cannot be removed, since the lacquer paint will etch itself into the transparant plastic. The end result has a few small imperfections, but I'm happy with the result. The canopy itself has a visible weld line, unfortunately.
The exhaust parts and nozzles were painted Revell 9 coal black. I decided against doing a drybrush job, it wouldn't fit with the rest of the paint job.
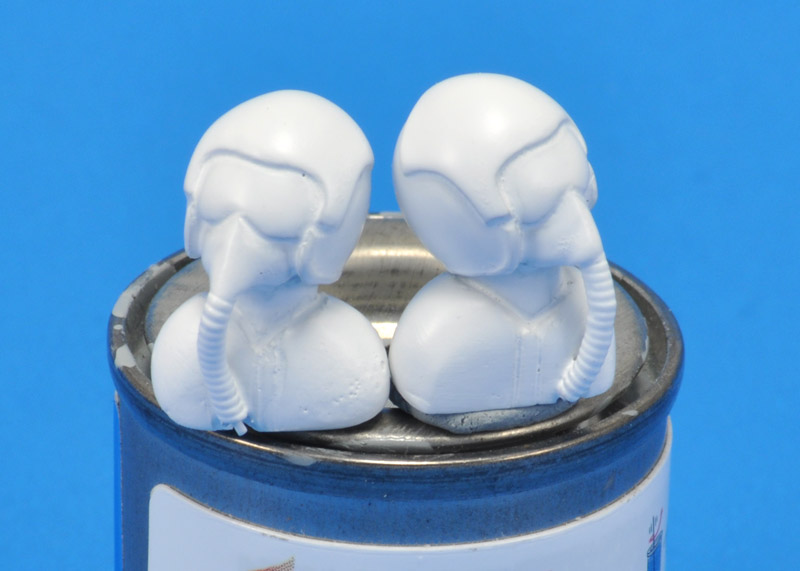
Finally some progress with the pilots. I added oxygen hoses wound from 0.5 mm solder, and base-coated the figures with Gunze Mr White Surfacer from a spraycan.
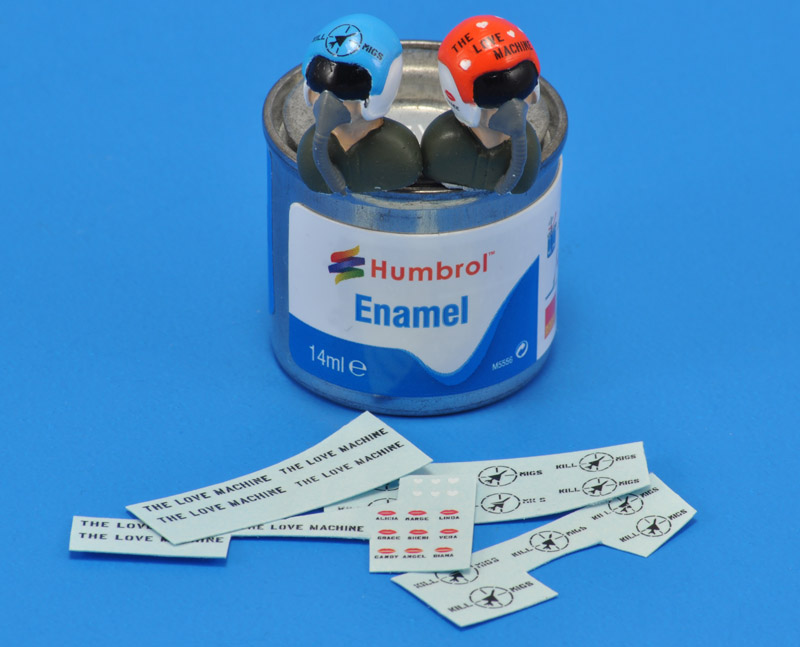
I painted the visor covers MRP-184 Signal Red and MRP-044 Ukraine Su-27 Blue. The visors were painted Humbrol 85 stain black, the masks a medium gray.

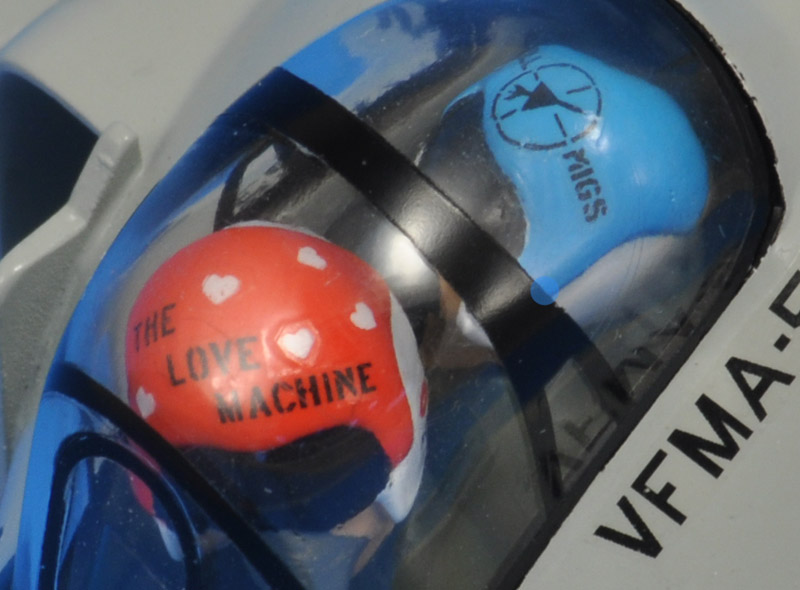
The decals were printed on my damaged Alps MD-5500. Inspiration for the 'Love Machine' helmet design came from a YouTube video showing a USAF pilot from the sixties. The 'Kill Migs' design was my own imagination.
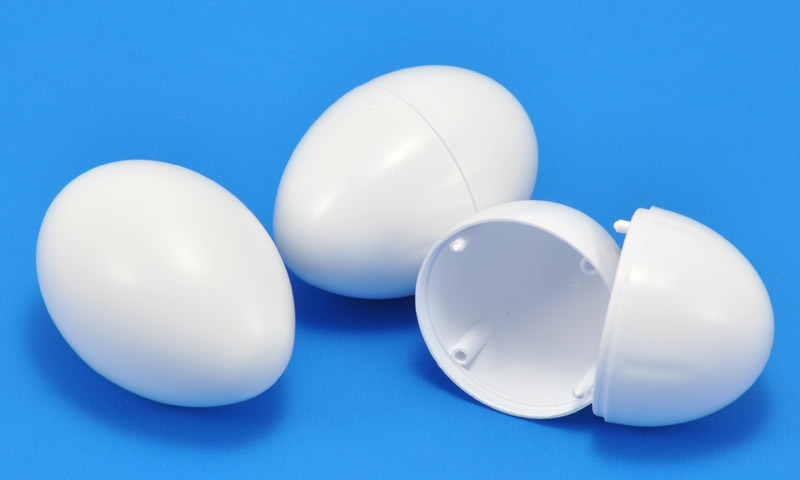
For a club project, I also needed an egg in the same scale. I purchased fake eggs, two part plastic mouldings. Getting rid of the seam and depressed areas was more work then expected, but in the end I had a good-looking egg. I used Gunze Mr White Surfacer 1000 from a spraycan, followed by Alclad ALC-314 Klear Kote Flat.


Finished model

I think I achieved all my goals with this model: all ideas worked well, and construction and painting went reasonably smooth.
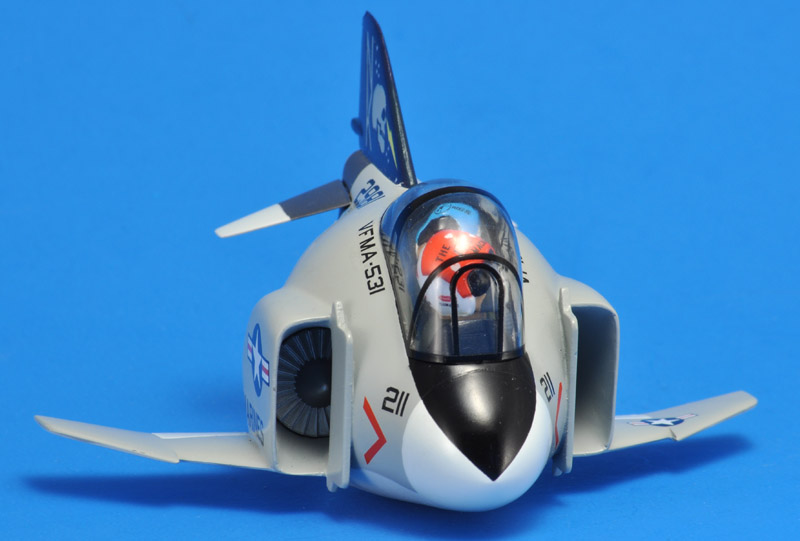
Front view, showing the inlet ducts and engine compressor.
Right side view. Some of the printing roughness of the tail decal can be seen - but the camera sees more than my 55 year old eyes :-)
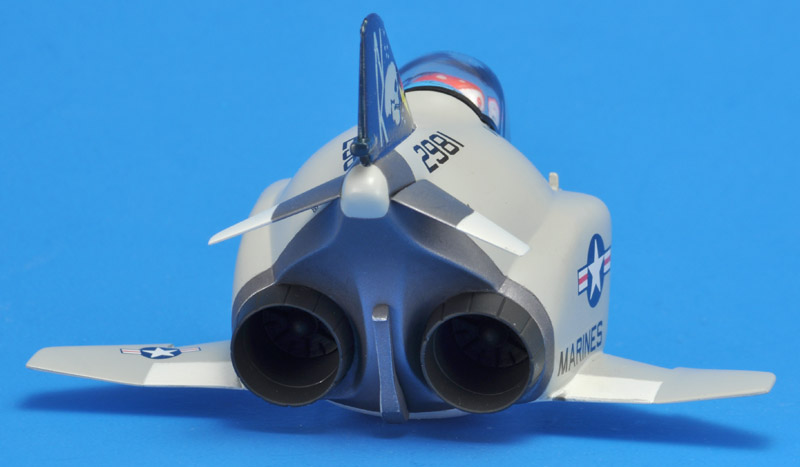
I like the smaller exhaust nozzles a lot, and the deep exhaust ducts are nice too.
Maybe this is the nicest viewing angle of the model. It shows the bobsled-like seating of the pilot and backseater best.
A close-up of the pilots. I don't know why that single white heart decal stands out so much - the others are much better. The Daco decal paper that I used is maybe a bit on the thick side.


Shop display

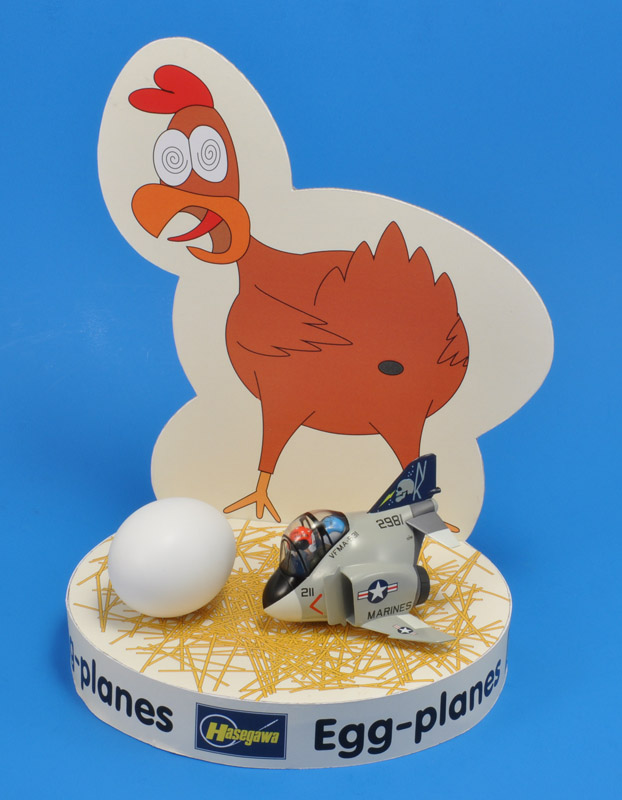
For our club's fictitious shop displays display at the 2023 Euro Scale Modeling event, I decided that I had to one for the Hasegawa egg planes too. The first idea was a direct hit: a chicken that was frightened by its clutch of eggs, that included an eggplane. I looked online for cartoons of chickens, and combined three to make my own chicken. Showing the cloaca (and its size) was a bit of a question mark, but I decided not to be a prude. I made the card cutout egg-shaped too. The 'straw nest' is a bit poor, looking like uncooked spaghetti, but it will do. This turned out to be the funniest display of the 33 selected for the 2023 Euro Scale Modeling event :-)


Eggplane links


Return to models page