Revell 1/72 F-16A (#2)
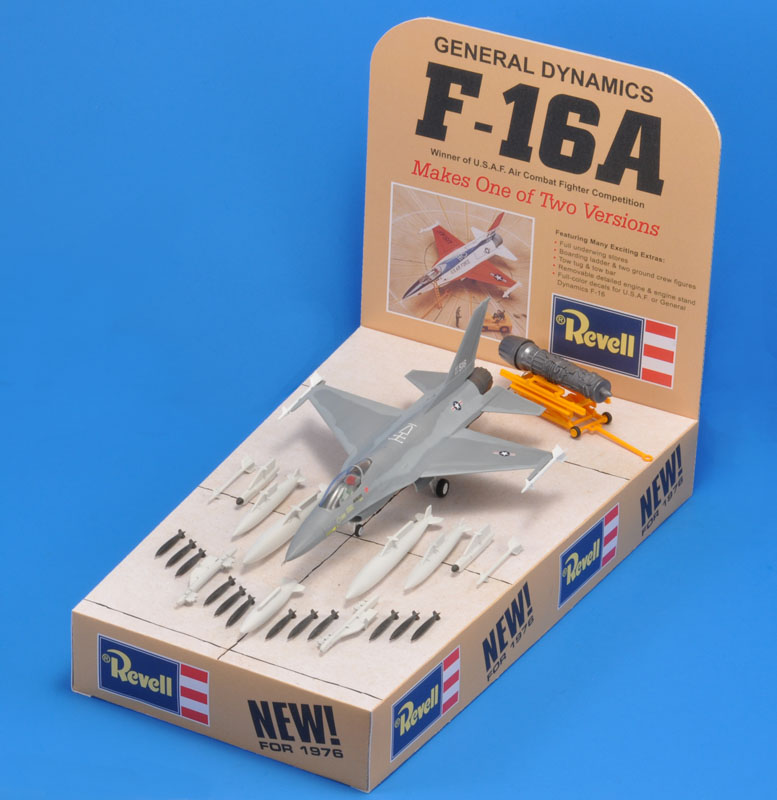
| For our club's fictitious shop displays project for the 2023 edition of Euro Scale Modeling, I decided to build this old model to look as much as possible like the 'secondary' model on the box, the grey one. |

| For our club's fictitious shop displays project for the 2023 edition of Euro Scale Modeling, I decided to build this old model to look as much as possible like the 'secondary' model on the box, the grey one. |
| For this project, I didn't build the original H-222 issue from 1976, but a later '4434' issue. Scalemates says it's from 1985 (link), and indeed the box carries this date on the side panels. But the model has 'Copyright Revell 1988' engraved on both fuselage halves! That made me wonder whether this was a new / second mould, because the original mould had possibly worn out. But I closely compared the runners and parts, and every detail matched. Things like machining marks, tiny nicks, locations with flash, small offsets in the runners because the mould is built up from steel blocks, everything was identical. I cannot imagine that one could make two moulds that are so identical, so my conclusion is that this is the same old mould.
The box art is quite bad if you ask me. The model portrayed is well built, but it has far too large roundels, and a black radome, that already was a thing of the far past, being replaced by grey radomes. All in all the box presents a model built by amateurs. The actual roundel decals are smaller than those on the box, but wrong in a different way, with orange centers that are too large - sigh.. | 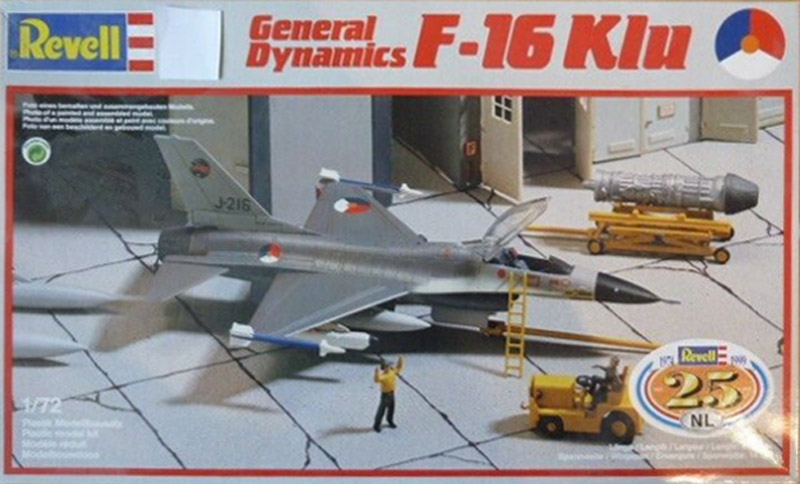
|
| Having built one before (see the first Revell 1/72 F-16), construction went relatively quick. The previous owner had fiddled a bit with the kit. I started with the lower fuselage, adding the inlet duct, cockpit tub and shims on the wing inserts. Gaps around the inlet duct were filled with Apoxie Sculpt. Apoxie was also used for the gaps around the insert of the vertical tail. | 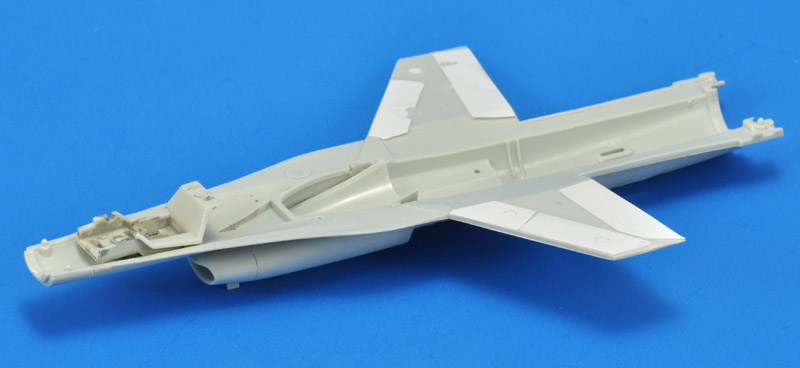
|
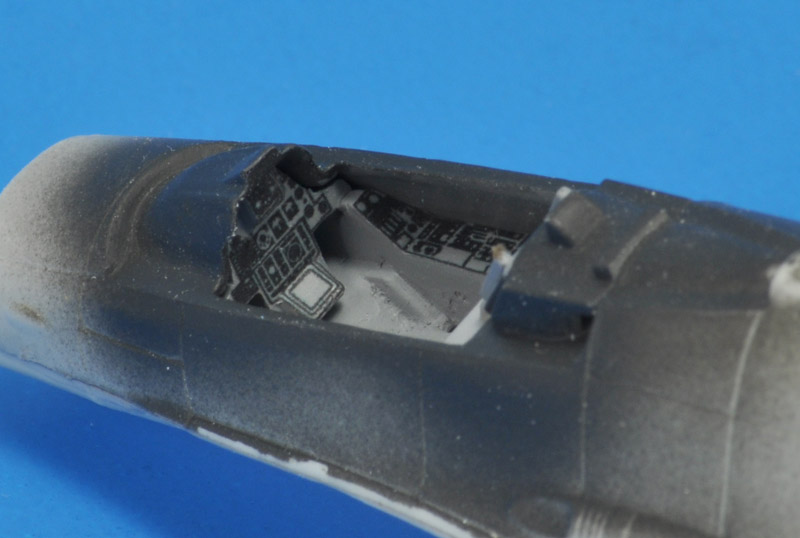
| The tub was painted with MRP-100 FS 36231. The seat frame also FS 36231, cushions light grey, headrest red, like on the box. I used my own decal redrawn decal set for the cockpit, printed by SpotModel. The top side of the cockpit was painted Revell 9. |
| The three tailplanes were next. I aligned the vertical tail by measuring the distance to the tip launchers. The horizontal tailplanes have a dihedral angle of 10 degrees. The tailplane parts themself have an included angle of ~2 degrees, therefore I used a 9 degree template to obtain the correct angle. | 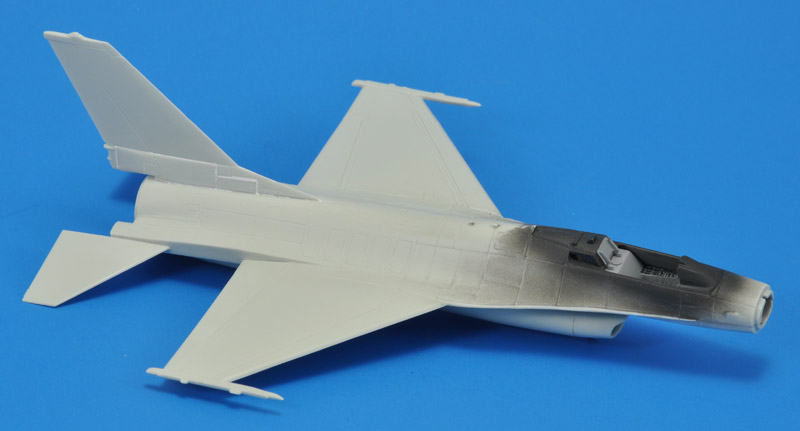
|
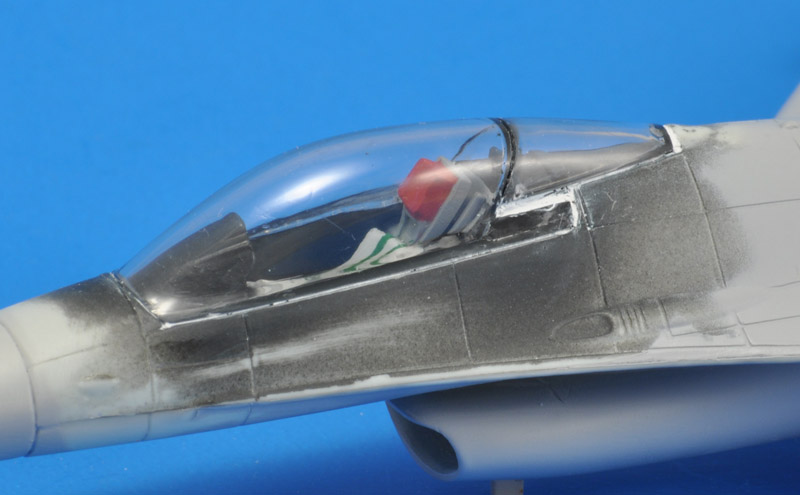
| The edges of canopy parts were painted Revell 9, and then attached using dots of 5-minute epoxy glue. Some filler is required around the hinges. |
| Masking the canopy was difficult, because there are no real panel lines, especially at the front of the canopy. | 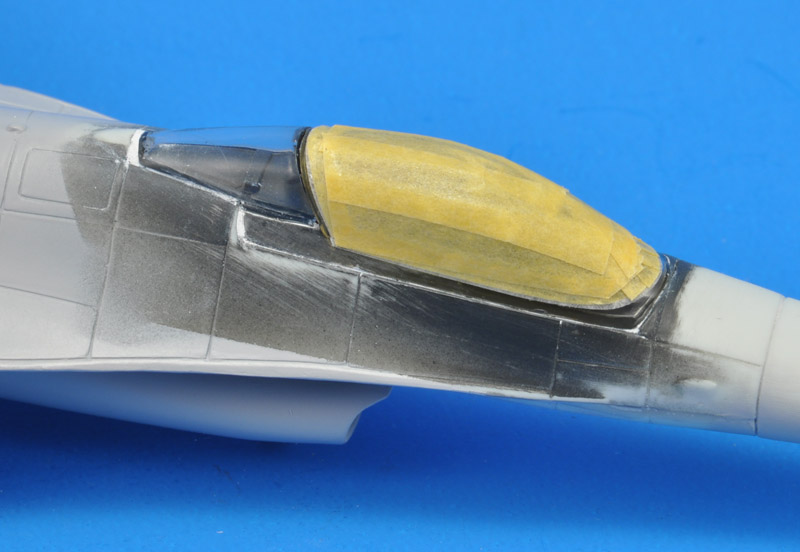
|
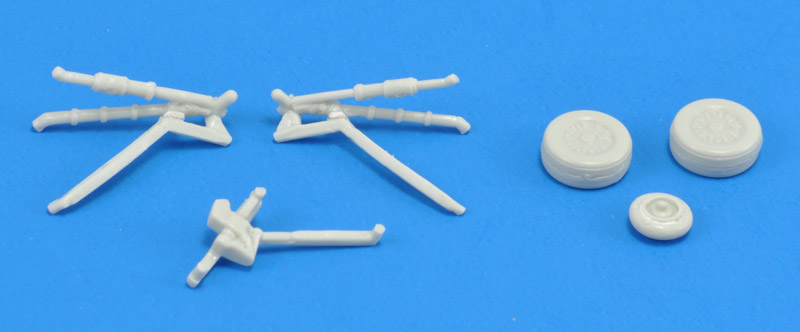
| A modification I came to regret is splitting the main landing gear parts into left and right halves. I did that so I could install part 39 before the landing gear. But it leaves you with incredible fiddly parts, with small glue joints. It took me a good bit of time to assemble the parts. I added small scraps of plastic strip to make a second glue joint between the drag stay and the legs.
The nose landing gear required a small modification at its front end, because it would bump into the antenna ahead of it, and the step in the wheel well. Also, I removed the pin that allowed mounting of an additional nose wheel. |
| These days I start with Tamiya Fine Surface Primer (spray can) to inspect the model's build quality. Mr Surfacer 500 from a bottle was used for spot repairs. This phase usually takes several rounds. | 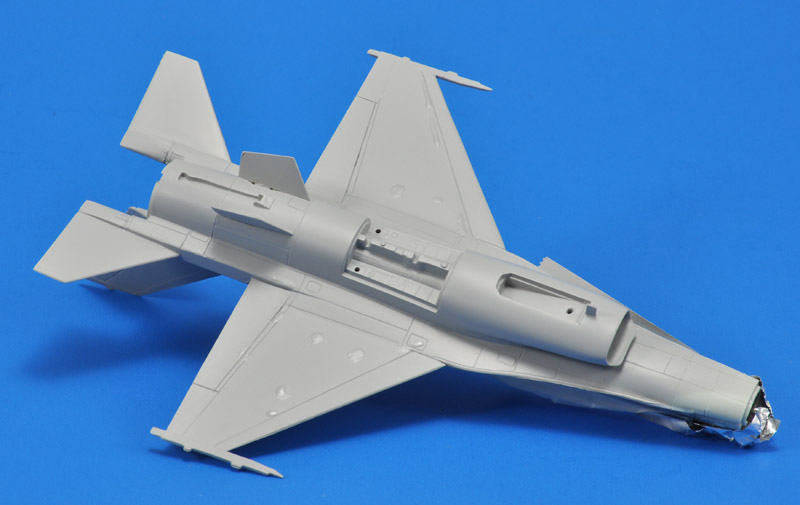
|
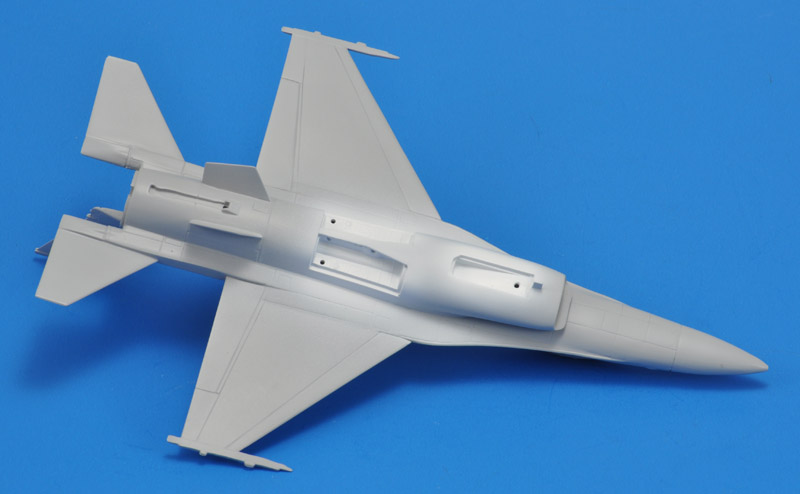
| Next I used Zero Paints 'Pure Brilliant White' to paint the wheel wells. I could / should have painted the inlet duct too, but I was a bit in a hurry and forgot about it. After this photo was shot, the wheel wells were masked using lots of Tamiya tape. |
| I decided to first apply the darker gray color, FS 36320. I did not have the correct color, so I started with FS 36375 and added MRP Extra Dark Sea Gray, until it matched my FS595B fandeck. | 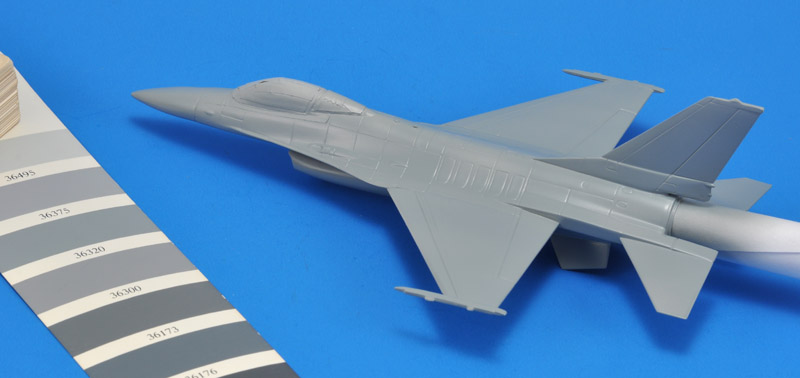
|
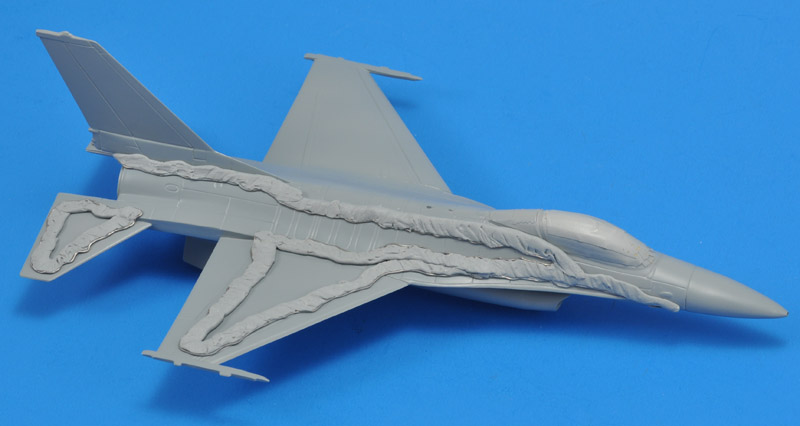
| I prefer to mask soft-edge camouflages with solder, held in place by Blu-Tack. Due to the 'squigly' nature of the camo patterns, I had to go down to 0.5 mm solder wire, which made the soft edge rather hard - a compromise. |
| The work had to be done in steps, since the additional masking (aluminium foil and Scotch tape here and there) was very easily disturbed. It took six rounds of masking and painting, taking 4-5 hours. | 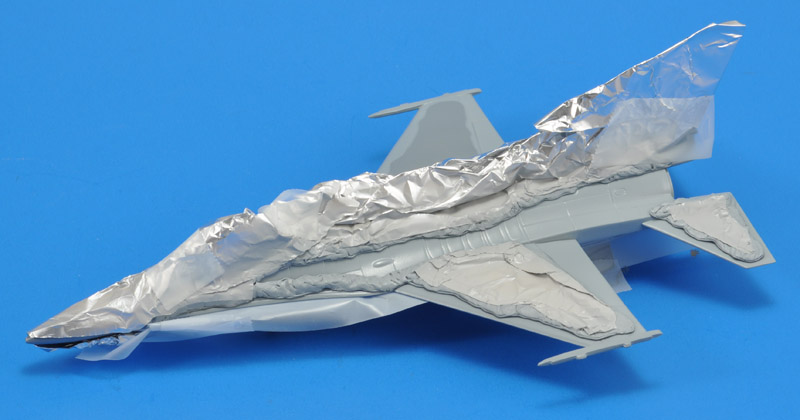
|
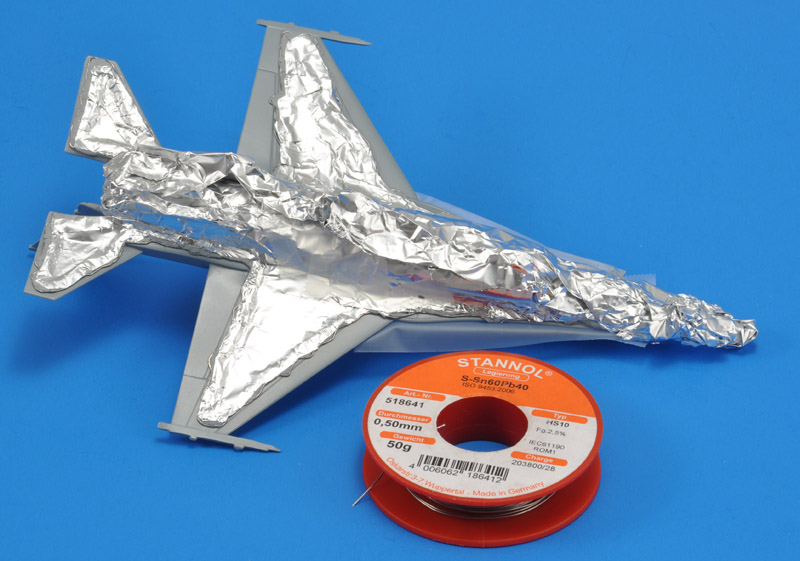
| Here's the masking of the lower side. I did the ventral fins and inlet masking separately. |
| The result on the top side. I used three sets of drawings for the camouflage pattern: the old Revell instructions, that are difficult to interpret (with vague dither patterns), instructions for the Tamiya 1/48 YF-16A, and an IPMS-USA drawing. I mostly used the latter, and ignored photos of the real YF-16A in these colors. The model is a hybrid of many things.. | 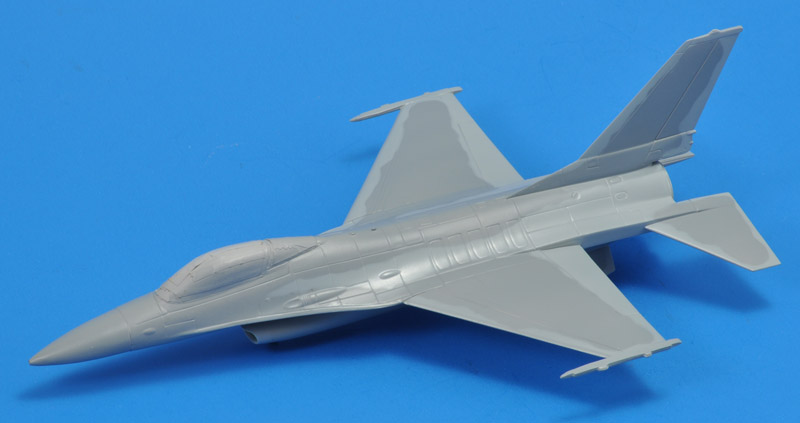
|
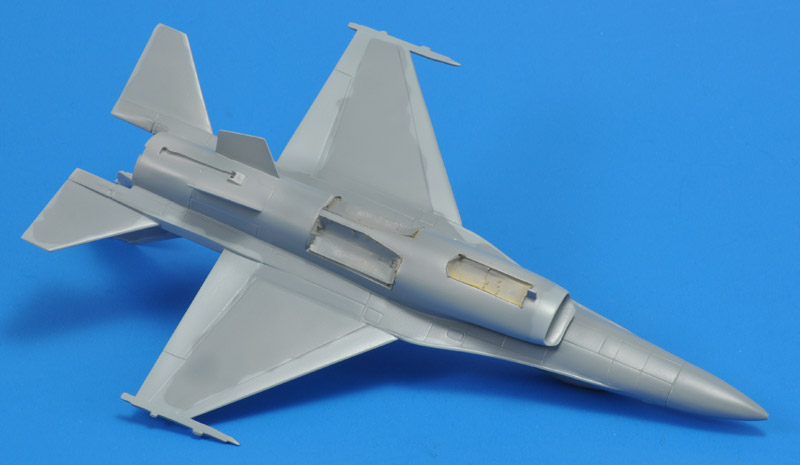
| Here's the result of the work on the lower side. The wheel well masking is still in place. |
| I had redrawn the original Revell decal sheet, and outsourced the printing to SpotModel (more details on the webpage of the first F-16 that I built). Everything left of the yellow stripes went to the red-white-blue F-16 model, and I thought the remainder would be sufficient for the gray version. Wrong - I needed some decals of the 'left-hand' set too. I solved that by printing these on my broken Alps - due to time constraints I could not wait on another SpotModel print. | 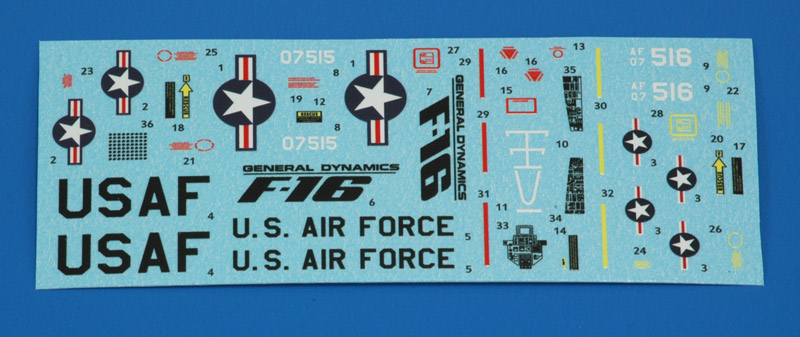
|
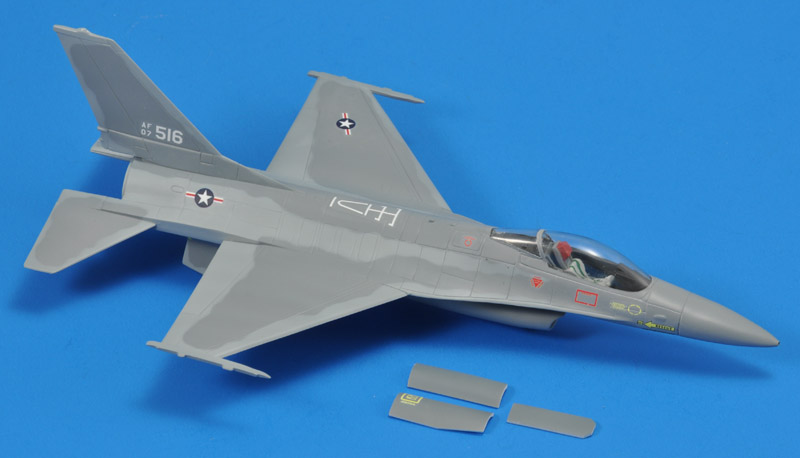
| The decals were applied in my usual way: a drop of Future on the model, decal applied over that, then slowly brushing out the excess Future from under the decal. I never use Set or Sol 'juices'. A coat of clear evens the glossiness and blends in the decals, and that's the stage you see in the photo.
The decals surely made the F-16 look a lot more interesting. It's largely fictitious I think, but it looks nice! |
| There are just a few decals on the lower side, just a national marking and the turbine warning stripe. The laborious masking of the landing gear wells now payed of. | 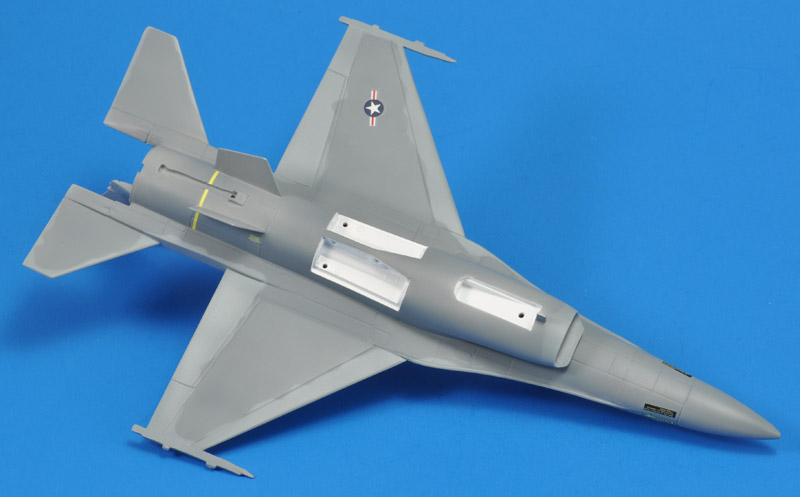
|

| The last parts to add were the landing gear, nozzle and the tailhook. All parts were painted exactly like Revell tells us to. |
| The finished model roughly achieved the goal of representing the box art model, except that my model has considerably darker colors. | 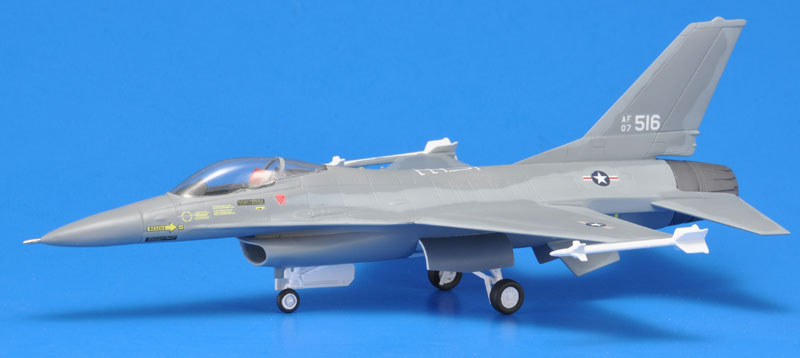
|
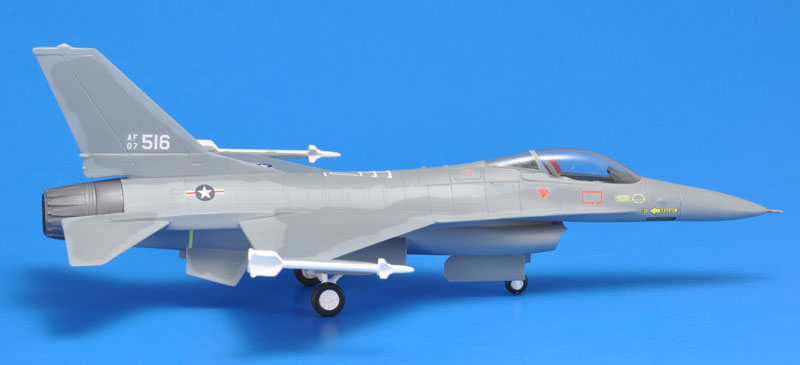
| I've been told that the YF-16 had this color scheme for maybe 2-3 weeks, therefore not many photos exist of this paint scheme. |
| White markings on a gray aircraft look good to me, and the F-15 type camouflage pattern also suits the F-16 fine I think. | 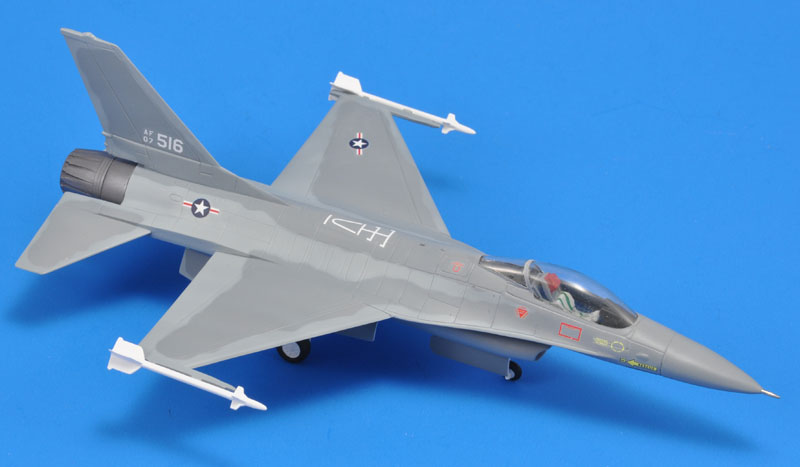
|
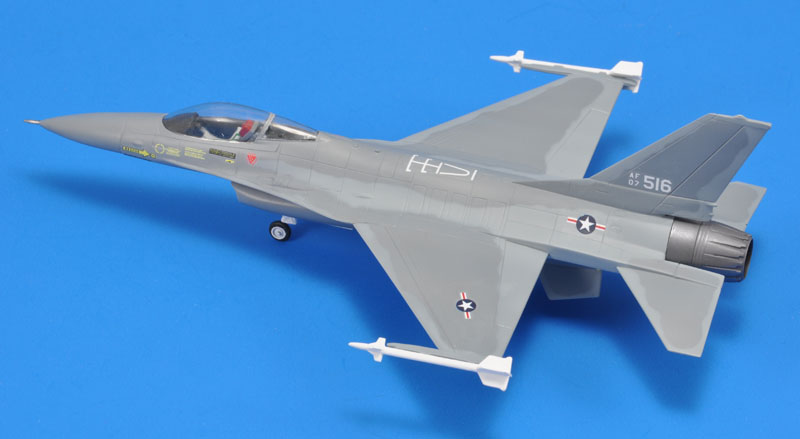
| I made one error in this build: the ejection seat wasn't glued down properly, and got unstuck during the painting. Luckily, I can shake the model to make the seat sit properly :-) |
| I assembled the stores, eliminated all seams and other defects (like the facets on the tanks) and used Apoxie to fill gaps. All mounting pins were removed, since the box art photo did not show them either. I then pinned them with 0.5 mm brass wire and painted the stores Humbrol 127, for a last check of the moulding and build quality.
In the photo you can see the stores in various stages: white bare plastic, base-coated with Humbrol 127 and sanded in places, and at the back all twelve bombs painted in Revell 9, charcoal black. | 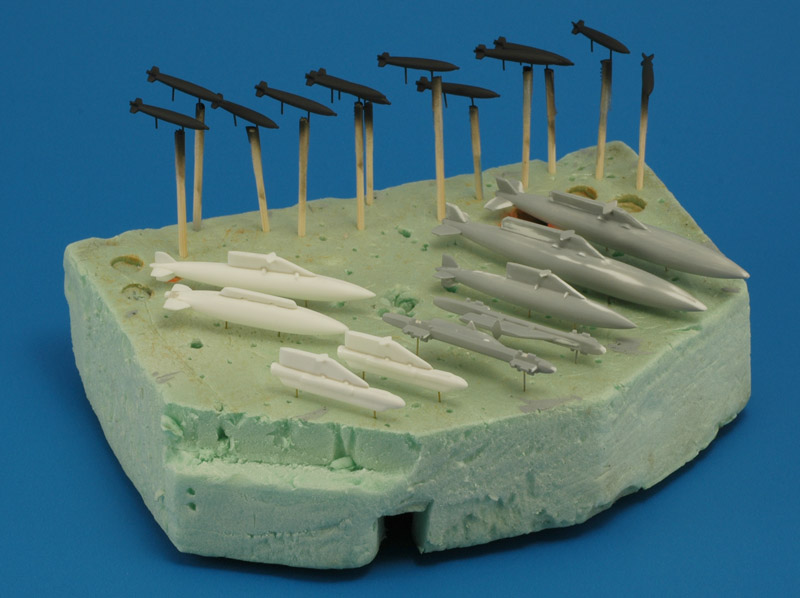
|
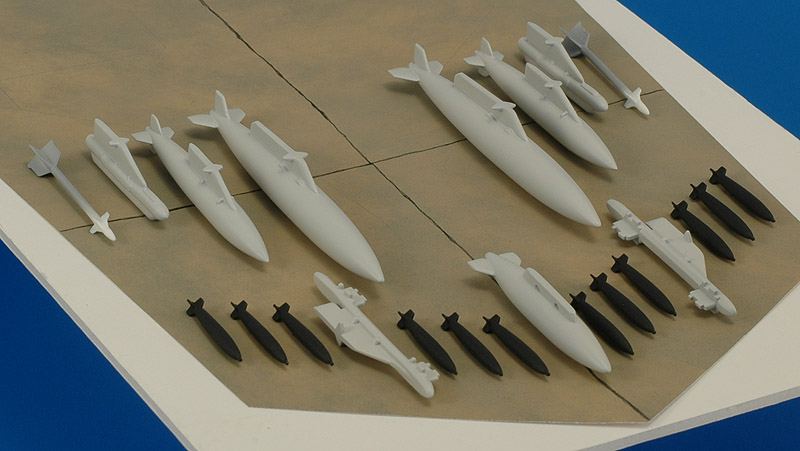
| After painting the remainder of the stores in an off-white color (Revell 371), I made a test fit. It's on a black & white print of the ramp, overpainted with concrete color, taped to a piece of foamboard. Later I repainted the off-white stores in normal white (Revell 04 I think). |
| And here's a test-fit with the F-16 in its base coat and without a landing gear, and an engine cart from the spares parts box. | 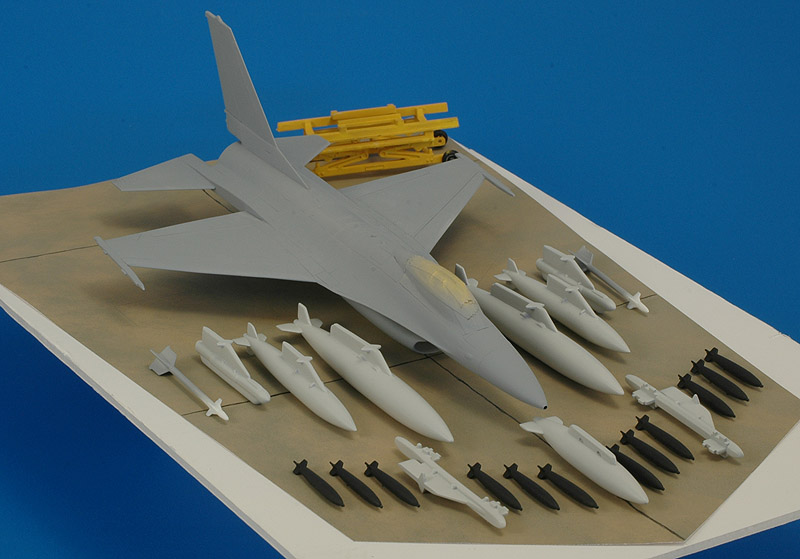
|
| The engine dolley parts were cleaned up and then assembled. The wheels were a lot of work, because of the strange wheel rims that extend from the tire. It meant a very finicky masking job of the yellow parts before airbrushing the tire color. I did not weather the engine dolly, since the box art does not show it either. Therefore it remains unrealistically shiny and new. And very yellow!
I first built the engine with the 'closed' nozzle, the only nozzle remaining after building the F-16. But that did not match the (different) engine on the box, so I cast a copy of the 'open' nozzle. The engine was painted Humbrol Metalcote Polished Steel and buffed. I will leave it like that since the box art shows a similar simple paint scheme. Put together it does make a nice 'airfield accessory'. | 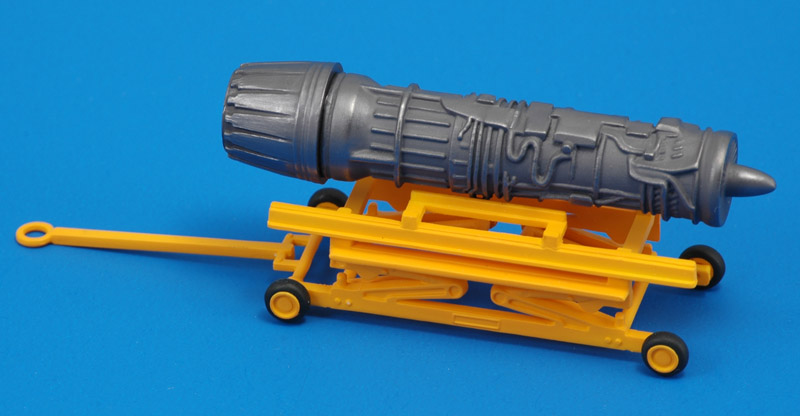
|

| By taking measurements of the built-up trailer, I tried to determine what Air Logistics 4000-series type it tried to represent. My reference was this great Air Logistics Corporation Ground Support Catalog 1980 brochure. But the result was very inconclusive, I cannot tell what it is.
| ||||||||||||||||||||||||||||||||||||||||||
| The cardboard display was a variation of the one I made for the red-white-blue F-16: I used the same background card but swapped the model photos, and made a new base for the model. Maybe the concrete should be darker and more yellowish, so the white stores are more visible.
The end result: a fictitious shop display, with all the stores from the kit, and the engine on a cart. I wonder how many modelers will recognize it as the insert photo of the box art? | 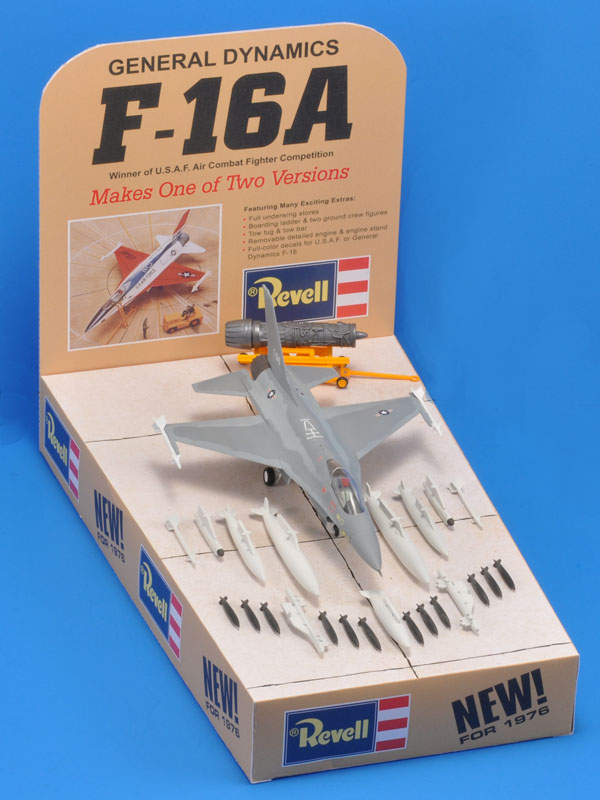
|

| I could easily picture this shop display in a window in 1976. And I'm sure it would help sales immensely! |
| A close up of the model and the stores. I'm happy with the end result, it achieved nearly 100% of what I had in mind when I started this project. | 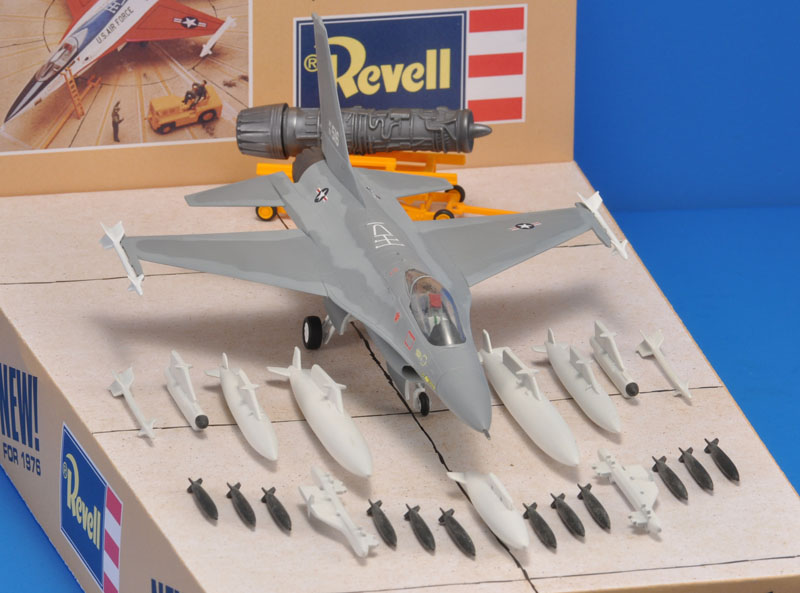
|