Airfix 1/72 Gnat from 'Hot Shots'


For a club project about fictitious shop displays, I decided to build the Airfix 1/72 Gnat as the ficticious 'Oscar EW-5894' from the movie 'Hot Shots'. It would be yet another attempt at trying to build something straight from the box. I managed mostly, except for a cockpit modification as seen in the movie, adding seat belts, opening the canopy, and a new pitot tube.


The kit

Modern Airfix kits definitely have their own style and feel. In a way you can sense they were designed with 3D CAD - the parts breakdown is different from that of the past, and the fit of complex parts is often extremely tight. So tight that an ejector pin marking can throw off the fit badly.

The panel lines also have their own style and feel. I would have liked finer lines, they are almost leaning towards die-cast style lines for such a tiny model. On the other hand they are very consistent. I think one has to be very careful when accenting them, otherwise they easily become overdone.

The plastic hardness is OK I think, no complaints.

The two-part shoe-box style box is great, with a nice and sturdy double-walled inner/lower box. The box art is very nice.

Accuracy is something I haven't looked into much. I haven't read about problems in that department either.


Construction

I was surprised by the Airfix instruction manual: each step just shows one or two parts that are assembled. It might be nice for young builders, but I felt a bit like being nannied.

I decided to build the inlets first - the inner duct wall and the inlet face. I added the face first, so I could align the inner wall correctly. That connection can be just seen in the photo, deep inside the inlet, at the bottom. Airfix wants you assemble it in the reverse order, with the risk of a nasty step inside the inlet duct.

The other (left) inlet face did not fit well, a sharp contrast to the overall fit of the model, which is near-perfect.
The cockpit was next. Airfix created a somewhat unusual construction, in which the seats are key building elements. But I wanted to build the 'tub' first, and leave the seats out, so I could paint and add the seats later. I did use the seats to align the center and rear bulkheads, but did not glue the seats down, so I could do the detail painting later. The center bulkhead was stabilised by two slivers of plastic card at its bottom.
The main wheel wells were a bit rough on the parts tree, but they cleaned up fine, and fitted very well. I took the gamble of not adding the landing gears, assuming they could be added later.

Later I found out that I had gambled right: the legs could be installed afterwards with some fiddling. But I first needed to improve the mounting slots in the wheel wells, they were a tad too small or had too much flash.
Here's a test fit of the cockpit tub sandwiched between the fuselage halves. The front and rear bulkheads were lightly sanded to decrease their size and improve the fit.
The wing was assembled by adding the lower wing inserts. The fit was fine. I will use a little filler to reduce the depth of the hinge line of the flaps and ailerons.

The tiny wing tanks were quite rough. The rear parts, once assembled, do not make a cilinder. The nose parts are slightly too small, and quite heavily faceted (hold one light between your fingers and rotate it). I will correct these problems with Apoxie.
The movie Gnats show that the front ejection seat juts out of the cockpit. To achieve that look, I raised the seat by 1 mm with a piece of plastic rod. The canopy allows this raise. The projections on the rear instrument coaming were also removed.

The rear cockpit required a bigger modification to depict the movie aircraft. It features a cilindral fairing from the rear instrument panel to the top of the rear ejection seat (although not all a/c had the rear seat it seems). I used a piece of 5.5 mm diameter thick-walled pipe to make the main part. All other built-up models I'd seen use a much wider fairing, but I believe this is the correct layout. After cutting out a section to wrap it around the headrest, I supported the front side with a small piece of plastic card. Next were two pieces of thin card, to close off the fairing (these cannot be seen in the movie). I added a 1 mm spacer under the seat to improve the fit.
With these modifications, the front and rear offices now look like the Gnat in the movie, I think. Apoxie putty is next to fill some holes and reinforce the delicate plastic card bits.
I decided to have the canopy open. A JLC saw was used to make the cut. The canopy has multiple weld lines, the result of having three injection points. Other manufacturers use just one injection point per transparent part to avoid this.
After finishing the rear cockpit insert, I glued the fuselage halves together. A bit of Mr Surfacer was used to fill a shrinkage area on the cockpit side, and a small step on the air intake.
A test fit of the wing, over the modified rear cockpit. It wasn't glued on yet. Airfix indicates Humbrol 126 for the cockpit. Humbrol says that FS 36270 is the equivalent, and my FS 595B fandeck matches the Humbrol color pretty well.

FS 36231 is next to FS 36270 on my fandeck, and to my eye is nearly indistinguishable. Therefore I used MRP-100 FS 36231 for the cockpit. A light black oil paint wash was added. More work needs to be done in the cockpit.
After painting the rear cockpit's 'interior' part of the wing with MRP-100 FS 36231, and the coaming with Revell 9 coal black, the wing was glued to the fuselage. Some filler will be required at the inlet-wing transition.

For the exterior, Humbrol 127 is recommended, the equivalent of FS 36375. MRP-038.
The kit's pitot tube didn't look very good, so I made a better one from stretched sprue. I drilled the end to accept a short piece of 0.3 steel wire. That in turns fit in 0.6 mm Albion brass tube, slid inside an 0.8 mm Albion brass tube. The tubing was superglued to the Gnat's nose. I keep the pitot tube removable.
The drag stay of the nose landing gear broke when I tried to remove it from the runner. Luckily, I could glue the broken drag stay in the wheel well, where it connects to the main leg when installed. Look closely to see the break.

The axle for the twin wheels was also quite mangled, I guess it doesn't release well for the injection mould. I bent it roughly in shape, but fine-tuning will be required once the wheels are glued on.
The exhaust part required a bit of clean-up, and the fuselage a bit of sanding. But once installed, the results was nice. It's a reasonable rendition of the real thing, although I could not find a photo of the interior, and that part looks a bit unusual. I will leave it as is, and it will be installed after painting of the fuselage.
Canopy glued with two-part epoxy. The glue edges were painted black first. Next I positioned an 0.5 mm strip of PVC tape around the bottom edge, then applied Cheap Chocolate Foil over the windshield.


Colours and markings

The consistency / continuity in the movie is horrendous. Nearly every plane is painted different. The decal sheet lacks the 'NAVY' marking as seen on left wing.

rocket pod 'droplets' as separate decals - nearly impossible to align them all properly.
The model was ready for final painting after adding the horizontal tails. I masked the cockpit area, and primed the last parts with Humbrol 127 before switching to MRP-038 (FS 36375). In my limited MRP experience, the adhesion on bare plastic is not that strong, like all acrylics that I used so far. An enamel paint offers much better adhesion, that's why I use Humbrol 127 as a primer. It's not perfect, since I need to sand it down with a 2000 grid sanding foam, because it's slightly rough. Tamiya Surface primer is another solution, but on a small models with lots of deep corners, I find it risky to apply with a spray can.
I applied a first layer of MRP-038, then sanded it where needed with Micro-Mesh 3600, since some of the roughness of the primer showed. The second coat already showed the nice sheen that I like so much of MRP.

There was a bit of wrinkling of the enamel paint, caused by the strong solvents of MRP, when the paint is applied too wet. Therefore I must find a better 'primer' for MRP.
Here are the detail parts that are to be added after painting, decaling and clear coating. The wheels were really difficult to paint. I used Arctic decal circular masks, but finding the perfect centered position on the parts was really difficult. On the main wheels, the wheel-tire demarcation was especially vague.
All kit decals and my own decals have been applied here. I made a fatter version of 'THE NAVY' than that of Airfix, and the 'NAVY' marking on the wing that was missing on the Airfix sheet. Unfortunately, both had the white background printed 0.1-0.2 mm higher, and this is quite visible. Due to time restraints I decided to use them nevertheless.

Another set of new decals were for the fake rocket pods. Airfix provides separate decals for each rocket tube opening, and I thought it would be impossible to line them all up accurately. Instead I made decals that integrated them. Due to the taper on the tank, cuts had to be made between each rocket tube opening. It worked reasonably well, but it was a challenge to apply them.
Next was a clear coat. First I tried MRP-125 Semigloss, but it was too shiny. A second coat of MRP-126 Semimatt looked better. The cockpit masking was then removed. The result was excellent - if this is the future of my modeling, I'm happy! No more grainy enamel finishes for me.

The edges of the inlets have to be painted red. It seems that every movie aircraft has these red areas painted differently, so there was no standard to adhere to. I used JammyDog 0.5 mm tape to outline the red areas, then brush-painted Vallejo Vermillion Red. It's not perfect, but it will do.
Time to add the landing gear. The nose gear was pretty easy. I used epoxy to add the tiny nose wheels, giving me five minutes to ensure the wheels aligned properly.

The main gear was very difficult to add at this stage - it was intended to be added much earlier in the build. Getting the tabs on the legs in their holes was difficult enough, but to align them was near impossible. I fiddled a long time before I dared to add some CA glue to the connection. The main wheels were again glued with epoxy, followed by five minutes of aligment, aiming for 5 degrees camber. I think I managed in the end. I installed steel wires in the wheels early on, thinking it would help to use these wires to fit the wheels on a piece of plastic card, but that solution did not work, I would have needed an extra pair of hands.
The canopy was masked with Cheap Chocolate Foil, as I've been doing for 20-25 years, but I learned a hard lesson. When using hot acrylic lacquers like MRP, the solvent disolves the wax of the foil, and creeps under the masking, leaving cloudy stains. On the positive side: I was able to remove most of it using Novus 2 polish. But you can still see some of the smudging.

I glued a small piece of thick aluminium foil to the rear of the canopy, to serve as a hinge.
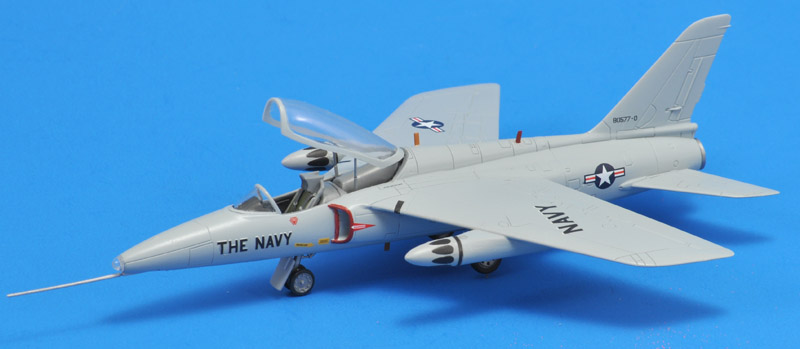
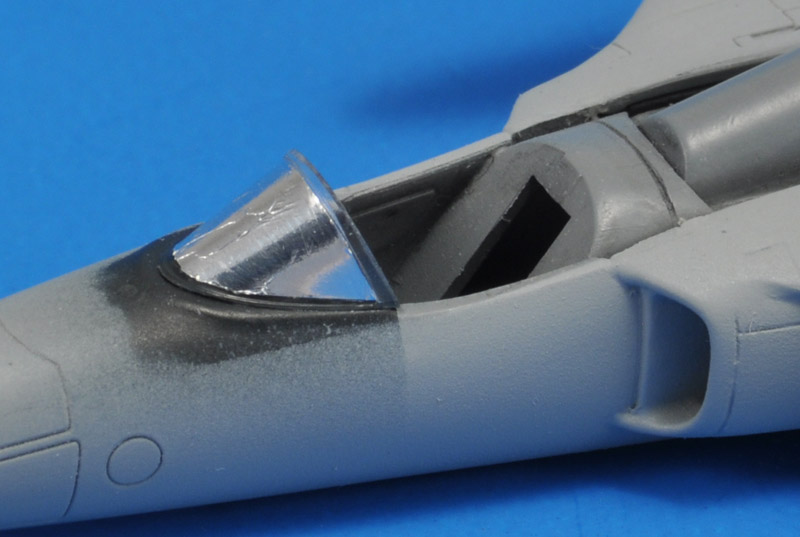
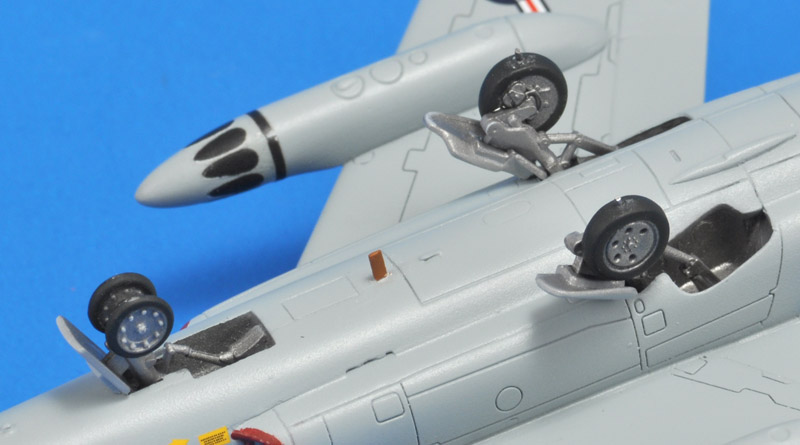
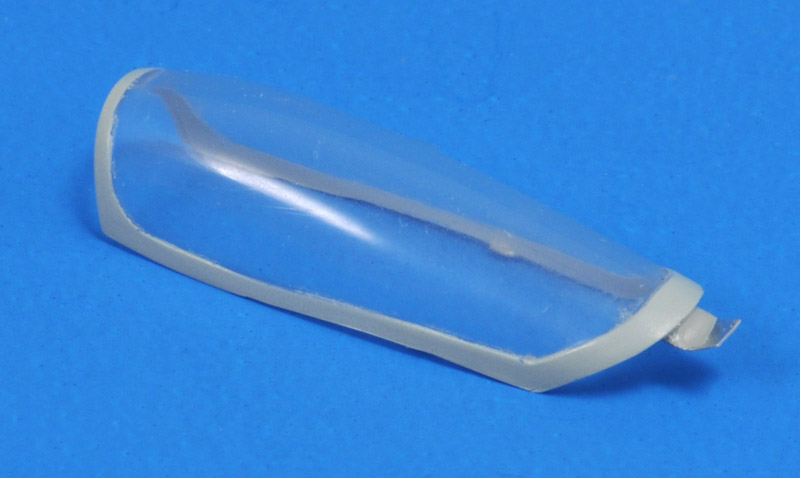
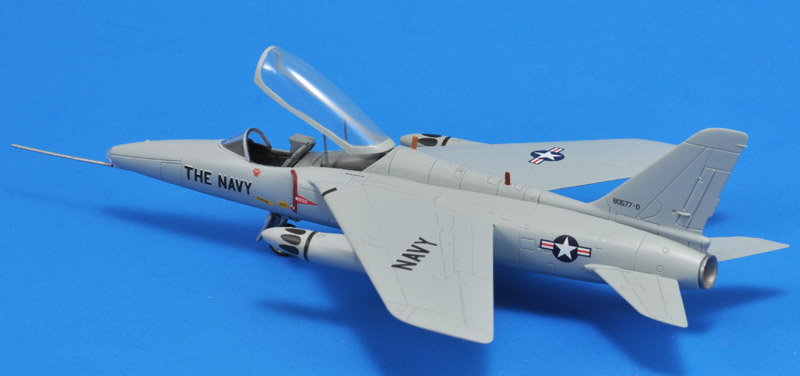
The movie usually shows the Gnats or their mock-ups with two hydraulic struts for the canopy. They differ in style, therefore I did not try too hard to copy the exact style. I used an 0.5 mm spring steel wire with an 0.7 mm Albion micro tube slid over it. The latter part was painted MRP-100 FS 36231, the former left blank. Inside the canopy I glued two tiny blocks of plastic strip, and drilled shallow holes to accept the hydraulic cilinders.

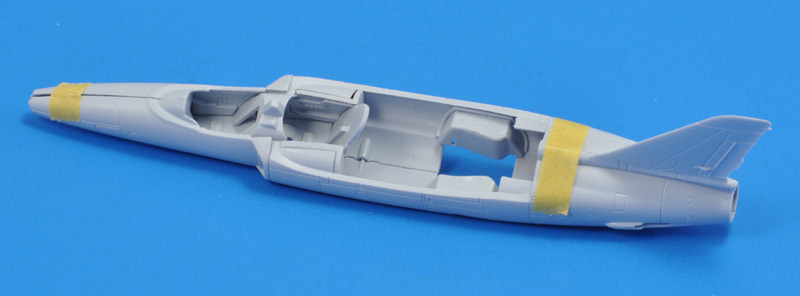
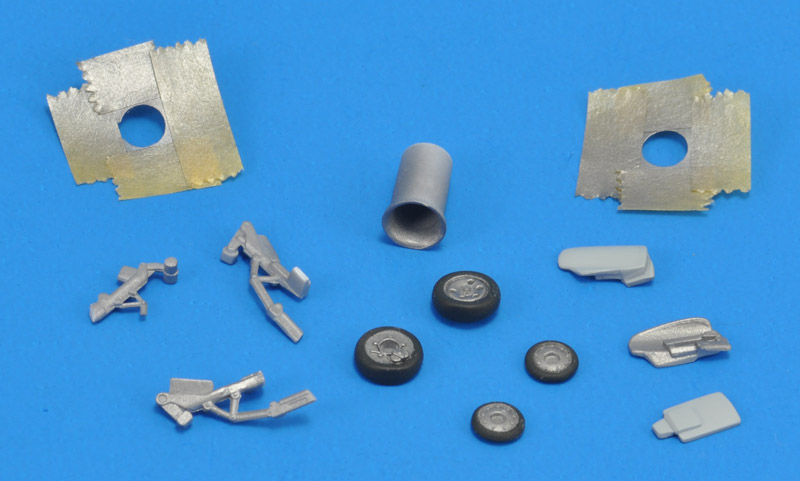
The ejection seats in the movie again showed all kinds of variations, so I roughly took the average for my seat. They all lacked the ejection handle, so I left that off. The standard Gnat seat has the parachute serve as the seat back, and I painted that green. The seat bottom is usually a yellow survival pack with a sheepskin cover, so I painted it tan. I added some simple seat belts from an old Eduard F-104D/J set, painted dark gray. It's all very simple, not a real attempt at creating a good-looking - it would far exceed the goals set for this model.
The last parts to add were the blade antennas on the spine. However, I had already bent the parts while still on the runner - they are very delicate. I was pretty sure that they would fail while handling the model. Furthermore, I had broken of the blade antenna on the lower fuselage, that moulded integrally with a fuselage half.

I decided to try something I had seen years ago in a Paul Budzik video: take a piece of brass wire, flatten it to make the blade, and use the round part to glue it in the fuselage. The flattening part did not work for me, but a Dremel sanding drum worked even better to create two flat sides. After drilling 1 mm holes, the antennas were installed easily, and I loved the result!
A late addition was a parking meter, as seen somewhere in the movie. I drew a 3D model of a old Rockwell parking meter, and club member Wim Hoogendoorn kindly printed it. I even drew a decal for it, but it's tiny.


Finished model

Except for the three 'white shadow' decals, I'm happy with the result. I built it against the clock, so i's not done in my usual way, but still I like the result.
I haven't dared (yet ?) to apply some weathering, since the movie aircraft are clean. I'm afraid that the rather deep panel lines will come out rather strong, maybe creating the dreaded 'blueprint' style of Hasegawa fame.
What made most happy is that the MRP paint route resulted in a really nice finish, the one I looked for all these years. If my future projects will be equally smooth, I'll be a happy modeler!


Shop display

I built this Gnat mostly for our club's fictitious shop displays display at the 2023 Euro Scale Modeling event. The shop display itself was the first film-themed display that I designed. I discovered a world of hi-res 'wallpaper' pictures, that make designing a shop display of a movie model rather easy. Laboriously I redrew the 'Hot Shots' movie logo and the Airfix logo in vector. But it still was a boring 'rectangular' display. That changed when I thought of cutting out the picture of lieutenant Hopper. That gave the display a very different look.
With the model placed on the shop display, something was still missing, to convey the humor of the movie. I decided a parking meter, as seen in the movie, would solve that issue. I drew in 3D, and club member Wim Hoogendoorn printed it. But it's so small that most viewers overlooked it.


Links


Return to models page