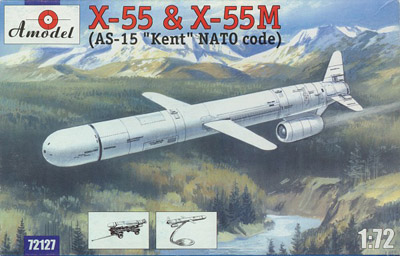
Amodel 1/72 Kh-55M (X-55M)
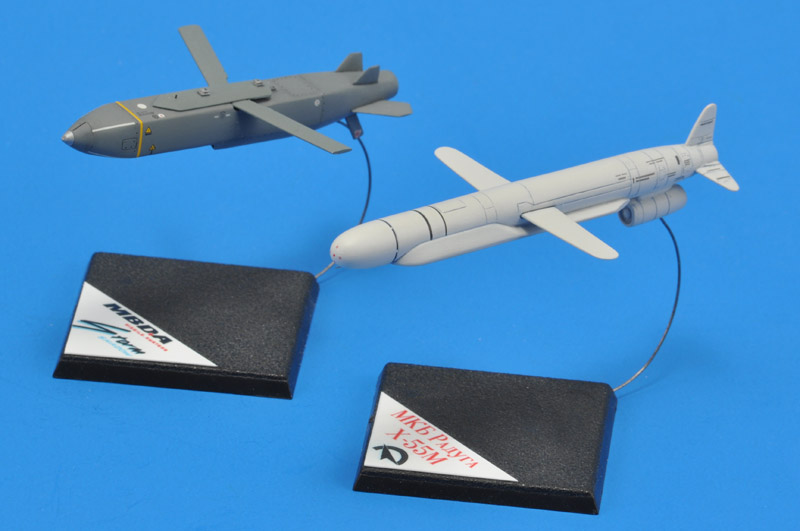
| While building the 1/72 Storm Shadow, I decided I wanted to build a Russian cruise missile too, to eventually create a set of American (BGM-109 and AGM-86), European (Storm Shadow and ASMP) and Russian designs. I picked Amodel's Kh-55 kit because it's the most modern Russian cruise missile available.
|
Kit description
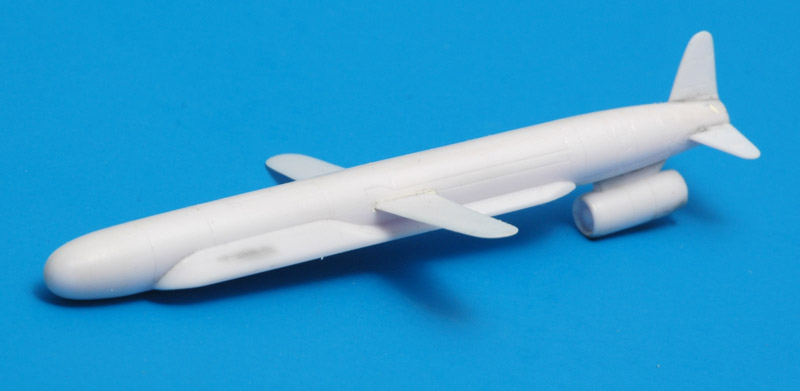
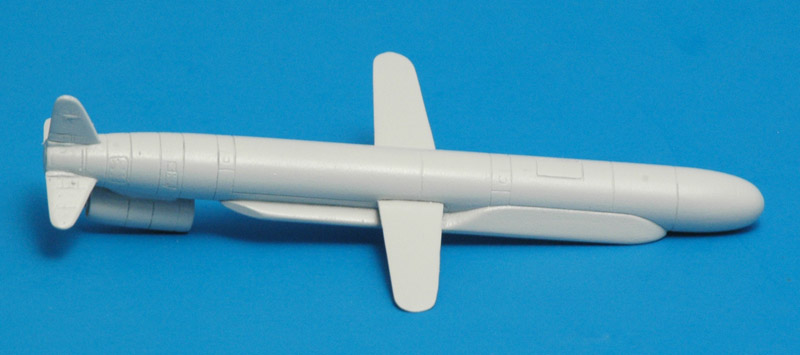
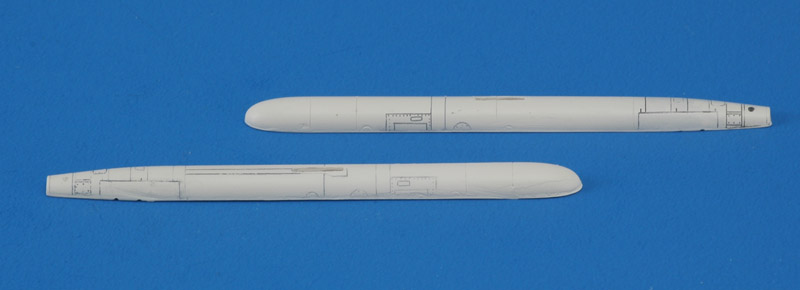
I wasn't expecting too much, since I already owned what is often described as Amodel's worst model, the Yak-28. But the Kh-55 kit was a pleasant suprise: it's nicely moulded with fine engraved details and a very extensive decal set. The box contains two missiles: a Kh-55 to be displayed in flying mode, and a Kh-55M loaded on a trailer. I decided to build the Kh-55M in flying mode, which requires just a few changes. The Kh-55M has conformal fuel tanks, and that would set it apart from the BGM-109's shape. One thing is puzzling, and that is the end-cap (part #4) that is installed on the Kh-55 but apparently not on the Kh-55M.
References
I'll admit that I know very little about the Kh-55 / 55M / 55SM (Izdeliye 120 / 124 / 125), its development and service were always shrouded in the usual Soviet military secrecy. And every source tells a slighly different story, and uses different designations, enough confusion to drive you nuts. Therefore I will build the model with very few modifications, and call it a Kh-55M like on the box. About halfway through the build process, I obtained 'Soviet long range and naval aviation missiles' by Sergei Moroz and Sergei Popsuevich, from 2001. It's a nice and rather obsure publication, with rather bad translated English text, but that only adds to the authenticity.
Accuracy
I checked the main dimensions of the model against data from 'Soviet long range and naval aviation missiles' by Sergei Moroz and Sergei Popsuevich, and 'Jane's Air-Launched Weapons' Issue 43 from 2004. It appears to be quite accurate, with a small question mark for the length. I will not make big changes or corrections.
|
| 1 to 1
(millimeter)
| 1 to 1
(meter)
| 1 to 72
(millimeter)
| Model
(millimeter)
| Source
| Comments
|
| Length
| 5880
|
| 81.7
| 80.6
| Moroz/Popsuevich
|
|
|
|
| 6.04
| 83.9
| Jane's
|
|
|
|
| 7.1
| 98.6
| Jane's
| with booster
|
| Body diameter
| 514
|
| 7.1
| 7.3
| Moroz/Popsuevich
|
|
|
| 514
|
| 7.1
| Jane's
|
|
| Body width
| 770
|
| 10.7
| 10.2
| Moroz/Popsuevich
|
|
|
| 770
|
| 10.7
| Jane's
|
|
| Wing span
| 3100
|
| 43.1
| 42.6
| Moroz/Popsuevich
|
|
|
|
| 3.1
| 43.1
| Jane's
|
|
| Tail span
| 1200
|
| 16.7
| 17.9
| Moroz/Popsuevich
|
|
| Fin height
| 650
|
| 9.0
| ~9
| Moroz/Popsuevich
| measured on model from fuselage centerline
|
Possibly the engine pod is too small?
Construction
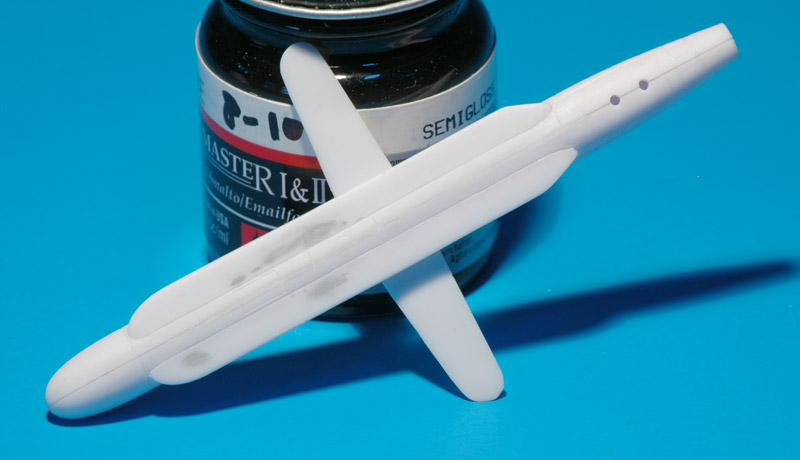
The Kh-55M fuselage halves required opening of the wing slots. Test-fitting of the stepped wing revealed that the slots are not accurately placed, and I had to move the left-side slot down, and the right-side slot up, using 0.1 mm plastic card for shimming. Still, the wing positions left and right do not match the position of the 'door' openings scribed in the sides of the fuselage. Possibly the wings needs more stagger?
After assembly of the fuselage plus wing, the lower side required considerable attention. The edges of the conformal tanks are shaped rather vaguely there. I scribed two lines 3 mm apart, to define the edges of the tanks. Outside of these lines I cut and sanded away the sloping parts of the tanks, and inside the lines I sculpted the rounded shape of the original cilindrical fuselage.
Last step in the fuselage construction was the reconstruction of the panel lines where the fuselage halves met. This was quickly done using the great JLC razor saw. It was also then that I noted that the fuselage halves are not symmetrical, the division line between the two lies right of the middle. This can be confusing when you try to line up parts such as the wings.
| 
|
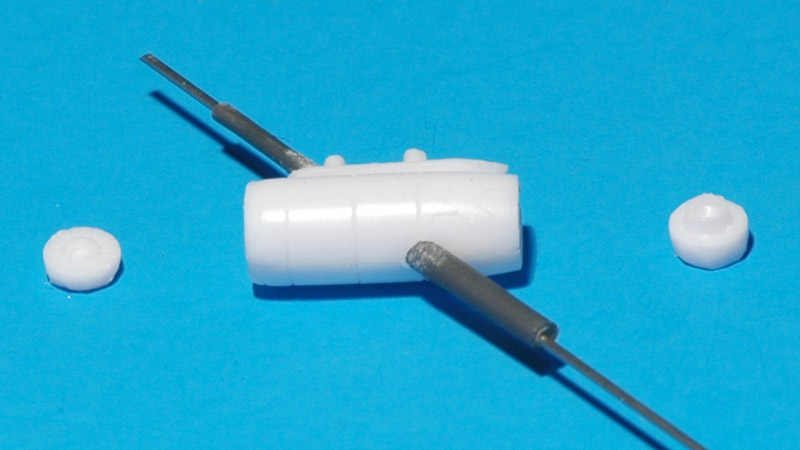
| The engine pod was next. To make the compressor face and the exhaust fit inside the pod after its assembly and painting, the slight taper on the compressor and exhaust parts needs to be removed. I also installed a piece of tubing in the pod, that allows the model to be mounted on a steel wire to display it 'in flight'.
|
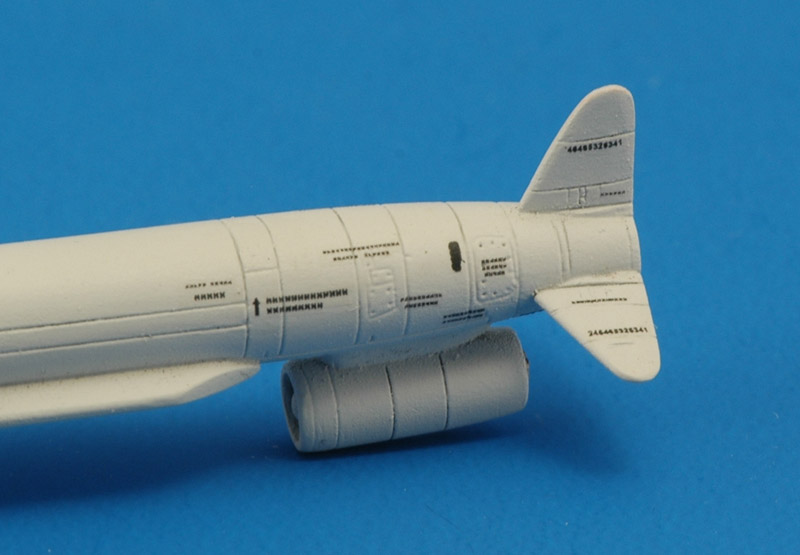
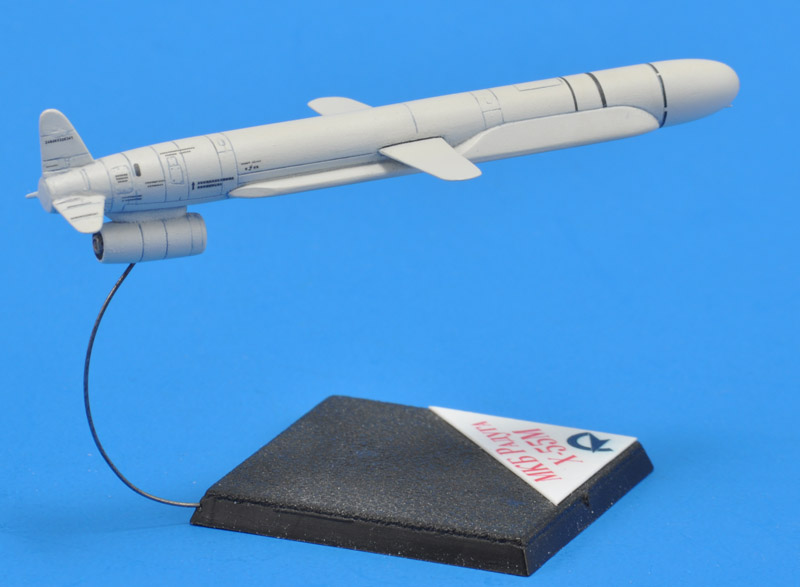
| After fitting the engine pod and the three tail planes, construction was done. I could not figure out whether part number 4 (some sort rear fuselage fairing) was applicable to an in-flight Kh-55M. It's only shown in the Kh-55 construction, so I decided to leave it off. In one photo I noted a circular raised hatch on the rear face of the fuselage, and I decided to add that. Using a Waldron punch I made one from 0.1 mm plastic card, and attached it slightly offset to the top on the rear surface of the missile.
| 
|
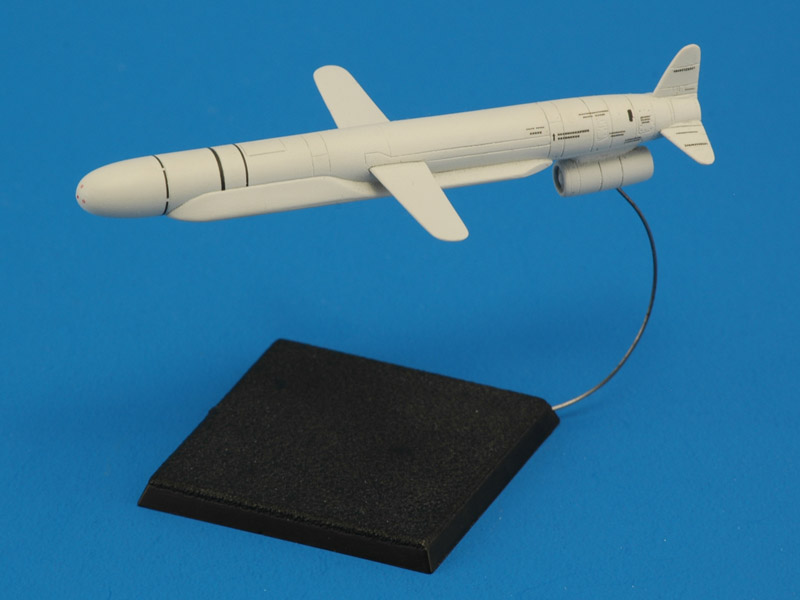
Colors and markings
| I went for a standard Kh-55M. Amodel suggest painting the Kh-55 white. Most photos show a slightly off-white color, and I found a tin of Revell 371 RAL 7035 that had just this off-white color. As usual, I first base-coated the model with Humbrol 127 to check for small build errors. A small amount of sanding solved them, and then a coat of Revell 371 was applied. Detail painting was limited to the engine pod: aluminium color for the compressor fan, dark grey nacelle rear opening with a goldish-colored exhaust tube. At least that is what I see in the rare photos showing the engine pod extended.
| 
|
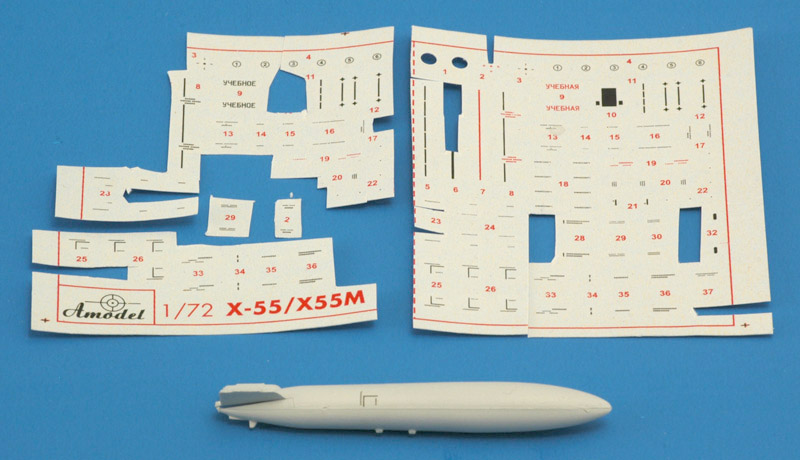
| The Kh-55 has a lot of stencils and warnings, and Amodel provides a full set. Actually Amodel provides two since the box contains two models. There are slight differences in colors between the two sets, and there is no information on which set to use for which model. There are quite a few decals on the sheet that are not mentioned in the instructions.
Having two sets allowed for a good testing of the decals, in order to find the best method to apply them without silvering. I painted a spare drop tank with Revell 371 and applied some decals. I cut the decals as close as I dared, and the drop the decals in a small puddle of Future to ensure good adhesion and avoid silvering. This method worked very well, I've never seen decals that worked so well as these! The film is very thin, and completely invisible.
The decal instructions are somewhat confusing. The decals for the three fins are confusing. The optional 'YKEBNOE' (Uchebniy) text on the fuselage translates as instructional or training. I decided to follow the instructions for the Kh-55M to the letter (except for the training markings), but the question marks made the decaling part less enjoyable.
|
It took a few hours to apply the full set of decals, tiny as they are. Some folded on themselves, but since there are spares this was not a problem. The rear fuselage has a lot decals as you can see here, and most are readable. Later I compared the decals to photos of the real thing, and saw only a partial resemblance, so I'm not sure the decal set is accurate.
I did find the black stencils on the near-white airframe quite harsh, so I overpainted the model with a thinned version of Revell 371 to tone down the decals a bit.
| 
|
| I coated the model with Vallejo 70.522 Satin Varnish. I might redo that with a glossier mix. An observation was that having a white airframe with just black decals makes a rather uninteresting model.
|
How do you weather a weapon that flies only once? It really doesn't get dirty. I decided to try some light panel line accenting. The last I tried that, it did not work well, so I decided to make test piece. It has exactly the same painting sequence as the real model. I first tried a gouache wash on the rear fuselage, but it was too strong, and it stained the area to a light gray color.
I tried various grades of darkness of the wash, and also changed the way I removed the excess. In fact in the end I no longer applied a wash, but normal gouache paint. I let it dry and removed the excess with tissue paper, but in such a way that the paper would not go into the panel lines. The result resembled the panels lines of the models in Hasegawa catalogs of the nineties. I also went lighter and lighter with the panel lines. The front sample shows some of these lighter panel lines.
For the actual model, I used a blueish-grey color, roughly a 30% lighter version of FS 35164, or a 20% lighter version of RAL 5014.
| 
|
End result
After the weathering, I added a very short pitot tube under the nose, made from 0.2 mm nickel steel wire. And then the model was done.
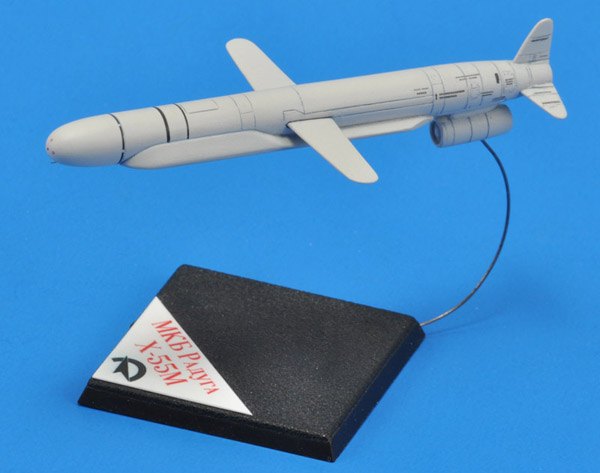
Like the Storm Shadow model, I mounted the Kh-55M on a Games Workshop 40 mm square base using a curved 0.5 mm steel wire. Amodel also provides a base, but I wanted commonality with my other models.
I added a decal to the foot, with 'MKB Raduga' and 'Kh-55' in cyrillic, plus the MKB Raduga logo. The arc consists of three stripes, but they look like one from a distance. I will replace that in the future.
| 
|
| For such a tiny model, it surely has nice detail, and great decals. Amodel made an excellent model if you ask me.
|
| Here's my tiny fleet of cruise missiles so far, the Kh-55 joined by the Storm Shadow. I plan to add a few more models of this obscure theme.
| 
|
Links
Return to models page