Academy 1/72 OV-10B Bronco
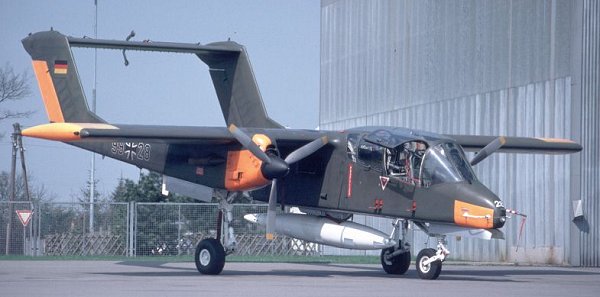
| During my spotter years I saw both USAF and Luftwaffe Broncos. In April 1987, we visited the airfield of Lübeck-Blanckensee, and we saw a number of Luftwaffe OV-10Bs on the ramp. The kind people of the company maintaining them (Condor Flugdienst I think) let us briefly on the ramp to shoot some photos, one of which is shown above. Since that day I had a vague plan to build one in 1/72. That vague plan became reality in 2003, when I bought the Academy OV-10A and the CMK interior detail set. Converting it into an OV-10B will require some modifications though. And so another project was started! But a modeler never can have enough projects :-)
|
Model quality
Various reviews and my own observations yielded good and bad points. The good points:
nice overall detailing
excellent engraved panel lines
good selection of stores
excellent transparancies without weld lines
decals for one USAF Bronco of 20 TASS in 1969 (painted FS 36473 / 37875) and one Marines Bronco of HML-267 in 1970 (painted FS 34097 / 36440 / 37875). The are printed sharp. The sharkmouth for the USAF version does not match the real one.
good fit of the wings and tail booms
the four-part canopy looks intimidating, but fits well
The bad points:
fit problems between the fuselage and wing
fit problems between the fuselage and the stub wings
the windscreen is wider than the fuselage
the main wheels are not done well, the wheels look too small, lack a rim definition, and hence the tires look over-inflated
the landing gear legs are not very realistic, see How to improve OV-10 from Academy on Britmodeller)
parked Bronco's have the propeller blades in neutral pitch. This requires some modifications of the kit's props. The engraved lines demarcating the tip colors are not realistic and in the wrong locations
the pitot tube should point downward around 5 degrees
a control stick is lacking in the rear cockpit, and there is no side panel detail
there is hardly room for a balance weight in the nose, and the model badly needs one
the centerline tank is too pointed
a to-be-checked problem is the shape of the extreme nose. If I compare the Revell model to the Academy, the nose is much too fat. For example, compare this Revell photo to this Academy photo.
A review was published in the October 1999 issue of Fine Scale Modeler.
Other 1/72 models
Academy OV-10D, #1680
Airfix OV-10A, 02035-2, issues from 1975, ~ 1980 and ?
Airfix OV-10D
Hasegawa OV-10A (USMC VMO-2 or USAF 19th TASS 51st TFW)
Hasegawa OV-10D, DT108. The D-model is the same kit as the A, but with a white metal D nose, to be placed after cutting off the A nose. The old decals are still there, but this kit includes new markings for VMO-2 (Light grey/blue grey scheme - Desert Storm), VMO-1 (Dark green/med. grey scheme), and VMO-2 and H&MS-36 in overall FS 34097 Field Green. (Thanks to Brad Hoskin for this bit of info!)
Revell OV-10A, early 70s. Reissued as 04120, same model, but instead of Vietnam vintage illustrations on the box cover it looks more like Desert Storm. Here is a review
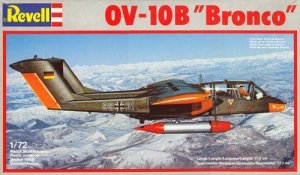
Revell OV-10B, 1983. Fellow IPMS member Maarten Schönefeld kindly donated his half-built and abandoned Revell OV-10B. This model is from 1983, and although not bad, it is no comparison to the relatively new and better detailed Academy model. However, the Revell model is a true OV-10B, without stub wings, and with a clear rear fuselage. It will therefore be a very useful reference for this project, and I may use the clear rear fuselage. Also, the box top photo is a pretty good one. For example, it shows something of the gear installed in the rear cockpit. Interestingly, it's flying with the cockpit fold-out steps in the open position.166.5 vs 169 mm span
Aftermarket accessories
Czech Master Kits interior detail (CMK7025)
Czech Master Kits control surfaces (CMK7030)
Czech Master Kits engine set (CMK7069)
Eduard ED72310 photo-etched detail set
Eduard EDCX127 masks
Extratech EX72101 photo-etched detail set
References
Except for the Lübeck photos, I don't have much on the B model of the Bronco. I have been told the German magazine 'Modell Fan' had an article on the OV-10B, around 1980, but their article index doesn't show such an article. 'Flugzeug' issue 6/89 contained a six-page article with very useful details, but no information on the rear cockpit, except for the one-off trainer OV-10B 99+17.
empty rear cockpit (except 99+17)
a target winch in the fuselage, under the wing
cooling inlet for winch on left fuselage side, cooling outlet on right fuselage side
rearwards-facing target operater seat
winch line 'outlet' under rear fuselage
transparent rear fuselage, with footsteps, mirrors and a small opening window. Winch line deflector fitted under rear frame
black thingie on left fuselage side with "Ankerstromversorgung AV - 020" markings
Construction
Usually I only start a project when I have gathered enough information. Considering the lack of knowledge about the rear cockpit and the towing gear, I shouldn't have started this one. But I decided to do some initial work on it anyway.
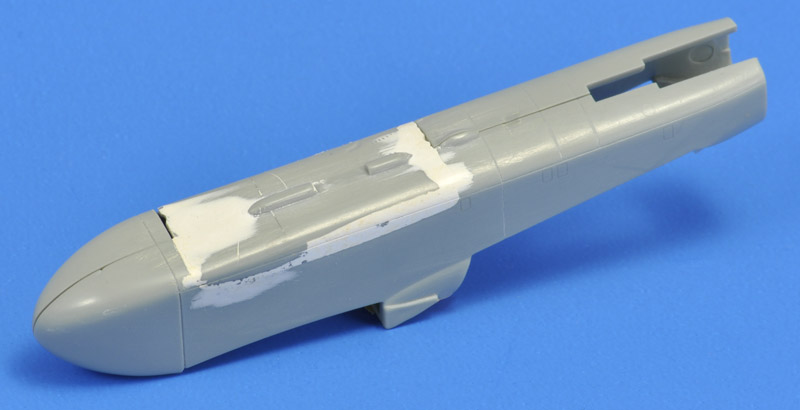
I started with the removal of the stub wings. I thought it would be relatively easy, since Academy moulded the stub wings as a seperate part (actually two) that fit in a cut-out in the fuselage. But it wasn't as easy as I had expected. The basic problem is that the unmodified Academy parts don't fit well. They don't result in a straight belly line, instead they form a bulge. I had to sand the parts considerably, and used lots of Milliput to create a straight lower fuselage. I left the centerline pylon in place.
| 
|
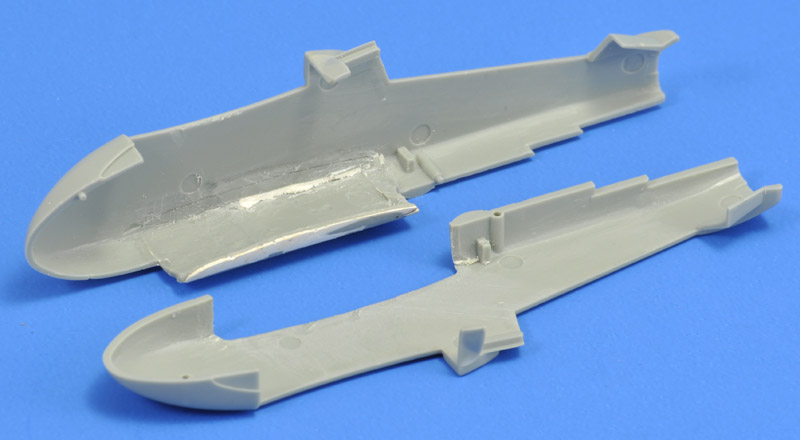
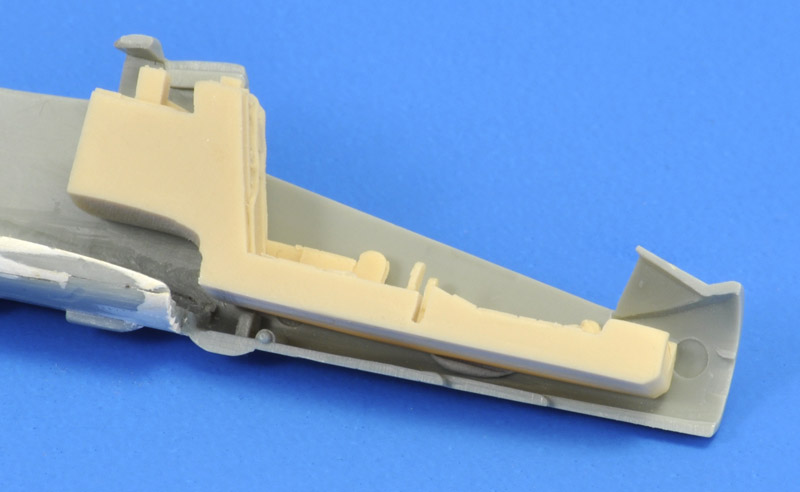
| The interior of the fuselage halves shows the stub wing insert of the model. This is OK for an OV-10A or D, but for an OV-10B it creates a problem. An observer was seated in the rear fuselage, and to make room for him, I cut away the rear part of the stub wing. I haven't removed the non-transparent rear fuselage fairing yet.
On the exterior of the cockpit, the four cockpit steps on the left side were filled with superglue. The ones on the right side are correct.
|
After a pause of almost three years I finally found more information on the rear cockpit, with many thanks to Julian Schüngel for great photos taken at Bückeburg, and Christian Horn for an interesting article.
I had also obtained the CMK interior set (7025). After grinding off the pouring stub, I had a cockpit tub with zero indication where it should be positioned in the fuselage halves.
| 
|
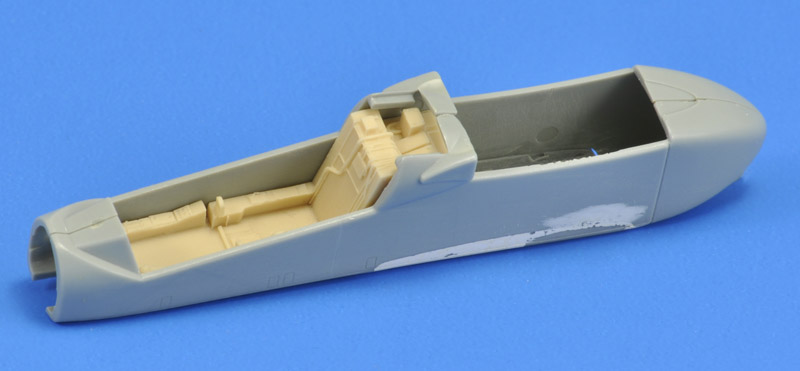
| Here's another view of the positioning problem. The rear bulkhead (tank?) will come off later, but I left it on for now, hoping it will aid in the positioning.
|
Centerline stores
So far I think I identified three centerline stores. The one seen in the top photo looks identical to a Skyhawk fuel tank (most notable similarity are the slots in the rear of the tank), but it has several prominent flat areas on it, the function of which I do not know. A second version of this store does not have the flat areas, and may be a pure fuel tank. The third centerline store, as seen on the Revell box, appears to be a pure fuel tank too, silver with orange nose and tail. This fuel tank is sometimes seen without its extreme tail, giving it a napalm tank look. I have on photo showing that appears to show some sort of target dart mounting fitted to such a tank, but details are vague.
According Jim Rotramel on the ARC forum, there were three kinds of fuel tanks used by American OV-10s. USAF aircraft during Vietnam typically used the 230-gallon tank. US Navy OV-10As also carried the 150-gal AERO 1C and FPU-3/A tanks. The AERO-1C was 21-inch in diameter and 179.5 inch long. The FPU-3/A appears to have been a modification with an extended hardback compatible with the both 14 and 30-inch suspension and an aft gravity filler cap. Its length was 176 inch.
Colors
RAL6014 upper surfaces over RAL9006 aluminium underside with RAL-Leuchtorange orange.
Decals
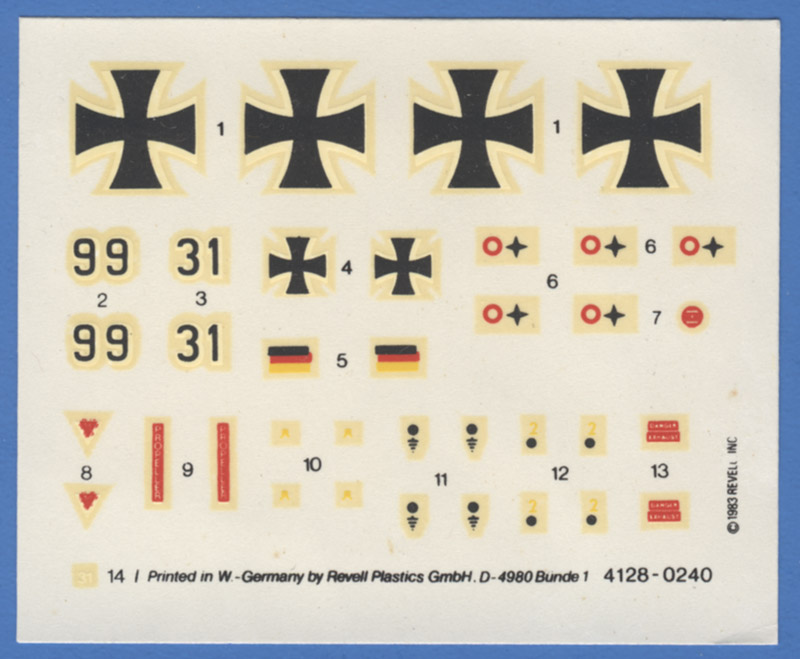
| I had hoped that the old Revell decals were good enough, but that definitely wasn't the case! But luck was on my side this time: while surfing for fonts for WW2 Luftwaffe stencils, I found a page with everything you want to know about the font used on current Luftwaffe aircraft, and even with an offer to send a CorelDraw file of the numbers. But it got even better: the maker, Eckart Müller, also had CorelDraw artwork for a large-scale radio-controlled OV-10B model, and he was so kind to send that too!
| 
|

| The only things I had to do was to change the serial number to the desired Bronco, and scale it down to 1/72 scale. For this I initially used the Revell decals as a reference. But a subsequent check revealed that the Revell tail boom decals were quite underscale. The iron cross on the 1:1 subject is 600 mm, the numbers 75% of that, but Revell has 400 mm iron crosses and accordingly sized numbers! The wing's iron crosses are 850 mm, and Revell did get these right. I also noted that the numbers are much closer to the iron cross than the official instructions specify. Shown below are the main items that can be printed in black and white on an Alps printer. I still have to do all decals with colors in them: the cockpit warning markings, the German flag on the tail, and the tank markings on the upper wing surface.
|
Modeling links
OV-10B links
Return to models page