Royal Model 1/35 Peter's point fifty


My uncle Peter lived in Veghel, a village along the route of operation Market Garden to capture bridges in Arnhem, in September 1944. Heavy fighting in and around Veghel took place. Around 1962 Veghel's small harbor was dredged, and a lot of dumped wartime weapons came out. They were simply thrown on a pile, and no one guarded the scrap iron. My uncle picked out the biggest gun in the pile, an M2 .50 heavy machine gun, and dragged it home. I wanted to portray that scene, and bought a resin figure of a boy and a .50 by Royal Model from Italy.


Figure construction

Here's the starting point: a boy from Italian brand Royal Model, catalog number 573. It was the closest thing that I could find for this project. But maybe more suitable models have been issued since. The detailing of the figures and accessories is exceptional, I think.
Unfortunately, I shot the first photos when the project was well underway. My (then) 8/9-year old nephews volunteered for a figure study, and that helped a lot in getting the boy's anatomy right. I gave the boy a walking pose by cutting the lower body in two parts (left and right), and setting back the left leg. I cut several horizontal slots in the back, and filled them with oversize shims, to bend the figure's back slightly. The modified model is coated with Mr Surfacer to hide all the crimes, and slightly buffed to give it a slight sheen.
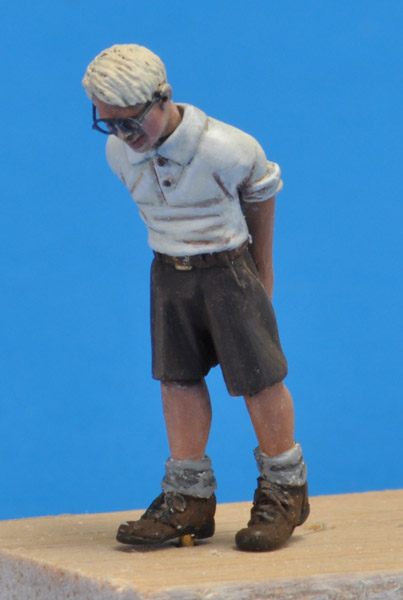
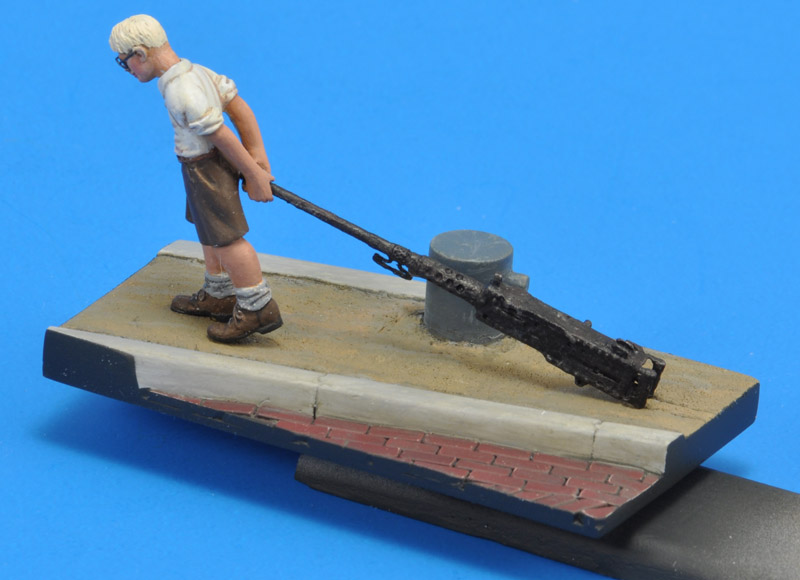
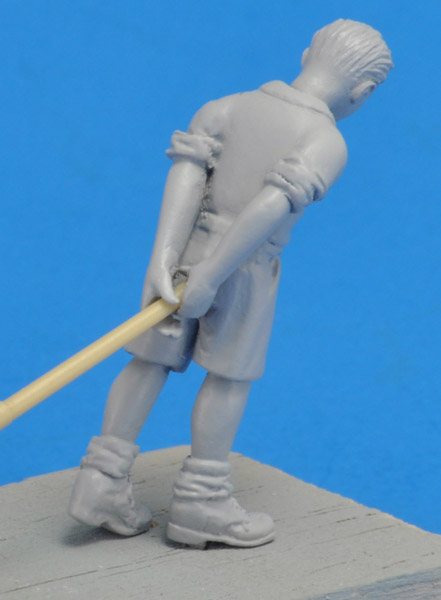
The last problem to solve was the figure's back. I had previously glued plastic wedges in saw cuts in the figure's back, to make him bend over a bit, and there was something wrong with the material combination. Every time I added a layer of Tamiya Surface Primer, these wedges kept appearing as raised lines. Sanding it down and repeating the priming would only give a repeat, Groundhog Day style. Maybe it was the primer's solvent that caused this problem? In the end I decided to apply several layers of thin CA glue, to create a barrier. And that worked. I would have loved to create some wrinkles in the clothing, but earlier attempts failed miserably, and time had run out. Therefore, no wrinkles.
Since I had little experience with painting figures, I asked club member Annamarie to paint it for me, which she kindly did. And the result was great! I added the glasses, made from 0.2 nickel silver wire by Albion. I tried making lenses from Kristal Klear, but that did not work, and I washed away the Kristal Klear.

In this view I now see that the lower legs are too massive. Children in the sixties hardly were chubby, and my uncle definitely never was. But apart from that, I'm really happy with the result.
Here's the built-up Royal Model M2 gun (catalog number 211), with detail parts by Calibre 35 (catalog number 35B13). I 'muddied' the machine gun with a thick coat of Mr Surfacer from a jar, and later I painted it with various colors (black, dark grey, brown).


Diorama construction

The start of the diorama. I made a bunch of street stones, each 5.7 x 2.0 mm, and sanded all edges all round. The kerbstones are of the Dutch '13/15' type, with a slightly canted face on the street side, and a rounded tongue and grove connection. The mounting bollard was cut from a 1/48 scale rocket pod (8.5 mm diameter), with a 2 mm diameter cross bar added. The harbor edging is several plastic profiles combined.
From my own memory from the seventies, street stones used to have a dark reddish-brown color. Browsing through my RAL fan deck, I picked RAL 8012 as something to aim for. I mixed MRP-5 Black with MRP-299 Insignia Red to achieve that color. The street stones were laid in a thin layer of Apoxie, to avoid having them all perfectly level. A lot more Apoxie was used to create the sand part. I stippled it with a toothbrush and a paint brush.
The painting of the diorama was hindered by a severe lack of acrylic paints in suitable colors, and a lack of mixing experience. I needed fast-drying paint due to time constraints. I'm not 100% happy with the concrete and sand colors, but my paint color palette was too small to solve this problem. The edges are painted like the base, Revell 9 coal black enamel.
I made a rectangular box (70 x 40 x 25 mm) as a base for the diorama, using 1 mm plastic card. It had a recessed area for the title label. I glued a bunch of steel screws inside the box to give it some weight. The box was painted with Revell 9 coal black enamel.
The base with the diorama glued on, and a title shield.


End result

I glued the figure right shoe to the diorama, and the handles of the M2 to the forward edge of the scratches in the diorama.
I would have loved to work some more on the model, but time was up. My uncle celebrated his 50th wedding anniversary, and I finished the model the day before the party.
The present was well received, and it led to more stories of my uncle's adventures. As an example, he built a concrete underground bunker, to store the WW2 weapons that he found. Maybe something to build in the future?


Return to models page