Profil24 1/24 1969 Porsche 917 Langheck


After looking at all Porsche 917 variants, I decided I wanted to build the original, a 1969 Langheck. Who cares that it was nearly undrivable? :-) A more detailed study made me decide to do the very first chassis, 917.001. It was never raced, but it's the original 917! In my favorite scale (1/24) there was only one choice, an expensive resin model by French manufacturer Profil24. I expected a good model, but read and weep..


Body shape analysis

While studying the model and various works drawings, I noted that the tail did not look right. It looked more like a 1970 or 1971 Langheck, with too strong curves on the top side and a curved lower profile. The fins were set too low, and weren't visible in a front view. It was difficult to pinpoint the exact errors and the way to solve it. Therefore I decided to take a telelens photo of the body and draw its outline in CorelDraw (red in the photo). I then put the outline over a reasonably good side view of the 1969 car, using the wheel base as the scale reference.

The analysis confirmed that the tail was indeed not of the correct shape. But it also showed other problems, the most important one being that the wheelbase is about 6 mm too short! This is easily verified on the body: the 917 wheelbase always was 2300 mm, or 95.8 mm in 1/24 scale. The model's wheel base is around 90 mm, or around 2160 mm in 1:1 scale.
Before starting a major reconstruction, I wanted to be sure that the side view photo wasn't too deformed by perspective. GPMA members located two useful line drawings: one by Philippe de Lespinay of Heller (their 917 model was originally intended as a 1969 version) and one from the Porsche 917 book by Peter Hinsdale. Again I used the wheelbase as the only reference. To me, the analysis confirmed that the side view photo was accurate enough.
Peter Morgan's book also provided a drawing of the 1970 Langheck. I superimposed the kit outline over that drawing too, and this confirmed that the model has the tail of the 1970 Langheck, with 1969 fins.
I looked into ways to correct the model, using the line drawing to do experiments. The bottom view shows the route I will likely take: two plugs in the body, and rotating the tail section to get the upper profile right. The lower side of body needs to be built up, and maybe I will try to give the nose a slight upturn on the bottom side. The rear wheel opening top side will be extended downwards.


Body reconstruction part 1 - wheel base and tail corrections

I once cut a model in 10 pieces and had a hell of a time reconnecting the parts. Therefore I wanted to modify this body in a much more controlled way. I decided to make a simple jig that would hold the two body parts securely, and remove all the unwanted degrees on freedom. The jig consists of a sheet of plastic car with blobs of Milliput, into which key points of the model were pressed.
This photo shows in close-up how the body fits in the Milliput blobs. The model has been cut in two parts by now.
By scribing and snapping the sheet in two, I could move the body pieces apart to add whatever plug was required. The ruler keeps the sheet pieces aligned.

I had to cut out the rear window sill, using a scriber and a router bit in the motortool. Unfortunately it snapped off eventually, but it will not present a big problem.
I reassembled the body parts with a 4.5 mm plastic card spacer, 4 mm for lengtening the body and 0.5 mm to compensate for the sawcut. Milliput was used to create a smooth transition. The lower side of the sponson will covered with additional plastic card, so I did not finish the Milliput job there.

After finishing the Milliput job on the rear window sill, I noted that it looked crooked. Measurements showed that the rear of the sill was one millimeter off to the right side, and this was very noticable. Therefore I removed the Milliput again, took out a small section of the sill on the left side, and repaired the whole mess with more Milliput.
The tail was cut from inside the wheel wells, until it could hinge on the top side. Using the jig made earlier, I rotated the tail section so its rear was 2 mm higher, and fixed it in place with plastic card and superglue. The fins were cut off using a JLC razor saw, for modification later.

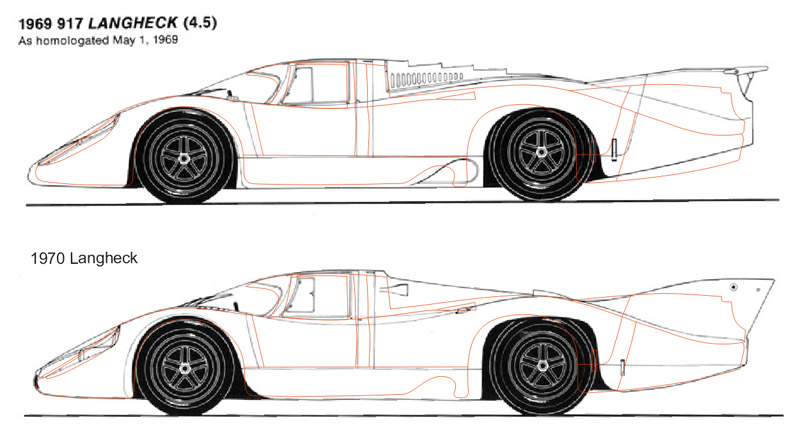
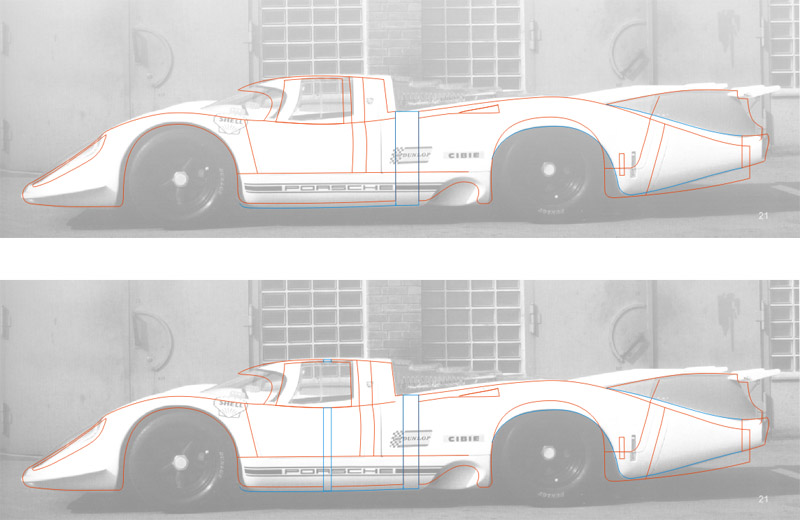
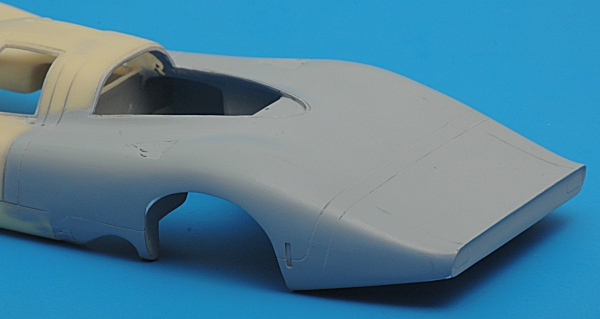
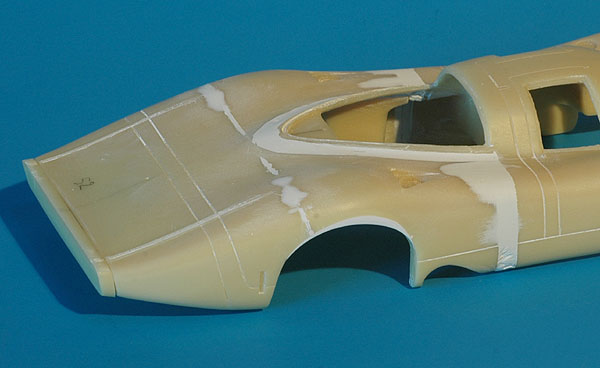
Next I removed a section of 4 mm for the rear side of the tail, and reattached the end piece with tail lights. The joint still needs to be puttied. The lower side of the tail was also reshaped, changing the 1970 curvature to a near straight 1969 line (compare with next photo).

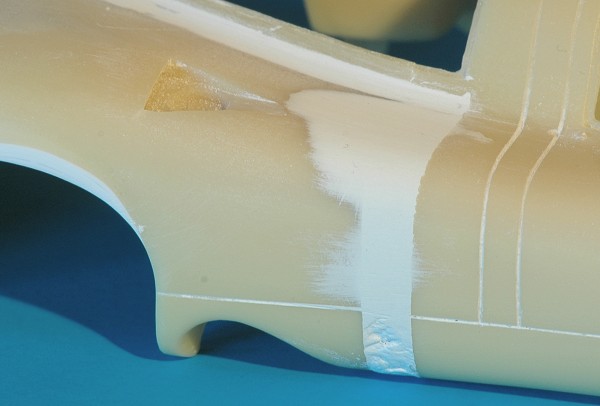
I also modified the wheel opening. I started with slanting the rear side of the opening, then I glued a number of plastic card strips inside the opening. I taped the the line drawings shown above to the body, and then sanded the wheel opening to an accurate shape.
It took a few rounds of painting and sanding, but the tail is smooth again. Here's the preliminary result, without the fins. I stuffed the NACA inlets on the front fenders with Blu Tack, to avoid having to sand the paint inside the inlets. Lastly, using Milliput I made the panel lines more straight and less deep.

Looking back, I think the correction was very worthwhile, and an interesting exercise. If I now look at an uncorrected built-up model (see the box art for example), it looks plain silly with those rear wheels so far forward. Big minus points for Profil24 for screwing up the shape so badly.

To be continued, because there's a lot more to correct..


Return to models page