Drone #1 'Dewey' from Silent Running


In 2008, I bought a set of three Silent Running drones on Ebay. For 48 US$ including shipping I got a box full of resin parts. But most of the castings were really, really bad. I guess I bought a set of illegal recasts of the Planet-X models, and I hope that the Planet-X originals were a whole lot better. In the next 16 years, every time I looked at the castings, I shook my head and decided it was not worth the time spent on repairs. But in the end, my curiosity whether I could pull it off won. Of my set of three drones, I decided to build drone #1.


The model

This is the complete set of parts that you get for Drone #1 - 15 resin parts if I count correctly. The base is 128 mm wide and 113 mm deep.

I got similar part sets for Huey (Drone #2, orange) and Louie (Drone 3, pale green). They have different bases.
Look closely and you'll notice the horrible casting quality. The mold division leaves many details irreversibly damaged, and there are many, many air bubbles. Most knobs are absent, leaving an air bubble in the casting.
More roughness and air bubbles on the rear side. I don't see the recessed rear panel in the movie. Nor was the number engraved.
The smaller detail parts. I'm not 100% sure they belong to this drone - I noted later the detail parts have specific details for each drone.
The instructions, giving lots of painting instructions. Good work by Planet-X, but badly copied by the recaster.. I'll refer also to the dozens of screenshots I made from the DVD.


Construction

The bottom side was more air bubble than resin. Every hole on the surface revealed a much larger air bubble underneath. I cut them all open, and filled the three bottom surfaces with Apoxie Sculpt. Drone #3 is shown here too, since it had similar defects.
There's a rough mould line across the whole body, sides, top and bottom. On this side, the circular vent was repairable, but I will probably replace the two upper vents.
On the other side, the mould halves did not align properly, and I doubt whether I can restore the details. The upper detail is rather easily replaced, the lower not.
Drone #3 again, for demonstration purposes. The horizontal flange around the body sides was heavily damaged, with enormous air bubbles plus damage from demoulding. In this view you can see a large air bubble, plus great damage to the mould, that left a large fillet on the lower side of the flange.
Here's another very large air bubble in the horizontal flange around the body sides, but it is repaired with Apoxie Sculpt, and a lot of scraping and sanded to recover the flange from excess resin. I will probably slightly thicken the flange, it looks too thin to my eye.
Nearly all sharp edges had sub-surface air bubbles, and most corners had an air bubble too. I cut them open and applied Apoxie Sculpt.
All buttons had an air bubble, with the consequence that there are no buttons, just an half sphere of an air bubble.
Here's the second round of repairs with Apoxie Sculpt. I counted 30+ spots, and it's still far from done.
I removed the damaged details, by first drilling multiple 0.5 mm holes around the circumference, and then using my motor tool to carve shallow cavities. Next I applied Apoxy Sculpt in the cavities, and used a stamp-like tool to create flat surfaces of uniform depth, ready to glue the 3D prints on.
I drew all damaged details in 3D CAD, and they are show here ready for printing, with supports added. The designs are a bit of a mix between the original kit's designs and what I saw in screenshots of the movie.
Club member Wim Hoogendoorn kindly printed the parts, here are two of them. They don't require any more work before installation.
After gluing the detail parts in place, I filled all gaps with Apoxie Sculpt (white), followed by Mr Surfacer 500. But only after Tamiya Fine Surface Primer I'll know whether everything is OK.
Slowly the model got covered completely with Tamiya Fine Surface Primer, revealing lots more air bubbles and other surface defects. I removed a part of the raised panel seen on the front of the left shoulder (right in the photo).
I discovered that in 'reality' the legs go into large openings in the lower sides. It can be seen in the movie when Drone 2 needs repairs after the collision. A simple jig from 1 and 2 mm plastic card would hold the model during the routing.
I used an old drill stand and a router bit to make deep square openings. The openings were quite rough.
The opening seen on the left has been lined with plastic card. Gaps still need to be filled with Apoxy Sculpt.
It all looks good after a few layers of Tamiya Fine Surface Primer. These openings will be difficult to see in the final result, but I'm happy I made the modification. The work on the lower side, including multiple layers of Tamiya primer, revealed many more air bubbles and other defects. You can a see a few if you look closely. This model must be the most laborious resin model I ever built.
The last major job on the body was to restore the flanges on the sides, with their triangular stiffeners.
The legs and feet also required a major clean-up, showing lots of air bubbles and surface defects. They are still not perfect, but I had to stop somewhere.
Here's the intermediate result, Blu-Tacked together. What a job it has been to get it to this point..
I had made screenshots from my DVD, but the rather small pictures did not show much detail. I was quite amazed by the detail visible in the YouTube video Whatever Happened to Silent Running? by Dan Monroe. One of the discoveries was that the gray detail on the top side were three buttons in reality. I cut slots in the part with a JLC razor saw. But now I have to repair some collateral damage.
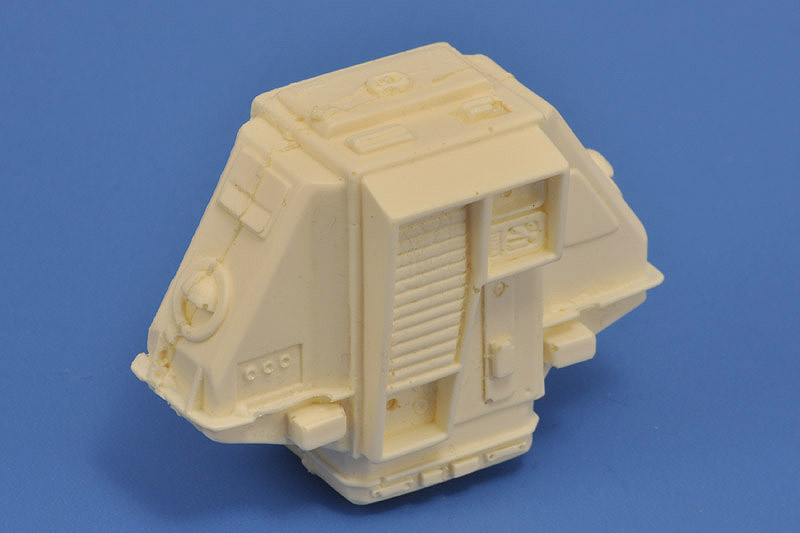
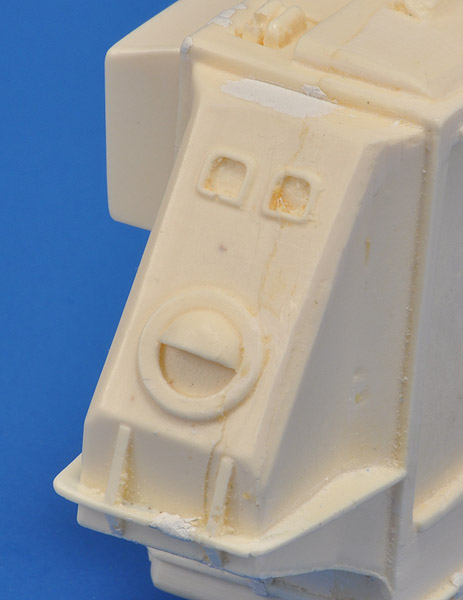
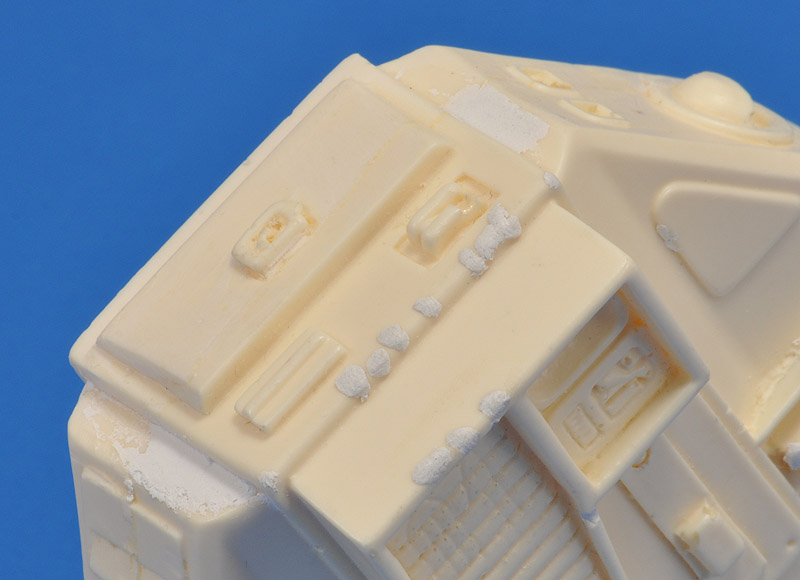
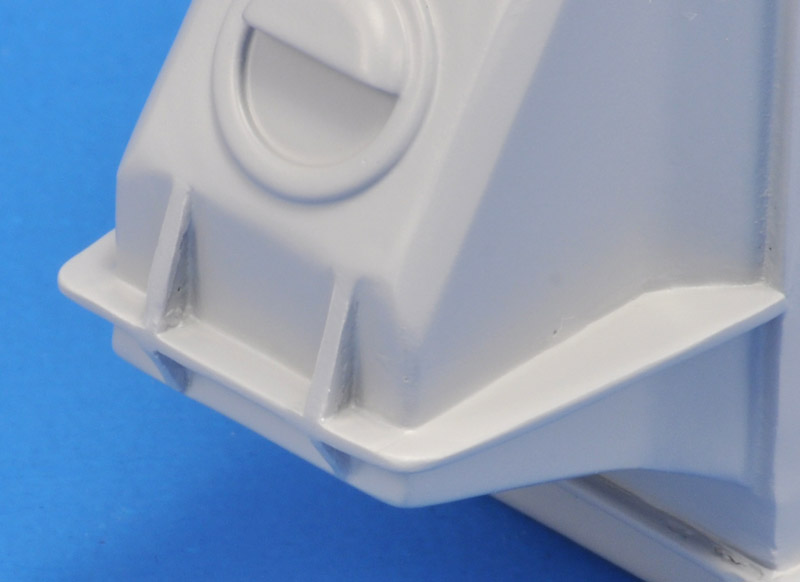
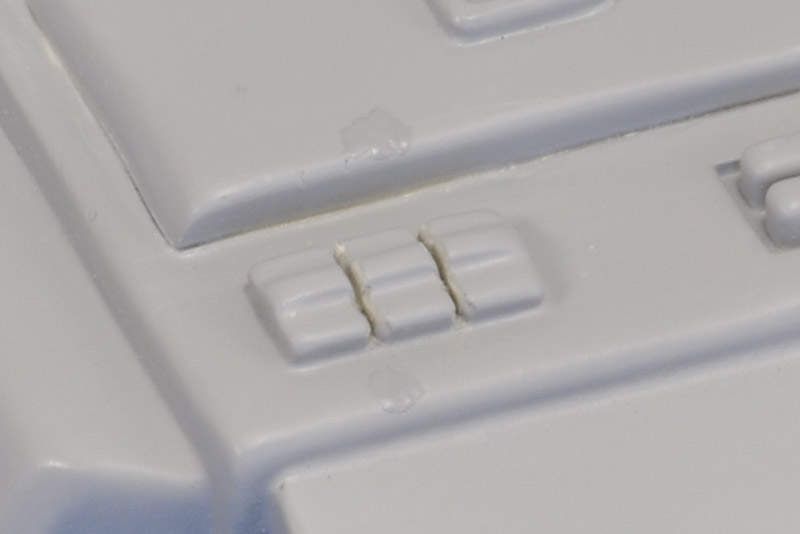
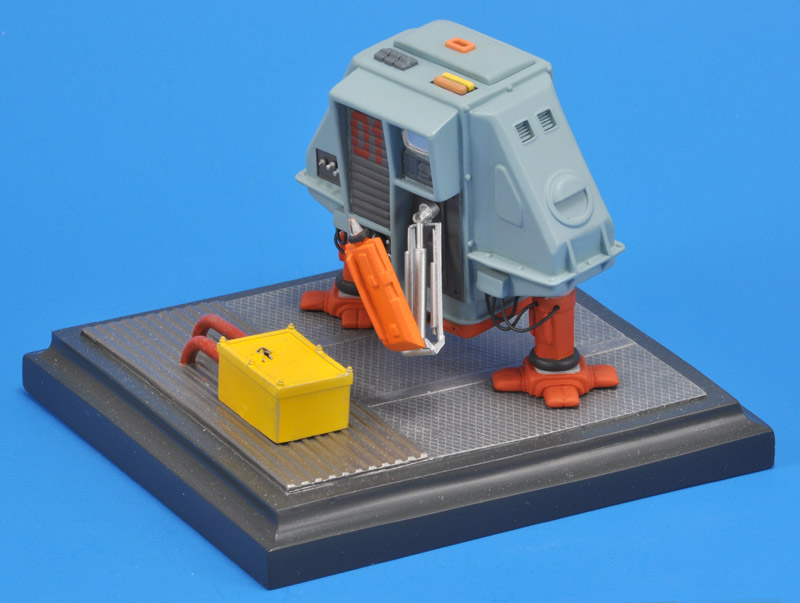
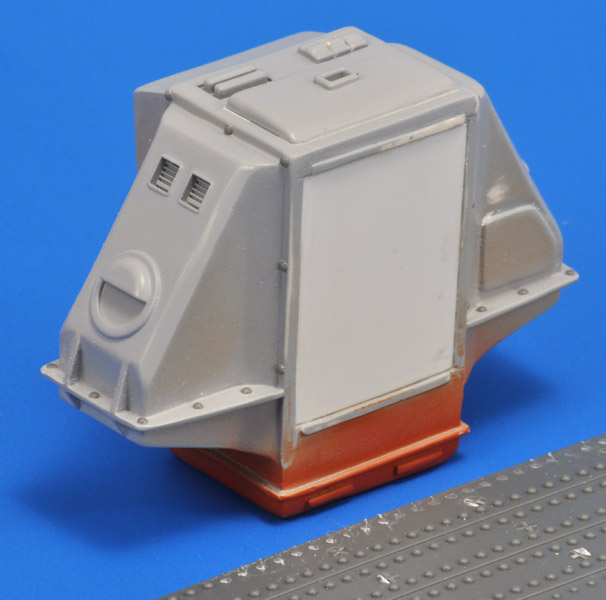
I could barely see rivets on the 'shoulder' pieces in my own low-res DVD screenshots, but in a small set of better screenshots I saw them clearly. Luckily I had a Meng Nuts and Bolts, set D with catalog number SPS-009, with 'spikes' and rivet heads. I used a JLC saw to cut a large number of 1.4 mm rivet heads, and detailed the shoulders with them, following screenshots.

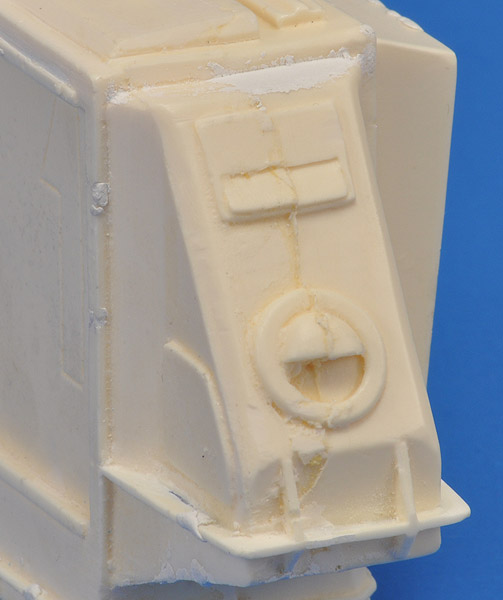
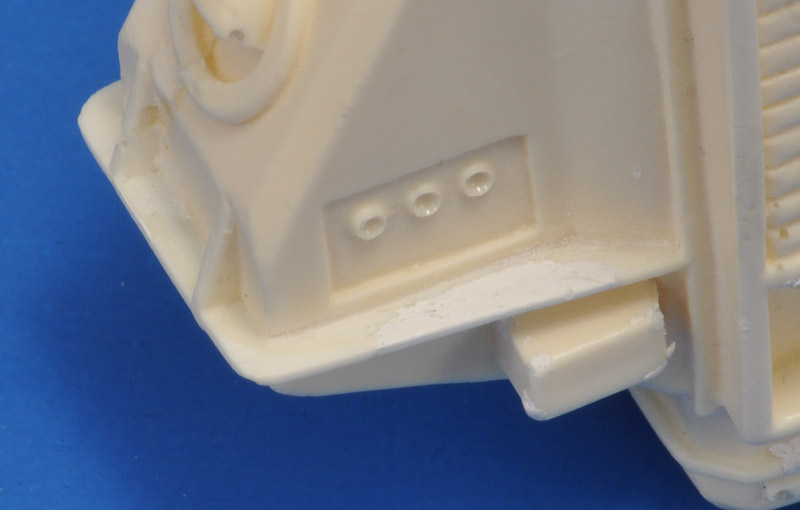
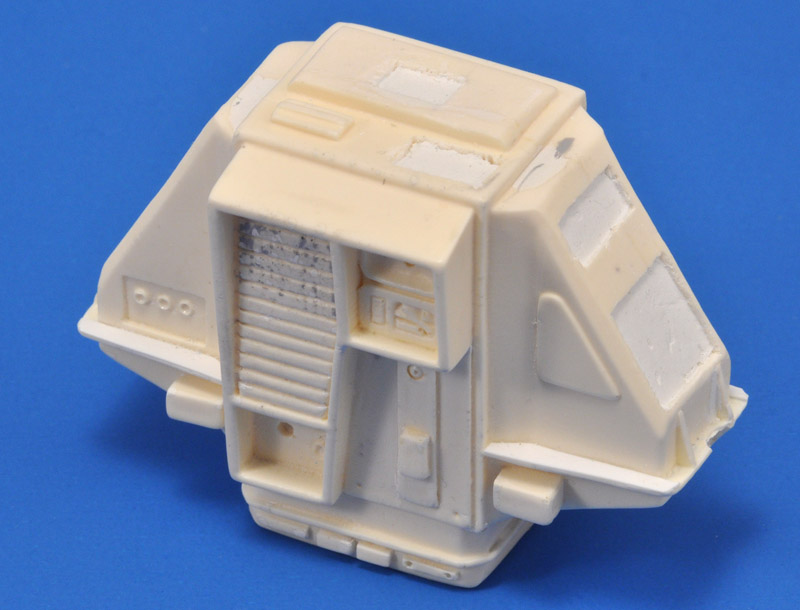
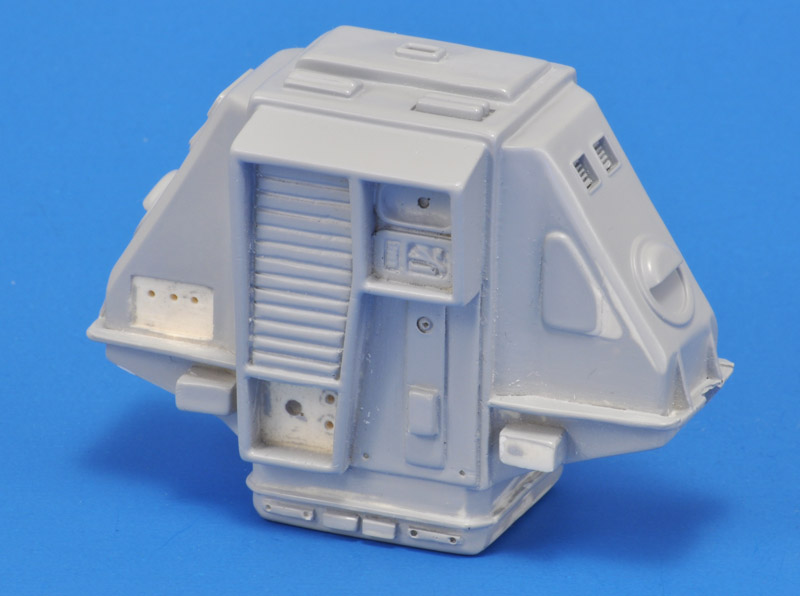
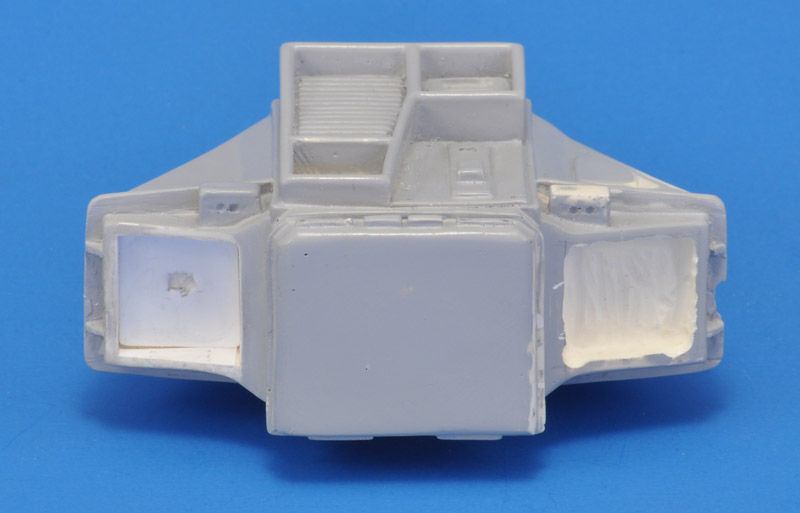
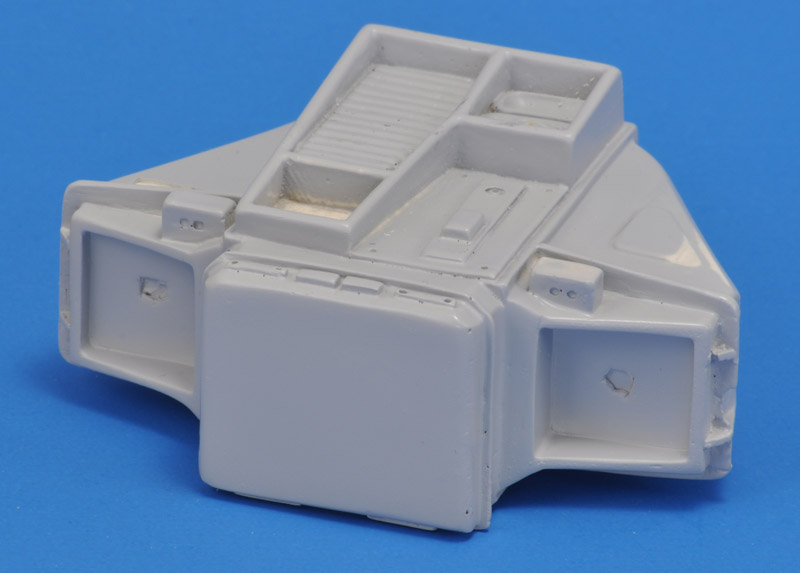
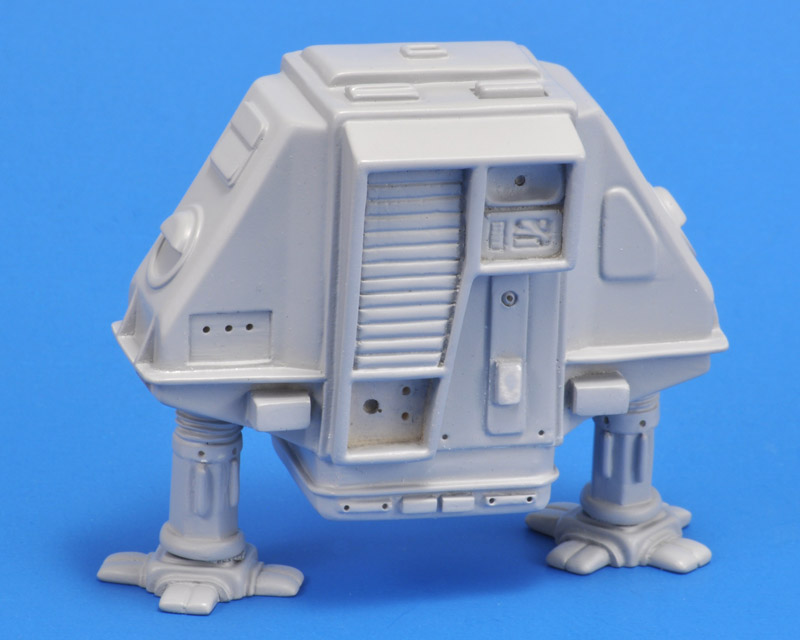
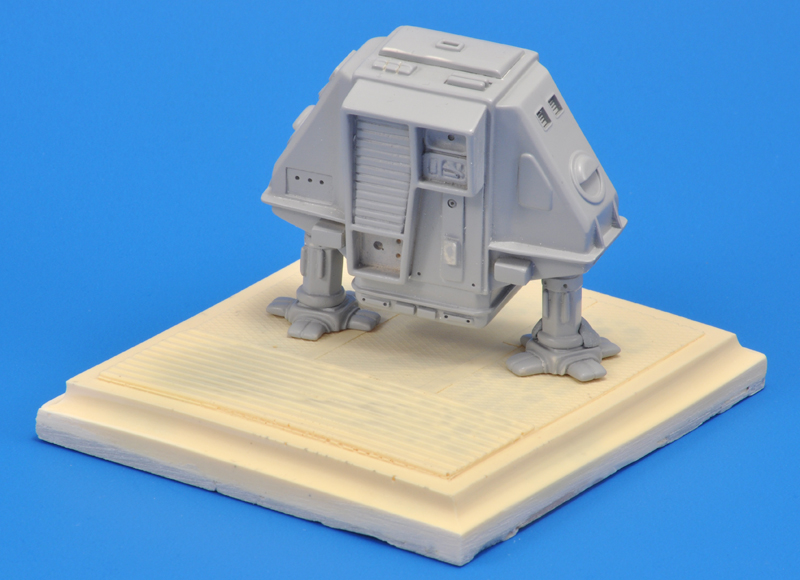
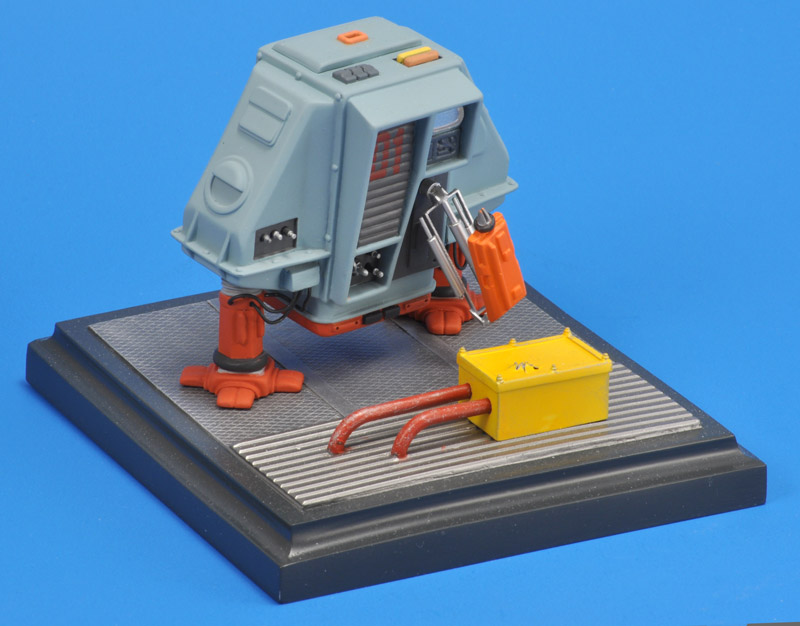
Also following screenshots, I added a piece of 1 mm plastic card inside the rear hatch opening. It's too deep on the original model. A last modification, not shown here, was reducing the depth of the 'hydraulic blocks', and canting the front faces a bit.
The three 'knobs' on the right-hand panel were made from 0.75 mm spring steel wire, 4/5th of which covered with 1.0, 1.2 and 1.4 mm Albion microtubing. I increased the diameter in 0.2 mm steps to find the diameter that looked correct. Of course I also tried an easier route, drilling a 0.75 mm hole in 1.5 mm plastic rod. But the hole was never properly centered.

On the 1/5th part sticking out, a short length of 1.0 mm Albion microtubing was added, making some sort of knob end. I made two short and one long knobs, as seen in the screenshots. The 1.4 mm diameter part was painted coal black, the ends silver.

The parts clamped by the clothes pin is a resin part that comes with the kit. One-third was an air bubble that I filled. The pointy end was far too large, and I carved it down until it somewhat resembled the screenshots.
I tried several materials, but ended up with lead wire, 0.7 mm diameter. I bent each wire to shape, then airbrushed all six with Revell 9 Coal Black. Lastly, each wire was installed carefully, using a bit of black paint as glue. This should prevent the wires from falling out, but also allow removal in case the legs need to be taken off.


Painting

Although I'm an MRP convert, I decided to paint this model with my 'previous' paint, Humbrol enamel. It's mostly since I have several hundreds of Humbrol tins, and maybe fifty MRP colors only.

After digging through all my Humbrol, I ended up up with two old Humbrol Authentics as the main colors. For the orangy-red-brown I picked MC11 Orange Facings. Looking later at more screenshots, I should have made it a bit more brownish.

I used Humbrol 127 for the flexible tubing and the squares on the tops of the feet. To mask the rounded edges of the latter, I cut Arctic Decals circular masks (ARC72-FR-05 and FR-06) into four pieces, for each of the four corners, and used Tamiya tape for the rest of the masking.
The main body was next, in this undetermined pale blue-gray color, a tin without a label that could be HG13 RLM78 or HN1 Light Grey, or a custom mix. That old Authentics paint smells very different from modern paint!
Next, I painted four 'front panels' MRP-209 RAL 7012 Basalt Grey, after a lot of masking. Next I painted one 'front panel' in a darker gray, MRP-114 Extra Dark Sea Grey. The rubber 'boots' at the bottom of the legs were painted MRP-077 NATO Black.
Not shown very often: the amount of tape and masking paper to achieve the above. I used 0.5 mm JammyDog tape (in a holder from another tape) plus 2, 6 and 10 mm Tamiya kabuki tapes.
On the top side, MRP-040 FS 36118 with a bit of MRP-100 FS 36231 for the 'three knobs in a row' and the 'memory slots' cavity. I painted the memory slot ends yellow and pink with Humbrol paint (H69 Yellow and H61 Flesh respectively), and the exhaust (?) orange (a mix of H69 Yellow and H220 Italian Red).

This digital photo is merciless in showing painting defects, that I can hardly see with the naked eye. Maybe I will do some more work there.
I had designed an '01' decal to go on the slats, cut in strips, but it really did not work. Luckily I had a backup plan: a home-cut mask, using the same artwork. I can only show the negative of that mask here. I used a red-brownish color, a Humbrol MC22 Chestnu Brown + H220 Italian Red mix, that is not well visible on the slat color. But that matches the colors in the movie.

The lens was made from a piece of flat car window, sanded to a shape of the kit's lens surround. I backed it with Bare Metal Foil, but it didn't look like a light at all. But with time running out, this had to do for now.


Robotic arm

The parts for the robotic arm are cast in a wafer. The front cover part is maybe 1/3rd too big, but I decided to use it anyway. The model had to be ready for the ESM 2025 show, and designing the very complex real arm in 3D CAD would have taken too much time. I cut a slit in the cone at the top end of the cover part, to make it look a bit like a clamping device.

Tamiya's primer responded strangely to the front cover piece, sort of beading up. Maybe the part was contaminated with a release agent? It doesn't matter much, the parts are close to useless anyway.
I really needed to design a replacement arm in 3D CAD, due to its complexity. But I wouldn't make the ESM 2025 show date unless I would use the kit part. So as a temporary solution I used the cleaned up oversized resin part, combined with a quick and dirty scratchbuilt frame with three hydraulic cilinders.

I painted the arm's cover with a mix of Yellow and Orange to make a light orange color. The frame and cilinders were painted in one color, MRP Aluminium. I made the arm partly outstretched, in order to show a bit of its workings, but not too much of the detail.

To be continued.


Base

After a lot of fiddling with the legs, I achieved the pose I wanted: slightly tilted forward, as if it's studying something below 'eye' level. I also decided to use one of the bases that came with the set, a rather plain one. I think it's a bit too large, but maybe it expresses the futility of a small robot on a giant spaceship.
The lower side of the base was uneven, leading to the edges being all over the place in terms of thickness. I added an edge using epoxy putty, then sanded the sides to a more or less constant height.
A sheet of plastic card was added to the bottom, then the sides were further improved. I also filled some 50 air bubbles all over the base. The coat of Tamiya primer revealed more - sigh..
The typical stance of the robots is slightly tilted forward, as if it's studying something. Therefore, there had to be 'something' on the base to be studied. Since I had three days left before Euro Scale Modeling 2025, I decided on something simple: some kind of box with damage, with two tubes attached to it.
The base was painted in two hours. I first used MRP-077 NATO Black to paint the edges, followed by masking to paint the rear half MRP-209 RAL 7012. More masking followed, and the front half was painted with MRP-030 Steel. The box was painted MRP-122 Marking Yellow, the pipes MRP-184 Signal Red. Lastly I used Humbrol 11 Silver Fox to drybrush the grid on the rear section, plus the box and pipes.


Preliminary end result

Although I will rebuild the arm later, here's the preliminary end result, as shown at our club's table at the 2025 edition of Euro Scale Modeling. I had no time left to try a bit of weathering, maybe I'll add that later. But even in a clean state, I'm quite happy with the result.
Building this crappy recast was a rotten job, not to be ever repeated. I gave away the other two robots in the set.
I will rebuild the arm in the future, probably as a 3D CAD and printer part, because of its complexity. The oversized kit arm looks weird if you know the film robots well.
This rear view shows the single decal used on this model: the large number 1 on the back panel. The narrow black boxes on the orange lower side are not prototypical, but I discovered that fact too late to change it.


Links


Return to models page