Italeri (Dragon) 1/72 Sukhoi Su 24MR Fencer-E


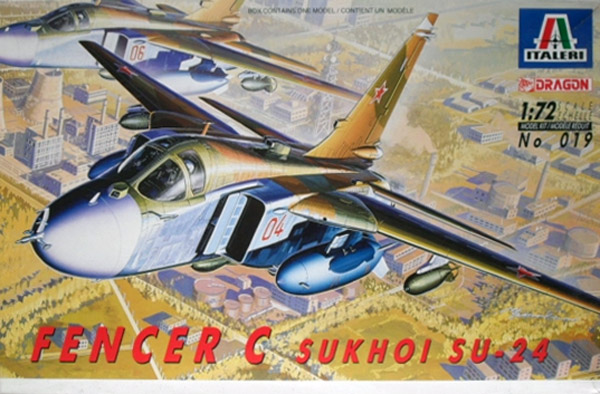
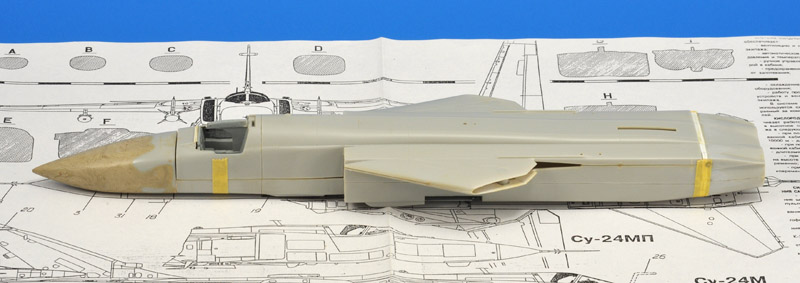
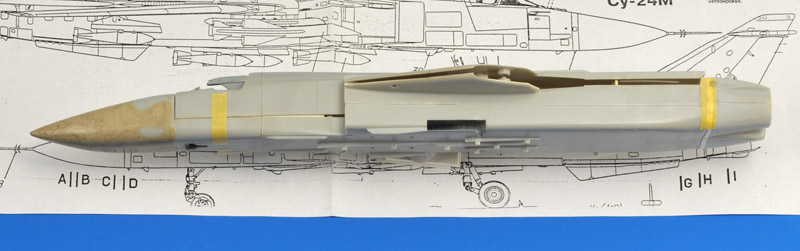
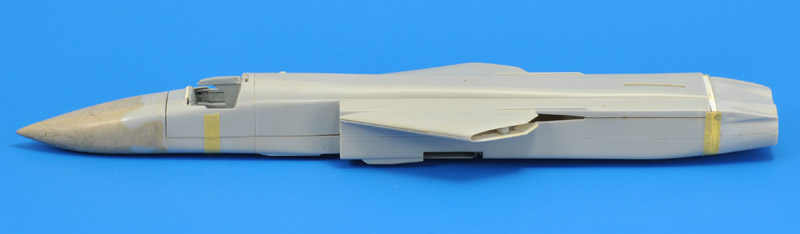
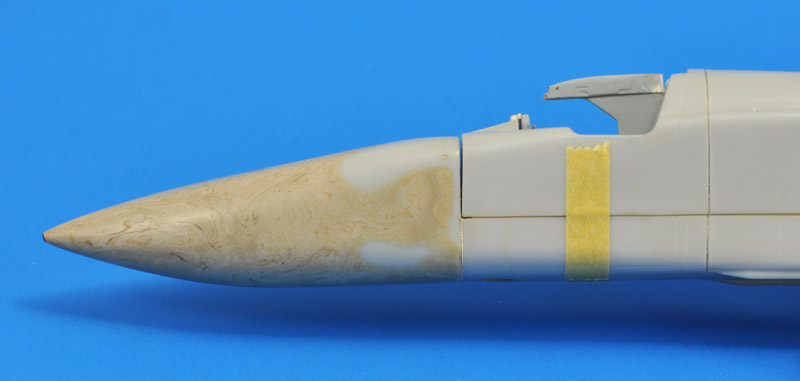
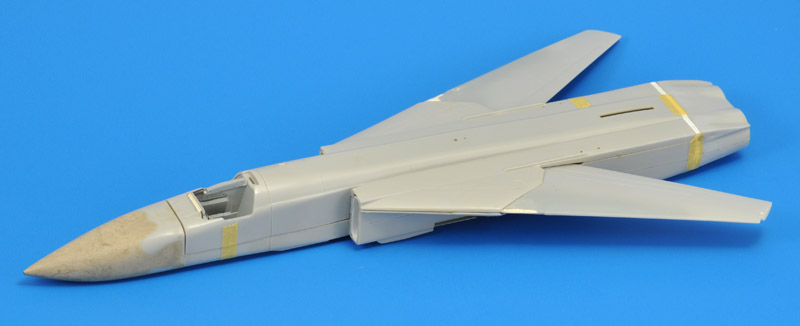
Ever since I saw Fencers in East Germany (Fencer-E and F) and Poland (Fencer-B, C and D) this is one of my favorite Soviet aircraft. Dragon produced a Fencer kit in two versions, the short-nosed Fencer-B/C and the long-nosed Fencer-D. Italeri markets the short-nose version. I bought the Italeri kit to build a Fencer-B or C as I had seen in Poland, and planned to later buy the Dragon long-nosed Fencer-D to convert it into a Fencer-E, which is the version I like best.

The construction of this model was stopped in 2003. In 2001 I first heard rumors of a new Fencer model coming from Russia, and in October 2003 it reached Europe. It is produced by 'Strim' or 'Stream', and according to first reports, the quality is quite good, at least a lot better than the Dragon kit. Because the Dragon model will require a great deal of work to bring it up to standards, starting over with the new kit is most likely much wiser. Therefore, this project is terminated. I had a lot of fun so far, but I also learned that Dragon models are not the best in the world. I don't understand all the raving about them! This partial build report will remain on the site in its original form for some time though.


Starting with a change of plans

After looking at my finishing rate, I decided to skip the Fencer-B/C and directly build the Fencer-E. The Dragon Fencer-D kit was difficult to find, so I decided to convert the Italeri kit. Aonother factor was that a modeller at rec.models.scale (remember that?) reported that the profile of Dragon's long nose was suspect. To make it even more complicated, Dragon later came out with a Fencer-E kit. I haven't seen it though. If it contains the recce pods it would be a good buy, I guess. But the box shows no sign of any of these stores, so my guess is that no specific Fencer-E stores are included.


Model accuracy

An initial look at the kit's shape (assembled with tape) revealed that the fuselage didn't look right at all. It looked too short in a way, and too deep. When I finally found a good drawing (from the Russian magazine 'Aerohobby' from 1994), it was clear that the kit indeed had some large errors. The rear fuselage is too short, the front fuselage too long, and the fuselage was too deep. But it also turned out that correcting these errors would not be too difficult (ever the optimist). Skipping ahead after the modifications, here's the model on the plan view drawing.
From the side view drawing I concluded what needed to be done in terms of fuselage height. I posed the model on the drawing, but in reality this does not allow a good comparison, because prespective will make the model look oversize compared to the drawing. You would need a much (much) larger viewing distance to make that work, and that wouldn't work either, because you couldn't see much because of the viewing distance :-) The comparison had to be done with measurements with calipers. Maybe it could be done with a camera with a telelens.

Later I found more drawings: a set from 'Krylya Rodiny' ('Wings of the Motherland') if I remember correctly, and one in Zlinek magazine, Volume III Number 2. Inevitably there were differences, and it became a case of 'man with two (or three) watches never knows the time'. I decided to continue working with the 'Aerohobby' drawings.


Plastic surgery

This first construction picture shows the complete fuselage with all major modifications. Fuselage height was reduced, front fuselage length was rediced, rear fuselage length was increased. The nose is a Milliput conversion job, to change the Fencer-B/C nose into a Fencer-D/E/F nose. With all these modifications in place the model started to look like a Fencer.
The modifications of the front fuselage started with a height reduction, increasing from 1 millimeter at the radome to 2 millimeters at the intakes. Then the front fuselage was shortened by 4 millimeters, just aft of the cockpit. You can still see the CA glue joint.

For the nose / radome, I used the short Fencer-B/C nose as a basis, and added and removed Milliput until I thought it looked like a Fencer-D/E/F nose. I hadn't used Milliput much up to that point, and its shows. I mixed it insufficiently, and I probably mixed in some of the crust that usually forms on one of two Milliput sticks. Sculpting a major airframe part was a first for me, and it's not easy to do this from photographs.
A close-up view of the rear fuselage. It shows the 2 millimeter cut from the lower fuselage half. It was not possible to simply remove 2 millimeters from the upper side of the lower fuselage, since the stub wing does not allow this. I cut a 2 millimeter strip from the middle of the fuselage sides, and glued it back together with CA glue. This cut is visible in the picture.

The extreme rear fuselage part (right in the picture) also needed to be lowered, but the nozzle openings needed to be retained. This was achieved by cutting a V-shaped notch in the sides of this part and gluing it back together. The two millimeter extension is a bit rough, being built up from multiple pieces.
The inlets also required a height reduction of 2 millimeters to make them fit on the modified fuselage. The parts were cut and glued with CA glue.
Here's an overview of all the changes that I made. I think the fuselage looks a lot better now, but don't take my modifications as the definitive answer.


Construction

Like so many kits, the intakes end after a couple of millimeters as a vertical wall. Very unrealistic if you look closely, and I can't stand it. Building full-length intake ducts was out of the question, way too much work and too little information. For this kit I tried something new. I removed the vertical wall, and replaced it with thermoformed 'cups' that make the intake look infinitely deep.
Shown here is the simple mould I made for this purpose. It was cut and sanded from a piece of wood, and sprayed with car body filler. I also made a simple thin plywood frame to hold the plastic card while heating it over a candle. On the right is a thermoformed piece. The plastic is stretched very thin in places, so I reinforced it with more plastic card. And I produced a bunch of unusable parts.
I constructed full main landing gear wheel wells from plastic card. The kit has very unrealistic wells, but you can leave it like that, since a door (that I had overlooked) covers it all up. I will definitely skip this modification next time.
I even detailed the wheel wells with lots of stiffeners, on all surfaces. You can see some of it under specific angles, but it's really not worth the trouble. A long narrow door would block this view when the model is done.
Here the fuselage is fitted with the wings. The wings have problems too: as molded, they have a decisive dihedral angle, and not the required slight anhedral. They are not straight either; they have a bend near the root. Once the bend is eliminated with hot water, the dihedral has doubled! To achieve the desired anhedral, you must scrape the upper side of the wing root (the part inside the stub wing) aggressively. The stub wing itself is too thick, but I decided to skip that problem.
For reasons of painting and transportation I wanted to build this swing-wing aircraft in such a way that I could insert the wings after painting. To make this possible, I removed all of the gear teeth. In the wings I cut a slot parallel with the wing's trailing edge, so the wings could slide past the pivot. The cut slides along the kit's wing pivot. This pivot is wrongly located by the way, so a moveable wing shows unsightly openings in most sweep angles. For my fixed sweep wing this didn't matter though.

Once the correct sweep angle was established, I glued a block of plastic card to the upper fuselage half, to fix the sweep angle. Some fine tuning was required by using thin pieces of plastic card. The wings can now be installed and removed as desired. But they are fixed in the largest sweep angle, as used when parked.
The kit's cockpit is a bit of a joke. The 'instruments' are 1/32 scale, and the seats are extremely simple. I decided to use an Eduard photo-etch set, because I had never built a cockpit completely from photo-etch parts. Working from photos I slowly modified the Dragon tub to something resembling the real thing. I increased the height of the side and center consoles 1 millimeter, brought the instrument panel 1 mm towards the pilots and made the stick pedestals longer and wider.

Looking back, it was probably a much better idea to install a Pavla/NeOmega resin cockpit, but I had started with the photo-etch and wanted to finish it. I did cast copies of the seat of a Pavla Su-17M-4 cockpit set. They are cast in epoxy resin, badly yellowed now. I hadn't found standard polyurethane resin yet, around 1997.
The right side of the instrument panel needs modifications to create a Fencer-E instead of a Fencer-D. Therefore I cut that side off, but I haven't found a replacement yet. Also, the photo-etch parts for the right cockpit wall needed quite some rearrangement before it looked like a Fencer cockpit, but you can't see this in the photo.
To show the massive size of the Su-24, I posed it next to a MiG-23 that I'm also building. I was surprised by the size difference.


Return to models page