I'm slowly working on this Monogram kit of the 1970 Superbird, a present from a friend (hi Eric!). I started construction with little hope to find detailed information on the Road Runner / Superbird here in Europe. But again I underestimated the information available on the internet! I found a set of fantastic restauration photos, that gave much needed inspiration, but they also showed that some of my modifications are not realistic. But the techniques I used may be useful to show. |
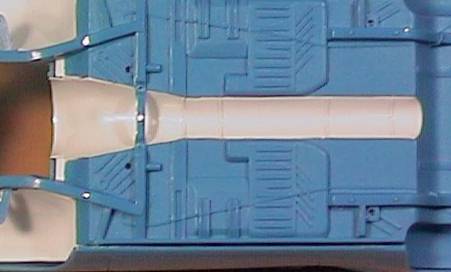
First thing I did on the kit was to add a transmission/driveshaft tunnel. This was strangely missing on the kit, inexcuseable for otherwise such a nice kit. The rear part is simply curved thin plastic curved with some thin plastic strips. The front part (that sits over the gearbox) was rather more laborious. |
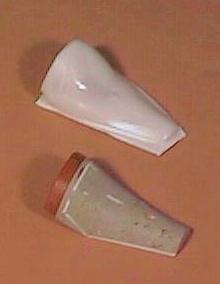
Since this part had a complicated shape, I decided to make a simple mold and thermo-form plastic card over it. The mold was made from a plastic card base, a truck wheel that had the same diameter as the firewall opening, and the rest was built up with Milliput two-component epoxy. Three thermoforming attempts later I had a useable piece. |
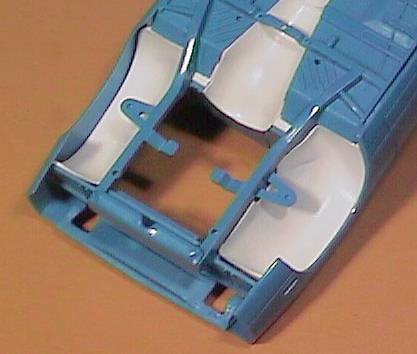
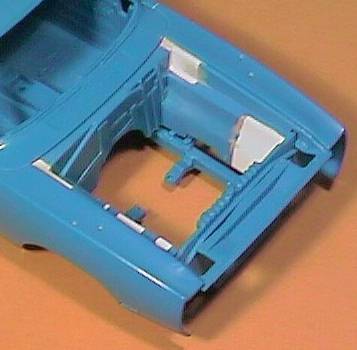
Next were internal fenders (lacking a better description). I have no idea what they look like on the real car (or whether it even has them, due to weight saving policy on this car). But I wanted them anyway. This parts too were thermoformed, as shown below. They fit nicely as you can see. But! I found out much later that indeed there were no internal fenders on the Superbird (thanks C.R.!). So what you see here is completly bogus.. The body/chassis as molded by Monogram is accurate. Nevertheless I will explain below how I made them. I attached the inner fenders with super glue, so I can probably remove them without too many problems. |
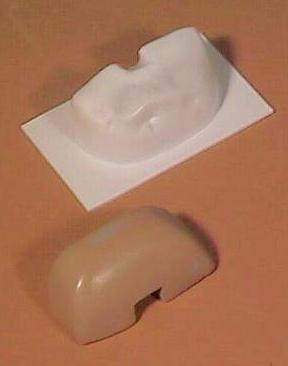
I made right and left molds from balsa wood. These were easy to shape and sand, something needed when it requires a lot of fitting to get the shape right. After that they were given a thick coat of putty from a spray-can. The thermoformed part at the top is one of the rejected items. |
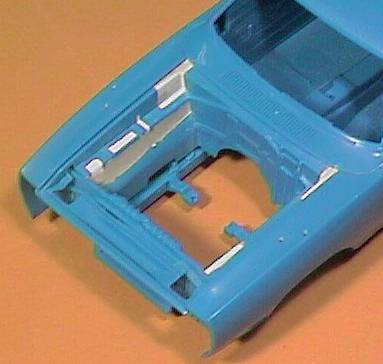
The engine compartment too needs improvements. First I removed the ugly boxes that receive the hinges of the hood. I restored the affected areas with card, superglue and Milliput. |
I cut off the moulded-on battery (on the left side) and two small fluid tanks (on the rights side). Because of the moulding process they extended down to the chassis, which was highly unrealistic. I restored the areas with card, superglue and Milliput. I made replacement tanks from plastic card. |
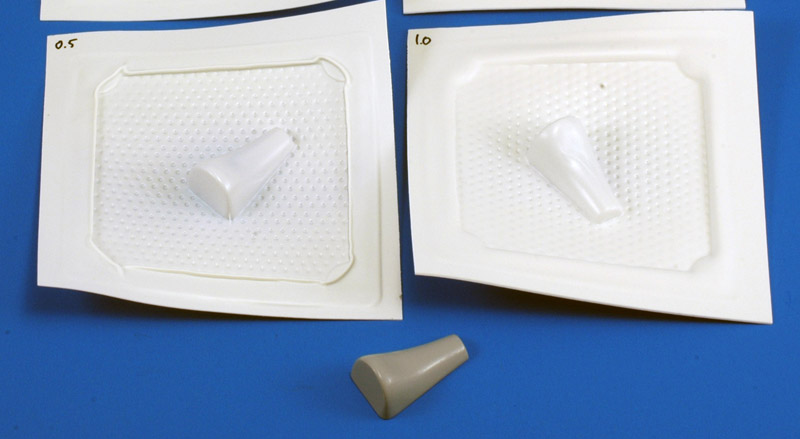
The project was dormant for about a dozen years. In 2018 I got a request for some copies of the gearbox tunnel. I decided to upgrade the rough master, and use our club-owned vacform machine to make copies. That worked well, and the results are shown here. |