Revell 1/25 Joe Amato top fuel dragster
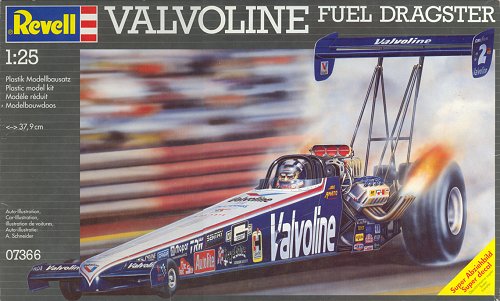
| Drag racing is not well known in Europe, and I've seen only a few races on Eurosport. Nevertheless I really like top fuel dragsters. When Revell-Germany issued the Joe Amato dragster in Europe in 1994, I bought one. Judging from a review in FSM January 1992 issue, the model was issued in the USA in 1991, and it represents the 1990 car. The Revell-Germany instructions don't mention this, but you can deduce it from the decals which are for car #2, the race number that Amato had in 1990, being the runner-up in the 1989 season.
|
The model
A review of the contents (in German) shows the starting point of this build. I was impressed by the frame, firstly because of its huge size, secondly because of its nice execution. Assembly seemed a challenge though! The chassis is an Al Swindahl design (aka Chassis Components Inc.), that was used the majority of teams. The engine is nice, typical American model style I would say. The rear tires are pretty bad, made of very thick vinyl in two parts with a nasty seam. The decals were printed nicely, but the decal film has yellowed very badly, directly after the purchase. The chrome plating on my model is flat, chips off easily, and rather looks like paint the way is collects on edges on the parts. Possibly a layer of matt clear was sprayed over the chromed parts? They are better stripped and repainted I think. The FSM reviewer judged the model to be excellent. The only problems that are mentioned are the body's wide panel lines and the two-piece tires.
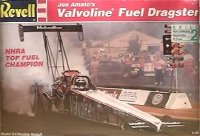
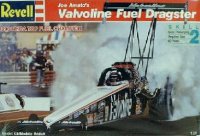
The model was issued with at least three types of box art in the USA (shown below) with catalog number 7422. I think the Amato version was the only one that issued by Revell-Germany in the old world, with catalog number 07366.
As described below, finding dragster references is not easy here, so I can't comment too much on the model's accuracy. There are two aspects in the accuracy department that worry me. Since the body is rather thick, and a loose fit over the chassis, one of two parts must be considerably off-scale. I guess it's the chassis, and I'm not happy with that, because it's the part I like best! I've been told that some modelers build bodies from brass or aluminum, but in this case it could result in an underscale cross section.
Other issues
Another question is whether this is an accurate replica of Amato's dragster, or just a generic dragster (a situation similar to NASCAR models), but I really don't know. A fellow modeler reported that the model is surprisingly fairly accurate, and that cars usually differed in fuel and clutch systems. The model has been issued by Revell-USA nearly twenty times with other decals and a few new parts to represent newer cars. One change that is very visible is that the body has grown some aerodynamic surfaces behind the driver ('kick-outs'). New and much larger front wheels, and new wings are also included. To answer the question of it being a generic representation, I made the following list of all 'modern' 300 inch wheelbase top fuel dragsters issued by Revell-USA. It makes it clear that the Amato and Ormsby kits were the first issues, so it is can be assumed that the kit is mostly based on these two cars. I also wondered whether parts from the previous Revell top fuel dragster from 1987 (Swamp Rat XXX) were recycled, like the engine. But a study of this build report of the Don Garlits Swamp Rat XXX on the MCM forum shows hardly any parts that look like the Amato kit.
I compared the instruction manual of my 1990 Amato kit (Revell-Germany) to the 1998 'Revell Nationals' kit (Revell USA), and found amazingly few differences. They are listed here in building sequence (step numbers are different in the kits, therefore not used).
the complete engines are identical
the control module (#62 versus #50) is different
the front end of the chassis more pointed on the later chassis, ending in a single cross tube
the front wheel suspension is taller on the later chassis, because of the taller wheels
the front wheels are completely different
in the rear frame assembly, the 1990 car has flat plates attached, none on the 1998 car
the rear axles are different
the 'puke tank' (#29) is reversed on the 1998 car
the wing end plates are different
the nose of the main body is more pointed on the 1998 car
the main body has side skirts that are glued on
the front wings are different
References
Gathering references was difficult on the east side of the Atlantic ocean, but here's my list:
'The Anatomy & Development of the Top Fuel Dragster' by Tony Sakkis, 1993
'Top Fuel Dragsters' by Robert Genat, 2002
'Collecting Model Car and Truck Kits' by Tim Boyd, 2001, with a chapter on the history of dragster models, and a value guide with issue dates
Scale Auto Enthusiast, April 1993 issue, with a two-page photo report of the 1991/1992 Amato car
Scale Auto Enthusiast, April 2001 issue, with an article by Tim Boyd about 40 years of scale dragsters
Scale Models International, March 2000 issue, with a build article of the Eddie Hill Pennzoil 1997 car. The builder builds it basically straight from the box.
Construction
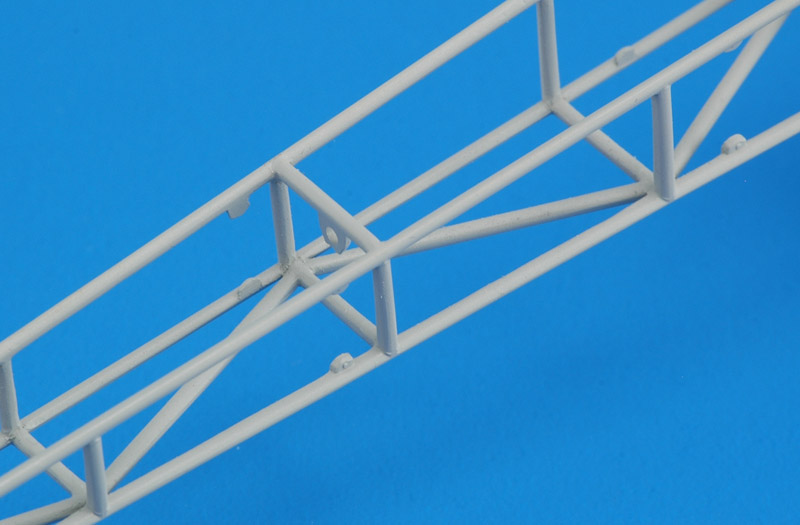
The huge frame looked like the biggest challenge, so I started with it. In order to build it as one piece, I had to deviate largely from the building order of the instruction sheet. The front part of the frame is single molding, with the result that the tubes are flat on the inside. I spent a lot of time sanding each tube round, a couple of hours work, but it improved the appearance enormously. The four cross members (one is visible here) were then added using CA as both glue and filler. Note that the frame in the photos is base-coated in a light grey.
Many years later, I learned more about the top fuel dragster chassis here: Mike Kloeber's nitro university - course 1, understanding the chassis. Part two is also very worthwile: Mike Kloeber's nitro university - course 2, the dragster body and aerodynamics. For example it explains why the Amato body has reversed NACA ducts on the sides of the body, just ahead of the cockpit.
| 
|
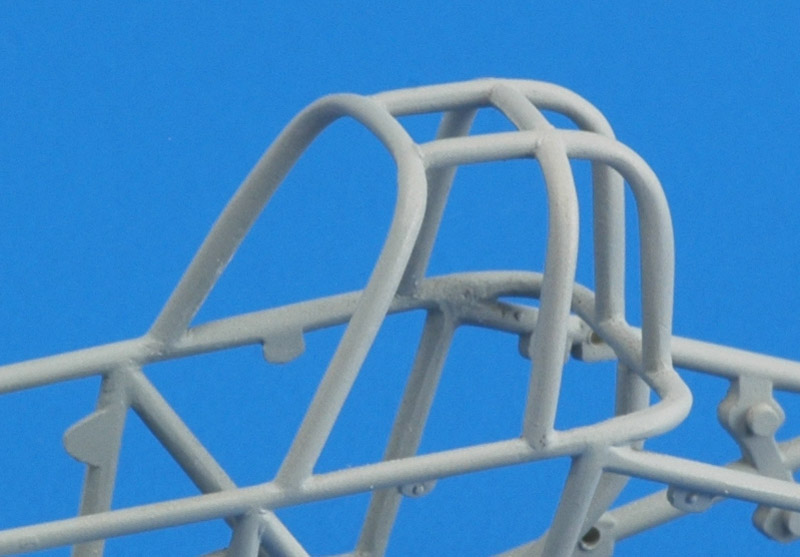
| The attachment of the roll cage to the front frame part is very difficult except if you use CA glue, which allows one to attach the tubes one by one. Again I used the CA as filler too, and I ended up with a very acceptable fit. The separate part running along the driver's spine, quite warped in my kit, was also quite easy to fit with CA. I should mention that I first tested whether I could fit the seat in the chassis before I attached the roll cage parts.
|
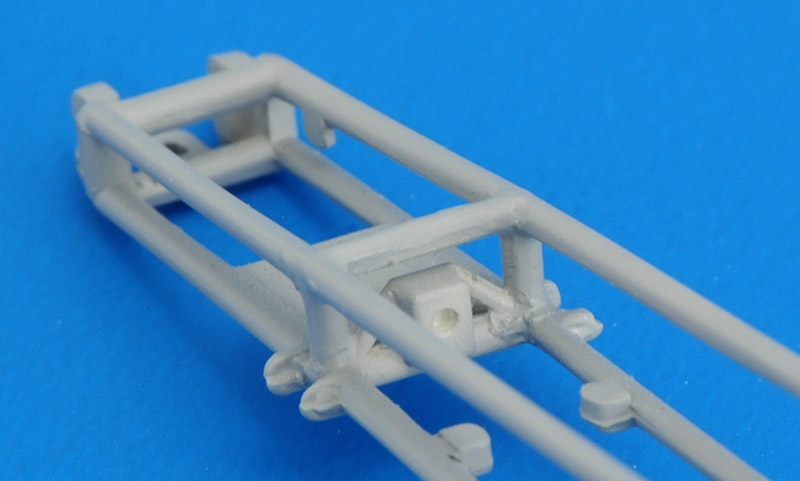
| A modification that may prove to be superfluous is that of the front axle. I planned to close the (too large) cut-out in the body for the front axle, and mount the suspension arms after fitting the body. I cut part 20 in three parts, and used the middle part build the front frame. Its fit was pretty bad, and I also thinned the parts to make them look like an integral part of the frame. I will fit thin steel wire pins the suspension parts later. The frame was a bit 'bulged' in side view around the front axle, but fitting of the front axle helped to reduce it. I had to fiddle some more to make it straight.
| 
|
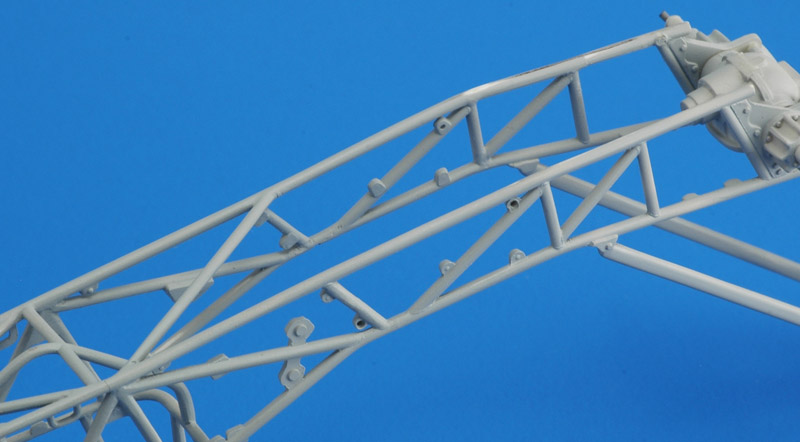
| The two rear frame parts were first sanded to remove the mold lines. I didn't like the way these parts attached to the front part. It makes the tubes they share very thick, and it spoils the appearance. I sanded these tubes considerably to make them fit in the overall picture. Note that the model's lower tubes have a slight kink at the connection of the front and rear parts. I don't know whether the 1:1 car has the same kink.
|
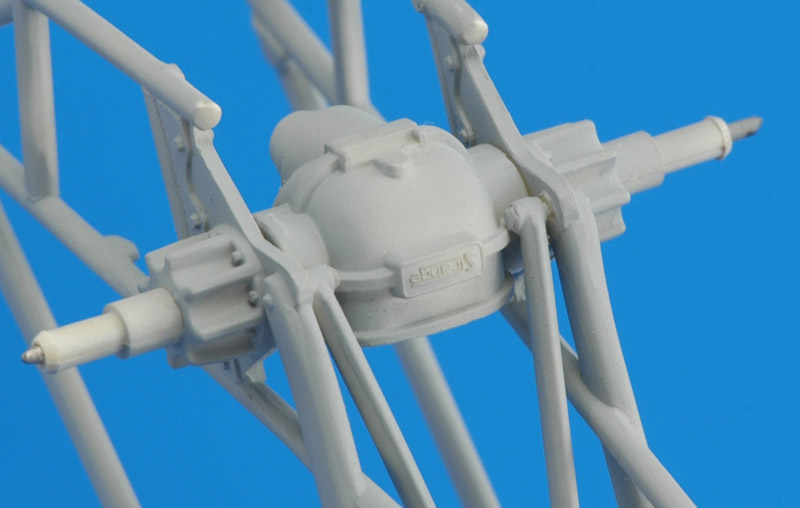
The rear of the frame derives a lot of stability from the rear axle fitted between the frame parts, but I didn't want to mount it yet, because of painting issues. I drilled a hole through the axle, then cut it in three parts, and glued the axle ends in the frame. The diff could now be fitted by pushing a steel wire through the parts, and removed for painting. The cross-bracing of the rear wing supports was also added. To my surprise the frame now looked like a pretzel: the rear end was severely twisted. It was easily solved though, but the method could be difficult to explain.
I considered the two frame sides as beams, and checked whether they would need to 'bend' upwards or downwards. The 'bending' was achieved by cutting either the top or lower tube, and putting a shim between it. Using this method I unwinded the chassis in one attempt. It was not the end of the story though, since the rear axle didn't sit square. I added 0.5 mm shims in both upper and lower tubes on one side (don't remember which side), which solved the problem. Place these shims as far backwards as possible, to avoid building a frame that is slightly kinked in plan view.
| 
|
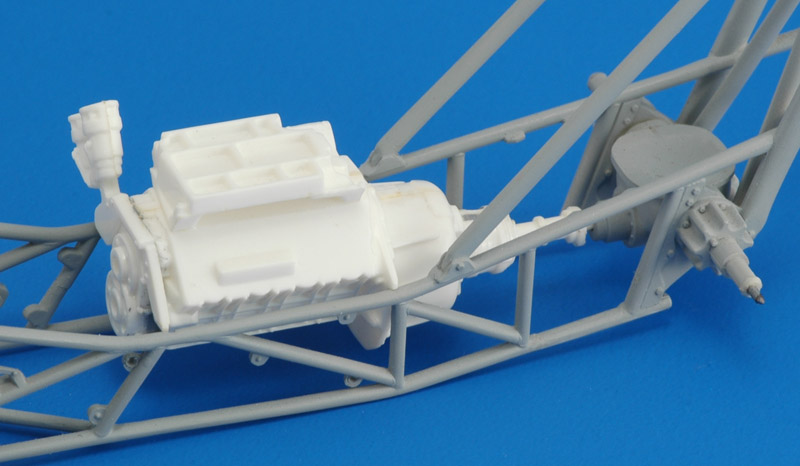
| The engine was assembled to a point where it could serve to check its fit and alignment in the chassis. This meant gluing the block halves together and adding the front mounting plate (parts 42, 43 and 44). I then tuned the fit of the engine supports so the engine sat right. The forward mounting holes in the frame were moved a little to establish a stress-free fit, and the rear holes were filled completely. The reverse gear box was a little strange: the details molded in the left hand half were not copied on the right hand side. I added these using plastic strip and putty.
I learned later the engine position is not fixed: it's variable position is one of the tuning possibilities of the car.
|
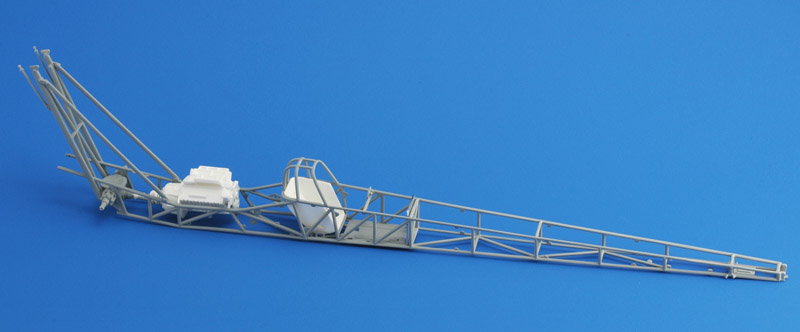
| The model was then stored in a drawer for a while, and one miserable day it got mangled while closing the drawer. The chassis lay in three pieces.. I repaired the breaks with thin steel wire inserts and glue. The whole frame was then painted light grey, because the white plastic made judgment of the repairs difficult. The result was very pleasing: it really looked like a steel-tube frame built from round tubing, with welds showing in places. Next step is painting it steel color.
| 
|
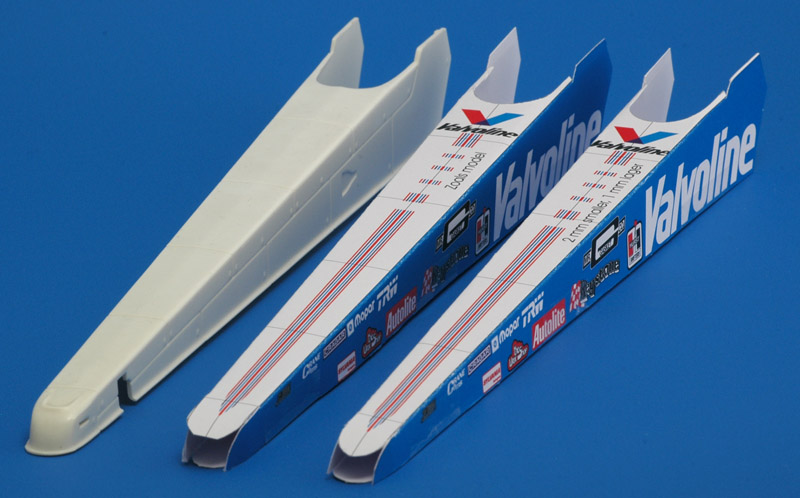
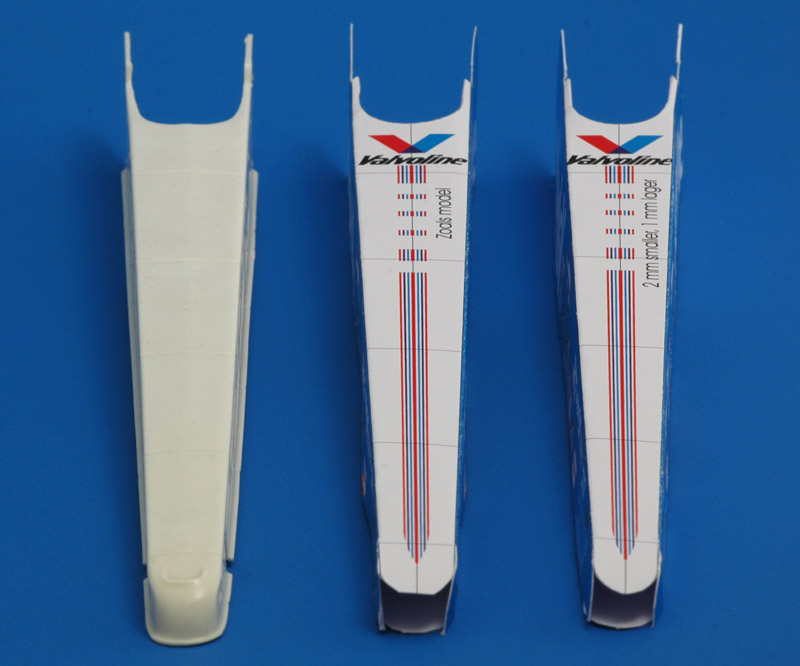
| On of my main doubts about the accuracy of this model was the loose fit of the Revell body molding. My doubts were fueled when I read a comment on the MCM forum that these Revell models look 'clunky'. But I did not know for a long time how to approach this question. The answer came when I was redrawing the decals, realising that I could make a paper or cardboard replica of the body, and then make smaller variants, for shape testing. Shown here, from left to right, the Revell body, the direct cardboard copy, and a copy that is 2 mm narrower and 1 mm lower. The latter fits fairly snugly around the frame.
|
| Even in the front view I find it difficult to see the difference near the cockpit area, but the noses look different. Therefore I think the visual effect of a smaller body will be minimal.
| 
|
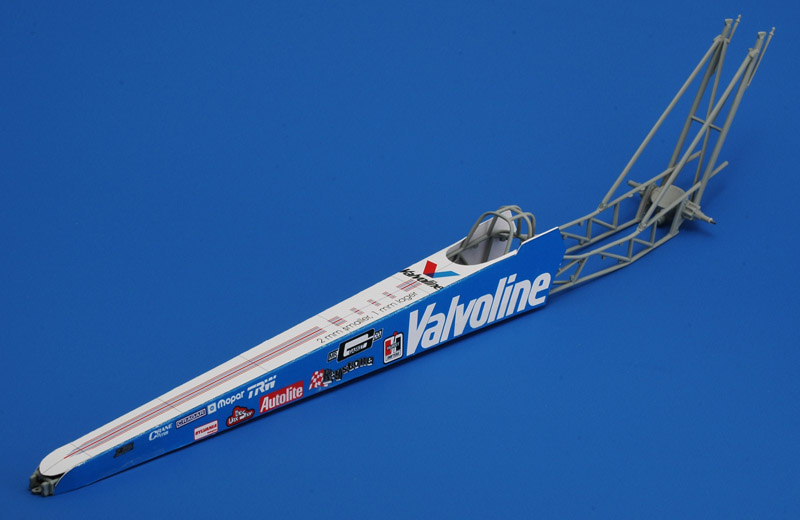
| Does this look less clunky? I think so, and I will probably build a new body for my model. I will most likely cut out some panels of the body to show the internals. The panels are fitted to the frame with some kind of quick-release fasteners, that are available as photo-etched parts from Scale Motorsports, Replicas & Miniatures Company and Detail Master.
|
MCW and/or BSR reportedly have a Valvoline blue in their paint lines.
Engine details
YouTube video What goes into rebuilding an 11,000-hp Top Fuel dragster engine? taught me a lot about engine details in general.
Aftermarket parts
Being an ocean away from the dragster modeling scene, my knowledge of aftermarket parts is rather limited. My modeling friend Eric bought replacement rear tires from SoReal in the USA (no longer in production I have heard). They are very nice and thin, and a huge improvement over the Revell tires. I had also read about resin tires with wrinkles in them, possibly Replicas & Miniatures Company or by MicroNitro, but these do not apply to a nineties dragster, only seventies dragsters had tires that wrinkled while at rest. American Satco also makes or made TF dragster tires (#10016).
Alfredo Stoca from Italy sent me the following links for dragster aftermarket parts:
Decals
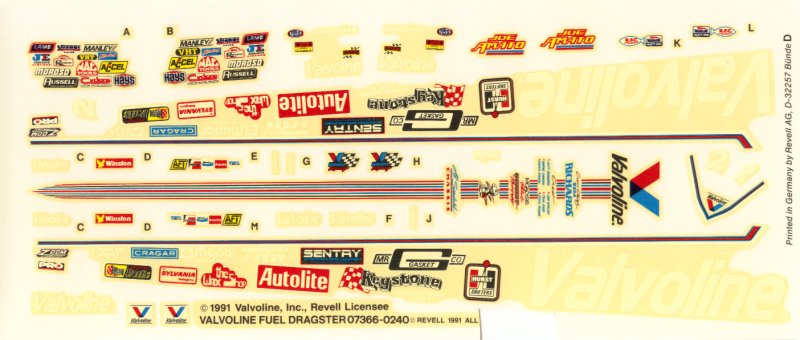
| The Revell-Germany sheet is pretty awful: mediocre printing and a badly yellowed decal film. Blech, I cannot use these decals.
| 
|
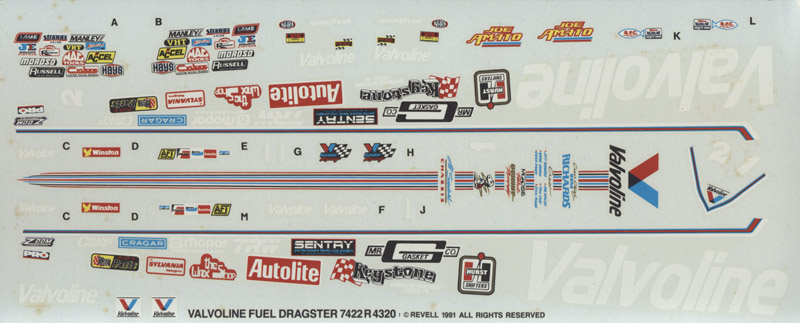
| The decal problem was mostly solved when I found the US issue of the kit. It contains much, much better decals. Compared to the Revell-Germany decals, they look like aftermarket decals.
|
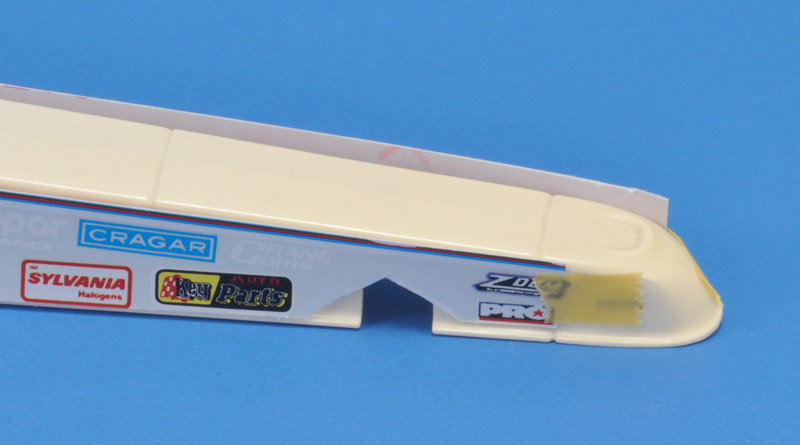
I tried the Revell-USA decals on the body, starting with the right side. I noted the large decal has to be cut very, very closely on the bottom side, to make the upper part remain on the side instead of on the top side.
The left side had a strange surprise: when cut the same way as the right side, the decal was much taller, and wouldn't fit on the side only. I don't know yet how to solve this.
| 
|
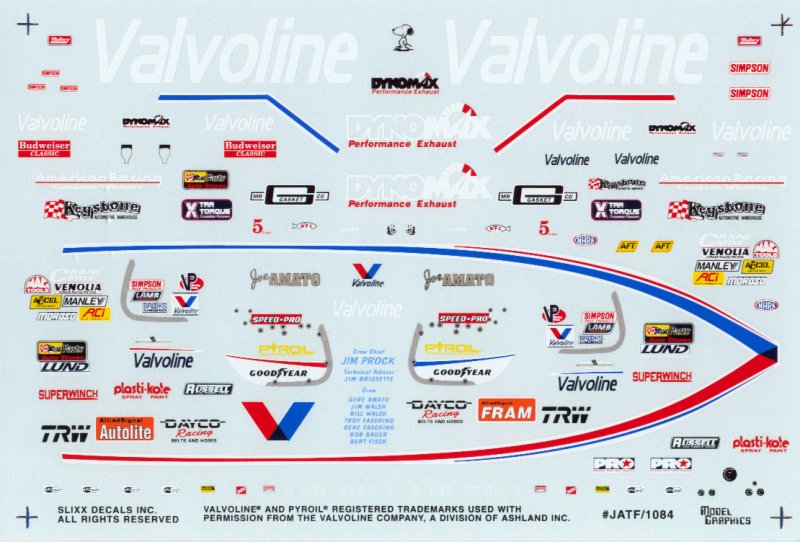
| Jim also found a Slixx decal sheet for my Amato car (catalog numbers JATF / 1084), which look 10 times better than the Revell-Germany decals. I really like details such as the blower belt decal!
A big problem is that the Slixx instructions don't mention the year. Judging from the name of crew chief Jimmy Prock (who took over from Tim Richards mid 1993) on the decals, the car is likely from 1994 and/or 1995. The 1994-1995 season car ran with the taller (motorcycle) front tires instead of the small aircraft tires, probably with eight-hole wheels. The car also had the wings on the rear side of the body ('kick-outs' or 'elephant ears' as I used to call them). Information courtesy of Guy Beaudette.
|
Slixx top fuel dragster decals
I created a table of the Slixx decals for nineties Top Fuel cars that I found so far.
| Slixx code
| Driver/owner
| Sponsor
| Season
|
| 1024/LVTF
| Darrell Gwynn (driven by Mike Dunn)
| Winnebago / La Victoria
| 1994
|
| 1039/TJTF
| Tommy Johnson
| Mopar Xpress
| 1994
|
| 1042/PATF
| Pat Austin
| Castrol Syntec
| 1993 or 1994
|
| 1044/CMTF
| Cory Mc Clenathan
| Mac Attack
| 1992/93
|
| 1049/SKTF
| Scott Kalitta
|
| 1994
|
| 1050/SATF
| Shelly Anderson
| Slick 50
| 1994
|
| 1084/JATF
| Joe Amato
| Valvoline
| 1994 or 1995 ?
|
| 1193/KTF
| Joe Amato
| Keystone
| 1996
|
| 1194/DGTF
| Darrell Gwynn
| Mopar
| 1996
|
| 1269/GSTF
| Gene Snow
| Mopar
| early 90's
|
| 1274/SMTF1
| Shirley Muldowney
|
| 1977/78/92
|
| 1277/97KTF
| Joe Amato
| Keystone
| 1997
|
| 1368/TTF
| Joe Amato
| Tenneco
| 1998
|
| 1421/TSTF
| Tony Schumacher
| Exide Batteries
| 1999 |
| 1446/99EHTF
| Eddie Hill
| Penzoil
| 1999
|
| 1603/TSTF2
| Tony Schumacher
| Exide (formerly listed as US Army)
| 2000
|
| 7026/JATF2
| Joe Amato (driven by Morgan Lucas)
| Lucas Oil
| ?
|
| 7043/...
| Cory McClenethan
| Fram Air Hog
| ?
|
| 7063/...
| Melanie Troxel
| Skull Gear
| ?
|
| 7064/KBTF
| Hillary Will
| KB Racing
| ?
|
| 7071/...
| Tony Schumacher
| US Army
| 2007
|
| 7073/...
| David Bacca
| Matco Tools
| ?
|
| 7078/...
| Cory McClenethan
| Fram
| ?
|
| 7101/...
| Melanie Troxel
| POW/MIA
| ?
|
Inspiration
I finally found a few inspirational builds that show how to detail a top fuel dragster model:
Links
A few top fuel dragster modeling links:
Return to models page


