WarningBe careful handling NaOH! Your eyes are at risk, always use safety glasses. Gloves are recommended too, otherwise your skin will start to feel greasy and slippery, because it's slowly dissolving. |
| Almost by accident I discovered a perfect way to strip off paint from plastic models. In the past I always used sodium hydroxide (NaOH) oven cleaner from a spray can, that worked well but slow, and often required multiple applications and considerably scrubbing. But when I combined it with an ultrasonic cleaner I found the perfect method: all paint and decals were removed in 10-20 minutes without any paint traces left. The technique described here works on enamel paint, I haven't tried other paints yet. |
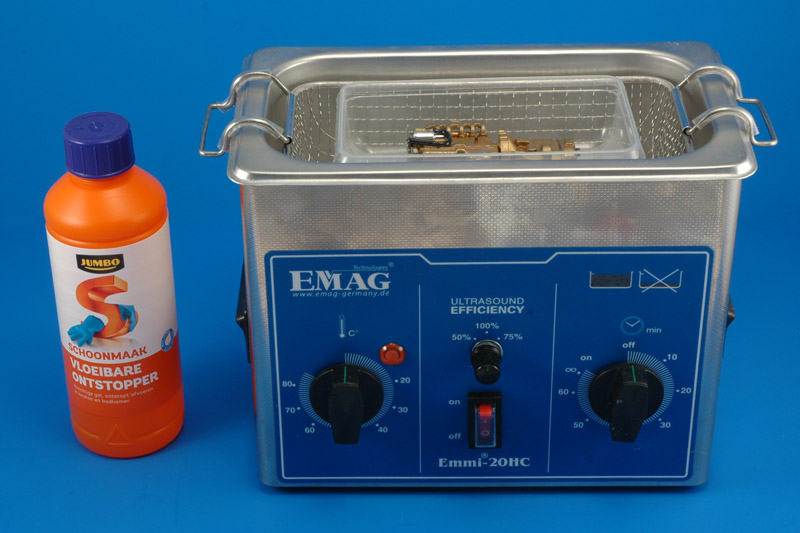
Shown here are the two main ingredients: sodium hydroxide (NaOH, lye and caustic soda in the US) and an ultrasonic cleaner. I used a drain opener that is a solution of approximately 10% NaOH in water and probably nothing else. I diluted it further down by adding water, to maybe 5%.
|
|
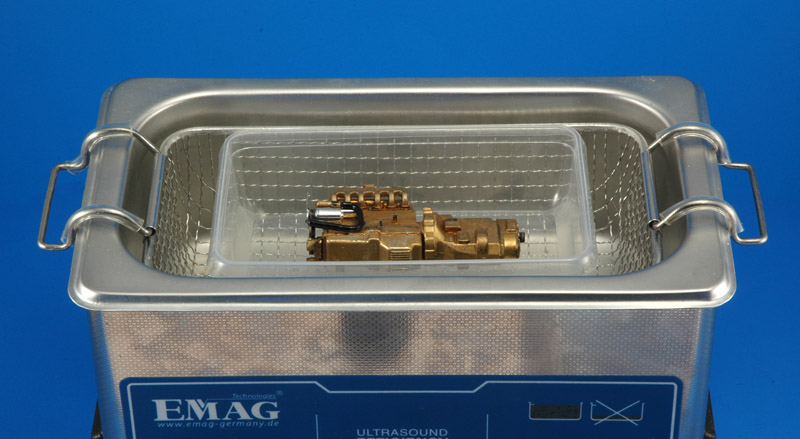
| From what I read, stainless steel is not attacked by NaOH below 65°C, but still I put the NaOH solution a separate plastic container, suspended in the metal wire basket that comes with the ultrasonic cleaner. There are no liquids in the photo, I did not want to get my photo set-up wet! |
| I think the wire basket can be left out, with the plastic container with NaOH solution directly in the water of the ultrasonic cleaner. This is the setup that I used ever after. | 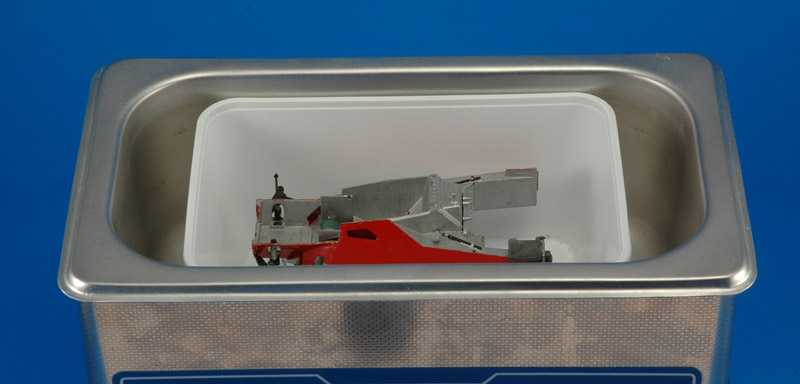
|
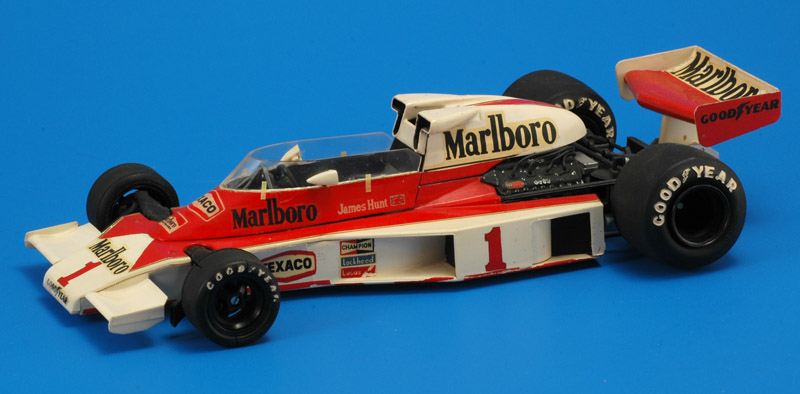
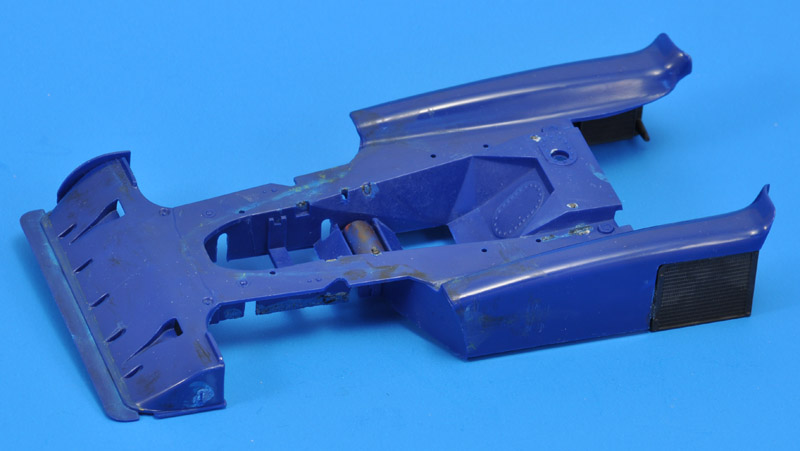
| This is the model I wanted to strip: a 35 year old Tamiya 1/20 McLaren M23. I used a Humbrol enamel spray can for the white, and brush-painted everything else with Humbrol enamels. I remember overpainting the large red-orange decal areas with red paint some time later. |
| All paint and decals were removed in 10-20 minutes. The parts were perfectly clean without any further effort, no scrubbing or anything. | 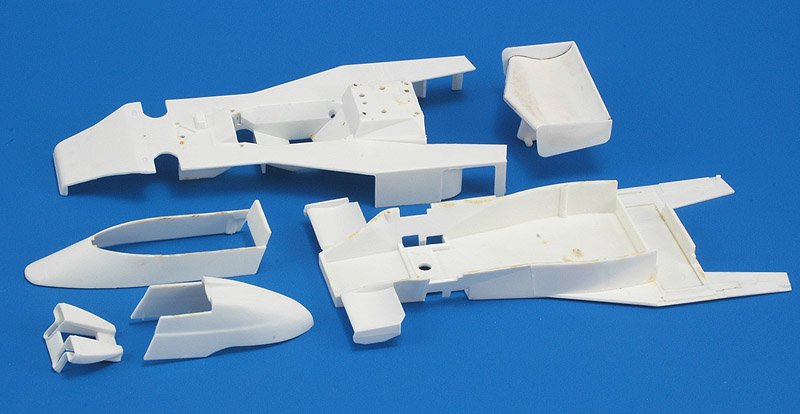
|
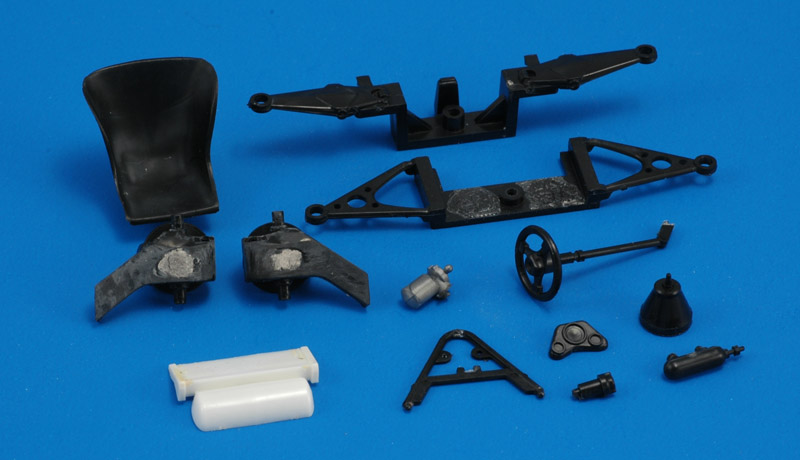
| Interestingly all glue joints also broke down during the paint stripping, an unexpected but great benefit. I removed the worst remains of the tube glue with a JLC razor blade used as a scraper.
Note that the spontaneous disassembly does not always occur. For example, I stripped the paint off an Airfix 1/24 transparent Ford J-Car, and the glue joints did not break. Maybe they would have if I did a longer ultrasonic run, compared to the 10 minutes this model needed to shed all paint. |
There are books with tables that describe the suitability of materials in all kinds of chemical environments. This could help to judge whether paint stripping with NaOH is safe for model plastic. I found one such table for polystyrene: Chemical Resistance of Polystyrene (PDF). I copied the relevant section here:
Sodium Hydroxide
Concentration 10%
Resin in contact for 24h
No load applied
23°C: Good
50°C: Fair
75°C: -
I used ~5% concentration and ~0.3 hours, so according to the table, I'm safe. However, in my experience this table data is a bit risky to use. The tests use 'pure' chemical environments, and the addition of another chemical, even a small percentage, can change the results completely. I've experienced that with material selection for a chemical process installation.
A fellow modeler commented that sodium hydroxide removes the plasticiser from polystyrene, if soaked for (say) a day. Possibly the table data ignores effects like that too. I cannot confirm or deny that, but if it's true, the fast paint removal in an ultrasonic cleaner is a big plus.
| I stripped many more old model parts that were painted with almost exclusively Humbrol enamels. Most of the stripping went fast and gave perfectly clean parts, like this cabin of 35-year old Ertl COF-4070B Transtar II. It had at least four different paints on it, with some paint drips, but everything came off perfectly. | |
| But I also had some parts that would not clean 100%, like this 40 year old Tamiya 1/20 Tyrrell six-wheeler. I had built it without painting, but later overpainted with matt black, followed by yellow flames. Interestingly, traces of the black beneath the yellow would not come off. Interestingly, Fine Scale Modeler, May 1996 page 52, in an article about restoring model, also reports that flat black paint 'seems to be impervious to all solvents and must be sanded down'.
Contrary to the M23 above, the few glue joints did not brake down. |
It is my impression that parts will try to find the areas of least excitation if left to their own device. They then clean less than in areas of high excitation.
One of the unknowns is the strength of the NaOH solution, since I buy it as drain cleaner with an unknown concentration. Therefore a next step could be to buy NaOH in dry form, and be able to decide on the concentration myself.
Another unknown is when to replace the NaOH solution. Does the stripped paint deminish the stripping strength of the solution? My chemistry knowledge is severely lacking here.
The disbonding of all glue joints, as experienced with the McLaren M23 model shown above, did not occur during most other stripping processes. I cannot explain this difference.
For acrylics my first guess was to use household ammonia. We tried it model parts painted with Tamiya and Vallejo paint, but nothing happened after 10 minutes. Next I tried cleaning alcohol (ethanol, C2H5OH) on Vallejo, but again little effect after 10 minutes. I did not have sufficient IPA (C3H7OH propanol) for a test. Back to caustic soda, but that did not work either after 10 minutes. Therefore, no success so far!
I had a roughly 25-year old tin of Humbrol that I wanted to use. I stirred it a bit, to mix in the thick drab at the bottom, then got the idea of putting it in the ultrasonic cleaner. I put it in a plastic bag and put it in for 10 minutes. There still was a bit of thick paint at the bottom, but a bit of shaking solved that. By then the paint was really well mixed, and had a really low viscosity. Amazing! More experiments are called for.
The next paint experiment was done with a batch of 25+ year old 'Polly S' acrylic paint. A fellow modeler donated some 25 bottles, and I will pass on to my modeling friend Eric, who's a longtime fan of this paint. Of the 25 bottles, 3 had dried out, the others were still alive. But they all consisted of a near-solid mass filling 2/3rd of the bottle, and a brownish liquid filling the remainder 1/3rd. I decided to first give them a 20 minute ultrasonic run to (hopefully) dislodge the near-solid mass, followed by a good shake, and lastly another 20 minute ultrasonic run. A final shake seemed to have rejuvenated the paint to a large degree. I could not check the actual consistency, since all bottles still had their factory seal, that I did not want to break.
The third paint experiment was done with a batch of ~20 year old Aeromaster acrylic paint, consisting of the full range of German WW2 RLM colors. I used the same procedure as with the Polly S paint, but since these bottles do not have a seal, I could check the contents after the ultrasonic procedure. The paint appeared to be in fine condition to me.
A note to myself: I used ziplock bags to keep the bottles dry during the ultrasonic treatment, but all bags eventually developed leaks. I think the constant micro-rubbing against the basket creates tiny holes. I'm still looking for a solution. Maybe the basket can be deleted, since I think its function is to prevent hard parts rubbing against the 'bathtub'.