Hasegawa 1/72 Bf 109G-14
'Just like the box art'
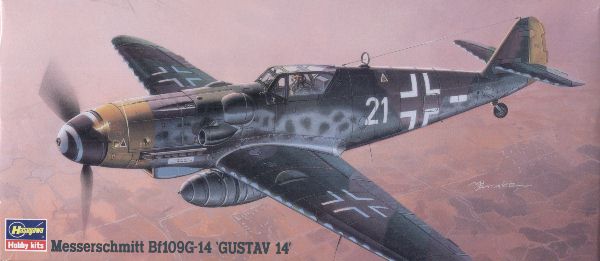
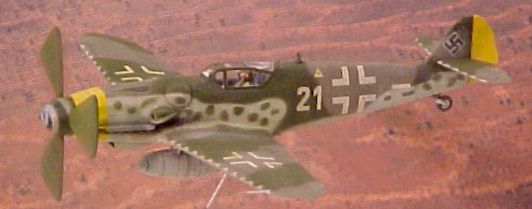
| I purchased this 1/72 Bf 109 model largely for learning purposes, and intended to build it straight out of the box. With regards to the camouflage I decided to try an build it as closely as possible like the very nice box art. That also meant I would pose it in a flying attitude, and I would have to add a pilot. It was my first attempt at Luftwaffe mottle camouflages, and this part was only partly succesful. Even less succesful were my attempts to create the impression of a spinning prop. The prop you see on this page was later replaced by a clear disc, which looks much better.
|
The kit
The Hasegawa Bf 109 looks very nice to my untrained eye. I've heard reports that the wing is too thin, which would also affect the fuselage height. I did not worry about this, and built it without modifying anything. The parts fit well, but I did not like Hasegawa's idea of splitting parts along panel lines. For example, the tail connects to the rear fuselage on a panel line, and it is quite difficult to make this connection look like the other panel lines on the fuselage. The same goes for the gun panel on the top of the cowling. The Bf 109 has a panel line along the spine, and I slightly sanded the rear fuselage parts before gluing to create this panel line. But I already had comments on a 'badly filled' seam ..
Construction
There's not much to tell about the construction of this Hasegawa 109, generally it fitted very well. The most fun part of the construction process was building a pilot figure as can be seen on the box art. I built it from an old Hasegawa pilot figure, of which I used the torso and legs. To this I glued a head of an Airfix Mosquito pilot, with added oxygen mask and tube and earphone bulges. The pilot looks to the left and upwards, just like the pilot of the box art. The arms came from a Preiser Luftwaffe personnel set. The right hand holds the stick, while the left arm is stretched out to the throttle. I studied myself to get the anatomy right; for example I modified the left shoulder to give the outstretched arm a realistic appearance. I did not improve the rather bare cockpit. I experienced problems in fitting the canopy. First of all the armour plate behind the pilot's head interfered, and then the canopy proved to be slightly too narrow.
Painting
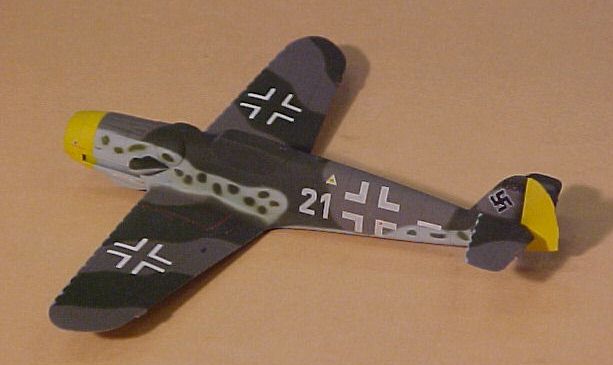
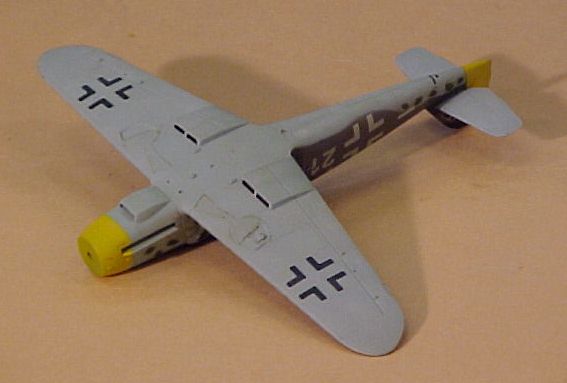
The first picture shows the model after I finished basic painting and decaling. Hasegawa's instructions say this 109 was painted in RLM 75/83/76, and that's what I used. RLM 75 is reported to match FS 36132, 36231 and 26122. I picked the last, since it had a brownish cast that the box art shows too. I mixed this color from Humbrol 125, 126 and 98 in a 1:2:1 ratio. Sources agree better on RLM 83 (FS 34079/34083) and I used Humbrol 116. I have to admit I find the color combination rather strange looking. But it looks rather like the box art, so I should be satisfied.
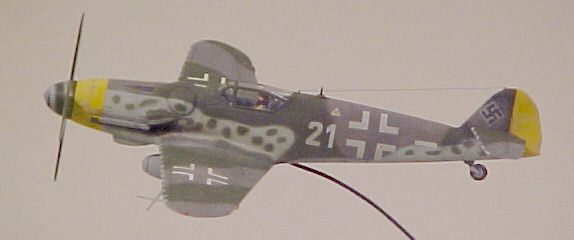
I masked the model using the 'Blu-Tack sausages' technique. The wavy leading edges (as shown on the box art) took about an hour to mask, but they ended up really nice, just like the box art. I got a little worried when I couldn't find a single photograph showing such a wavy camo demarcation, but modeling pal Julian Herrero sent me three pictures that show them clearly on some other 109G's. The yellow nose and rudder were added last before mottling.
| 
|
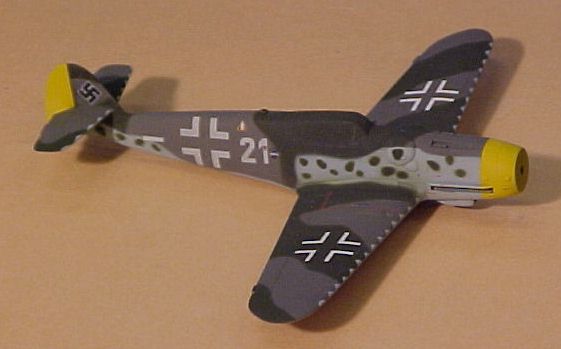
| The mottles are sprayed through custom made masks cut from thin plastic card. It was my first attempt at mottles, and I had a hard time finding a suitable technique. Still I'm not satisfied with the results. Happily, I later found a ten times better technique, see my Me 163B model. The decals weren't easy either. The kit decals silvered even on a gloss surface, and I could only make them work when using Klir (Belgian Future) under them. I had to replace the first four I tried (the wing crosses) with Microscale replacements. Still I have some silvering in places. After a coat of semi-gloss clear they look pretty nice though. Later however, a friend discovered a major error in the (replacement) decals. Compare the upper wing crosses closely.. and don't laugh! This was corrected later.
|
The lower side shows the retracted landing gear. It was quite a sanding job to make the wheels fit in the wheel wells. Before painting I closed the openings temporarily with aluminum foil and Kristal Kleer. Vaguely visible just behind the wing is a hole in the fuselage, to mount the model later.
| 
|
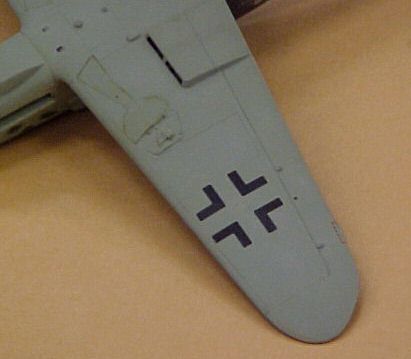
| I was determined to test a technique I call 'anti-monochromatic finish'. In my opinion the model-like look of many models is caused by the monochromatic appearance of the camouflage colors. They lack the 'life' present on the real aircraft. This effect is also seen on repainted museum aircraft, which sometimes look like large models. To bring this 'life' to their models, many modelers try to compensate for this by applying heavy panel washes, excessive dry-brushing and lots of paint chipping. Instead, I believe the paint should have all kinds of subtle color differences in it, combined with very restrained washes, dry brushing and chipping. I planned to achieve this effect with pastels. The lower wing seen here has some pastel applied to it, but it is too subtle to show in the picture. More on the pastels below.
|
Weathering
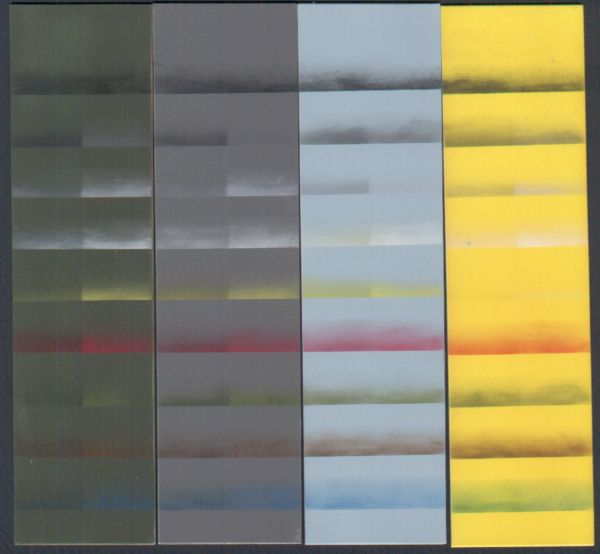
I planned to do the weathering of this model largely with pastel powders. Pastels gave excellent subtle results on my YF-23, and I wanted to repeat it on this model. I knew that pastels react strongly to subsequent clear coats. The colors change, and the strength is often reduced dramatically. This can however also be used to advantage, since you can apply it liberally, and a clear coat makes it subtle again. But these effects appear to differ with each combination of paint and pastel, so I made test strips in the colors of my model, as shown on the left. The right sides show the pastel powder applied, while the left sides are overcoated. I think the results speak for themselves. I picked suitable pastel powder colors after this test, and started weathering the model.
This however did not work as I expected. I started with a light grey pastel, but despite knowing how much the pastel effect would be reduced by the clear coat, it was very difficult to gauge the end effect. On the RLM 76 I overdid the pastel effect, thinking the clear coat would reduce it more. On the top side colors I was very careful, because the contrast was so high, but after a clear coat nothing remained! It was very frustrating. So I changed plans: I would try to achieve the same effect using normal enamel paints.
| 
|
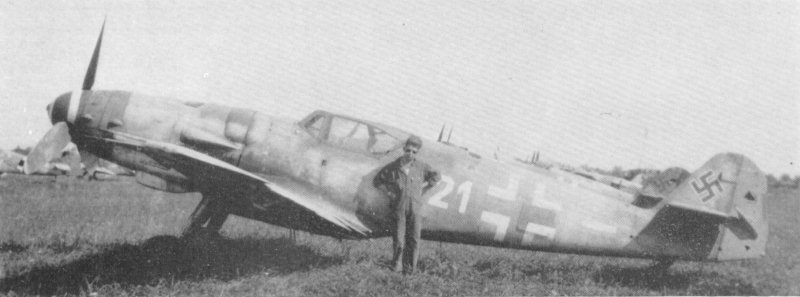
At this stage I found this picture of the real one in Profile number 113. It looks rather different than my model, I think .. But I stuck to my plan and continued to build it 'just like the box'. I also learned that this 109 belonged to 7. Staffel of JG52 (Hasegawa notes 'unit unknown'). This unit fought on the East Front but flew to American occupied Neubiberg to surrender.
On another model I was building in parallel (a 1/48 Lippisch P 13), I tried the 'anti-monochromatic finish' technique using enamel paints. The technique consists of using all kinds of colors, applying them in a drybrush-like technique, to bring a bit of life to the camo colors. This worked pretty well; not as subtle as pastels, but good enough. So I used the same technique on the 109. The main difficulty is having to achieve very small color differences in each camo color. Some dry brushing attempts failed, leading to large paint spots, but these could be removed easily with a little thinner. And if the results didn't look good after all, I dry brushed the original camo color over it. In this way I achieved a result that I liked. The result can be seen below.
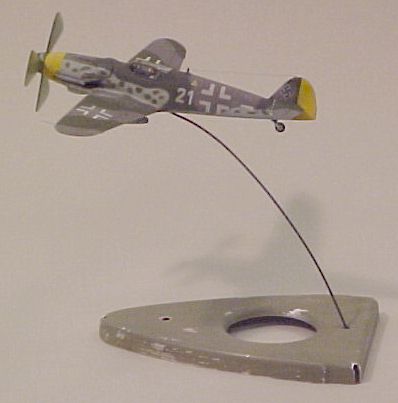
After the 'anti-monochromatic finish' treatment I only had to add small details like the tail wheel, antennas and pitot tube. In the mean time I had come up with an idea for a base for the model: a wing rib painted in RLM02 primer. Having access to suitable equipment, I made a rubber press mould from Obo wood. I decided to make a nose rib because of its interesting shape. Then I prepared blanks from the softest aluminium sheet I could find, and pressed a couple of ribs in a 400 tons press. The best one was then painted in RLM02 and slightly weathered. A spring steel wire was bent to shape to hold the model at the right height and position, and painted RLM66. Almost finished!
Spinning propeller
Last and most difficult: the propeller. Since I had planned a flying model, I had to come up with a 'turning' propeller. I had seen quite a few ideas in magazines and on the net, but I found them unconvincing. I came up with an idea by looking at the box art: transparent blades that each cover some 40-50 degrees of the 360 degrees arc. It sounded like an interesting idea, but changes were high that the end results would not be really convincing. But there was no way back, my 109 had to fly!
I made a plastic master blade, cast a small silicone rubber mould, cast three more blades, and made another mould with three blades. Then I mixed a small batch of clear epoxy resin, colored it slightly with black and green dyes, and cast a set of prop blades. The spinner mean while had received a white spiral painted by hand with oil paints, which was then faded and slightly sanded in a motor tool to achieve a 'spinning' impression. The blades were then glued to the spinner in a small jig. Lastly I put the prop in the motor tool and airbrushed some airbrushed some vague stripes on the blades. The result? Not very good, to be honest. It just doesn't look realistic, and it doesn't fit the model.
About a year after finishing I replaced the resin prop blades with a disc of clear plastic. This is neither a perfect solution, but it looks better than the resin prop shown here.
Finished
But there it is: my Bf 109G-14 'just like the box art'. Except for the prop and the mottles I like the result. Building the pilot was probably the most interesting part of this model.
Battle damage repair
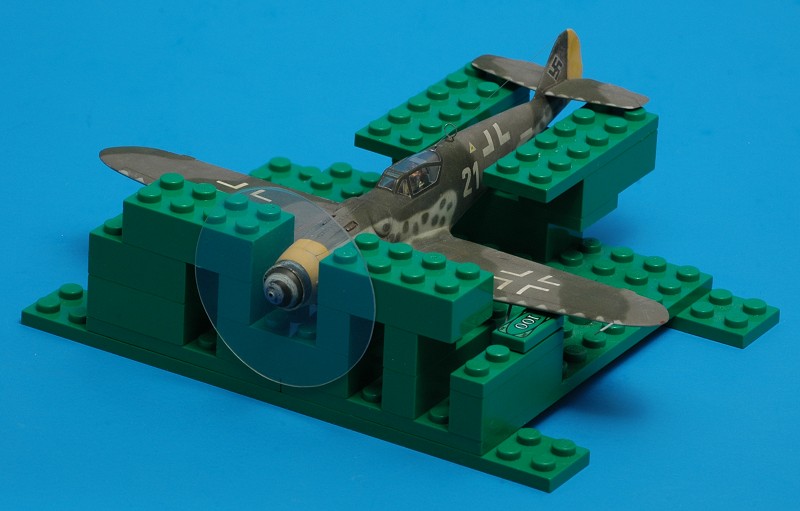
In 2013, the model got damaged when something fell on it. The right stabiliser, propeller disc, direction finding antenna and the radio wire were knocked off. After gathering courage, I started the repair job. Soon it became clear that I could not do the repairs free-hand, so I decided to build a jig. Previously I made my jigs from scratch using plastic card, this time I tried Lego. That experiment worked very well, despite the rather large steps that the Lego bricks allow. Here's another nice Lego biplane jig.
First objective was reattaching the stabiliser, which went smoothly using super glue. No repainting was necessary! Next was the prop disc, that aligned nicely against the front of the jig. Third was the DF antenna, a photo-etched part that I took from a Dragon Arado 234. Last was the wire antenna, that took the most time, fiddling to attach it to two minuscule posts. But then it was ready for display again!
| 
|
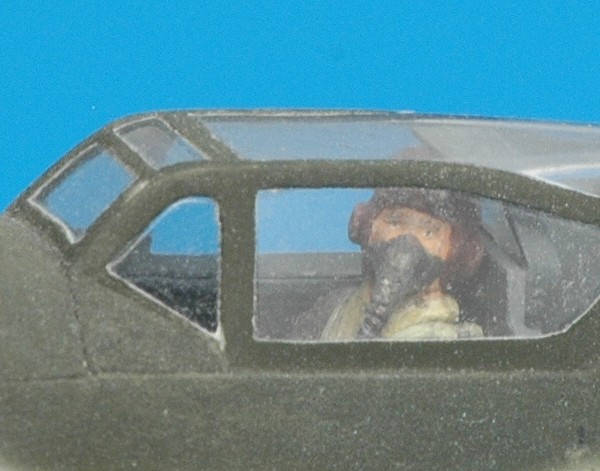
| During the photo shoot I tried to photograph the pilot a little better. My camera lens is not really suited for this kind of macro photography, but here's the best I could do.
|
Return to models page


