Revell 1/48 Lippisch P 13A
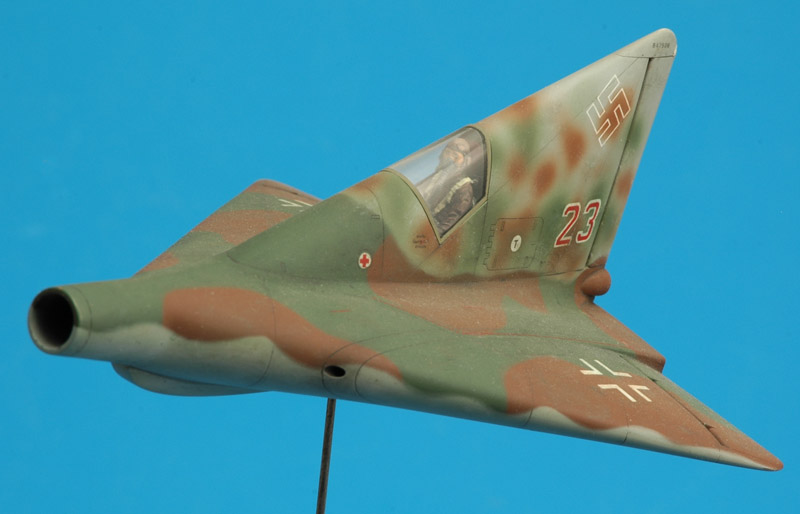
| I bought this model after finishing my P-47. That 'quick and dirty' project was such fun that I wanted to repeat it. It required a model I had nearly zero interest in, since this would avoid doing research and modifications. The Lippisch P 13, being a 'Luftwaffe 1946' model, fulfilled this requirement nicely. My interest in Lippisch' most famous design, the Me 163B, made the model fun too. The model was originally issued by Mauve and was pretty expensive when it came out, I've seen a price of 40$. Revell then bought or leased the moulds and replaced some photo-etched parts with injected parts. I bought the Revell model for 10 guilders (4$)
|
Construction
I did not photograph the construction of this model, so you'll have to do with a description.
Construction was pretty straight-forward. First task was to glue a piece of tube in the lower wing half, to serve as a mounting later. The model had a see-through effect from front to rear. Therefore I blocked the inlet with a piece of plastic card, and built a box inside of the exhaust, that was painted black. The gun tubes looked to be problematic, so I enlarged the openings and glued pieces of suitable polystyrene tube in them. After assembling the upper and lower wing halves with superglue, the gun tubes were cut off and sanded flush with the leading edge. I pushed a quantity of Milliput in the inlet, and used a wet brush handle to create a semi-infinite inlet duct.
Next was the 'fuselage'. The two fuselage halves were glued together, and positioned on the wing. The fit was quite vague, but I decided to glue it in the most rearward position. Nevertheless the fit didn't look natural, and I had to sand here and there. I decided to put in the cockpit details and attach the canopy after painting the model.
Painting
Another reason for building this model was to see whether the airbrushing problems that I was experiencing with my Stuka model were my own, or the paint's fault. On the Stuka I used matt Humbrol paints, which resulted in a horribly grainy surface. But the satin Humbrol paints I used before on other models had worked fine. Therefore I decided to paint this P 13 model with Humbrol satin paints exclusively. As for displaying the model, I wanted to build an in-flight model. This required a pilot that was not included in the model. But after building a 1/72 pilot for my Bf 109G , which was great fun, I thought I could repeat that trick.
After the rapid assembly it was time to decide on the camouflage scheme and colors. I didn't like the pattern that Revell suggested, with a solid colored 'fuselage leading edge'. I just didn't feel this was a natural type of camouflage for this aircraft. So some sketching was called for to find another scheme. I decided on a pretty simple scheme: the solid wing colors extended somewhat on the fuselage, and mottling was applied to the rest of the fuselage, thinning out to the top. I also decided to use a wavy leading edge paint demarcation, since I liked that on my Bf 109G .
Next to decide were the colors. I wanted to use RLM 81-83-ish (late war) colors, but since no 1945 sample seems to show the same color, I took a lot of freedom there. I located two satin colors in my collection (H133 en H98) that, mixed in a 2:1 ratio, looked somewhat like the RLM 81 'Braunviolett' I had seen before. A straight-from-the-can RLM 82 or 83 lookalike green wasn't available either, so I mixed one a green from gloss grass green (H2) and a gray (H66). I used them on the model without much further thought; looking back they look a little funky I think! For the RLM 76 fuselage and lower surface I used a mix of H126 of H47 in a 5:1 ratio. The spray painting went without a hitch, which confirmed my theory about the Humbrol problems I had suffered earlier. I used Blu-Tack sausages to lay down the camo scheme. The resulting soft edges are a bit to small for a 1/48 if you ask me; the technique is better suited to 1/72 scale models.
It was the first time I tried to airbrush mottles free-hand. I did a lot of experimenting on a scrap model, but I found it quite hard, and especially very risky. One wrong mottle and the whole thing would be spoiled. Also, the edges of the mottles weren't soft enough to my taste. Then I thought of a new idea: mix the paint with lots of clear, which allows a gradual build-up of the mottle, and a very soft edge. I tried this mixture on the model for the green mottles, but found out I had to spray so much paint that I risked spraying a puddle. Therefore several applications were required, with some drying in between. But this led to the problem of aiming the nearly invisible spray, and subsequently my mottles grew larger every time. I sprayed the brown mottles with less clear paint added, which largely solved the problem. I tried really hard to spray irregular mottles, with opaque and transparent parts. The finishing touch was a very thin application of green over the lower side of the fuselage, to decrease the contrast between the green and light grey there. It made it look more natural.
Decals
Expecting the Revell decals to work well, I initially tried a technique similar to that used on my Revell YF-23 model, with Future as a combined glue/setting and solvent agent. I tried the lower wing crosses, but they didn't respond at all to the Future, and refused to pull into the panel lines. More fiddling and the use of Micro Set and Sol resulted in considerable silvering of the decals. Tape came out and the decals were ripped off. Next experiment was to use Humbrol clear varnish to attach the decals, after polishing the surface. It worked well on a testbed, but applied to the real thing it didn't work too well (again). Nevertheless it was the best option at the moment, and I used it for all decals. I had silvering in a few places.
The Reichsverteidigung stripes, suggested for the inlet, didn't fit at all (too long, and with a wrong curvature), and were removed after a few minutes. I briefly thought about applying a spiral, just like on spinners. I cut a piece of tape to see how it looked, but then decided to skip that plan. I put the code numbers ('23') much lower on the fuselage than Revell suggested, and I like how they balance the model now. Last decals to be applied were aftermarket swastikas by Xtradecal. I opted for white outline swastikas. These decals worked well, except that the inked parts of the decal were stiffer than the transparent parts, and had be pushed into the panel lines. Having finished the decals, a coat of Humbrol 135 satin clear was applied to make the decals blend in. At this point the model looked extremely clean and unrealistic, so some weathering was called for.
Weathering
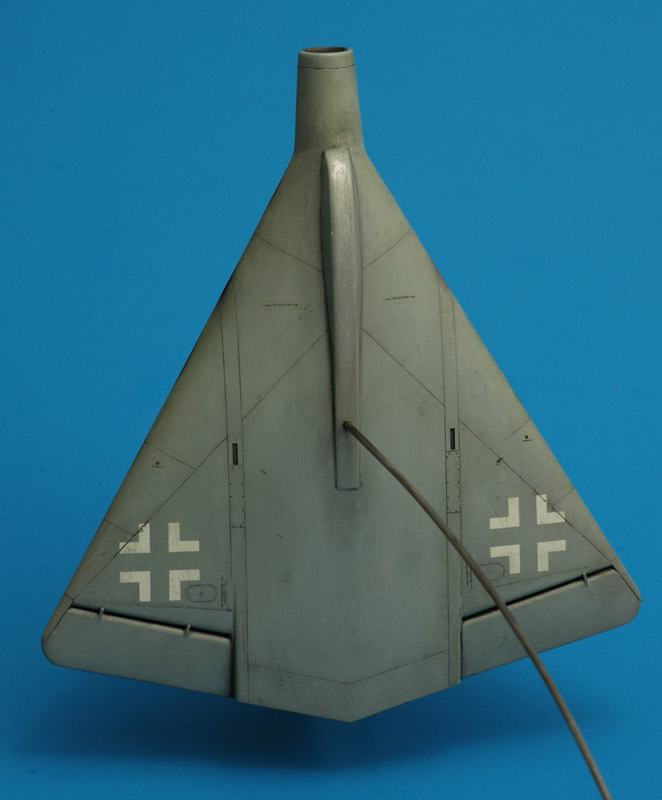
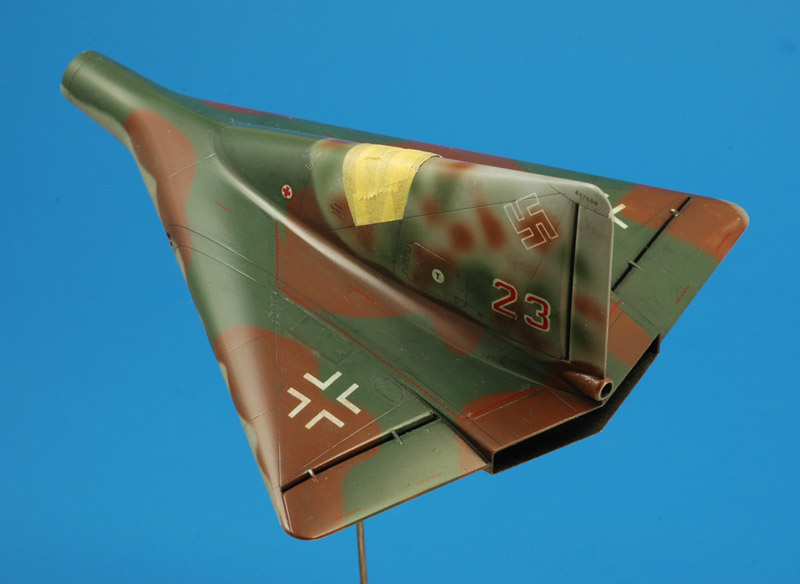
My favorite weathering technique is the 'anti-monochromatic finish': trying to create all kinds of subtle color variations in each camouflage color. This brings a model to life, and I believe it is much more realistic than extensive washing, drybrushing or pre- or post-shading. On my previous models I had tried to achieve this with pastels, and except for one model it had failed. On this model I therefore skipped pastels and tried another technique: simply painting the color variations. I used a fairly dry brush for this, and applied the paint in a sort of scrubbing action. It worked pretty much to my satisfaction, and in places where it looked overdone, I removed the excess with a little thinner. I also applied a restrained wash to the panel lines, using dark grey water colors. The photo below of the lower surface shows the weathering most clearly.
Pilot figure
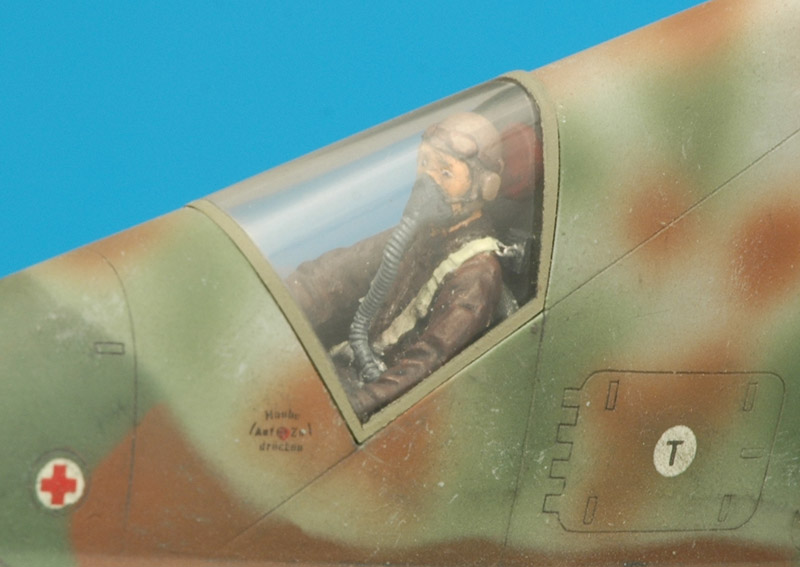
A flying models requires a pilot, but none was included. Spares box to the rescue! I found a few 1/48 figures, of which an F-16 pilot seemed best suited. I had to cut and reposition both arms and legs to make him fit the cockpit and seat. The figure's right hand already held a (side) stick, so I only had to add a piece of wire to make it a normal stick. I made his left hand holding the throttle. Some Milliput was needed to make things look more realistic. Next I replaced the head (which had a modern helmet on it) with a bare head cut from a Monogram ground crew figure. On the head I built a flying cap, goggles, and an oxygen mask with Milliput and lead foil for the belts. The oxygen hose was made from a piece of wire wound like a spiral spring, but I made it a bit too thick.
I painted the pilot's jacket semi-gloss brown to simulate a leather jacket, maybe 'borrowed' from a downed US pilot. His trousers were painted a dark grey-blue, and gloves and boots black. The flying cap was painted light brown with middle-brown goggles and belts. The oxygen mask was painted very dark grey, the tube dark grey-blue. The belts were painted a very light tan. Then it was time to paint the face. My inexperience showed by trying to paint the eyes with white and black (I hadn't read Shep Paine's book back then). The result was wide-open (almost scared) eyes, like the pilot was about to ram a B-36. No matter what I tried, I just couldn't make look more realistic. Another lesson learned.
I mounted the pilot in the seat, and glued this into the open cockpit. Shoulder belts were then added. The instrument panel could then be fitted. Last item to add was the canopy. I painted the frame RLM02 to give the model a little more color variation. To my surprise it didn't fit as well as before, but I glued it on with epoxy anyway (it was a slammer after all). The result can be seen below.
Mounting base
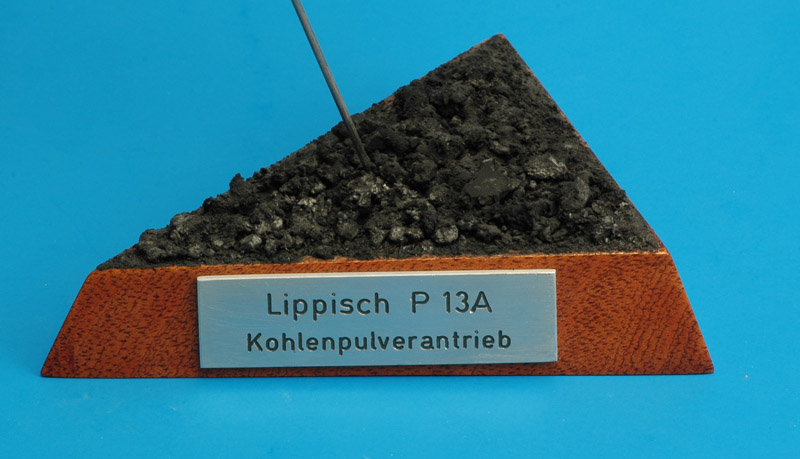
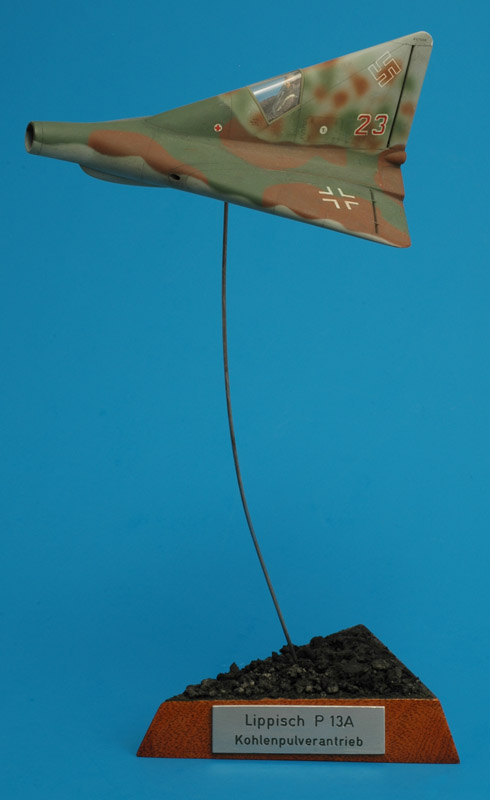
A triangular (delta) shaped base seemed best suited to this strange craft. I first made a rough prototype having the same angles as the P 13, but that looked plain stupid. After some more experiments I found angles that seemed more natural. I cut a piece of Meranti wood, and after sanding I applied several coats of Humbrol gloss clear. Initially I used a brush, but I kept getting brush marks, and then switched to my airbrush. The results was a very shiny and nicely colored wooden base.
I wanted the base to tell the viewer about the peculiarities of the aircraft. Therefore I glued small pieces of coal to the top of the base. I sprayed matt clear over it to prevent the coal from staining everything else. Also, having found an old engraving machine in our lab, I decided to make a small sign with the text 'Lippisch P 13A - Kohlenpulverantrieb' (coal powder propulsion). I used a small aluminium plate, and filled the engravings with dark grey paint.
Finished!
The only thing left was to mount the model on the steel wire projecting from the base. Some bending of the steel wire was also called for to give it the attitude I wanted. But then it was finished! The model attracts quite a lot of attention due to its strange configuration. Most people (even those quite deep into aviation) ask politely whether it is a real aircraft. I then have to tell them about the DM 1 aerodynamic prototype that performed some gliding tests, and about the coal powder ramjet idea that never materialised.
Conclusion
The model proved that satin Humbrol paints do not suffer from the problems that matt Humbrol paints have, which was a positive conclusion. The model also showed that the weathering techniques that I had in mind did give me the desired results. But as a whole the model doesn't interest me, and I'm quite sure I won't do a Luft '46 model again.
Experiments 17 years later
I finished this model in 2000, and in 2017 I decided to use it for an experiment. I never liked the very matt finish of this model (and my other models), plus I wanted to see whether one could make the decals 100% flush on a model. Under certain lighting conditions you can always see the edges of the film.
I combined that in one experiment, that was inspired by the purchase of Alclad 'Klear Kote Light Sheen' lacquer varnish. I applied that varnish quite thick to the model, and extra thick around the decals. It resulted in a nice fairly glossy sheen, that looks highly unrealistic though.
| 
|
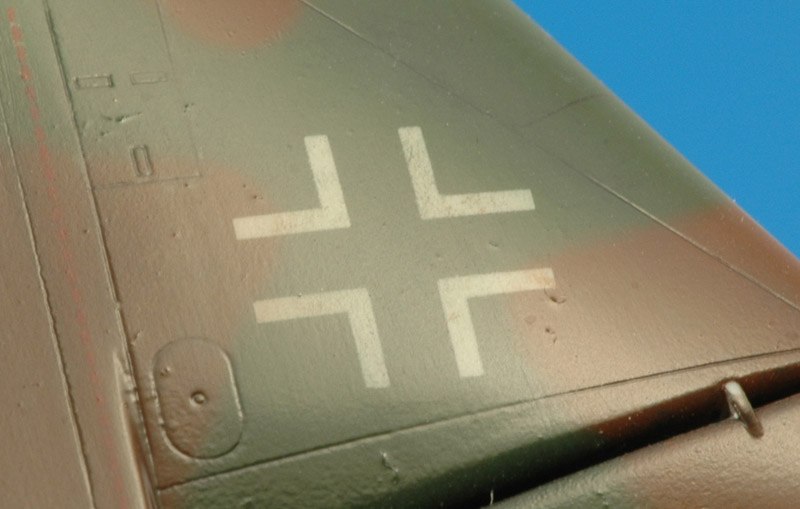
| I then sanded the decal areas until they were completely flush. This removes the step caused by the decal film. Next I applied another solid layer of varnish, and that's the stage I made this photo. I shot it with a glare over the surface to show the surface quality, hence the washed-out colors. If you look really close I think there's still a trace of a step in the lower / rear side of the Iron Cross. The dirt in the varnish was caused by the strong Alclad solvents cleaning out my airbrush - another lesson learned.
|
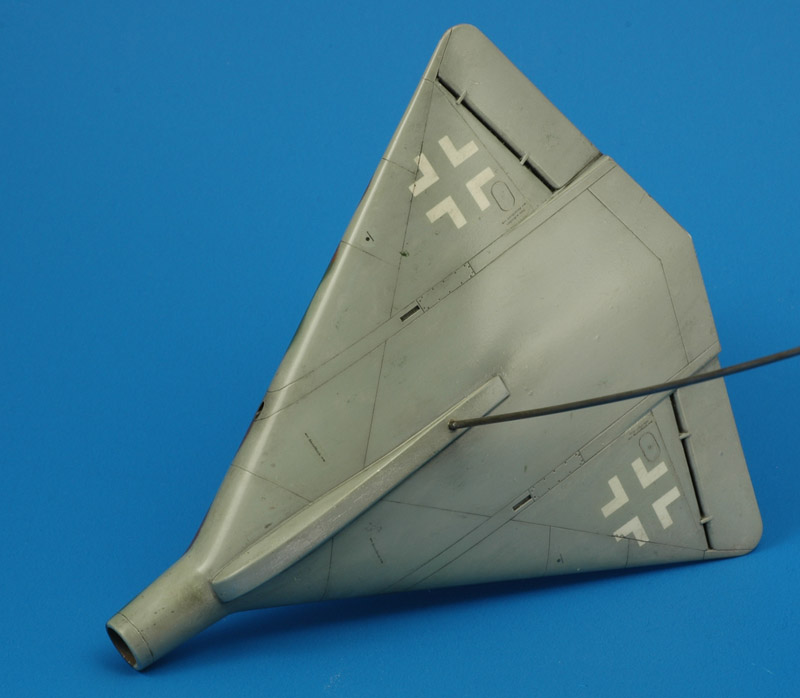
| I did the same on the lower side. You can see the model is still attached to its steel wire, and that made for rather awkward painting inside my modestly sized spray booth, and the photography wasn't easy either.
| 
|
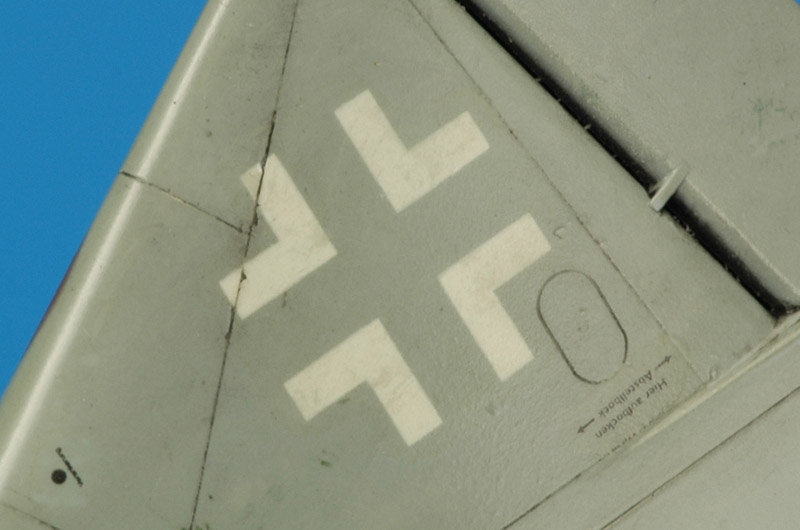
| Here you can see the completely flush decal of the Iron Cross on the lower wing. I'm happy with the result, this is exactly what I wanted to achieve.
|
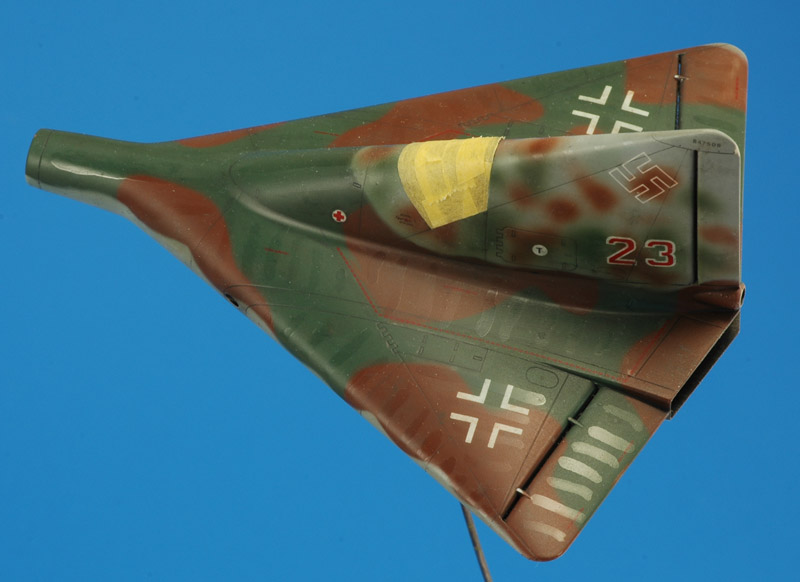
| The other thing that I wanted to experiment with is 'Ultra Toning', as described in an article in Fine Scale Modeler from 1991 by Hawk's / Testor's John Andrews. I started the process by painting the whole model with Alclad 'Klear Kote Matte'. The model did not turn out matt, I would call it satin. Note that I used good wet coats of the clear varnish, as if it was a gloss clear. It was followed with lots of brush-painted stripes with gloss clear. It looks pretty scary right now..
| 
|
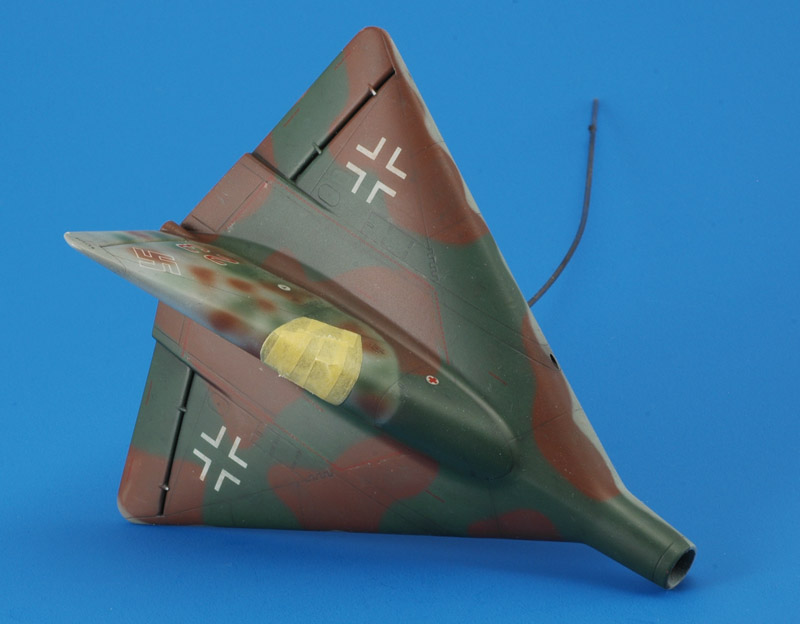
| The buffing as described in the article did not give the expected result. Therefore I painted a another good coat of Alclad 'Klear Kote Matte' over the model, to 'Go back to start' like in Monopoly. But compared to my original model, it's still quite glossy, not a finish I like on a Luft 46 aircraft. What now?
|
Return to models page


